14 15www.howdens.com
Built-in Single Split Cavity Oven LAM3676 Instructions and Installation
4. Preparation 5. How to operate the main oven and grill
First cleaning of the
appliance
1. Remove all packaging materials.
2. Wipe the surfaces of the
appliance with a damp cloth
or sponge and dry with a clean
cloth and mild detergent.
The surface may get damaged
by some detergents or cleaning
materials.
Do not use aggressive detergents,
cleaning powder / cream or any
sharp objects or abrasives.
Initial heating
It is recommended to heat up
the product for about 30 minutes
and then switch it off. Thus, any
production residues or layers will
be burnt off and removed.
1. Take the tray and the wire grid
out of the oven.
2. Close the oven doors.
3. Select the highest oven & grill
power levels (See How to use
the oven and grill section).
4. Operate oven & grill for about
30 minutes.
5. Turn off your oven & grill and
allow to cool.
Small amounts of fumes may
emit during the initial heating
process; this is normal,
however monitor the oven
at all times and ensure that
the room is well ventilated.
Tips for saving energy
The following information will
help you to use your appliance in
an ecological way, and to save
energy:
• Use dark coloured or enamel
coated cookware in the oven
as the heat transmission will
be better.
• Perform a preheating operation
if it is advised in the user manual
or cooking instructions. Do not
open the door of the oven
frequently during cooking.
• Try to cook more than one
dish in the oven at the same
time whenever possible. You
can place two cooking vessels
onto the wire shelf. Cook one
dish after another. The oven will
already be hot.
• You can save energy by
switching off your oven a few
minutes before the end of the
cooking time. Do not open the
oven door.
• Defrost frozen dishes before
cooking them if possible if
applicable.
Operating a single
oven section
Manual cooking by selecting
temperature and operating
function.
During manual operation, the
oven will operate regardless of
the cooking time after the function
and temperature selection is
made. The oven will not switch off
automatically at the end of the
cooking time. Cooking should
be ended by the user. Oven
returns to standby display after it
is powered on for the first time
and the current time is set. Only
the current time appears.
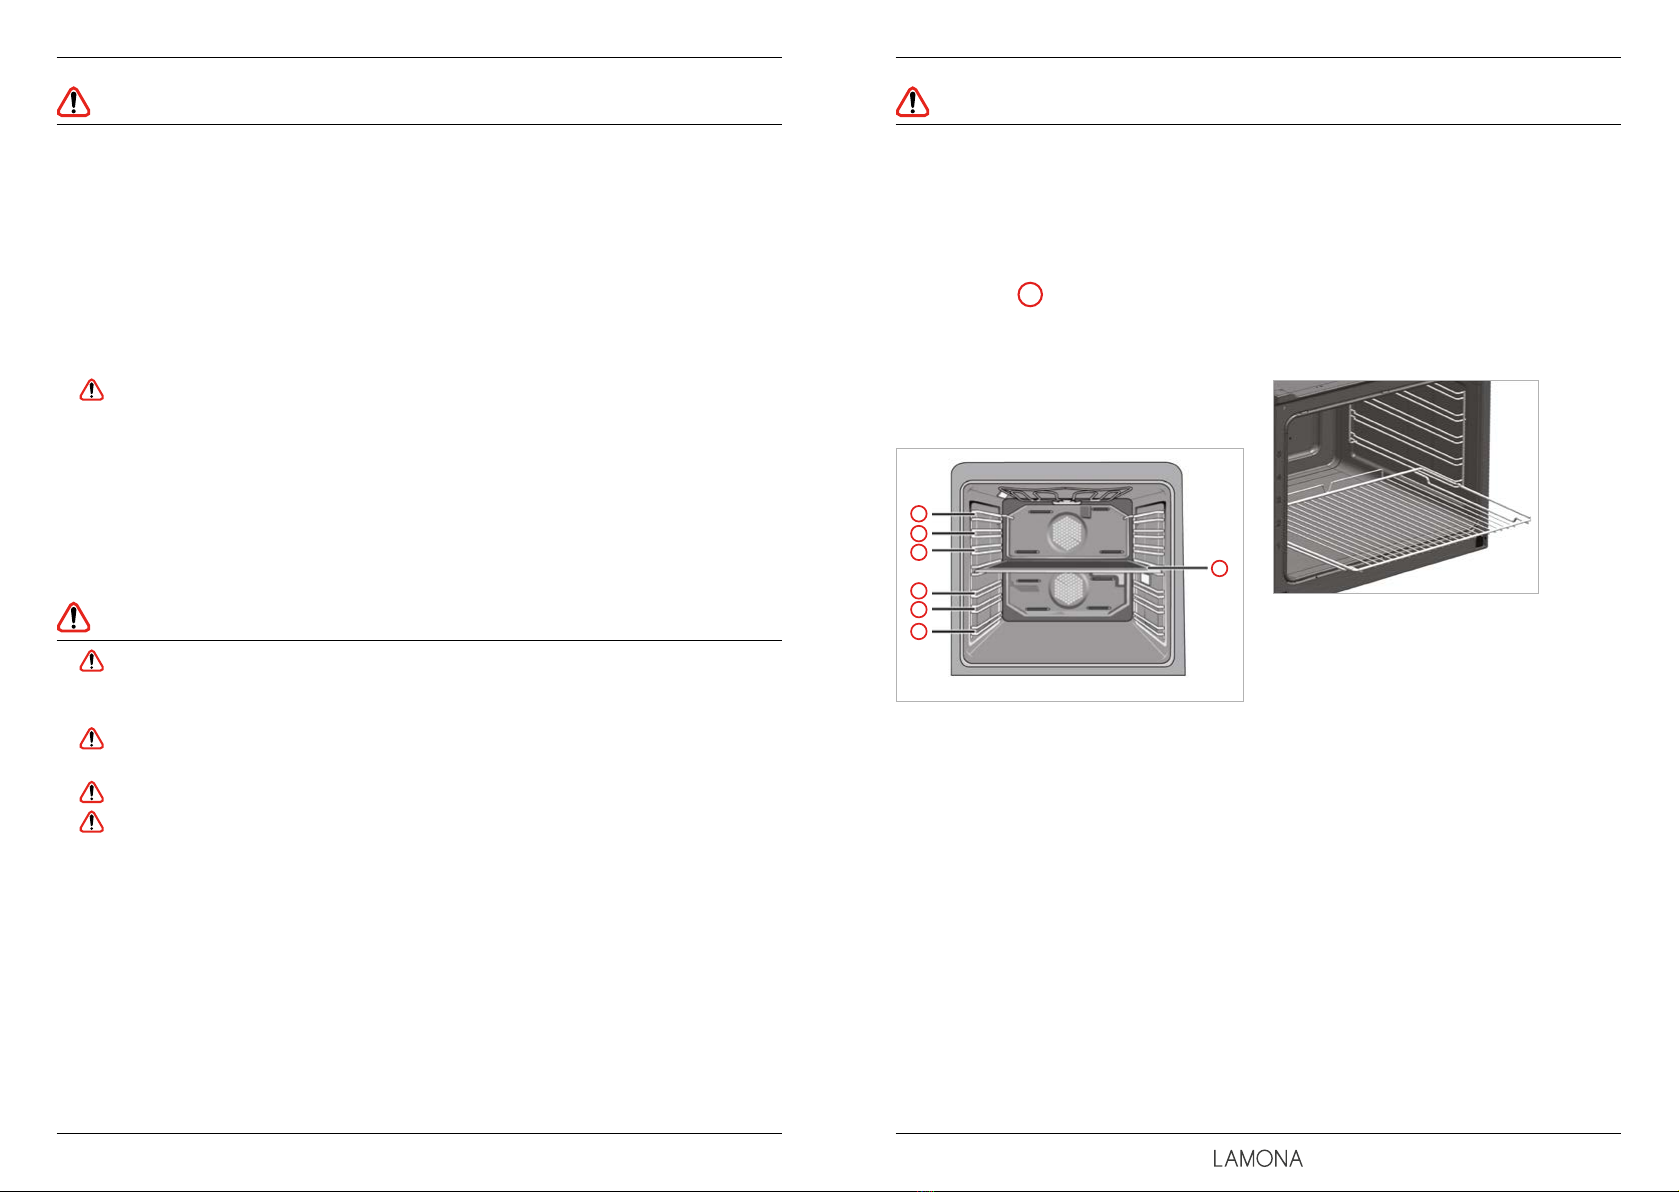
1. Remove the middle section
plate from the oven. Only after
the middle section plate is
removed the oven timer will
work in single large section
cooking setting.
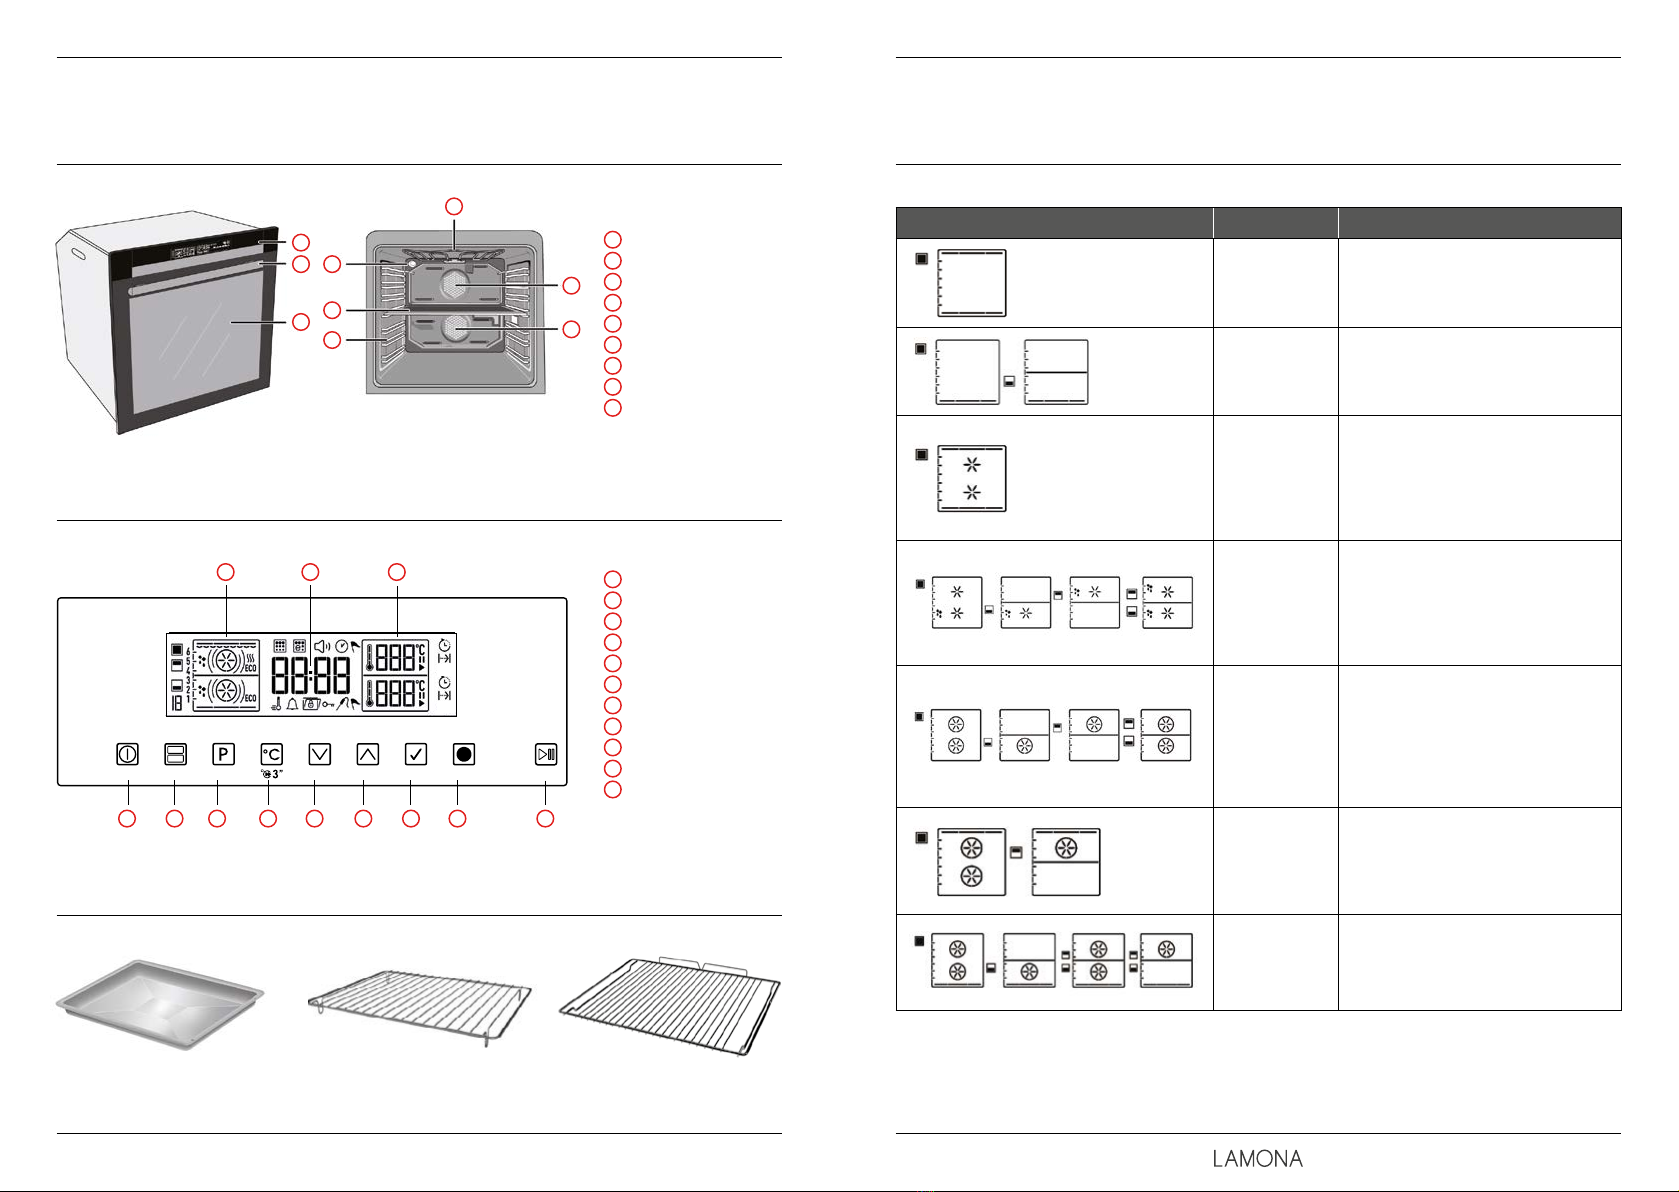
2. Switch on the oven touching
the key for two seconds.
3. When the oven is switched on,
the first function peculiar to the
single large section cooking will
be displayed.
4. Touch to enter the display for
setting the operating function.
The relevant function number
will flash on the display.
5. Set the desired cooking function
touching the keys. Touch
the to confirm setting.
6. If you want to change the
temperature, touch once to
reach the temperature display
and will flash on the display.
7. Touch to set the desired
temperature. When the desired
value is reached, touch to
confirm the temperature.
8. For booster (Rapid Heating),
touch tor approximately
3 seconds until appears on
the display. will appear and
the booster setting will
be activated.
When the booster setting
is made,the oven operates
in maximum power to reach
the set temperature. When the
set temperature is reached
will disappear. Booster setting
is active for the functions
during which is displayed
when is touched for a
long time. Booster can only
be activated for cooking
operations performed in the
single large section.