Landscape Forms is not responsible for site preparation and footings. Footing recommendations are included in these instructions.
Installation Guide www.landscapeforms.com Ph: 800.521.2546
Page 2 of 3
Date: March 19, 2021
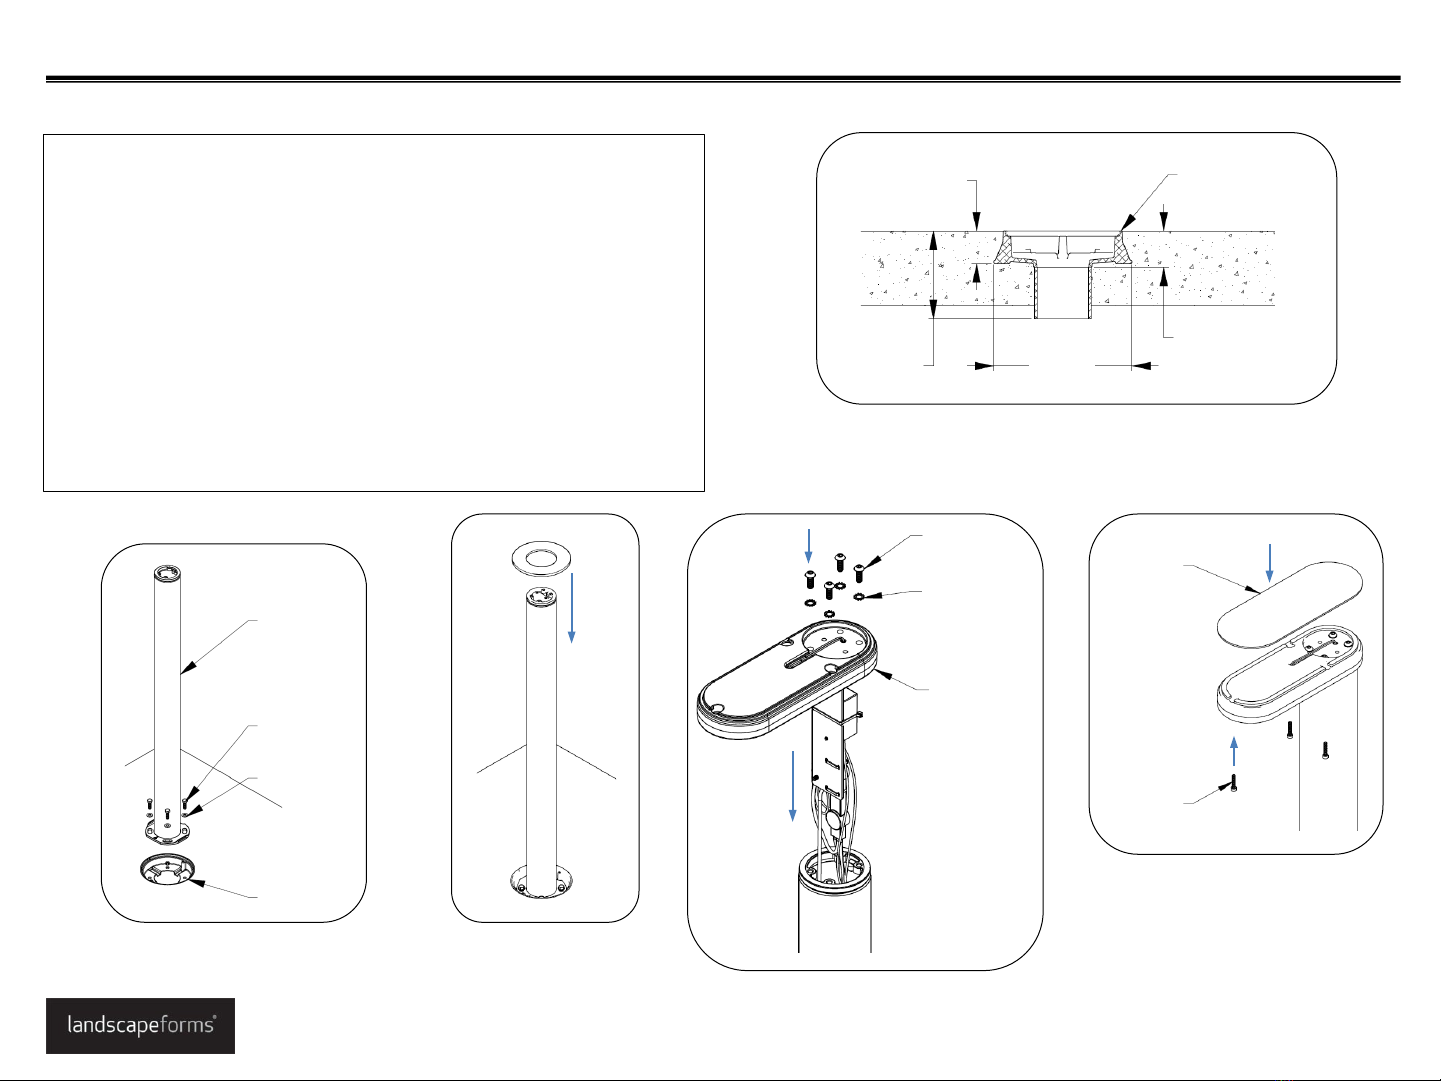
Fig. 6 –Install cover plate
M6 SOCKET
BUTTON HD
SCREW
TOOTH
WASHER
LUMINAIRE
HEAD WITH
DRIVER PLATE
ATTACHED
Fig. 7 –Install luminaire and driver plate
LUMINAIRE
COVER
M4 SOCKET
HEAD CAP
SCREW
Fig. 8 –Install luminaire cover
INSTALLATION PROCEDURE FOR PATH LIGHT:
NOTE: The embedded pathlight is designed to be installed in new concrete.
1. Prepare footing as required by local codes, see Fig. 1 and Fig. 2 for
recommendations.
2. Set socket in place. Verify that socket is in the correct orientation. See Fig. 3 and
Fig. 4. Seal bottom of socket tube around conduit to prevent concrete from
entering the socket. Top of socket should be flush with top of concrete. Concrete
should be cured before proceeding with steps 3-7.
3. Set pole in socket and attach using hex bolts and washers as shown in Fig. 5. Align
arrow on base plate with front location of path light.
4. Install cover plate over pole. See Fig. 6. Ensure nut on cover plate is facing down.
5. Make wiring connections (refer to page 3) between driver plate and line-in supply
wiring, see Fig. 7.
6. Secure luminaire and driver plate assembly to pole with (4) M6 screws and lock
tooth washers, see Fig. 7.
7. Attach luminaire cover with (3) M4 screws, see Fig. 8.
Torres Path Light, embedded
Fig. 5 –Install cover plate
EMBEDDED
POLE
5/16-18 x 1”
HEX HEAD BOLT
5/16 WASHER
SOCKET
Fig. 4 –socket in new concrete
TOP OF SOCKET
SITS FLUSH
WITH GRADE
[187mm]
7-3/8”
[119mm]
4-3/4”
[44mm]
1-3/4”
[49mm]
2”


