Lanix Ilium L950 User manual

1
Ilium L950
User Manual

2
Contents
Get Started .............................................................................3
Install SIM Card ................................................................ 3
Charge Mobile Phone....................................................... 4
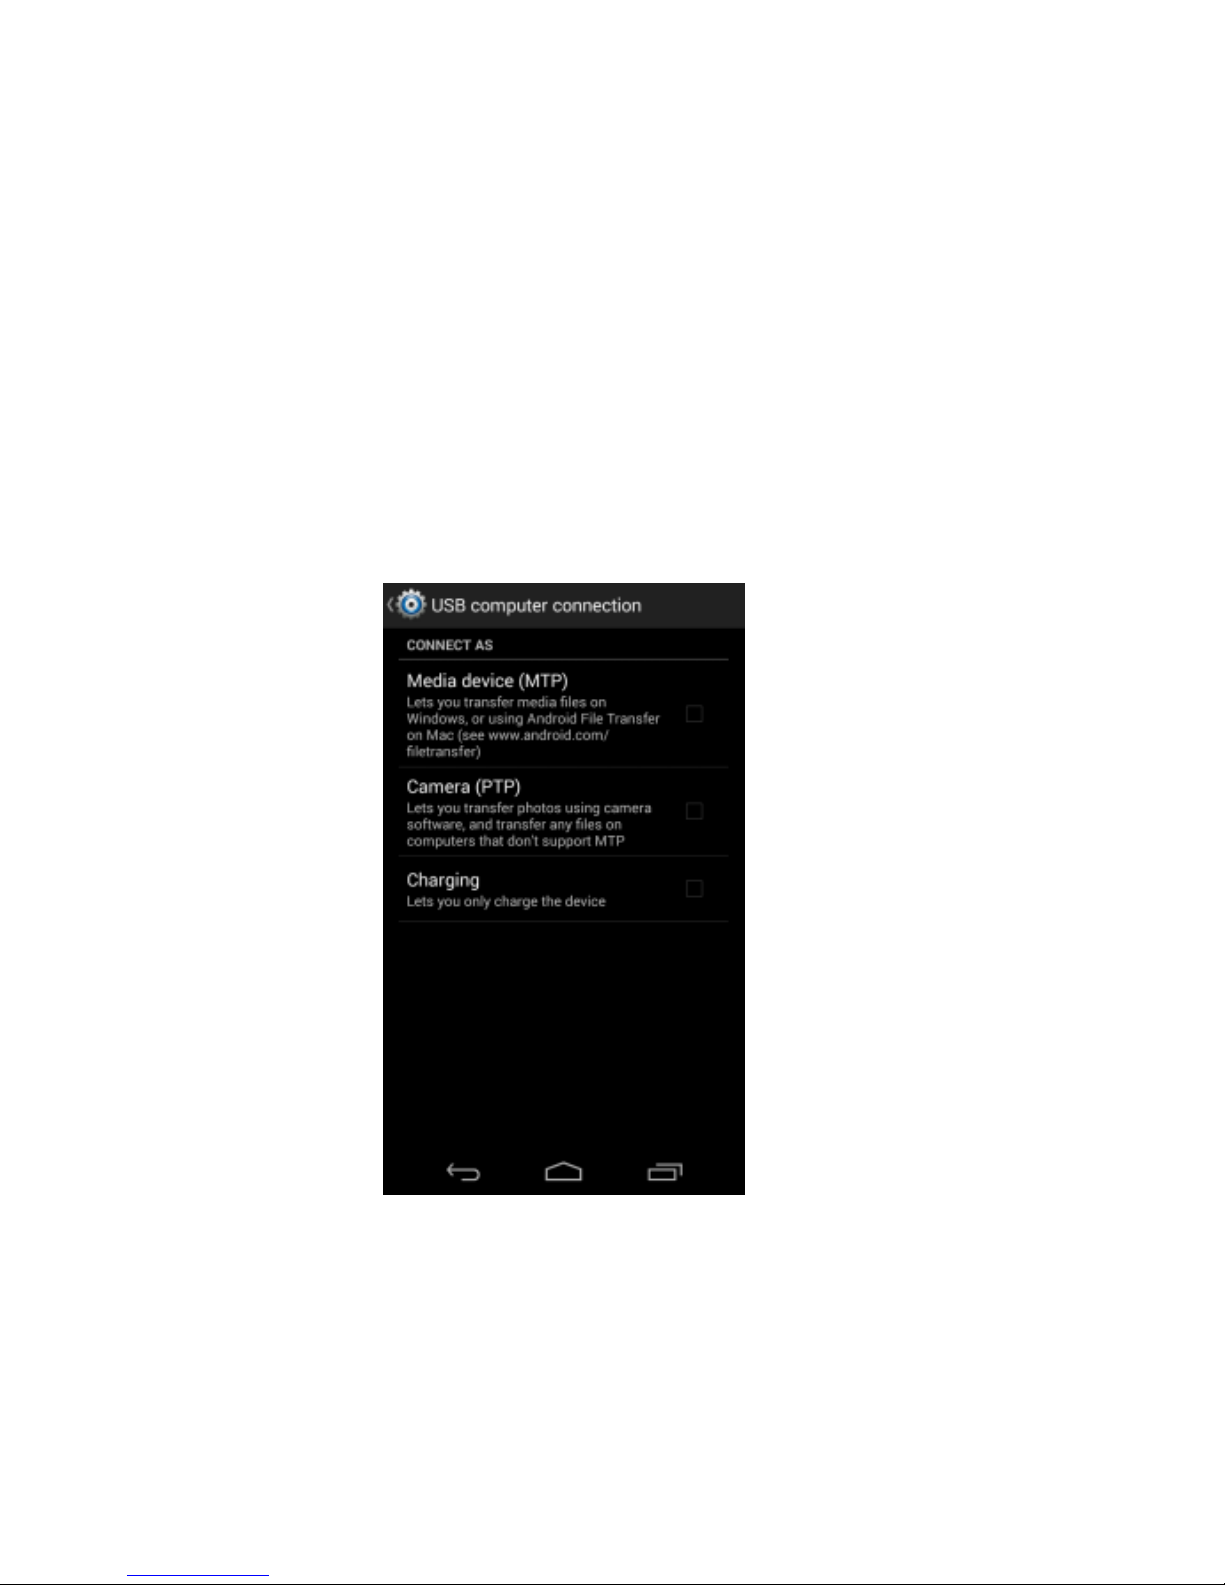
PC-Phone File Transfer ..................................................... 5
Keys and Parts ........................................................................6
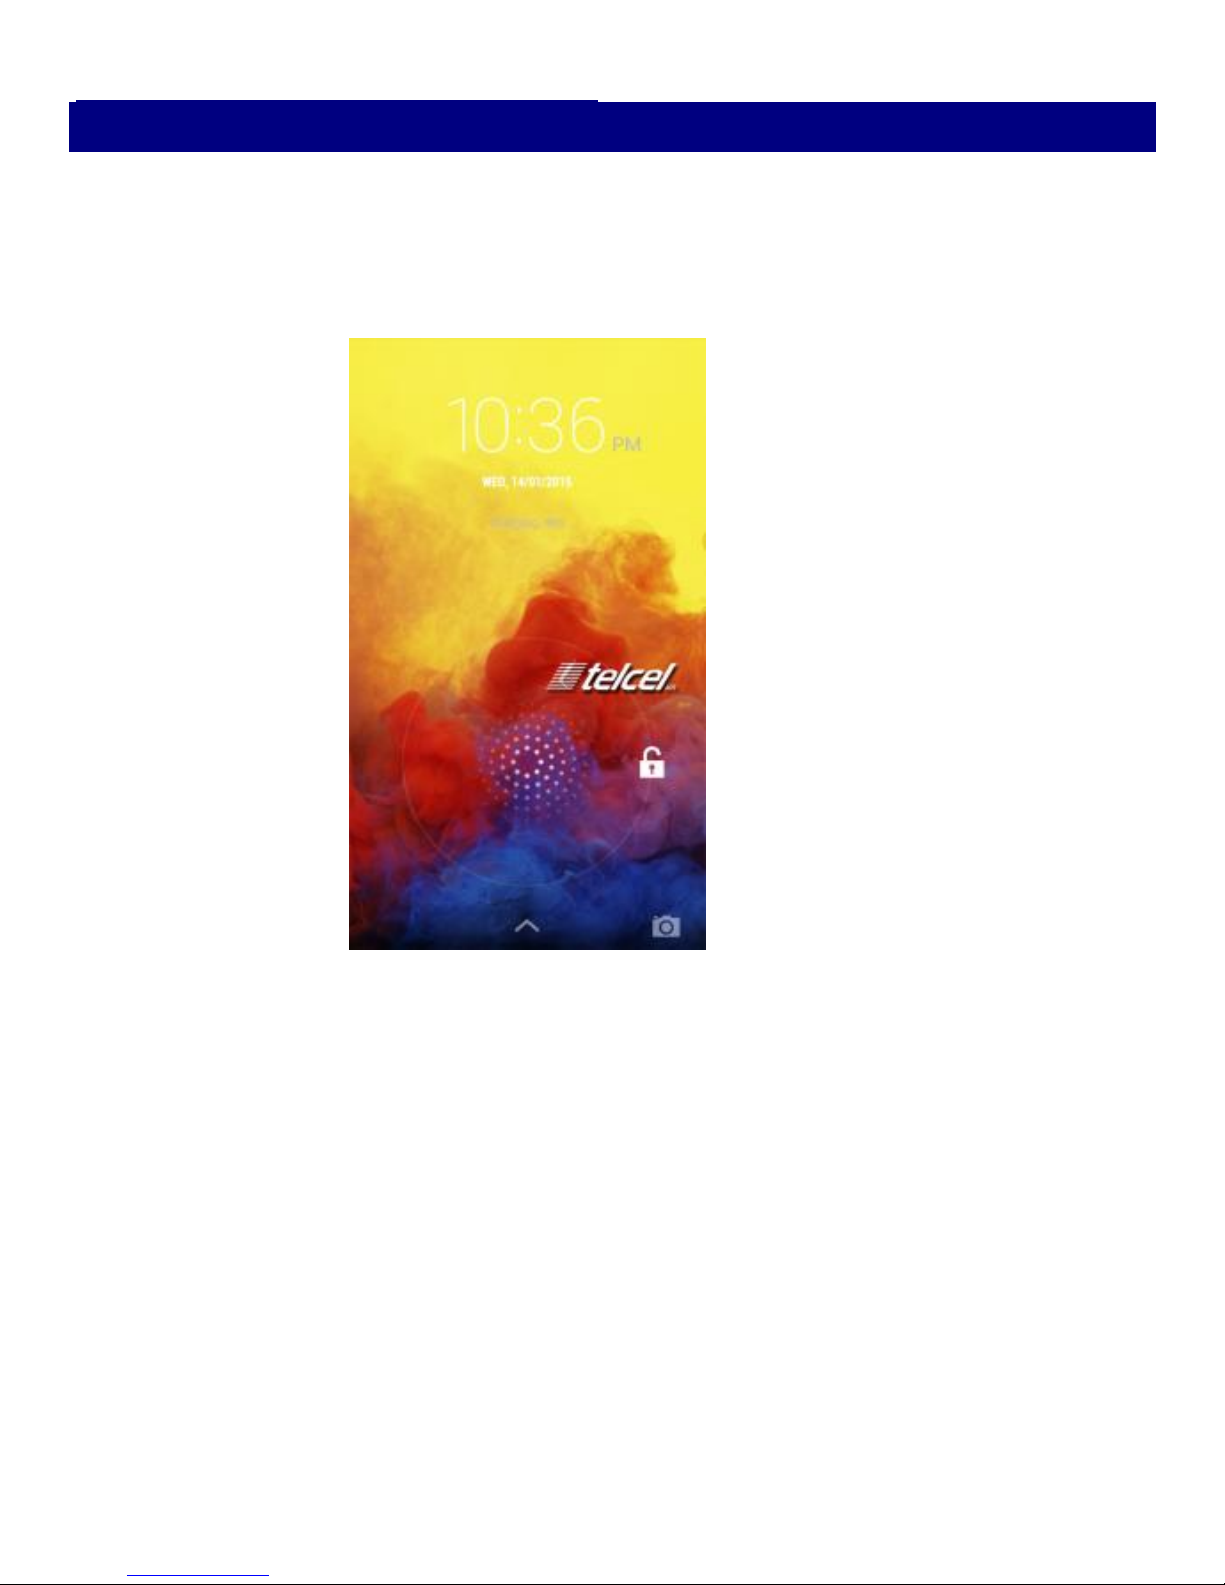
Lock and Unlock the Screen.....................................................8
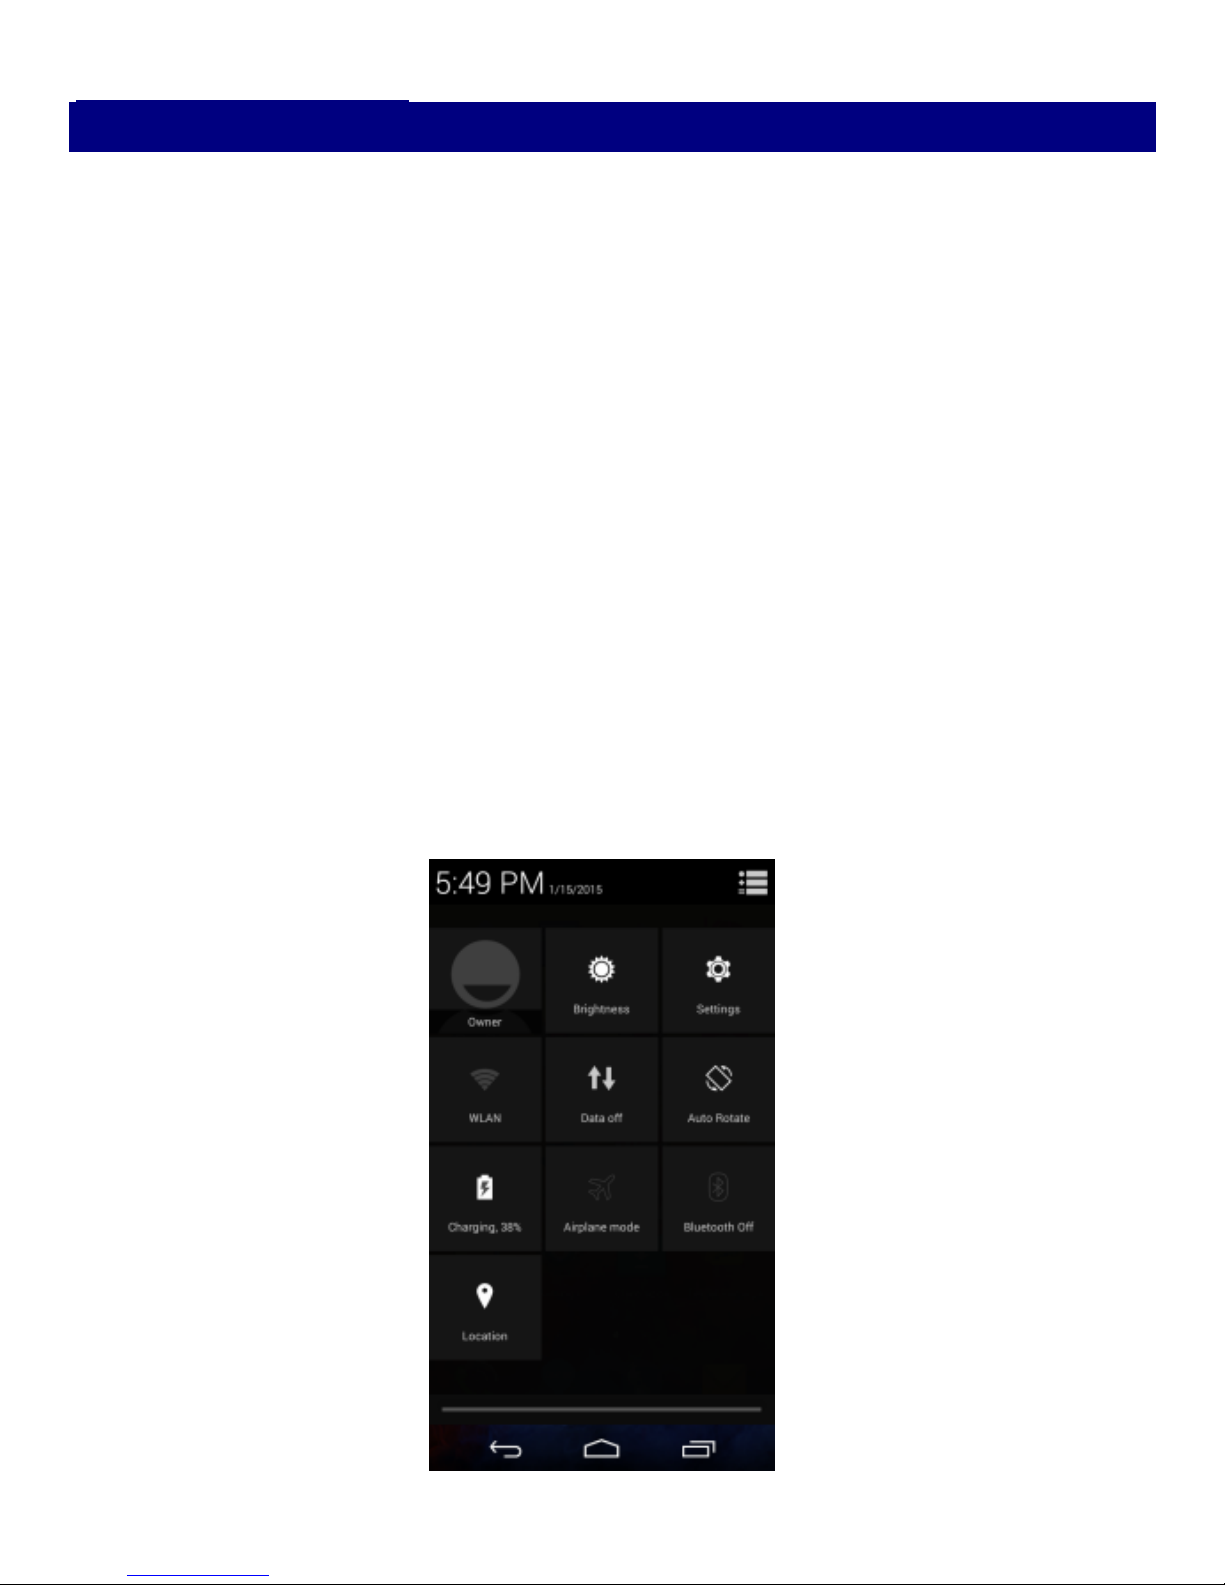
Notification Panel ...................................................................9
Arranging and Rearranging Widgets and Icons .......................10
Adding Folders on your Screen ..............................................11
Adjusting Brightness .............................................................12
Changing your Wallpaper ......................................................13
Make a Call ...........................................................................14
Call Log .................................................................................15
Reject a Call by Sending a Busy Message................................16
Add a Contact .......................................................................16
Messaging ............................................................................17
Receiving a New Message.............................................. 17
Editing SMS and MMS.................................................... 18
Message conversations .................................................. 18
Browse the Web ...................................................................19
Enjoy Music ..........................................................................20
System Updates ....................................................................21
Download Applications From Android Market .......................22
Manage Applications.............................................................23
Maintenance & Safety...........................................................24

3
Get Started
Install SIM Card
You must insert the SIM card before using the phone.
1. Switch off the mobile phone.
2. Insert the SIM card correctly on the right side of card slot (See
figure below).

4
Charge Mobile Phone
Your phone is powered by a rechargeable battery. If your phone comes
up a message which notifies you that the battery power is too low, at
that moment, please recharge the battery, if the charge is too low, it
may shorten the life of the battery. Connect the charger to a power
outlet and the micro USB connector to the phone’s USB port. The
LED flashlight on the top of the phone is red. Once the phone has
finished charging, the light turns green and you should un-plug the
charger.

5
PC-Phone File Transfer
Once the mobile phone is connected to a PC with USB, the PC will
charge the mobile phone automatically. In such case, Connected as a
media device will appear on your screen.
1. Drag the notification panel down and tap Connected as a media
device.
2. Select Media device (MTP).
3. The device is recognized as a Removable Disk by the computer.
Open the folder and transfer or copy files from you phone to PC and
vice-versa.

6
Keys and Parts
This mobile phone gives you marvelous feelings to experience on
Camera, Video recorder, FM radio, Music and Sound recorder. Let
you install various APPs, games, and more (supports APK format) by
downloading from Android Market.
2
1
10
12
4
3
11
5
9
6
7
8

7
1.Volume
Up/Down Key
To adjust the ringer volume, adjust the voice
volume during a call and adjust media
volume.
2.Headset port
To connect an earphone so you can listen to
music or radio, etc.
3.Receiver
To hear the voice of the other side when calling.
4.Front Camera
Allow you to take pictures while facing the
screen.
5.Power Key
Switch the phone on or off.
Press and hold to open phone options menu.
6. Return
Go back to the previous screen;
Close the on-screen keypad, a dialog box, an
options menu, or the notification panel.
7.Home Key
Go to home screen;
Press and hold to open a window showing you
most recently used applications.
8.Menu
Switch to recently used applications.
9. USB jack
To connect charger or USB data cable for data
exchange.
10.Back Camera
lens
For taking photos.
11.Flashlight
To take photos in low-light conditions.
12.Speaker
To listen to music, and other sounds offered by
your phone.

8
Lock and Unlock the Screen
Press power button to enter Sleep mode and meanwhile the screen will
be locked; press power button again to wake up and then drag the lock
the side wards to unlock.

9
Notification Panel
Notification icons on the status bar report the new arrival of messages,
calendar events, alarm set and ongoing settings such as when call
forwarding is on or the current call status. You can open the
Notifications panel to open the message, reminder, or event
notification and see the mobile operator’s name. Even you can switch
on Data connection, WLAN, Bluetooth, etc.
-> Opening the Notifications panel
Press and hold the status bar, slide your finger downward to open the
Notifications panel.
If you have several notifications, you can scroll down the status bar to
view more notifications.
-> Closing the Notifications panel
Do one operation of the following:
1. Press and hold the bottom bar of the Notifications panel, then slide
your finger up the screen.
2. Press BACK or Home directly.

10
Arranging and Rearranging Widgets and Icons
Rearrange the widgets and icons on your Home screen to give room
for adding more items to the Home screen.
-> Press and hold the widget or icon you are desired to move.
The phone vibrates and you'll see this icon App info on the screen.
Don't release your finger.
-> Drag the widget or icon to a new location on the screen. Pause at
the left or right edge of the screen to drag the widget or icon onto
another Home screen panel.
-> When the widget or icon is where you are desired to put it, release
your finger. If you've released your finger but a message shows that
there's no space to place the widget or icon, drag it right or left again
to another Home screen panel.

11
Adding Folders on your Screen
Use folders to group related applications and other shortcuts to keep
your Home screen tidy and organized.
-> Adding folder on your screen
Press and hold an application icon or a widget that you want to move.
The phone then vibrates. Don't release your finger. Drag the
application icon or widget and drop it on top of another application
icon or widget. Then, simply tap the folder to open it so you can
access the applications and widgets inside the folder.
-> Renaming a folder
Tap the folder to open it, and enter a new folder name and then tap
anywhere on the screen.
-> Deleting folder
Drag out all the applications from the folder, then the folder will be
deleted automatically.

12
Adjusting Brightness
Drag the notification panel down and adjust brightness. Or enter
Settings->Display-> Brightness, and adjust the brightness level here
(by dragging the brightness slider to the left to decrease or to the right
to increase the screen Brightness).
Note: Lower the brightness of the screen to prolong the battery life.

13
Changing your Wallpaper
Personalizing your Home screen wallpaper with your favorite photo is
a quick and easy way to change the feel of your phone and give it a
fresh look. Browse the collection of wallpapers included in your
phone by default or choose from photos that you have taken with the
camera.
-> Press and hold the screen where there is space.
-> The screen will vibrate and an optional context.
-> Select the wallpaper you want and confirm to set it as wallpaper.

14
Make a Call
On the start screen choose and enter a complete phone number
to make a call.

15
Call Log
Enter Phone interface, tap the icon in the left corner, and then
access Call log. In call log options, you can Make calls, add new
contact and send message etc.

16
Reject a Call by Sending a Busy Message
While there is an incoming call, you are inconvenient to accept the
call, and then you can send a busy message for rejecting the call.
Drag the circle up to , some busy messages will show on the
screen, short tap any of them to send out.
Add a Contact
Tap and enter Contacts and then add a contact (see figure
below.)
Tap to add a new contact to Phone or SIM card.

17
Messaging
Enter Messaging, and then compose new message. You touch a text
field where you want to enter text, to open the keyboard.
Receiving a New Message
When there is a new message comes, a new message icon will appears
in the notifications area of the status bar to notify you of a new text or
multimedia message.
To open the message, press and hold the status bar, and then slide the
status bar down to open the Notifications panel. Or go to Messaging,
read the message directly.

18
Editing SMS and MMS
-> When you are composing a new text message, you can select text
for cutting or copying. Touch the text field or portion that contains text.
You can select all contexts, copy, cut and paste. The selected text is
highlighted in Blue.
-> A multimedia message may contain video, pictures, audio,
sideshow, etc. Thus, when you are supposed to edit a MMS, you can
just add videos, pictures and more to SMS and change to MMS.
Message conversations
Text and multimedia messages that are sent to and received from a
contact (or a number) are grouped into conversations or message
threads in the All messages screen. Threaded SMS or MMS let you
see exchanged messages (similar to a chat program) with a contact on
the screen.

19
Browse the Web
Open the browser; click the URL on the screen to search or tap
website address.
The browser is fully optimized and comes with advanced features that
let you enjoy Internet browsing on your phone.
You must have an active data connection or Wi-Fi connection to
access the Internet.

20
Enjoy Music
When you copy music to your Micro SD card, the Music player searches
the device for music files and builds a catalog of your music, based on
information about each file that is stored in the file itself.
Table of contents
Other Lanix Cell Phone manuals

Lanix
Lanix W31 User manual

Lanix
Lanix Ilium S670 User manual

Lanix
Lanix Ilium S130 User manual

Lanix
Lanix Ilium S115 User manual

Lanix
Lanix Ilium X100 User manual

Lanix
Lanix LT500 User manual

Lanix
Lanix S215 User manual

Lanix
Lanix ILIUM s420 User manual

Lanix
Lanix L620 User manual

Lanix
Lanix L1100 User manual