manuals.online logo
Brands
  1. Home
  2. •
  3. Brands
  4. •
  5. lap
  6. •
  7. Outdoor Light
  8. •
  9. lap Napoli 108PG Manual

lap Napoli 108PG Manual

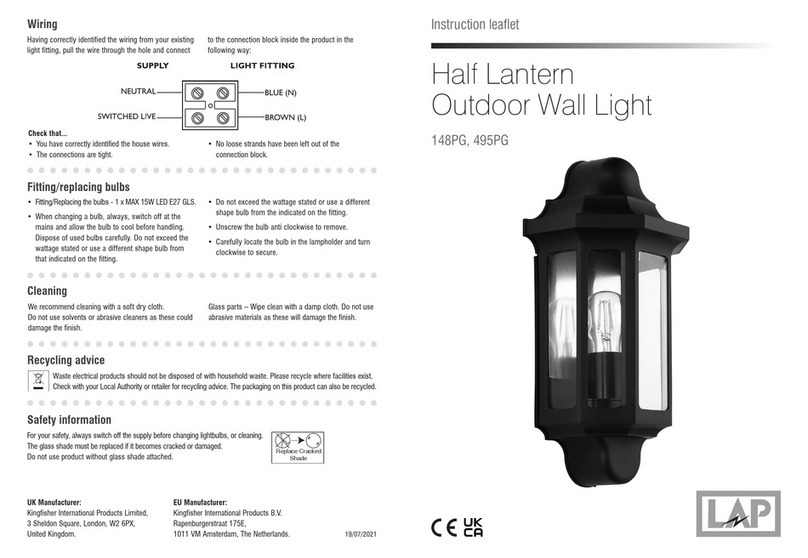
Instruction leaflet
Napoli Round Bulkhead
Napoli Caged Bulkhead
Outdoor Wall Light
Waste electrical products should not be disposed of with household waste. Please recycle where facilities exist.
Check with your Local Authority or retailer for recycling advice. The packaging on this product can also be recycled.
Recycling advice
Safety information
24/05/2021
We recommend cleaning with a soft dry cloth.
Do not use solvents or abrasive cleaners as these could
damage the finish.
Glass parts – Wipe clean with a damp cloth. Do not use
abrasive materials as these will damage the finish.
Cleaning
108PG, 589PG
For your safety, always switch off the supply before changing lightbulbs, or cleaning.
The glass shade must be replaced if it becomes cracked or damaged.
Do not use product without glass shade attached. Replace Cracked
Shade
UK Manufacturer:
Kingfisher International Products Limited,
3 Sheldon Square, London, W2 6PX,
United Kingdom.
EU Manufacturer:
Kingfisher International Products B.V.
Rapenburgerstraat 175E,
1011 VM Amsterdam, The Netherlands.
• Fitting/Replacing the bulbs - 1 x MAX 40W E27 GLS.
Suitable for use with LED bulbs.
• Do not exceed specified wattage (marked on product)
as this may cause the product to overheat. Always
switch off and allow product to cool before changing
the bulb.
• Unscrew the shade and remove.
• Remove the old bulb and replace with a bulb of the
same type and wattage.
• Replace the shade making sure the seal is properly
seated.
Fitting/replacing bulbs
• Ensure that the screws and cable entry points are
sealed to maintain the IP rating of the product.
• Refit the shade and outer bezel and secure with the
screws. Ensure the seals are correctly located.
• Replace fuse or circuit breaker and switch on.
Your light is now ready for use.
Commissioning
Thank you for purchasing this light fitting. Please read the instructions carefully before use to ensure safe and satisfactory
operation of this product. Please retain these instructions for future reference.
Warning
Fixing Instructions
Specification
Voltage: 240V 50Hz
Lamp: Max. 1 x 40W E27 GLS
IP rating: 44
Make sure you have the following items which
are required to install this light fitting:
• Selection of cross and flat head screwdrivers.
• Electric drill and assorted drill bits.
• Wire strippers.
• Insulation tape.
This is a Class 1 product and must be earthed.
This product is only suitable for connection to a
240V~50Hz supply in accordance with current IEE
wiring regulations. It should be installed in accordance
with local building regulations.
This product is IP44 rated and is suitable for outdoor use.
Before installing your light fitting always switch off
the mains supply and remove the appropriate fuse
or switch off the appropriate circuit breaker before
commencing installation.
This product contains glass so care must be taken
when fitting or handling to prevent personal injury or
damage to the product. If replacing an existing fitting,
make a careful note of the connections.
This product is suitable for installation on surfaces
with normal flammability e.g. wood, masonry. It is not
suitable for use on highly flammable surfaces or in
flammable atmospheres.
Never put anything on the product or hang anything
on any part of this product.
Never fit bulbs of a higher wattage than those specified
on the label, as these may cause overheating and
damage the fitting. This product is dimmable when
used with a dimmable bulb.
If you are in any doubt about your competence please
consult a qualified electrician.
If any modification is made it will invalidate the warranty
and may render the product unsafe.
Keep children and animals away from the assembly area.
This fitting contains small parts that could cause
choking if swallowed.
Keep all plastic wrapping materials away from children
to avoid danger of suffocation.
Ensure that all packaging is disposed of carefully
and responsibly.
Decide on the position of the light fitting, or remove
existing light fitting. Note the position of the electrical
connections. Ensure there is a solid mounting surface,
preferably a brick wall, to support the weight of the
light fitting.
• Remove the outer bezel (1) and shade (2) by
removing the screws around the outside of the
products. Keep screws safe for refitting later.
• Using the wall back as a template mark the position
of the fixing holes and drill them.
• Take care to avoid damaging any concealed wiring
and pipes. The correct fixings should be used for
brick, cavity walls or plasterboard.
• Pierce a hole in the grommet, and pull the cable
through. Remove the cover in front of the terminal
block (3) and wire as detailed below.
• Fix the wall back into position.
Installation
Check that...
• You have correctly identified the house wires.
• The connections are tight.
• No loose strands have been left out of the
connection block.
• Earth cable is securely attached to earth connection.
Wiring
Having correctly identified the wiring from your existing
light fitting, pull the wire through the hole. Add supplied
sleeving to live and neutral cables and connect to the
terminals inside the product in the following way:
Live and neutral cable to lampholder terminals and
earth cable to earth screw.
L N
Sleeving
1
2
3
L N
Sleeving
L N
Sleeving

This manual suits for next models

1

Other lap Outdoor Light manuals

lap 1122S User manual

lap

lap 1122S User manual

lap AFD1019-NB User manual

lap

lap AFD1019-NB User manual

lap 442PG User manual

lap

lap 442PG User manual

lap 2617S-PIR User manual

lap

lap 2617S-PIR User manual

lap 148PG Manual

lap

lap 148PG Manual

lap 172PG Manual

lap

lap 172PG Manual

lap 179PP Manual

lap

lap 179PP Manual

lap Bronx Spike 4503R User manual

lap

lap Bronx Spike 4503R User manual

lap G10156PBK User manual

lap

lap G10156PBK User manual

lap 570JK User manual

lap

lap 570JK User manual

lap S083S User manual

lap

lap S083S User manual

Popular Outdoor Light manuals by other brands

WAC Lighting Grand Accent 5212 Installation instruction

WAC Lighting

WAC Lighting Grand Accent 5212 Installation instruction

edishine HOPL01A4 instruction manual

edishine

edishine HOPL01A4 instruction manual

Brooklyn BR-IP65-DP8 quick start guide

Brooklyn

Brooklyn BR-IP65-DP8 quick start guide

LIGMAN VEKTER 7 installation manual

LIGMAN

LIGMAN VEKTER 7 installation manual

Lightronics AMPULLA Installation intructions

Lightronics

Lightronics AMPULLA Installation intructions

Malmbergs JRA2-S30 instruction manual

Malmbergs

Malmbergs JRA2-S30 instruction manual

HUDSON VALLEY LIGHTING mitzi MILLA HL175201 Assembly and mounting instructions

HUDSON VALLEY LIGHTING

HUDSON VALLEY LIGHTING mitzi MILLA HL175201 Assembly and mounting instructions

atmosphera Luce installation instructions

atmosphera

atmosphera Luce installation instructions

Acuity Brands Lighting Lithonia Lighting FML4W Wrap installation guide

Acuity Brands Lighting

Acuity Brands Lighting Lithonia Lighting FML4W Wrap installation guide

TFA LUMATIC GUARD 43.2033 operating instructions

TFA

TFA LUMATIC GUARD 43.2033 operating instructions

FAAC BILAMP quick start guide

FAAC

FAAC BILAMP quick start guide

Dale Tiffany TT10891 Assembly instructions

Dale Tiffany

Dale Tiffany TT10891 Assembly instructions

LIVARNO LUX LSLB 30 A1 Operating instructions and safety instructions

LIVARNO LUX

LIVARNO LUX LSLB 30 A1 Operating instructions and safety instructions

LIVARNO LUX 275315 Operation and safety notes

LIVARNO LUX

LIVARNO LUX 275315 Operation and safety notes

LOWE'S 20442-000 quick start guide

LOWE'S

LOWE'S 20442-000 quick start guide

West Elm Jamie Harris Assembly instructions

West Elm

West Elm Jamie Harris Assembly instructions

M-Elec ML-MSL8-W manual

M-Elec

M-Elec ML-MSL8-W manual

heatco JAMMY O-0005-WUP instruction manual

heatco

heatco JAMMY O-0005-WUP instruction manual

manuals.online logo
manuals.online logoBrands
  • About & Mission
  • Contact us
  • Privacy Policy
  • Terms and Conditions

Copyright 2025 Manuals.Online. All Rights Reserved.