manuals.online logo
Brands
  1. Home
  2. •
  3. Brands
  4. •
  5. Leister
  6. •
  7. Power Tools
  8. •
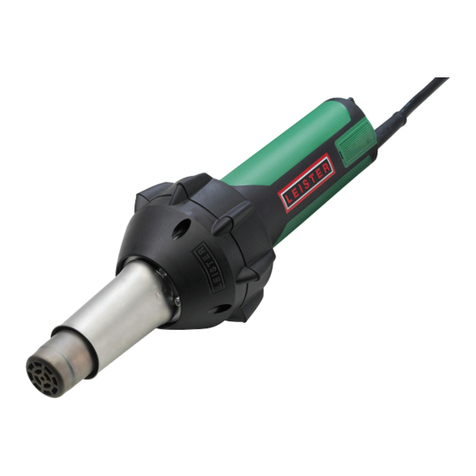
  9. Leister ELECTRON ST User manual

Leister ELECTRON ST User manual

ELECTRON ST
Hot Air Tool
User Manual
Leister Technologies AG
Galileo-Strasse 10
6056 Kaegiswil
Switzerland
Tel. +41 41 662 74 74
Fax +41 41 662 74 16
[email protected]
www.leister.com
2
Anwendungen
Dieses Heissluft-Gerät Leister ELECTRON ST eignet sich zum Schweissen und
Schrumpfen thermoplastischer Kunststoe sowie zum Aufheizen und Trocknen.
Applications
This hot air tool Leister ELECTRON ST is suitable for welding and shrinking of
thermoplastics as well as for heating and drying.
Bedienungsanleitung vor Inbetriebnahme aufmerksam lesen und zur weiteren Verfügung aufbewahren.
Please read operating instructions carefully before use and keep for future reference.
Instructions d’utilisation à lire très attentivement avant mise en marche et à conserver pour dispositions ultérieures.
Por favor, leer detenidamente las instrucciones antes del uso y guardarlas para referencia adicional.
Por favor leia cuidadosamente este manual de instruções antes de utilizar o equipamento e guarde-o para futuras consultas.
Prima della messa in funzione leggere attentamente queste istruzioni d‘uso e tenerle a di sposizione per la consultazione
Gebruiksaanwijzing voor ingebruikname, zorgvuldig lezen en voor latere naslag bewaren.
Betjeningsvejledningen gennemlæses omhyggeligt før ibrugtagning og gemmes til evt. senere brug.
Läs noga igenom bruksanvisningen innan automaten används för första gången och tag vara på den i fortsättningen.
Ta vare på bruksanvisningen og les den nøye før apparatet tas i bruk.
Käyttöohjeet on luettava huolellisesti ennen käyttöönottoa ja säilytettävä myöhempää tarvetta varten
Παρακαλούμε διαβάστε προσεκτικά τις οδηγίες λειτουργίας πριν από τη χρήση και φυλάξτε τις για μελλοντική αναφορά.
Kullanım kılavuzunu, makineyi işletime almadan önce dikkatle okuyun ve daha sonra başvurmak üzere saklayın.
Należy dokładnie zapoznać się z niniejszą instrukcją obsługi i zachować ją do późniejszego użytku.
A használati utasítást üzembevétel előtt gondosan olvassa el és őrizze meg.
Před uvedením do provozu přečíst pozorně návod k obsluze a uschovat ho aby byl stále k dispozici.
Návod na obsluhu si pozorne prečítajte pred uvedením zariadenia do prevádzky a uchovajte ho pre neskoršie použitie.
Citiţi cu atenţie Instrucţiunile de operare şi le păstraţi pentru a fi disponibile ulterior.
Pred zagonom skrbno preberite navodila za uporabo in jih shranite za nadaljnjo referenco.
Прочетете внимателно ръководството на потребителя преди пускане в експлоатация и го съхранявайте за по-нататъшно ползване.
Enne seadme kasutuselevõttu lugege hoolikalt kasutusjuhendit ja säilitage see edaspidiseks kasutamiseks.
Prieš pradėdami darbą su prietaisu, atidžiai perskaitykite naudojimo instrukciją ir pasidėkite ją saugioje vietoje, kad galėtumėte prireikus pasinaudoti ja ateityje.
Pirms ekspluatācijas uzsākšanas uzmanīgi izlasiet lietošanas instrukciju un uzglabājiet to turpmākai izmantošanai.
Перед вводом в эксплуатацию внимательно прочтите инструкцию по эксплуатации и сохраните ее для дальнейшего использования.
ご使用を開始する前に必ず本取扱説明書をお読みになり、わかりやすい場所に保管してください。
嫁媓ℋ媵ᶒ䶄擃媹㎋Ḛ媲㓌ᴤ濕㿴⋌⁋庙圊᳉Ჾ㨣䕂㎋ḚƲ
ϕΏϝ ΏΩ˯ ΍ϝΕεύϱϝˬ ϱΝΏ ϕέ΍˯Γ Ωϝϱϝ ΍ϝ΍αΕωϡ΍ϝ ϭΡϑυϩ ϝϝ΍αΕω΍ϥΓ Ώϩ ϝ΍Ρϕ΍˱.
ϻНвЍЬТаϻУЬϾгоЛбЧϻЬНйЄпЁЬГϻоЧГϻЬНЕЉЮДЫЏЮЁЬГзПЪжϻнДНЫϻУЬϾгоЛбЧГЯпкСпжЕнГжЧϻФЬНЧпЬЁЧЮЁйГиЧϻЬФЏоЧкЕ
Deutsch
English
Français
Español
Português
Italiano
Nederland
Dansk
Svenska
Norsk
Suomi
Eλληνικά
Türkçe
Polski
Magyar
Česky
Slovensky
Românã
Slovensko
Български
Eesti
Lietuviu
Latviešu
Русский
日本語
ᳫ㑅
ϲΑήϋ
КЬУЬкБМ
3
Technische Daten / Technical Data / Caractéristiques techniques /
Datos técnicos / Dados técnicos / Dati tecnici / Technische gegevens /
Tekniske data / Tekniska data / Tekniske data / Tekniset tiedot /
Τε νικά αρακτηριστικά / Teknik veriler / Dane techniczne / Mæszaki adatok /
Technická data / Technické údaje / Date tehnice / Tehniãni podatki / Технически
параметри / Tehnilised andmed / Techniniai duomenys / Tehniskā informācija /
Технические данные /技術データ/ㄾ㗭㐮㈬/ΔϴϨϔϟ΍ ΕΎϔλ΍ϮϤϟ΍
V~ 120 200 230 230
W 2400 3400 2300 3400
g
lbs
1180
2.6
°C
°F
40–650
100–1200
a = ø mm / inch 90 / 3.5
b = mm / inch 338 / 13.3
c = ø mm / inch 56 / 2.2
d = ø mm / inch 50.5 / 2.0
max. l/min (20°C)
max. cfm (68°F)
320
10.8
dB (A) 67
dca
b
2400 / 3400W
2300W
4
Original-Bedienungsanleitung
1
3
4
2
3min
3
4
2
1
5min
Inbetriebnahme
Start-up
Mise en service
Puesta en marcha
Colocação em funcionamento
Messa in funzione
Ingebruikneming
Idriftssættelse
Idrifttagning
Igangsetting
Käyttöönotto
Εκκίνηση
İşletime alma
Uruchomienie
Üzembe helyezés
Uvedení do provozu
Uvedenie do prevádzky
Punerea în funcţiune
Zagon
Въвеждане в експлоатация
Kasutuselevõtt
Ekspluatācijas sākšana
Naudojimas
Ввод в эксплуатацию
始動
ㅓ‣庎圊
ΏΩ˯ ΍ϝΕεύϱϝ
жНЮоЛйЄпжϾНбоЧЁ
Ausschalten
Switching O
Désactiver
Desconexión
Desligar
Spegnere la macchina
Uitschakelen
Sluk
Frånkoppling
Slå av
Poiskytkentä
Θέση εκτς λειτυργίας
Kapama
Wyłączanie
Kikapcsolás
Vypnutí
Vypnutie
Oprire
Izklop
Изключване
Väljalülitamine
Išjungimas
Izslēgšana
Выключение
作動停止(冷却機能付き)
‵㗇⁵∲⅝侻䕂‱㑫
΍ϝ·ϕ΍ϑ ϡω ΍ϝΕΏέΩ
ЕЮЎжϾНбоЧЁ
Deutsch
English
Français
Español
Português
Italiano
Nederland
Dansk
Svenska
Norsk
Suomi
Eλληνικά
Türkçe
Polski
Magyar
Česky
Slovensky
Românã
Slovensko
Български
Eesti
Lietuviu
Latviešu
Русский
日本語
ᳫ㑅
ϲΑήϋ
КЬУЬкБМ
5
Original-Bedienungsanleitung
1
2
3
1
2
3
4
5
6
Luftfilter reinigen
Cleaning air filter
Nettoyer le filtre à air
Limpiar filtro de aire
Limpar filtro de ar
Pulizia del filtro dell‘aria
Luchtfilter reinigen
Rengøring af luftfilter
Rengör luftfilter
Rengjøre luftfilter
Ilmasuodattimen puhdistus
Καθαρισμός φίλτρου αέρα
Hava filtresi temizlenmelidir
Czyszczenie filtra powietrza
Levegőszűrő tisztítás
Vyčištění vzduchového filtru
Vyčistiť vzduchový filter
Curăţarea filtrului de aer
Čiščenje zračnega filtra
Почистване на въздушен филтър
Õhufiltri puhastamine
Gaisa filtra tīrīšana
Oro filtro valymas
Чистка воздушного фильтра
エアフィルターの清掃
㳃㮿䤸㫒庅㶢┦
Εϥυϱϑ ϑϝΕέ ΍ϝϩϭ΍˯
БуЬϾСЬЛФЪЧЬЎзЖоГϻНЧЁЧЬϻЬТ
Heizelement-Wechsel
Changing heating element
Remplacement de l‘élément chauant
Cambio del elemento calentador
Substituição do elemento de aquecimento
Sostituzione della resistenza
Verwarmingselement vervangen
Udskiftning af varmeelement
Byte av värmeelement
Skifte ut varmeelement
Kuumennuselementin vaihto
Αλλαγή θερμαντικού στοιχείου
Isıtma elemanının değiştirilmesi
Wymiana elementu grzejnego
Fűtőelem csere
Výměna topného tělesa
Výmena vykurovacieho prvku
Înlocuirea elementului de încălzire
Menjava grelnega elementa
Смяна на нагревателен елемент
Kütteelemendi vahetus
Sildelementa nomaiņa
Kaitinimo elemento keitimas
Замена нагревательного элемента
加熱エレメントの交換
⅞㾫 ᶴ㖲㈠
Εύϱϱέ ωϥιέ ΍ϝΕαΥϱϥ
ϻЬНжЕПЯоМГкФпϾСЬЛНпЧГ
Deutsch
English
Français
Español
Português
Italiano
Nederland
Dansk
Svenska
Norsk
Suomi
Eλληνικά
Türkçe
Polski
Magyar
Česky
Slovensky
Românã
Slovensko
Български
Eesti
Lietuviu
Latviešu
Русский
日本語
ᳫ㑅
ϲΑήϋ
КЬУЬкБМ
7
Translation of the Original User Manual
Warning
DANGER! Danger when opening up the tool, as live components and
connections are exposed. Therefore, before opening it, unplug the tool
to ensure disconnection from the mains.
Before
putting into operation,
check power supply cord and connector as well as extension cable for
electrical and mechanical damage.
Incorrect use of the hand extruder (eg overheating of the material) can
present a fire and explosion hazard, especially near combustible
materials and explosive gases.
Do not touch the element housing, air nozzle and
discharging
plastizised material when they are hot as they can cause burns.
Let the tool cool down. Do not point the hot air flow and the
discharging plastizised material in the direction of people or animals.
Caution
The voltage rating stated on the tool must correspond to the mains
voltage.
For personal protection on building sites we strongly recommend
the tool be connected to a RCCB (Residual Current Circuit Breaker).
The tool must be operated under supervision. Heat can ignite
flammable materials which are not in view.The machine may only be
used by qualified specialists or under their supervision. Children
are not authorized to use this machine.
Protect tool from damp and wet.
Repairs should only be carried out by authorized Leister service
points. Restricted to use with original Leister accessories and
replacement parts.
Warranty
• For this tool, we generally provide a warranty in accordance with the statu-
tory / country-specific regulations from the date of purchase (verified by invoice or
delivery document). Damage that has occurred will be corrected by replacement
or repair. Heating elements are excluded from this warranty.
• Additional claims shall be excluded, subject to statutory regulations.
• Damage caused by normal wear, overloading or improper handling is excluded
from the warranty.
• Warranty claims will be rejected for tools that have been altered or changed
by the purchaser.
Conformity
Leister Technologies AG, Galileo-Strasse 10, 6056 Kaegiswil/Switzerland,
confirms that this product, in the version as brought into circulation through
us, fulfils the requirements of the following EC directives.
Directives:
2006/42, 2004/108, 2006/95, 2011/65
Harmonized Standards: EN 12100-1, EN 12100-2, EN 14121-1, EN 55014-1,
EN 55014-2, EN 62233, EN 61000-3-2,
EN 61000-3-3, EN 60335-2-45, EN 50581
Kaegiswil, 17.09.2013
Bruno von Wyl, CTO Beat Mettler, COO
Disposal
Power tools, accessories and packaging should be sorted for environmen
tal-friendly recycling. Only for EC countries: Do not dispose of power
tools into household waste! According to the European Directive 2002/96/
EC on waste electrical and electronic equipment and its incorporation into national law,
power tools that are no longer suitable for use must be separately collected and sent
for recovery in an environmental-friendly manner.
Deutsch
English
Français
Español
Português
Italiano
Nederland
Dansk
Svenska
Norsk
Suomi
Eλληνικά
Türkçe
Polski
Magyar
Česky
Slovensky
Românã
Slovensko
Български
Eesti
Lietuviu
Latviešu
Русский
日本語
ᳫ㑅
ϲΑήϋ
КЬУЬкБМ
8
Translation of the Original User Manual
Important safety instructions
This appliance has a polarized plug (one blade is wider than the other). To reduce
the risk of electric shock, this plug is intended to fit in a polarized outlet only one
way. If the plug does not fit fully in the outlet, reverse the plug. If it still does not fit,
contact a qualified electrician. Do not modify the plug in any way.
Read these instructions
Warning: Extreme care should be taken when stripping paint. The peelings, residue
and vapors of paint may contain lead, which is poisonous. Any pre-1977 paint may
contain lead and paint applied to homes prior to 1950 is likely to contain lead. Once
deposited on surfaces, hand to mouth contact can result in the ingestion of lead.
Exposure to even low levels of lead can cause irreversible brain and nervous system
damage; young and unborn children are particularly vulnerable.
Before beginning any paint removal process you should determine whether the paint
you are removing contains lead. This can be done by your local health department or
by a professional who uses a paint analyzer to check the lead content of the paint to
be removed. LEAD-BASED PAINT SHOULD ONLY BE REMOVED BY A PROFESSIONAL
AND SHOULD NOT BE REMOVED USING A HEAT GUN.
Persons removing paint should follow these guidelines:
1. Move the work piece outdoors. If this is not possible, keep the work area well
ventilated. Open the windows and put an exhaust fan in one of them. Be sure
the fan is moving the air from inside to outside.
2. Remove or cover any carpets, rugs, furniture, clothing, cooking utensils and air
ducts.
3. Place drop cloths in the work area to catch any paint chips or peelings. Wear
protective clothing such as extra work shirts, overalls and hats.
4. Work in one room at a time. Furnishings should be removed or placed in the
center of the room and covered. Work areas should be sealed o from the rest
of the dwelling by sealing doorways with drop cloths.
5. Children, pregnant or potentially pregnant women and nursing mothers should not
be present in the work area until the work is done and all clean up is complete.
6. Wear dust respirator mask or a dual filter (dust and fume) respirator mask
which has been approved by the Occupational Safety and Health Administration
(OSHA), the National Institute of Safety and Health (NIOSH), or the United States
Bureau of Mines. These masks and replaceable filters are readily available at
major hardware stores. Be sure the mask fits. Beards and facial hair may keep
masks from sealing properly. Change filters often. DISPOSABLE PAPER MASKS
ARE NOT ADEQUATE.
7. Use caution when operating the heat gun. Keep the heat gun moving as excessive
heat will generate fumes which can be inhaled by the operator.
8. Keep food and drink out of the work area. Wash hands, arms and face and rinse
mouth before eating or drinking. Do not smoke or chew gum or tobacco in the
work area.
9. Clean up all removed paint and dust by wet mopping the floors. Use a wet cloth
to clean all walls, sills and any other surface where paint or dust is clinging.
DO NOT SWEEP, DRY DUST OR VACUUM. Use a high phosphate detergent or
trisodium phosphate (TSP) to wash and mop areas.
10. At the end of each work session put the paint chips and debris in a double
plastic bag, close it with tape or twist ties and dispose of properly.
11. Remove protective clothing and work shoes in the work area to avoid carrying
dust into the rest to the dwelling. Wash work clothes separately. Wipe shoes o
with a wet rag that is then washed with the work clothes. Wash hair and body
thoroughly with soap and water.
SAVE THESE INSTRUCTIONS
Deutsch
English
Français
Español
Português
Italiano
Nederland
Dansk
Svenska
Norsk
Suomi
Eλληνικά
Türkçe
Polski
Magyar
Česky
Slovensky
Românã
Slovensko
Български
Eesti
Lietuviu
Latviešu
Русский
日本語
ᳫ㑅
ϲΑήϋ
КЬУЬкБМ
35
35
Notizen | Notes
36
© Copyright by Leister
Your authorised sales and service center:
www.leister.com
Leister Technologies AG is an ISO 9001certified enterprise.
BA_ ELECTRON ST / Ident No. 148.264 / 08.2013
Leister Technologies AG
Galileo-Strasse 10
6056 Kaegiswil
Switzerland
Tel. +41 41 662 74 74
Fax +41 41 662 74 16
[email protected]
www.leister.com
1250 Pacific Oaks Place #104
Escondido, CA 92026
(800)694-1472

Other manuals for ELECTRON ST

2

Other Leister Power Tools manuals

Leister TRIAC AT User manual

Leister

Leister TRIAC AT User manual

Leister GHIBLI AW User manual

Leister

Leister GHIBLI AW User manual

Leister WELDMAX User manual

Leister

Leister WELDMAX User manual

Leister WELDPLAST S6 User manual

Leister

Leister WELDPLAST S6 User manual

Leister UNIROOF 700 User manual

Leister

Leister UNIROOF 700 User manual

Leister TRIAC S User manual

Leister

Leister TRIAC S User manual

Leister TRIAC AT User manual

Leister

Leister TRIAC AT User manual

Leister SOLANO AT User manual

Leister

Leister SOLANO AT User manual

Leister ELECTRON ST User manual

Leister

Leister ELECTRON ST User manual

Leister TRIAC ST User manual

Leister

Leister TRIAC ST User manual

Leister TRIAC ST User manual

Leister

Leister TRIAC ST User manual

Leister TRIAC AT User manual

Leister

Leister TRIAC AT User manual

Leister SOLANO AT User manual

Leister

Leister SOLANO AT User manual

Leister ELECTRON ST User manual

Leister

Leister ELECTRON ST User manual

Leister MINIFLOOR User manual

Leister

Leister MINIFLOOR User manual

Leister Diode S User manual

Leister

Leister Diode S User manual

Leister LE 40 000 User manual

Leister

Leister LE 40 000 User manual

Leister TRIAC AT Setup guide

Leister

Leister TRIAC AT Setup guide

Leister TRIAC AT User manual

Leister

Leister TRIAC AT User manual

Leister Electron User manual

Leister

Leister Electron User manual

Leister GROOVER 500-LP User manual

Leister

Leister GROOVER 500-LP User manual

Leister TRIAC ST User manual

Leister

Leister TRIAC ST User manual

Leister TRIAC S User manual

Leister

Leister TRIAC S User manual

Leister GHIBLI AW User manual

Leister

Leister GHIBLI AW User manual

Popular Power Tools manuals by other brands

Alpha tools DF 850 Original operating instructions

Alpha tools

Alpha tools DF 850 Original operating instructions

Bosch 0 601 9H5 100 Original instructions

Bosch

Bosch 0 601 9H5 100 Original instructions

Hilti TE 800-AVR user guide

Hilti

Hilti TE 800-AVR user guide

Matrix EJS 800-1 Translation of the original instructions

Matrix

Matrix EJS 800-1 Translation of the original instructions

Makita JS1000 instruction manual

Makita

Makita JS1000 instruction manual

JAMEC PEM TDR3000 operating instructions

JAMEC PEM

JAMEC PEM TDR3000 operating instructions

Ingersoll-Rand DAA40 Series maintenance

Ingersoll-Rand

Ingersoll-Rand DAA40 Series maintenance

Craftsman 315.172281 owner's manual

Craftsman

Craftsman 315.172281 owner's manual

Black & Decker JS700 instruction manual

Black & Decker

Black & Decker JS700 instruction manual

DeWalt DWE315 Original instructions

DeWalt

DeWalt DWE315 Original instructions

Heiniger TPW Aussie Xpress Operator's manual

Heiniger

Heiniger TPW Aussie Xpress Operator's manual

Bosch PHO 1 Original instructions

Bosch

Bosch PHO 1 Original instructions

Challenge M1Q-DD7-65 Original instructions

Challenge

Challenge M1Q-DD7-65 Original instructions

Grizzly T10256-58 instructions

Grizzly

Grizzly T10256-58 instructions

EINHELL Bavaria 43.452.00 operating instructions

EINHELL Bavaria

EINHELL Bavaria 43.452.00 operating instructions

Eaton MBS-I2 Instruction leaflet

Eaton

Eaton MBS-I2 Instruction leaflet

Felco 880-NP user guide

Felco

Felco 880-NP user guide

VATTON 49855 manual

VATTON

VATTON 49855 manual

manuals.online logo
manuals.online logoBrands
  • About & Mission
  • Contact us
  • Privacy Policy
  • Terms and Conditions

Copyright 2025 Manuals.Online. All Rights Reserved.