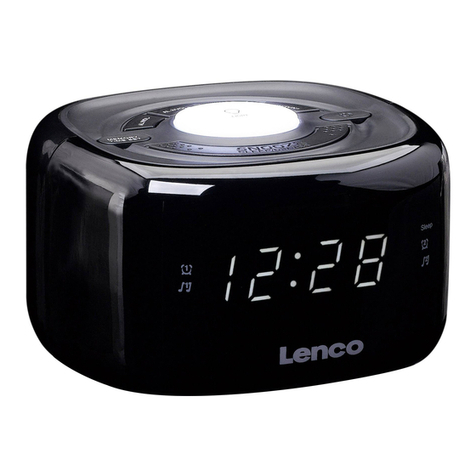
LENCO CRW-1 User manual

MODEL: CRW-1
Wellness Clock Radio
User manual
Lenco recommends attentive reading of the manual before operating the unit.
For information and support, www.lenco.com

2
Table of content
Instruction and warnings............................................................................................3
At a glance (features).................................................................................................6
First time use................................................................................................................8
Setting up and connecting the alarm clock.............................................................8
Turning display illumination on/off ............................................................................9
Setting the time......................................................................................................... 10
Turning the mood light on/off.................................................................................. 10
Turning the radio on/off........................................................................................... 10
Setting an alarm ....................................................................................................... 10
Turning the alarm function on/off/Stopping the alarm..........................................11
Setting the sleep timer..............................................................................................11
Fault/Remedy............................................................................................................ 12
Cleaning..................................................................................................................... 12
Technical specifications........................................................................................... 12
Service and support................................................................................................. 13
Box content
1x Main unit
1x User manual
1x AC/DC adaptor
Note: if some parts are missing please contact your dealer as soon as possible.

3
Instruction and warnings
Read the safety warnings carefully and only use the articles as described in these
instructions to avoid accidental injury or damage.
Keep these instructions for future reference.
If you pass this product on to another person, be sure to give them these instructions:
This symbol warns you of the danger of injury.
This symbol warns you of the danger of injury caused by electricity.
The term DANGER warns you of potential severe injury and danger to life
The term WARNING warns you of injury and severe material damage.
The term CAUTION warns you of minor injury or material Damage.
This indicates additional information.
Safety warnings
Intended use
The well-being alarm clock is designed for home use. It is not suitable for commercial
use.
The well-being alarm clock should only be used in dry indoor areas
Only use the product under moderate climatic conditions.
The well-being alarm clock is exclusively intended to be used with mains electricity.
Back-up batteries can be inserted to ensure settings are saved in case of a power cut.
DANGER to children
Children are not aware of the hazards that can be caused by handling electrical
appliances in correctly. Never allow children to use electrical appliances without
supervision.
Swallowing batteries can be fatal. Keep the batteries and the clock out of the
reach of infants. If a battery has been swallowed, seek medical advice
immediately.
Keep children away from packing material. There is a risk of suffocation!
DANGER due to electricity
Only connect the appliance to a properly installed wall socket which complies
with the requirements listed in the section “Technical specifications”.
You can only disconnect this appliance by removing the mains adapter. The
socket must be easily accessible to ensure that the appliance can be
unplugged quickly if necessary.
The appliance must not be allowed to get wet, as this could cause an electric
shock. Don not submerse the appliance in any liquid and protect it from drops

4
and splashes of water.
Do not use the appliance in humid areas(such as the bath-room) or near any
bodies of water (such as a pool or bathtub). Do not put any liquid-filled
containers on or directly next to the appliance (such as vases or coffee cups).
Do not touch the appliance or mains adapter with wet hands.
Never open or remove any part of the casing. There are live electrical parts
inside the appliance that could cause an electric shock.
Never insert any objects into the appliance’s openings. You could touch a live
electrical part.
Keep the mains adapter away from sources of heat and sharp edges.
Do not use the alarm clock or the mains adapter if either of them are visibly
damaged or have been dropped.
Unplug the mains adapter,…
…if you notice a fault,
…if you do not intend to use the appliance for any length of time,
…before cleaning the appliance and
…during thunderstorms.
Always pull the mains adapter, not the connection cable.
Do not make any modifications to the product.
Only have repairs to the product carried out by a specialist workshop or the
customer care service. Never change the connection cable yourself. Repairs
carried out by non-professionals could cause severe dangers for user.
WARNING-risk of injury or fire
Lay the connection cable in such a way that nobody can trip over it.
Batteries must not be charged, taken apart, thrown into fire or short-circuited.
If a battery has leaked, avoid contact with skin, eyes or mucous membranes. If
necessary, rinse the affected areas with water and consult a doctor immediately.
Do not put any naked flames, such as a lit candle, on or directly next to the
appliance.
To ensure that the appliance has adequate ventilation, there must be at least 10
cm of empty space all around the appliance. Do not put the appliance in closed
cupboards or on shelves that do not provide sufficient ventilation. Do not cover
the appliance’s vents with newspapers, table cloths or curtains, etc. Do not place
the appliance on a soft surface, such as a bed, sofa or blanket.
CAUTION-material damage
Do not set up the appliance in the immediate vicinity of a magnetic field (e.g. near
a TV or speakers).
Protect the batteries from excessive heat. Remove the batteries from the alarm
clock when they are flat or if you do not intend to use the product for any length of
time. This will avoid damage that can be caused by leakage.
Always replace all batteries at once. Do not use different types or brands of
battery or batteries with different capacities.

5
When inserting the battery, ensure that the polarity is correct (+/-).
If necessary, clean the contacts on the battery and appliance before inserting a
battery. Risk of overheating!
Protect the appliance from knocks, falls, dust, humidity, direct sunlight and
extreme temperatures. Also maintain an adequate distance from sources of heat,
such as hobs and ovens.
Only use original accessories.
Never use caustic chemicals, or aggressive or abrasive cleaning products for
cleaning.
Some varnishes, synthetic substances or types of furniture polish may react
adversely with the material of the non-slip feet and soften them. To avoid
unwanted traces on furniture, place a non-slip mat underneath the article if
necessary.

6
At a glance (features)

7
VOLUME-/+
Set volume
Tuning</>
Tune radio
LCD BACKLIGHT DIM
(OFF/DIM/LIGHT)
Set display illumination
RAINBOW LIGHT DIM
(OFF/DIM/LIGHT)
Set mood light
POWER
Turn radio on/off
MELODY
Choose nature sound
1/2/3
ocean/forest/stream
ALARM
Choose alarm
MELODY/RADIO/BUZZ
Nature sounds/radio/neutral alarm
Operational controls around the
circumference
ALARM
MELODY /RADIO /BUZZ
VOLUME
POWER
TUNING
MELODY
RAINBOW LIGHT DIM
OFF/DIM/LIGHT
LCD BACKLIGHT DIM
OFF/DIM/LIGHT
Top
TIME SET
HOUR
ALARM SET
MIN
SNOOZE
SLEEP
ALARM ON/OFF
Bottom
Battery compartment
Mains adapter
connection

8
TIME SET
Set time
ALARM SET
Set and show alarm time
SNOOZE
Pause alarm for approx. 5 minutes/ Press to show clock time
in radio play mode (not alarm activated )
SLEEP
Set sleep timer
ALARM ON/OFF
Turn alarm function on/off
Stop alarm sounding
MIN
Set minutes
HOUR
Set hours
First time use
Unpacking
DANGER to children-Fatal risk of suffocation/ Choking
Keep children away from packing material.
Dispose of it immediately.
△Take all parts out of their packaging and make sure they are not damaged.
Inserting back-up batteries
The back-up batteries ensure that the set time and alarm time are saved in the case of a
power cut or if the appliance is unplugged from the mains. The display is completely
turned off during this time. The back-up batteries are not included!
Back-up batteries are not essential for operation. Operation using solely
batteries-without connecting the appliance to the mains-is not possible.
The battery compartment is on the bottom of the alarm clock.
1. Press the locking tab in the direction of the arrow and
remove the battery compartment lid.
2. Insert the batteries as illustrated. Ensure that the polarity
is correct (+/-).
3. Place the lid back on the battery compartment.
Setting up and connecting the alarm clock
1. Place the alarm clock on a solid and level surface.
2. Unfold the FM cable antenna completely. Attach the end as high as possible against a
wall or a shelf using sticky tape, for example.

9
3. Insert the connection cable’s small connector plug into
the alarm clock’s connection socket.
4. Plug the mains adapter into an easily accessible socket.
0:00 will be displayed. The correct time must now be
set.
If you cannot see the display clearly, turn the display illumination on.
Turning display illumination on/off
△Set the LCD BACKLIGHT DIM switch to …
…LIGHT to light up the display.
…DIM to dim the display illumination.
…OFF to turn illumination off.

10
Setting the time
1. Press TIME SET button, the clock is blinking
△Press HOUR to set the hours.
Pressing the button once will change the time by one hour. If you press and hold
the button, the hours will change until you let go.
△Press MINUTE to set the minutes.
Pressing the button once will change the time by one minute. If you press and hold
the button, the minutes will change until you let go.
2. Press the TIME SET button to confirm.
Turning the mood light on/off
While it is switched on, the mood light runs through the colours of the rainbow.
△Set the RAINBOW LIGHT DIM switch to…
…LIGHT to turn the mood light on.
…DIM to dim the mood light.
…OFF to turn the mood light off.
If you have set an alarm, the mood lighting will switch on with the alarm, even if
you have switched it to OFF.
Turning the radio on/off
1. To turn the radio on press POWER. The frequency currently tuned in will be shown on
the display.
2. To change the frequency turn the TUNING dial left or right using < or >.
3. To set the volume turn the VOLUME dial left or right using –or +.
△To turn the radio off press POWER again.
If you want to check clock time while radio is on (not alarm activated situation),
press SNOOZE.
Setting an alarm
Setting the alarm time
1. Press ALARM SET button, AL TIME “7:00” is blinking.
△Press HOUR to set the hours.
Pressing the button once will change the alarm time by one hour. If you press and
hold the button, the hours will change until you let go.
△Press MINUTE to set the minutes.
Pressing the button once will change the alarm time by one minute. If you press and
hold the button, the minutes will change until you let go.
2. Press theALARM SET button to confirm.
Choosing an alarm

11
Set the volume level that you would like to wake you. The alarm will sound quietly
and become increasingly louder until it reaches the set volume level.
Please note: If you have turned the volume down completely, you will not hear the
radio at the set alarm time; the nature sounds and neutral alarm will retain the
normal volume.
You can choose which alarm you would like:
△Set the ALARM switch to…
…MELODY to choose one of three nature sounds.
△Set the MELODY switch to …
…1for ocean sounds.
…2for forest sounds.
…3for stream sounds.
△Set the ALARM switch to…
…RADIO to choose the radio.
…BUZZ to choose a neutral alarm.
Turning the alarm function on/off/Stopping the alarm
△Press ALARM ON/OFF to turn the alarm function on. The alarm symbol appears
in the display. The chosen alarm will sound at the set time, becoming increasingly
louder, for approx. 1 hour. The dimmed mood light will also turn on (provided it was not
already on).
△To pause the alarm for approx. 5 minutes, press SNOOZE. SNOOZE will be displayed.
The alarm will sound again after approx. 5 minutes. You can pause the alarm as often
as you like for one hour. Following this, the alarm will only sound again the next day at
the set alarm time.
△Press…
…ALARM ON/OFF once to stop the alarm sounding. The alarm symbol will still appear in
the display. The alarm will sound again the next day at the set alarm time.
…ALARM ON/OFF twice to stop the alarm sounding and to turn off the alarm function.
The alarm symbol will disappear from the display. If you would like the alarm to sound
again at the same time the next day, press ALARM ON/OFF again and the alarm symbol
will reappear.
Setting the sleep timer
The sleep timer automatically turns the radio off after a chosen time period-90/60/30 or 10
minutes.
△Press SLEEP quickly and repeatedly until the time is shown that you would like to set.
The radio turns on automatically as soon as you press SLEEP.

12
Repeatedly pressing the button will show the sleep timer settings-from 90 minutes
downwards-briefly in the display. The display will then show the frequency again and a
small SLEEP sign.
△To turn the sleep timer function off, press SLEEP repeatedly until the SLEEP sign
disappears from the display.
△To turn the radio off during the sleep timer period chosen, press POWER.
Fault/Remedy
Not working
Is the mains adapter plugged in properly?
Wrong time displayed
Have back-up batteries been inserted?
If there has been a power cut, all settings will be lost.
Alarm clock does not
work or goes off at the
wrong time enough?
Has the alarm been set properly the alarm function
switched on (alarm symbol in display)?
Is the radio tuned in? Has the volume been set high?
Have back-up batteries been inserted?
If there has been a power cut, all settings will be lost.
Radio switches off
suddenly
Was the sleep timer on? Press POWER to turn the
radio back on.
Cleaning
DANGER-risk of electric shock
Unplug the mains adapter before cleaning the appliance.
The appliance and mains adapter must not come into contact with water. Also
protect both from drops and splashes of water.
CAUTION-material damage
Never use caustic chemicals, or aggressive or abrasive products for cleaning.
△Clean the casing as required with a soft, dry cloth.
Technical specifications
Model:
CRW-1
Mains adapter:
Input:100-240V~50/60Hz
Output: 6V DC 500mA
Back-up batteries:
2x AAA (UM-4) x 2 Batteries
Max. power output:
0.5W RMS
Frequency ranger:
FM87.5-108MHz
Light source:
LED (not replaceable)
Ambient temperature:
+10 to+40°C

13
Power supply adaptor (For EU Only)
Manufacturer:AQUILSTAR PRECISION INDUSTRIAL (SHENZHEN) CO., LTD.
Model number:ASUC30E-060050
Adaptor type: ALTERNATIVE ADAPTOR
Manufacturer: CHOU SEN ELECTRONICS (SHEN ZHEN) CO., LTD.
Model number: CS6D060050FGF
Use only original AC adaptor
Use only the power supply listed in the user instructions
Service and support
For information: www.lenco.com
Lenco offers service and warranty in accordance to European law, which means that in
case of repairs (both during and after the warranty period) you should contact your local
dealer.
Important note: It is not possible to send products that need repairs to Lenco directly.
Important note: If this unit is opened or accessed by a non-official service center in any
way, the warranty expires.
This device is not suitable for professional use. In case of professional use, all warranty
obligations of the manufacturer will be voided.
If at any time in the future you should need to dispose of this product please
note that: Waste electrical products should not be disposed of with
household waste. Please recycle where facilities exist. Check with your
LocalAuthority or retailer for recycling advice. (Waste Electrical and
Electronic Equipment Directive)
Products with the CE marking comply with the EMC Directive (2004/108/EC)
and the Low Voltage Directive (2006/95/EC) issued by the Commission of the
European Community.
The declaration of conformity may be consulted at
https://lencosupport.zendesk.com/forums/22413161-CE-Documents
® All rights reserved
Other manuals for CRW-1
2
Table of contents
Other LENCO Clock Radio manuals