Important Safety Instructions
-3-
Introduction
1. Read Instructions
All the safety and operating instructions should be read
before the product is operated.
2. Retain Instructions
The safety and operating instructions should be
retained for future reference.
3. Heed Warnings
All warnings on the product and in the operating
instructions should be adhered to.
4. Follow Instructions
All operating instructions should be followed.
5. Cleaning
Unplug this product from the wall outlet before cleaning.
Do not use liquid cleaners or aerosol cleaners. Use a
damp cloth for cleaning.
6. Attachments
Do not use attachments not recommended by the
product manufacturer as they may cause hazards.
7. Water and Moisture
Do not use this product near water for example, near
a bathtub, wash bowl, kitchen sink, or laundry tub; in a
wet basement; or near a swimming pool; and the like.
8. Accessories
Do not place this product on an unstable cart, stand,
tripod, bracket, or table. The product may fall, causing
serious injury to a child or adult, and serious damage
to the product. Use only with a cart, stand, tripod,
bracket, or table recommended by the manufacturer, or
sold with the product. Any mounting of the product
should follow the manufacturer's instructions, and
should use a mounting accessory recommended by
the manufacturer.
9. Portable Cart Warning
A product and cart combination should be moved with
care. Quick stop, excessive force, and uneven
surface may cause the product and cart combination
to overturn.
10. Ventilation
Slots and openings in the cabinet are provided for
ventilation and to ensure reliable operation of the
product and to protect it from overheating, and these
openings must not be blocked or covered. The
openings should never be blocked by placing the
product on a bed, sofa, rug, or other similar surface.
This product should not be placed in a built-in
installation such as a bookcase or rack unless proper
ventilation is provided or the manufacturer's
instructions have been adhered to.
11. Power Sources
This product should be operated only from the type of
power source indicated on the marking label. If you are
not sure of the type of power supply to your home,
consult your product dealer or local power company.
For products intended to operate from battery power
or other sources, refer to the operating instructions.
12. Grounding or Polarization
This product may be equipped with a polarized
alternating current line plug (a plug having one blade
wider than the other). This plug will fit into the power
outlet only one way. This is a safety feature. If you are
unable to insert the plug fully into the outlet, try
reversing the plug. If the plug should still fail to fit,
contact your electrician to replace your obsolete outlet.
Do not defeat the safety purpose of the polarized plug.
13. Power Cord Protection
Power supply cords should be routed so that they are
not likely to be walked on or pinched by items placed
upon or against them, paying particular attention to
cords at plugs, convenience receptacles, and the point
where they exit from the product.
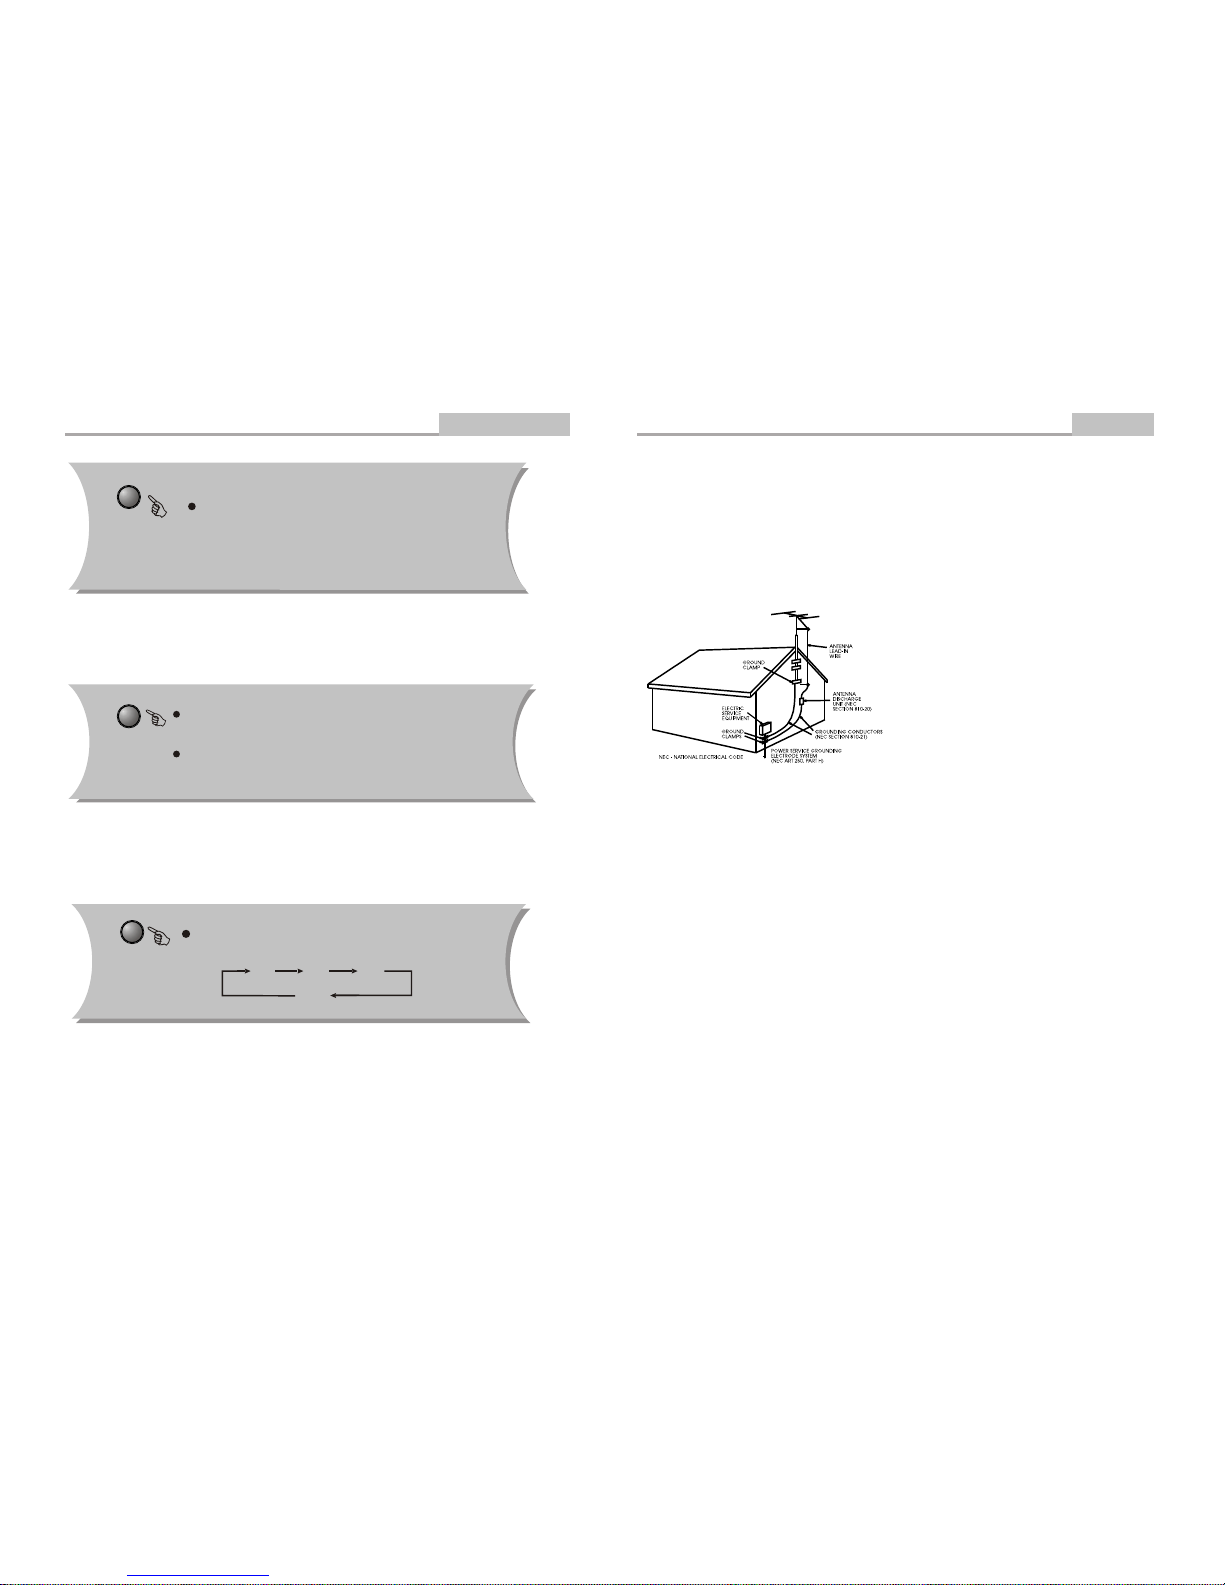
(Symbol provided by RETAC)
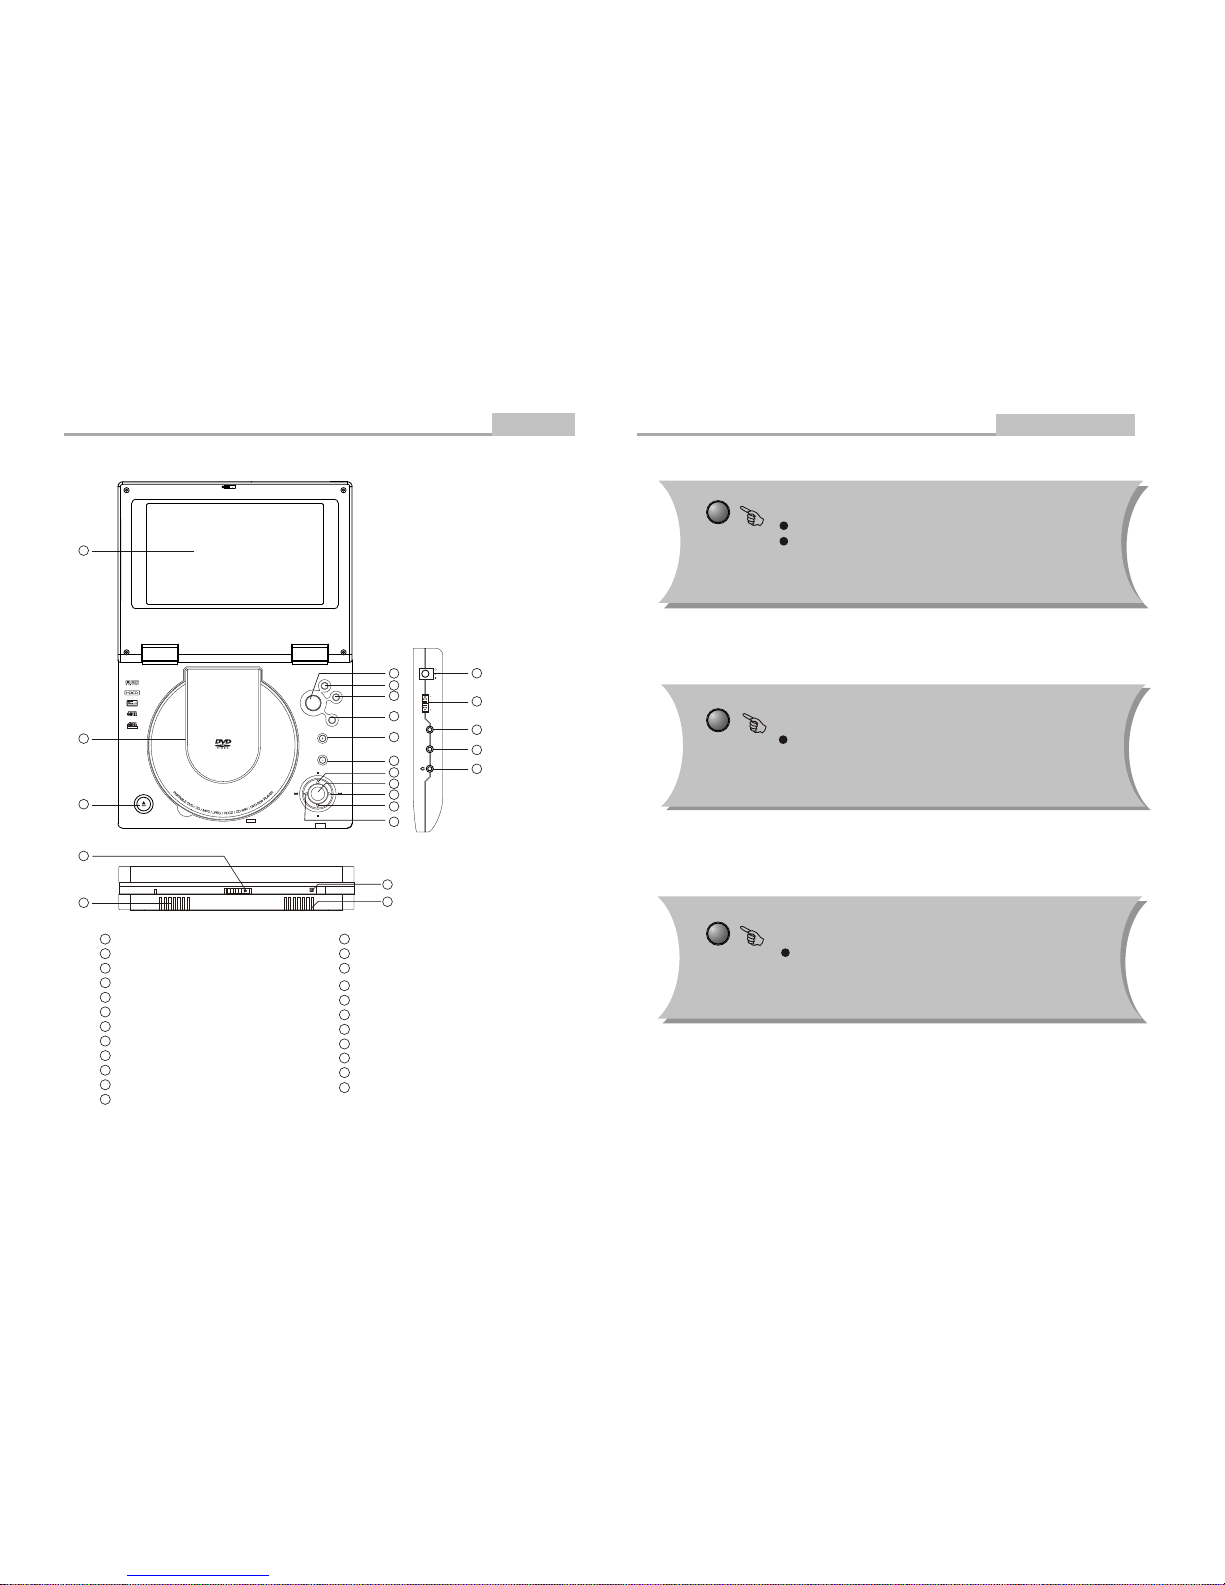
MP3 and MPEG4 Playback Advanced Features
-28-
JPEG
JPEG adoptting the most efficient compression is
widely used as picture storage type flattened and
stored format.
Even if pictures are compressed 15-20 times. they
still have good effect. Supported by most picture
processing software, fit for picture storage, it has small
data and easy use .This machine can read. JPEG-
fomat-made picture CD disc.
Press revelant number key to select picture display.
1.Put in disc correctly, the machine begins to
search disc information.
2. Press number key to select picture.
3. It s efficient only in present picturewhen press
number key.
Select to play by menu
1. Put in disc, machinesearches disc information and
main menu displays on screen. press number key
from 1 to select picture. press play key to make sure.
2. Press direction key to select picture then press
play key.
3. In condition of stop. press direction key to select
other pictures.
4. In condition of stop. select the first line file item
on the right. Then press play key, to return to upper
menu.
OPERATION OF MP3 MPEG4
FUNCTION
MP3 is an audio compression mode using Level
3 of the international standard MPEG, whereby
sound signal is compressed in a rate of 12:1. AMP3
disc can record music for play of over 600 minutes
or record over 170 songs, rivaling CDs in sound
quality.
Divx-MPEG4 is a video encode using the international
standard MPEG-4 and audio using MP3 format.
To play a MP3 or MPEG4 disc
Files Menu of MP3 or MPEG4 play
When playing a MP3 disc, 2 files menus can be
selected by pressing PROG key: File list, Folder.
1. FILE LIST
It may select the files to be played by pressing
UP DOWN arrow key combining
with ENTER key, or using number keys and
ENTER key to select directly. If the number
input is out of the music number, "CURRENT
TRACK NUMBER " will display on screen.
2. Folder
Display menu first then press up down, left right
arrow and ENTER key to select subdirectory
and content.