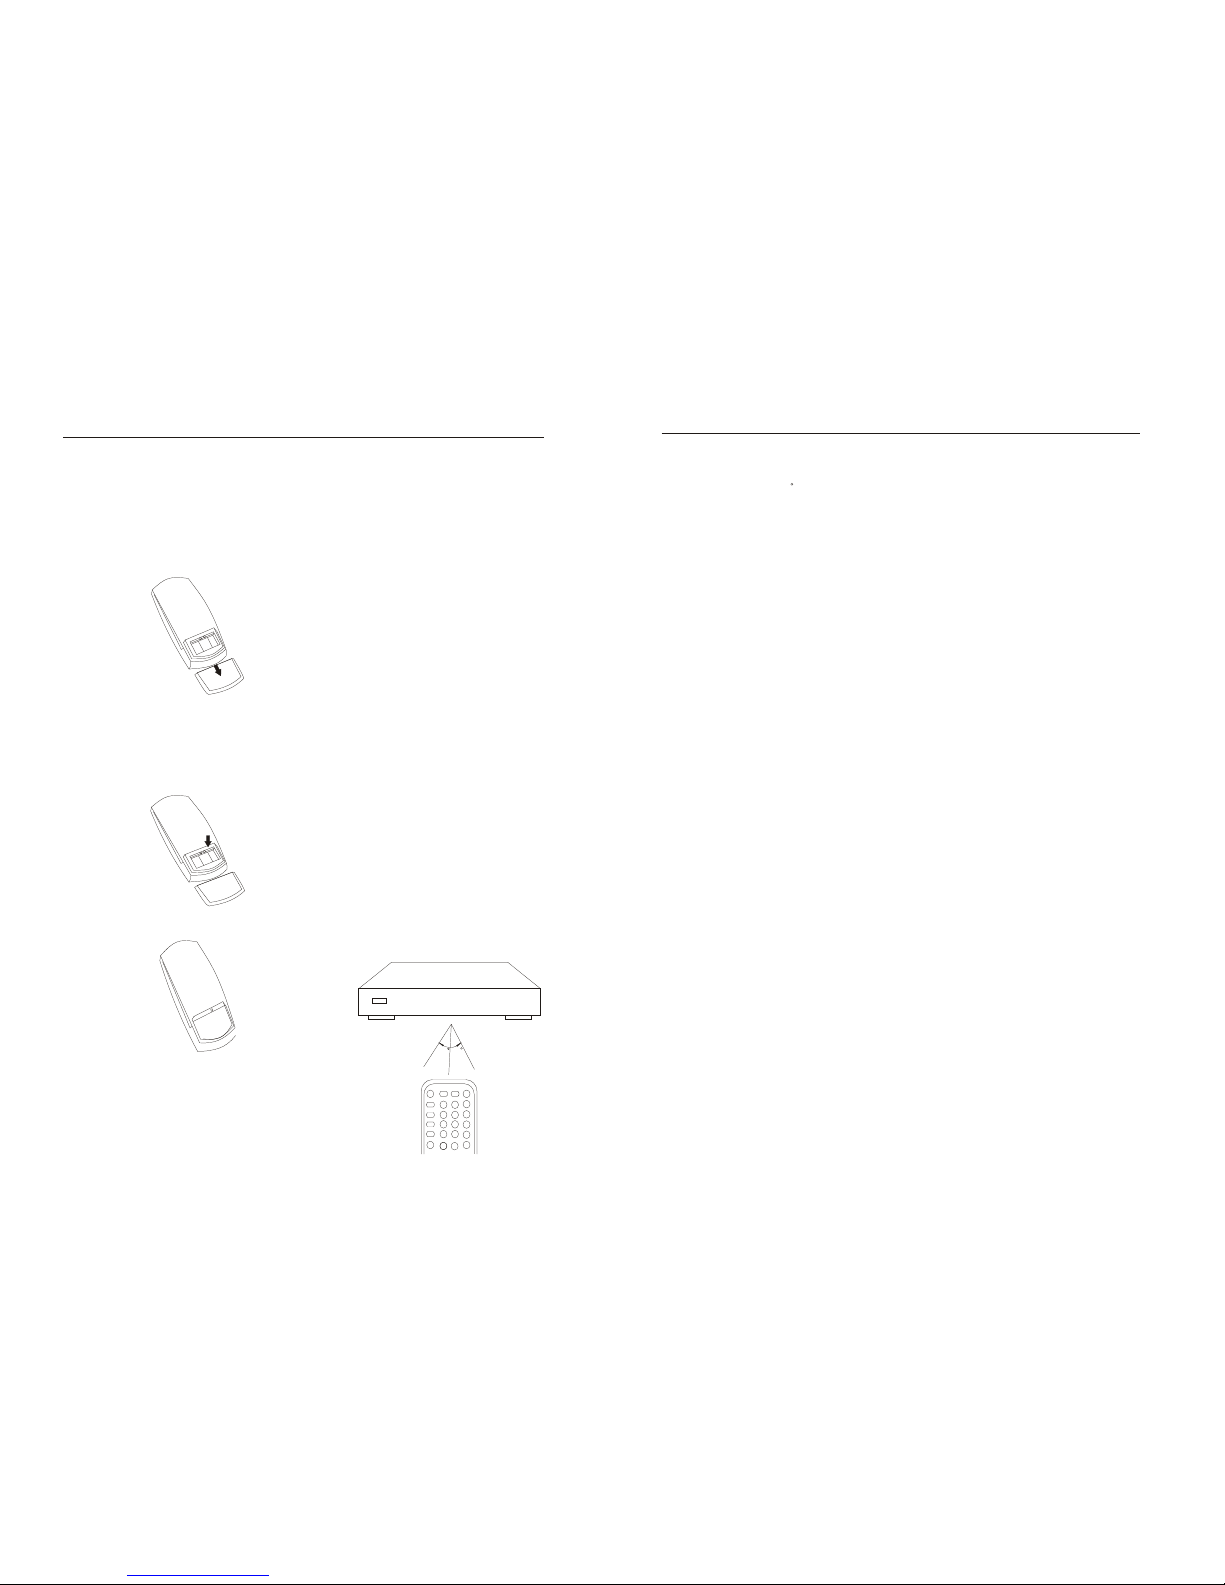
LENCO DVD-28 K - User manual

VIDEO CD
DOLBY
MP3
POWER
ON OFF
DVD /VCD/ CD/MP 3 PLAYER DVD -28 K
MP3
VCD DVD CD PC B REV PROG
L R N P
REMOTE
SENSOR
OPEN/ CLOSE
PLAY/PAU SE
STOP
D I G I TA L
DOL
B
Y
DECODER
KARA KE
PLAYBAC K
PREV
MIC VOL
1MIC1
2
NEXT
2
DVD-28 K
User manual
DVD VIDEO PLAYER

safety. Improper use can result in
will protect you if you observe the
following procedures for installation,
transistorized and does not Contain
any parts that can be repaired by the
Do not remove the cabinet cover
you may be exposed to Dangerous
voltage.Refer servicing to qualified
service personnel only .
Please read the owners Manual
Carefully and follow all the operating
and other instructions.
Power sources
This product should be operated only
from the type of power source
indicated on the marking label. for the
usage of the battery power and Other
power source, refer to the operating
instructions.
Ventilation
Slots and opening in The cabinet
provided for Ventilation and to ensure
reliable operating of the product and
to protect it from overheating,and
these openings must not be blocked or
covered. This product should not be
Placed on the bed or sofa.
IMPORTANT-SAFETY INSTRUCTIONS
caution:
Cleaning
Please read And observe All warnings
Unplug this product from
And instructions given in this owners
Before cleaning. Do not use liquid
manual forFuture reference.Retain this
cleaner or aerosol cleaners.Use a damp
This set been designed Andhas
cloth for cleaning.
Power-cord protection
electric shock or fire hazard. The
Power-supply cords should be
safeguards incorporated in this unit
so that they are not likely to
on or pinched by items placed
and servicing. This unit is fully
use
against them.Pay particular attention
cords at plug, convening, convenience
receptacles and the point
exit from the product.
, or
Lightning
In order to prevent from the
caused by storm or the player
used for a long period of time,
the plug from the outlet.
Are
and those marked on the unit.Manual
assure personal
to
Manufactured
User.
radiators,
Do not use this product near water. For
example, near a bathtub, wash bowl,
kitchen sink, or a damp basement
Heat sources
The product Should be Situated away
from the heat source such as
heat registers, Stoves or other products
that produce heat.
Water and moisture
etc.
the outlet
be walked
upon or
where they
pull out
Routed
to
damage
is not
any kind
Order
shock.
Object and liquid entry
Never push objects of
this product through openings in
to prevent from a fire or electric
in to
I
IMPORTANT-SAFETY INSTRUCTIONS
This product should be operated only from the type of power
source
Do not remove the cabinet cover you may be exposed to
dangerous voltage.
, or
Do not use this product near water.
The product Should be Situated away from the heat source
Power-supply cords should be routed
The player used for a long period of time.
is not
any kind
Never push objects of this product through
openings .
in to
Keep your fingers well clear of the disc tray as it is closing.
Do not place a heavy object on or step on the product.
Unplug the outlet before Connection.
product from
Do notremove the cabinet cover
Do not use acracked, deformed or repaired disc.
Unplug this product from the outlet
Do not attempt to service this product yourself
an
Do not place this product on unstable place.
manufacturer
notDo not use attachments recommended by the product
II

IMPORTANT-SAFETY INSTRUCTIONS
Safety check
Upon completion of any service or
repairs to this product, ask the service
technician to perform safety checks to
determine that the product is in proper
operating condition.
special notice:
This manual is edited based on general
description of all conditions, it may vary
depending on different cases without
prior notice.
III
IMPORTANT -SAFETY INSTRUCTIONS
Burden
Do not place a heavy object on or step
on the product.
The object may fall
to the product.
causemanufacturer as they may
hazards.
causing personal injury and damage
CONNECTION TO OTHER EQUIPMENT
Unplug the outlet before
connection, otherwise,
serious personal
Laser
product from
it may cause the
Injury.
Do not remove the cabinet cover. Direct
exposure to laser may cause damage to
eyesight.
Disc
Do not use a cracked, deformed or
repaired disc. These discs are easily
broken and may cause personal injury
and the damage to the product.
Damage requiring service
Unplug this product from the outlet
and refer servicing to qualified service
personnel under the following
conditions:
a) When the power-supply cord or
damaged.
b) If objects have fallen into the
product.
plug is
c) If the product has been
exposed to rain or water.
d) If the product does not operate
normally by following the operating
instructions, adjust Onlycontrols
those that are covered by the
operating instructions as an
adjustment of other
controls may result in damage and
will often require extensive work by
a qualified technician to restore the
product to its normal operation.
e)If the product has been dropped
or damaged in any way
Do not attempt to service this
product yourself as opening or
removing covers may expose you to
dangerous voltage other hazards.
Refer all servicing to qualified service
personnel.
Improper
or
not
Attachments
Do not use attachments
recommended by the product
IV

NOTES ON DISCS
On handling discs
Do not touch the playback side of the
disc.
On cleaning discs
Wipe the disc from the center Out
ward with a soft cloth. Fingerprints and
dust on the disc cause picture and
sound deterioration. If you cannot
wipe off the dust with a soft cloth, wipe
the disc lightly with slightly moistened
soft cloth and finish with a dry cloth.Do
not use any type of solvent such as
thinner, benzine, commercially
available cleaners or antistatic spray.
It may damage the disc.
On storing discs
Do not store discs in places
moisture and dust such
or near a humidifier.
Store discs vertically in
Do not store discs in a place subject
sunlight or near heat sources.
About the Owners manual
This owners Manual explains the
instructions of this DVD
When the functions of
players are not mentioned or
please refer to instruction
or follow the procedure
TV screen.
Do not attach paper or tape to
discs.
subject to
as a bathroom
case.
to
basic
video player.
some DVD
video
instructed,
discs
prompted on the
notes of
V
PRECAUTIONS
NOTES ON HANDLING
1. When shipping the DVD video player,
the original shipping carton and packing
materials come in handy .
For maximum protection, repack the
unit as it was originally packed at the
.
2. Do not use volatile liquids, such as
lens and drive parts are dirty
down, the picture quality
poor To obtain a clear picture, we
recommend regular inspection and
maintenance(cleaning or
replacement) every 1,000 hours
use depending on the operating
or worn
becomes
parts
of
environment.
insect spray, near the DVD video player
for a long time. They will leave marks
on the finish.
3. The top and rear panels of the DVD
video player may become warm after a
period of use. This is not a malfunction.
4. When the DVD video player is not
in use, be sure to remove the disc and
turn off the power.
5. If you do not use the DVD Video
player for a long period of time, the unit
may not function properly in the
future. T urn on and use the DVD
video player occasionally.
Notes on locating
When you place this DVD video player
near a TV, radio, or VCR, the playback
picture may become poor and the
sounds may be distorted. In this case,
place the DVD video player away
from the TV, radio or VCR.
Notes on cleaning
Use a soft, dry cloth for cleaning.
1. For stubborn dirt, soak the cloth in a
weak detergent solution, wring well and
wipe. Use a dry cloth to wipe dry. Do not
use any type of solvent, such as thinner
and benzine, as they may damage the
surface of the DVD video player .
2. If a chemical saturatredyou use
factory
products instructions.
, followcloth to clean the unit that
Warning:
Cleaning and adjustment of the lens
or other components should be done
qualified personnel.
To obtain a clear picture
The DVD video player is high
technology,
precision device. If the optical pick-up
by
IV

NOTES ON DISCS.............................................................................................. V
PRECAUTIONS................................................................................................... IV
IV
IMPORTANT SAFETY INSTRUCTIONS................................................ .
.
.
. .
.
.
. .
.
.
. .
.
.
. .
.
.
. .
.
.
. .
.
.
. .
.
.
.
.
.
. .
.
.
.
.
.
. .
.
.
.
.
.
. .
.
.
.
.
.
. .
.
.
.
.
.
. .
. .
. .
. .
.
.
. .
. .
. .
. .
. .
. .
. .
.
.
. .
. .
. .
. .
. .
. .
I-
LED
29
29
29
15-28
15-28

INSTRUCTIONS TO THE REMOTE CONTROL
PREPARATION OF THE REMOTE
2. Do not charge, heat, open or short-
CONTROL
circuit the batteries. Do not throw
At first , place the batteries into the
remote control, then you can use remote
control to operate the DVD video player.
batteries in the remote control.
1. Open the cover
4. Do not use different typesof batteries
together or mix old and new batteries.
5. If you do not use the remote control for
a long period of time , remove the
batteries to avoid possible damage from
battery corrosion.
6. If the remote control does not function
correctly or the operating range
becomes reduced, replace all batteries
2. Insert the batteries( No. AA-A)
Make sure to match the +and on the
batteries to the marks inside the battery
Compartment.
compartment, then insert new batteries.
The batteries can be used for one year in
normal condition.
Operation of the remote control This is
for instructions how to use the remote
control.
3. Close the cover
Note on the batteries
Improper use of the batteries may cause
battery leakage and corrosion. To
operate the remote control correctly,
follow the instructions below.
1. Do not insert batteries into the remote
control in the wrong direction.
3. Do not leave dead or exhausted
batteries into a fire.
7. If battery leakage occurs, wipe the
with new ones.
battery liquid from the battery
30 30
INSTRUCTIONS TO THE REMOTE CONTROL
Do not expose te remote sensor of the
DVD video player to a strong light
source such as direct sunlight or other
illumination. If you do so, you may not
be able to operate the DVD video
player via the remote control.
Notes on the remote control
1. Direct the remote control at the
remote sensor of the DVD video player.
2. Do not drop or give the remote
control a shock.
3. Do not spill water or any liquid on the
remote control.
4. Do not open the remote control.
front of the remote sensor.
Angle: within 30 in each direction of the
Distance :within 7m from the front of the
remote control sensor.

DVD P LAYER
PROD UCT:DV D PLAYER
MODE L:DVD- 28 K
POWE R SOURCE :AC 90-2 40V/50 -60Hz
POWE R CONSUM PTION: 20W
SR.N O.:
2
SCART O UT
15
15
SCART output jack
1
POWER
ON OFF
DVD/ VCD/C D/MP3 P LAYER DVD-28 K
MP3
VCD DVD CD PCB R EV PROG
LR N P
REMOTE
SENSOR
OPEN/C LOSE
PLAY/PAUS E
STOP
DI G I T A L
DOL
B
Y
DECODER
KARA KE
PLAYBACK
PREV
MIC VOL
1MIC1
2
NEXT
2
1 2 357
6 8 9 12 13
11
10
4
DVD-28 K
1.POWER
2.CD door
3.OPEN/CLOSE
4.PLAY/PAUSE
5.STOP
6.LED OSD
7.REMOTE SENSOR
8.MIC VOL 1
9.MIC VOL 2
10.PREV
11.NEXT
12.MIC 1
13.MIC 2
2
OSD PBC
A-B
RESUME
RAN
STEP
NUMERIC BUTTON
+ VOL -
PDVD
ANGLE
3D
PROG
TITLE
ENTER
ZOOM
STOP
MUTE
PREV
NEXT
REV
FWD
CLEAR
N/P
L/R
+ KEY -
TIME
SUBTITLE
LANGUAGE
SETUP
- ECHO +
DIRECTIONAL BUTTON
MENU
PAUSE
PLAY
POWER
REPEAT
SLOW
RETURN
OPEN/CLOSE
10+

3
OSD
Display the disc status information
on TV screen.
ANGLE
As for a DVD disc with Multi-angle,
the button to view the picture
from the different angle. Each time
when press it , the picture will switch
to another angle.
RESUME
During playback, press STOP Once,
Press this button to resume play
back from the stopped point. ( you
can press PLAY to resume for some
discs.)
Press
then
MUTE
Press this button to Mute the Analog
Channel.
Press this button to play fast forward
without sounds. Each time when press
it, the fast forward speed will change
a level. Finally it will return to the
normal Playback.
Press this button to play fast backward
without sounds. Each time when press
it , the fast backward speed Will
change a blevel. Finally it will return to
the normal playback.
As for a DVD disc, press this button
skip to the previous chapter to play, as
for a SVCD disc or other disc, press
button to skip to the previous Track.
to
this
As for a DVD disc, press
next chapter. As for a SVCD disc
it to skip to
or other
to the
disc, press this button to skip
track.
the
next
ZOOM
The Zoom Function allows you to
enlarge or zoom out the video image
and to pan though the image. Press
Zoom repeatedly to activate the
function and choose the required
zoom factor: Zoom 2,Zoom 3,Zoom 4
Zoom 1/2,Zoom 1/3,Zoom 1/4,Zoom
off.
RETURN
As for a non-DVD disc, when
on, press this button to return
list menu during playback.
the menu
to the
is
track
REPEAT
As for a DVD disc, press this button
repeat the Current chapter . Press
it again to repeat the programs Of the
current title. Press It the third time
cancel
to
repetition. As for a SVCD disc
( the menu is off), press this button to
Repeat the current track. Press it the
third time to cancel the repetition.
to
to load
remove a
disc or
disc.
a
tray, press it again to Close the disc
Tray.
use this button
OPEN/CLOSE
Press this Button once to eject the disc
To activate the aptions contalned in
the disc (valld or not depending on
the disc). When the PBC is off, In the
stop mode press this button to
browse the contents of the disc
MENU
As for a DVD disc, press this button
PROGRAM
Press this button to change the
playback order. It varies according to
the different discs.
TITLE
Press this button, the selection menu
of the DVD disc will appear. At this
moment , use button
to move the selection mark to the
desired menu. Then press ENTER
button to confirm the selected contents.
(It may be the next sub menu,
use button and
ENTER button to operate )
/ / /
/ / /
PLAY
During the state of stop, pause, slow
motion, fast forward or fast reverse
etc., Press this button to return to
the normal playback.
A-B
During the playback, press this button
at the point ( A ) where the repetition
will start. Press this button again at
the point ( B ) where the repetition Will
Then the player repeats the programs
between A and B . Press this Button
third time to finish repetition.
end.
the
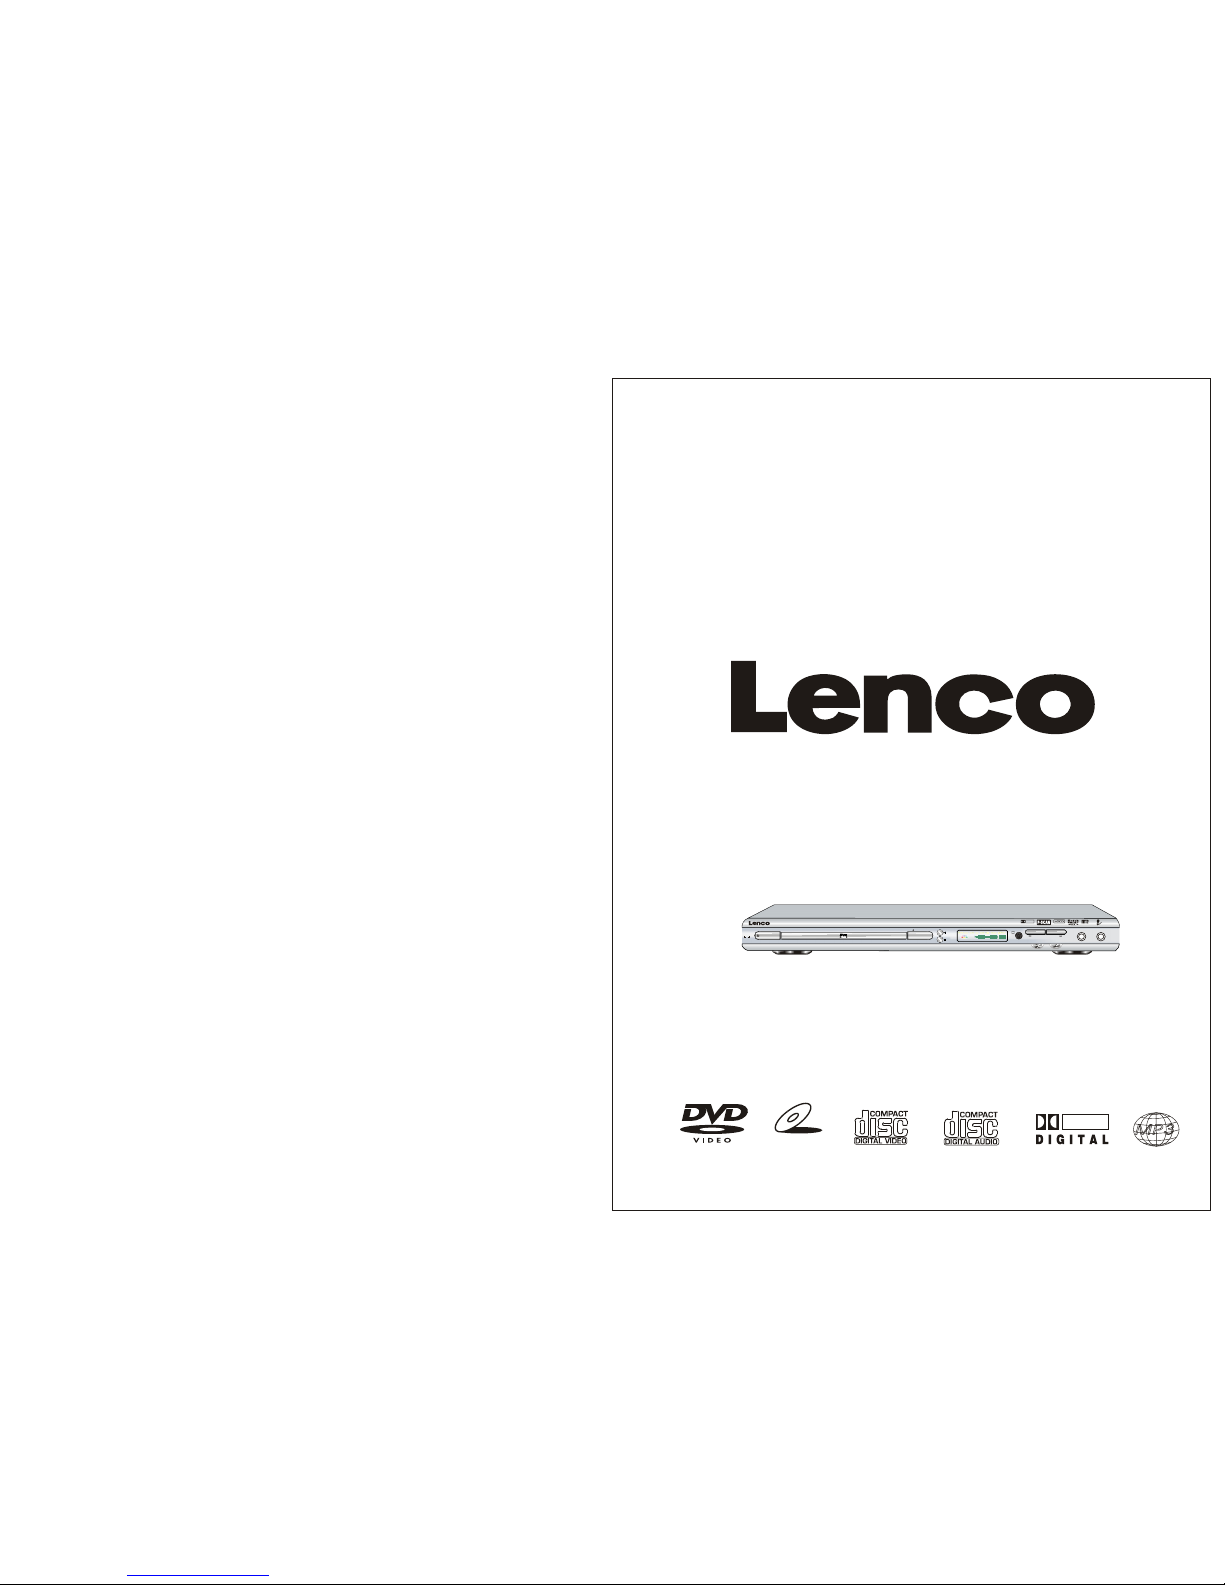
This chapter lists the functions or
operations of keys on the remote
You can refer to the Previous
Of most keys.
control.
or the detailed operations
Chapters
of the disc.
contents
press this button to browse the
mode,
When the PBC is off, in the stop
disc ).
( valid or not depending on the
disc
activate the options contained in the
As for a DVD disc, press this button to
ROOT
4
PAUSE
While the player is in the playback
( include slow, fast forward,
fast reverse etc. ), Press this button
and the playback will pause. The
picture will be still. Press It again
to return to the normal playback.
mode
SETUP
Press this button, the SETUP screen
will appear and wait for your setting.
You can
set up according to your needs.
STOP
As for a DVD disc, press this button
once and the playback will pause,
press this button Again to stop the
playback. Asfor a non-DVD disc, press
it once to stop the playback.
TIME
Press this button to enter the
designated time. The player will
skip to the designated time to play.
( it varies according to the disc).
LANGUAGE
Press this Button to select the
language of the disc.
the different discs.
To
according
AUDIO (L/R)
As for a VCDs or DVCDs, press this
button to select left, right, stereo etc.
Multi output modes. Each time when
press this button it will switch to
another channel. Press this button
close
to
karaoke melody . It varies
the
N/P
Press this button to switch the
system of output signal of the DVD
player (PAL or NTSC), Each time
when press this button, the system
will switch to another one.
forward . Each time when
press this
button, the slow speed will change
once. Finally it will return to the normal
Playback.
PBC
Press this button to switch the menu
Mode.
POWER
Press this button to turn on or off the
player.
ENTER
Press this button to make the selection
valid.
When the DVD menu or system menu
display on te TV screen and wait for
selection, press this button to move
selection mark to select the desired
program.
// /
of the karaoke songs, the
DVD chapters and the
number of the
Number buttons
[0], [1], [2]......[9] is Used forentering
numbers. For example, enter the
the
number
time.
numbers of the
chapter is more than 10, use the 10+
When the number of the track or
then enter the second
number. Each time when press 10+
button, the number increase 10.
first,
button
will
10+
press it , the subtitle language will
switch to another one.
SUBTITLE
Press this button to select the
language of the the subtitle such as
Chinese, English, etc., Each time when
RAN
In STOP state,Press RAN button,the
player is in the random play mode.
ECHO+,ECHO- (with karaoke model)
In karaoke mode,ECHO+and ECHO-
can be used,the funciton is ECHO effect.
KEY+,KEY-
In karaoke mode,Tone can be modified
by Button KEY+ and KEY-.
SLOW
Press this button to play in slow speed
without sound.
CLEAR
Selects sound balance, tone controls
and brightness level by pressing this
button Clear input selections and
cancel certain playback function.
3D
Press this button to switch sound
field effects.
Press VOL+ to increase the volume.
Each time when press it, the volume
will increase a volume unit.
Press VOL- to decrease the volume.
Each time when press it, the volume
will decrease a volume unit.
VOL+,VOL-
VIDEO (PDVD)
Press this button to switch the System
Of output signal of the DVD player
(
Progres Sive or interlace scan)

6
5

78

9 10
invalid

11
D
5.1CH
D
5.1CH
12

13 14
for
automatically
automatically
automatically back

a) Press the Setup button, the main setup menu appears.
lWhen the main menu displayed, the DVD system will auto pause.
b) Press the Left and Right arrow buttons to highlight the icon of the desired
page, then press the Down or Right arrow button to activate that page; For
example, if you want to setup the video page, press Right to highlight the
video icon, the video page will be displayed on the screen.
c) Press the Down arrow button to highlight the desired option. Press Enter
or press Right to select, the choices of that option appear on the right; For
example, press the Down arrow button to highlight the BRIGHTNESS
option, then press Enter to select, the brightness choices appear on the
right.
d) Press the Arrow buttons to highlight the Exit Setup option, then press
Enter or Setup again to exit Setup Menu. Notes:
lWhen setup, the pressing of the following buttons will turn off the setup
menu, while the choices that have been changed will be saved: P / N,
Subtitle, F.F, F.R, Vol +/-, PBC, Title, Return, Play, Stop, Resume, Pause
/ Step, Next, Prev, S.F, S.R, Zoom, Preview, Goto, Program, Repeat, A-B,
Angle, language, Soundtrack, 3D, Record, Display, Mute, Setup.
2. Setup Items Introduction
a) SYSTEM SETUP
The system setup options are illustrated below:
uVIDEO
lInterlace-YUV: Choose this setting if your DVD player is connected to a
TV with Y, Cb, Cr video cables.
lTV-RGB: Choose this setting if your DVD player is connected to a TV
with an S-Video cable or composite video cables.
lP-SCAN: Choose this setting if your DVD player is connected to a prog
ressive scan TV with Y, Cb, Cr video cables.
lPC-VGA: Choose this setting if your DVD player is connected to a
progressive scan TV or a monitor with a VGA video cable. Notes:
lWhen your DVD player output composite video, you can choose the
setting randomly.
Choose TV-RGB / P-SCAN if your DVD player is connected to a
progressive scan TV.
The default setting is TV-RGB.
SYSTEM SETUP
uTV SYSTEM
According to the Color System of the TV, you can choose the TV System.
lAUTO: Choose this settings if your DVD player is connected to a
multi-system TV.
lNTSC: Choose this settings if your DVD player is connected to a NTSC TV.
lPAL: Choose this settings if your DVD player is connected to a PAL TV.
lPAL60: Choose this settings if your DVD player is connected to a PAL60 TV.
The default setting is PAL.
SCREEN SAVER
If the screen saver is on, when your DVD player is in Stop, Open, or No Disc
state, or there is a frame frozen for more than 60sec, the screen saver will be
displayed. This feature can protect the screen from damage.
lON: Choose this setting to activate the screen saver.
lOFF: Choose this setting to cancel the screen saver
The default setting is ON.
15 16

TV TYPE
l16 : 9 (Wide Screen): Choose this setting if your DVD player is connected
to a wide screen TV. If you choose this setting and you don't have a wide
screen TV, the images on the screen may appear distorted due to vertical
compression.
l4 : 3 LB (Letter Box): Choosing this setting if your DVD player is connected
to a normal ratio TV. connector You'll see the movies in their original
aspect ratio (height-to-width ratio). You'll see the entire frame of the
movie, but it will take up a smaller portion of the screen vertically. The
movie might appear with black bars at the top and bottom of the screen.
l4 : 3 PS (Pan & Scan): Choosing this setting if your DVD player is
connected to a normal ratio TV. You can fill the movie to the entire screen
Notes:
lThe image display ratio is related to the recorded disc format. Some disc
can not display images in the aspect ratio you choose.
lIf you play a disc recorded in 4:3 format on a wide screen TV, black bars
will appear on the left and right side of the screen.
lYou must adjust the screen setting depending on the type of the
television you have.
uPASSWORD
The password option is initially locked, and you cannot set the ratings
limit or change the password. In order for the Ratings feature work, the
password mode must be turned on. If you want to set the ratings limit,
you will need to enter the default password, which is 0000, then press
Enter to confirm. To change the password, you will be prompted for the
old password, then be prompted for a new. Enter a 4-digit number (this is
your password).
of your TV. This might mean that parts of the picture (the left and right
edges) won't be seen.
17

uHighlight the AUDIO LANG option, and press the Arrow buttons to choose
the audio language you prefer. Press Enter to confirm. If the disc you are
playing has that language available, it will output audio in that language;
There are 8 optional audio languages: Chinese, English, Japan,French,
Spanish, Portuguese, German and Latin.
uRATING
The Rating feature is a rating limit system, like movie ratings. It works
with DVD discs that have been assigned a rating. This helps you control
the types of DVDs that your family watches.
lThere are two rating options: NO ADULT and KID SAFE.
lSelect the VIEW ALL option to cancel the rating limit.
The default setting is VIEW ALL.
Notes:
lIf the password option is locked, you cannot set the ratings limit; the
rating limit doe not work when the password option is unlocked.
uDEFAULT
Choose this option to set all the setup options to the default setting.
a) LANGUAGE SETUP
The language setup options are illustrated below:
uHighlight the OSD LANGUAGE option, and press the Arrow buttons to
choose the OSD language you prefer. Press Enter to confirm, and it will
display OSD in that language; There are 8 optional OSD languages:
Chinese, English, Japan, French, Spanish, Portuguese, German and
Latin.
20

uHighlight the AUDIO OUT option, and press the Arrow buttons to choose
the audio output mode you prefer. Press Enter to confirm; There are 3
optional audio output modes: ANALOG, SPDIF / RAW, and SPDIF/ PCM.
lANALOG: From the Coaxial Output jack and the Optical Output jack, no
signal is output.
lSPDIF/ RAW: Choose this setting if your DVD player is connected to a
power amplifier with a coaxial cable or an optical cable; When playing
a disc recorded with Dolby Digital, DTS and MPEG audio formats, the
corresponding digital signals will be output from the Coaxial Output
jack or Optical Output jack. This player's digital output jacks are
designed for a connection to a Dolby Digital, DTS , or MPEG receiver or
decoder.
lSPDIF / PCM: Choose this setting if your DVD player is connected to
a 2-channel digital stereo amplifier; When playing a disc recorded with
Dolby Digital and MPEG audio formats, audio signals will be modulated
into a 2-channel PCM signal, and it will be output from the Coaxial
Output jack or Optical Output jack.
uMIC SETUP with karaoke model)
There are two MIC settings in the MIC SETUP option: AUTO and OFF.
When selecting AUTO, the player will auto detect and deal with the input
voice. When selecting OFF, the player will do nothing with the MIC input.
For example, when playing a VCD2.0 karaoke disc, choose AUTO to
enable Auto A/D Detect Feature.
uECHO with karaoke model)
Use the Up and Down arrow button to move the scroll and adjust the echo.
22
21
Highlight the SUBTITLE LANG option, and press the Arrow buttons to
choose the subtitle language you prefer. Press Enter to confirm. If the
disc you are playing has that language available, it will displays subtitles
in that language; There are 8 optional audio languages: Chinese, English,
Japan, French, Spanish, Portuguese, German, and Off.
uHighlight the MENU LANG option, and press the Arrow buttons to choose
the menu language you prefer. Press Enter to confirm. If the disc you are
playing has that language available, it will displays menu in that language;
There are 8 optional menu languages: Chinese, English, Japan, French,
Spanish, Portuguese, German, and Off.
Notes:
lIf your preferred language isn't available, the disc's default language will
be played.
The default language of your DVD player is Chinese.
C) AUDIO SETUP
The audio setup options are illustrated below:

uSATURATION
Use the Up and Down arrow button to move the scroll and adjust the
saturation.
uBRIGHTNESS
Use the Up and Down arrow button to move the scroll and adjust the
brightness.
uCONTRAST
Use the Up and Down arrow button to move the scroll and adjust the
contrast.
uHUE
Use the Up and Down arrow button to move the scroll and adjust the hue.
uKEY
Use the Up and Down arrow button to move the scroll and adjust the key.
D) VIDEO SETUP
The video setup options are illustrated below:
While the DVD player is in the normal playback mode, insert the
microphones to use karaoke function ,at the same time ,select the
set up menu to switch the on/off of karaoke , the volume of MIC
and adjust of the ECHO.
uMIC VOL with karaoke model)
Use the Up and Down arrow button to move the scroll and adjust the
mi rophone volume.
23 24

uBASS MODE
There are three settings in this option: ALL LG SPK, ALL SM SPK,
MIXED SPK. You can adjust subwoofer volume in this option
uCENTER DELAY
You can adjust center delay in this option.
uREAR DELAY
You can adjust rear delay in this option.
e) SPEAKER SETUP(with 5.1 CH model)
The speaker setup options are illustrated below:
uDOWNMIX
Use the Up and Down arrow button to move the scroll and adjust the
downmix.
lLT / RT: Choose this setting, sound will be like in a movie theatre if the
original movie was encoded in the Pro Logic Dolby Digital format.
STEREO: Choose this setting, when 5.1-channel sound playing, two
channels of signals will be output from the left and right soundtrack;
when 2-channel sound playing, stereo signal will be output.
l VSS: Choose this setting, when a disc recorded with 5.1-channel sound
format playing, the fictitious surround soundtracks effect will be heard
from the main soundtrack.
OFF: Choose this setting to output the 5.1-channel sound.
uSUBWOOFER
There are two settings in this option: OFF / ON. When ON is chosen, the
player will auto detect the subwoofer input then output it. When OFF is
chosen and the subwoofer input will not be output.
25 26

f) DIGITAL SETUP
The video setup options are illustrated below:
uOP MODE
lLINE OUT: Choose this setting to line out the input signal. It will be
more suitable for playing in the night time, for the output volume is low.
ltherefore REMOD: It will be more suitable to choose this setting for
playing in the day time, for the output volume is high.
uDYNAMIC RANGE: When “LINE OUT” is selected, choose this setting
to adjust the line out ratio and get different effect. If adjusting to FULL,
the audio signal peak value will be the minimum; while adjusting to OFF,
maximum.
NOTE:
This option will be validated when the DOWNMIX OFF.
uDUAL MONO (LEFT + RIGHT)
Choose this option to setup the L and R mono output mode; There are
four modes in this option: STEREO, MONO L, MONO R, and MIX MONO;
It is mainly used in karaoke mode.
REFERENCE:
lTo protect your DVD player, the interval between two consecutive Power
button operations must be above 30 seconds.
lWhen not using the dvd-player for a long period of time, please pull out
the plug from the electronic
outlet.
lThe player should be operated only on condition that the type of power
supply corresponds to the marking label. Otherwise, it doesn't work or
might even be damaged.
lThe player may not be compatible with some encrypted discs.
If the player stops playback by accident, please power it up again.
27 28
Other manuals for DVD-28 K -
1
Table of contents
Other LENCO DVD Player manuals

LENCO
LENCO DVD-431 User manual

LENCO
LENCO DVP-854 User manual

LENCO
LENCO DVP-740 X2 User manual

LENCO
LENCO DVD-431 User manual

LENCO
LENCO DVP-938X2 User manual

LENCO
LENCO DVD-30K User manual

LENCO
LENCO DVD-320 User manual

LENCO
LENCO DVD-433K User manual

LENCO
LENCO DVP-723 User manual

LENCO
LENCO DVD-41 MPEG4 User manual