Table of Contents
~ 1 ~
Troubleshooting
Table of Contents...................................................................................................................................................................1
Safety Information.................................................................................................................................................................2
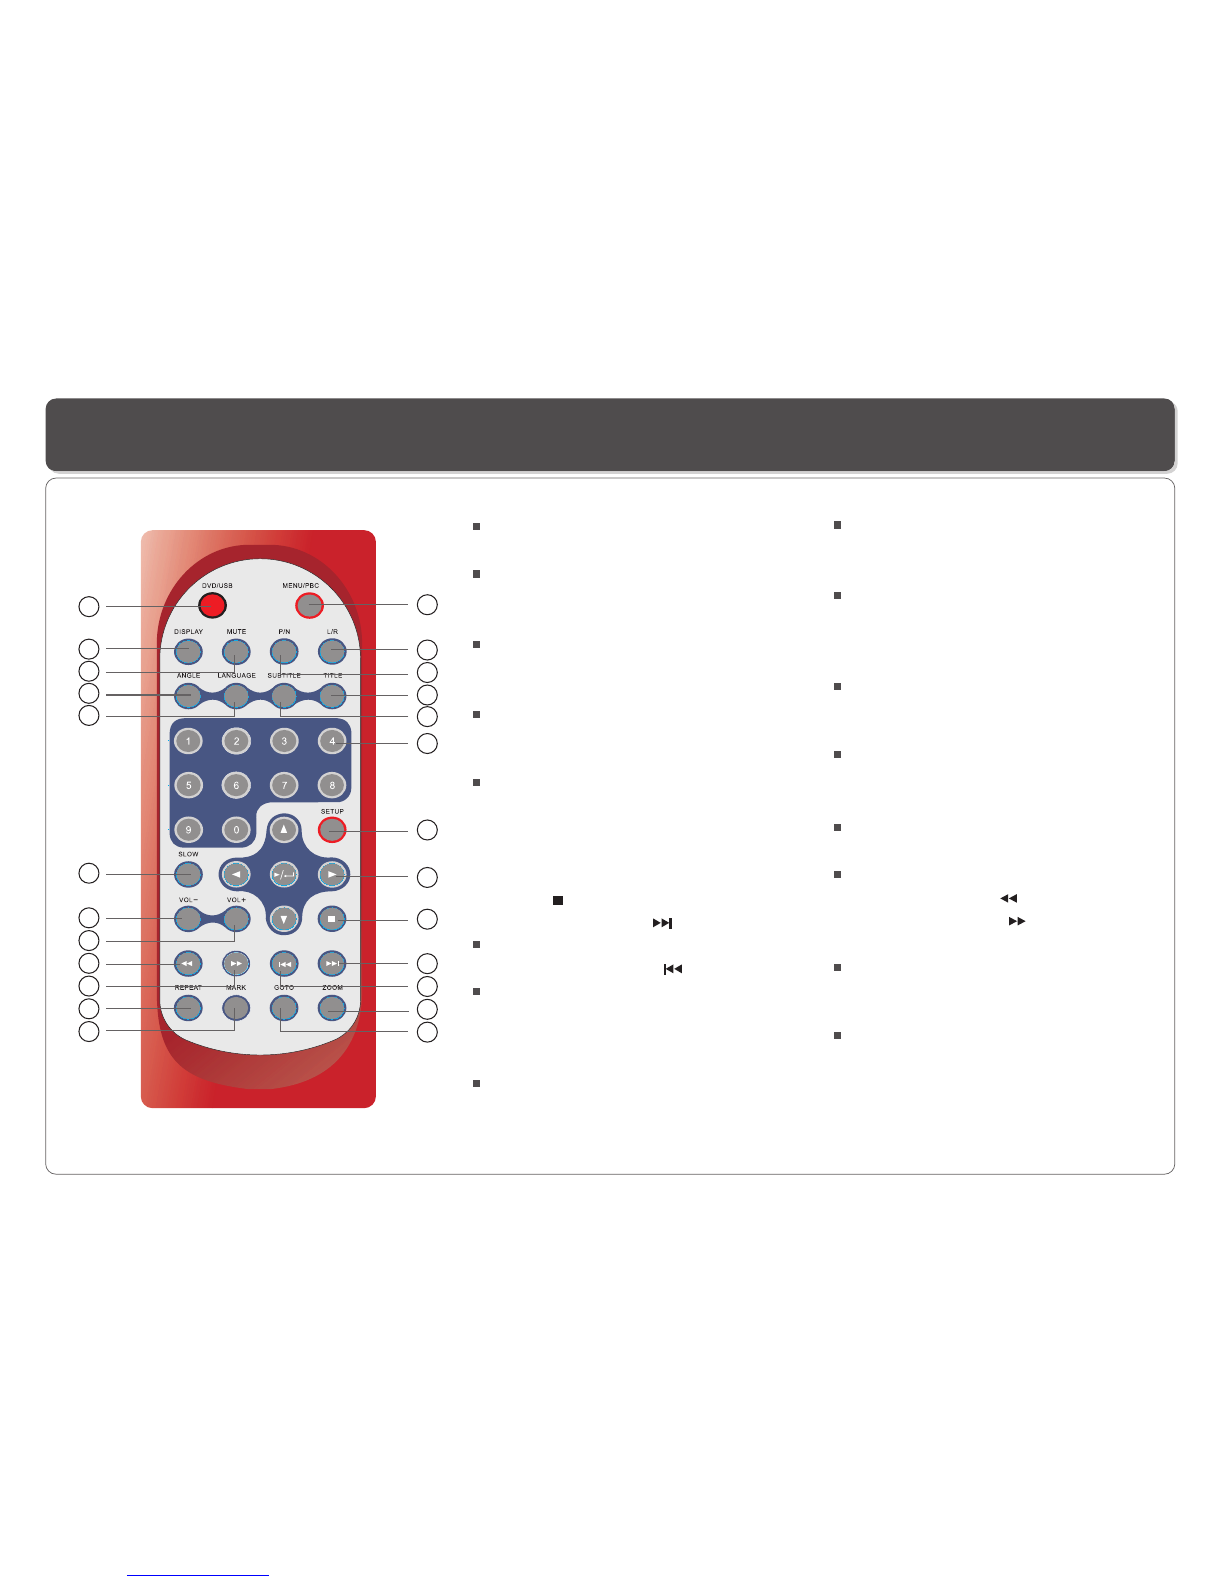
Remote Control.....................................................................................................................................................................3
Description of the Player........................................................................................................................................................4
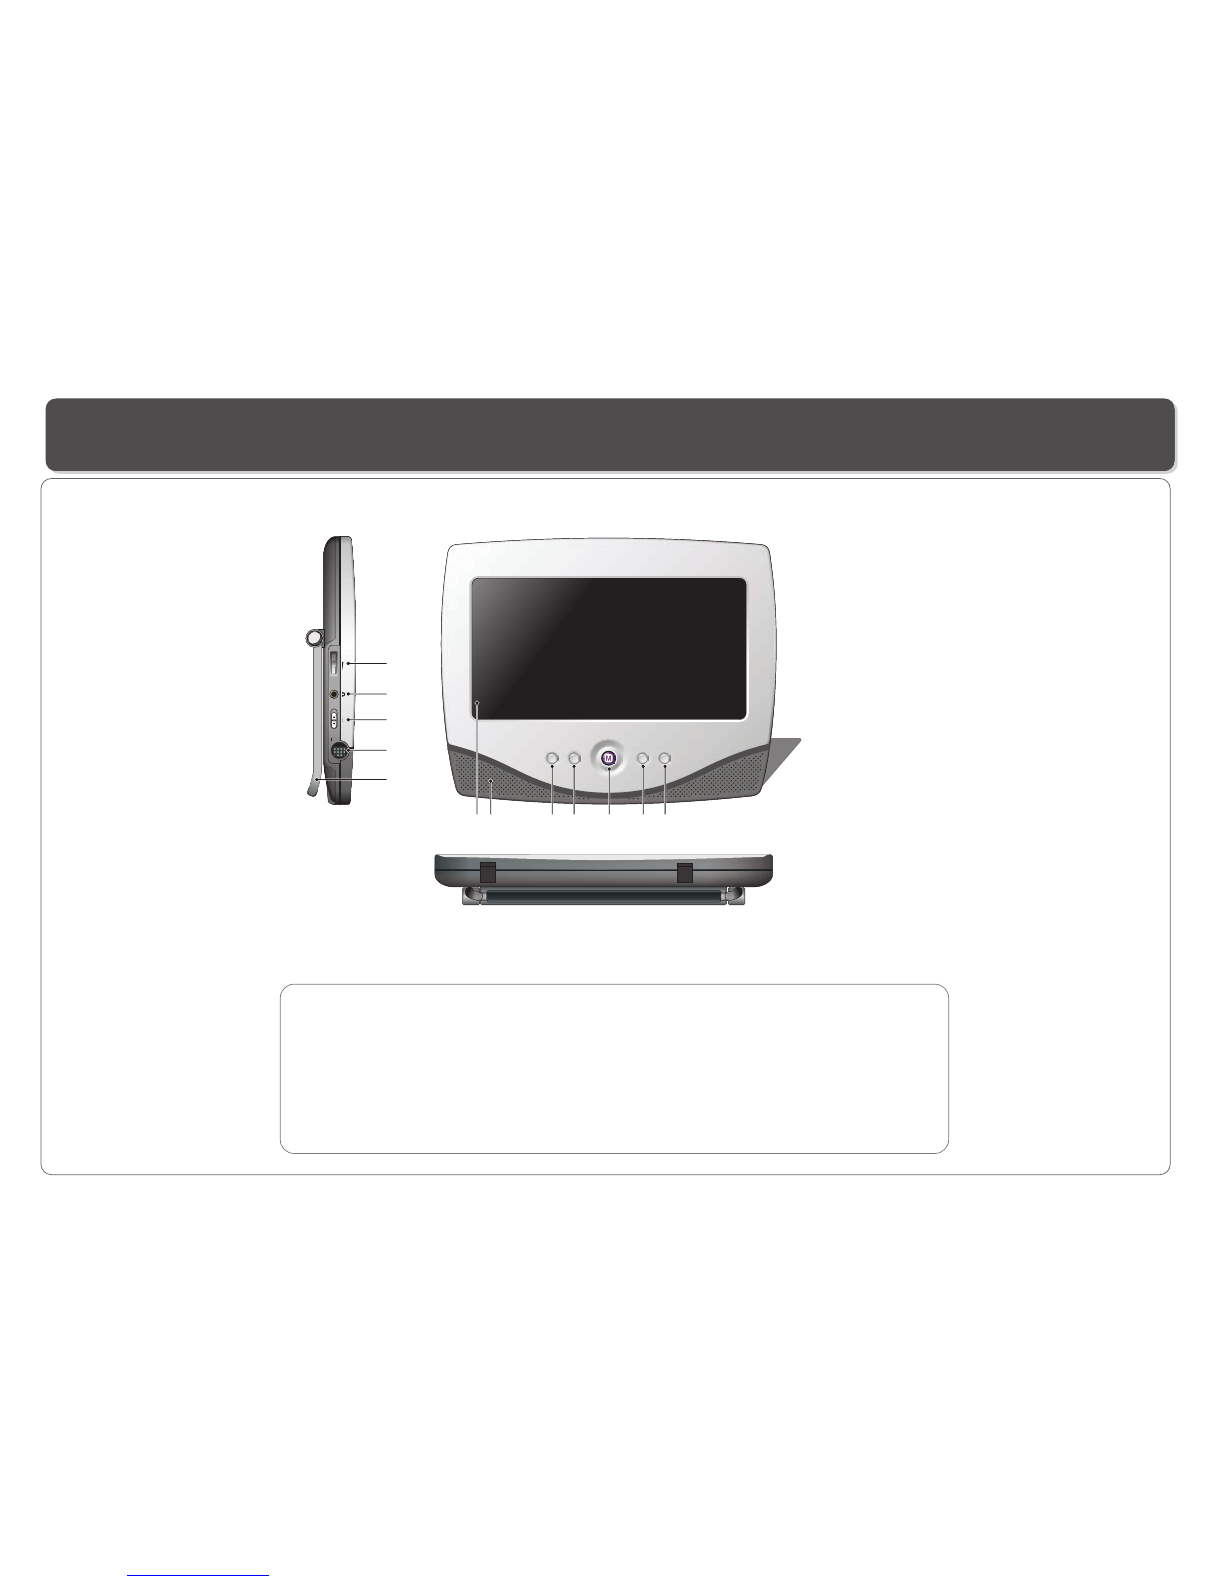
Description of the LCD Screen................................................................................................................................................5
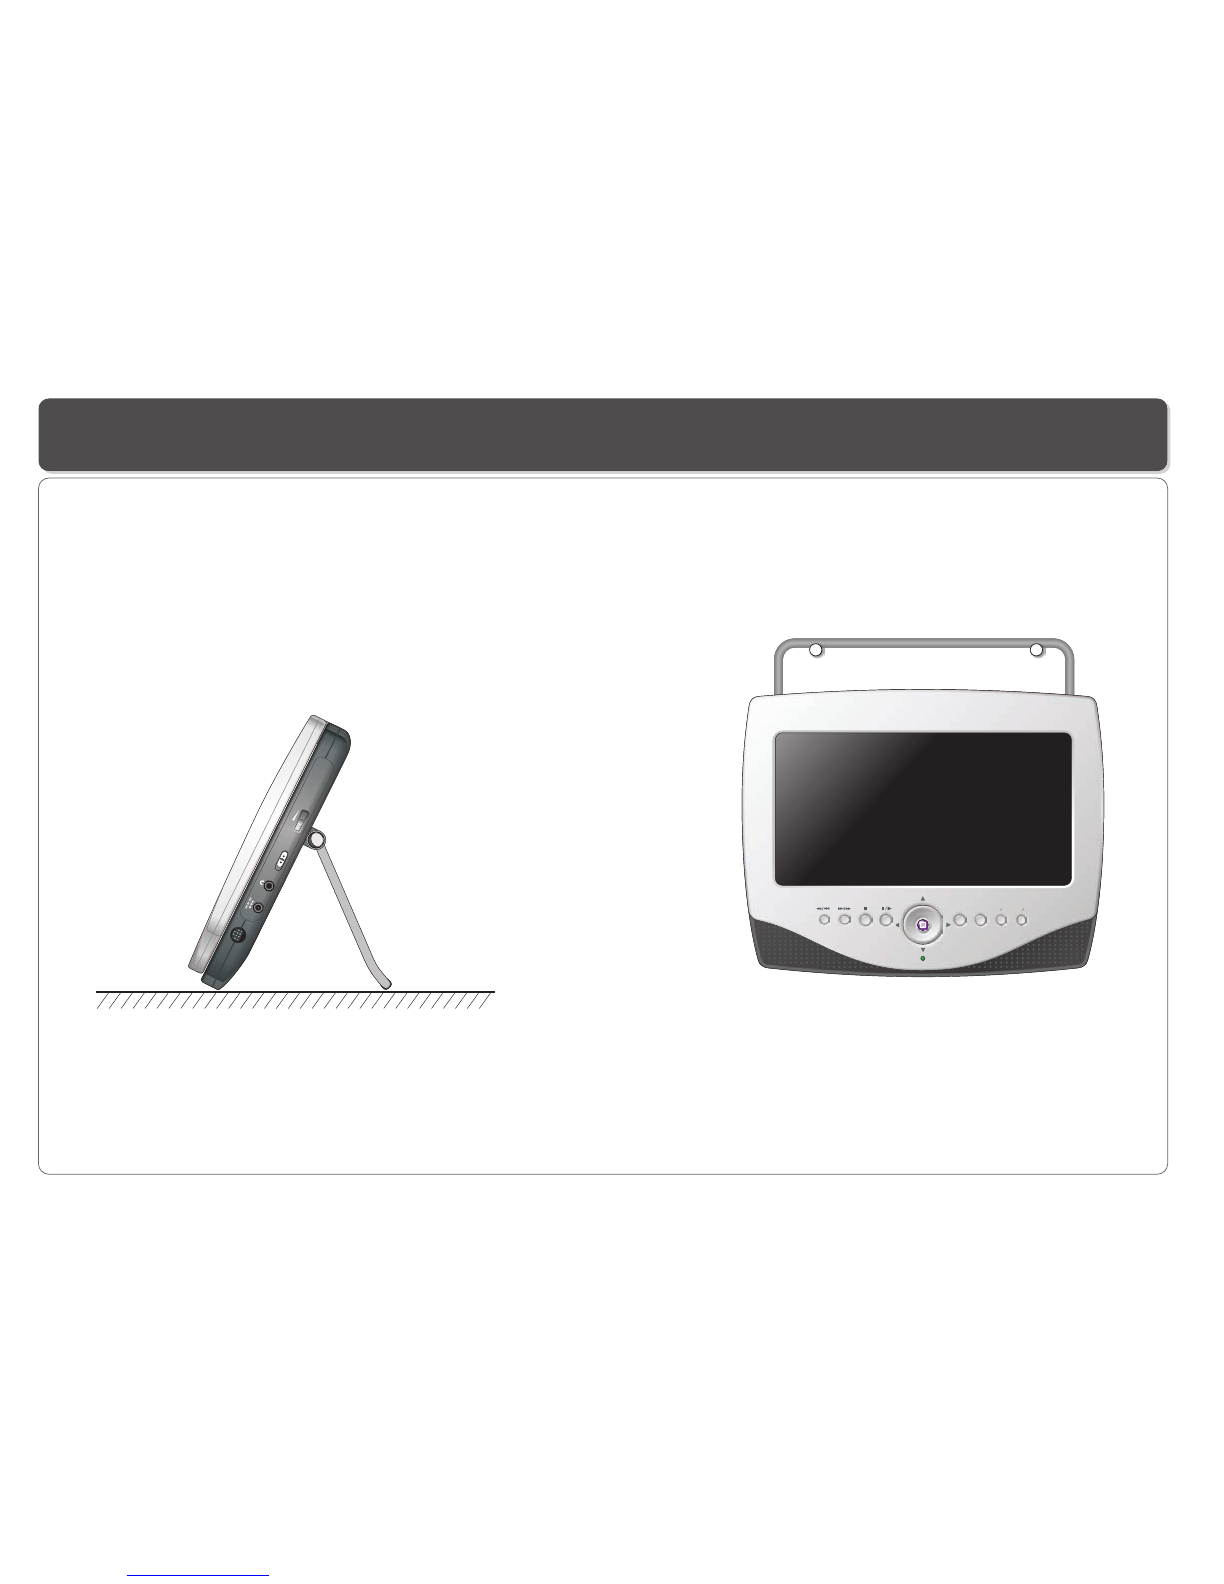
Placing the DVD Player or LCD Screen....................................................................................................................................6
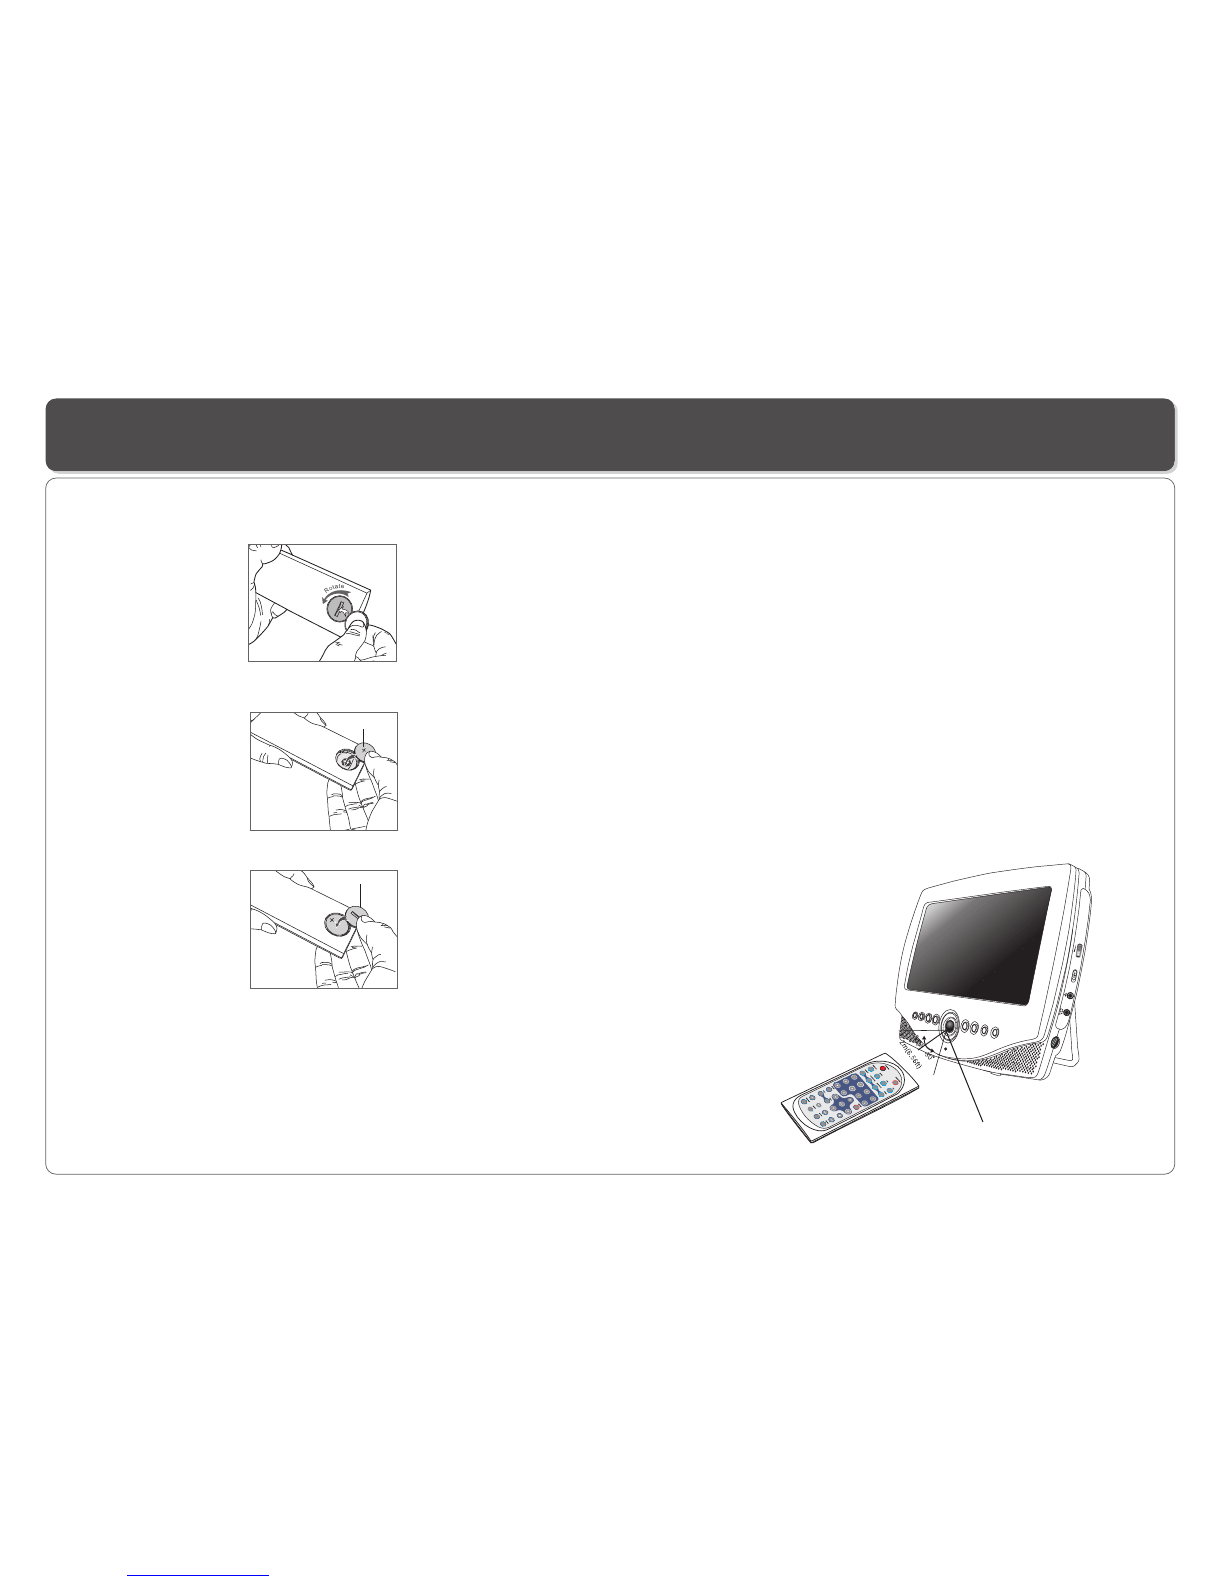
Using the Remote Control.......................................................................................................................................................7
Connecting the LCD Screen to the Player.................................................................................................................................8
Connecting Earphones (OptionalAccessory) to thePlayer or LCDscreen ...................................................................................9
Using USB Port....................................................................................................................................................................10
Using the AC Adaptor............................................................................................................................................................11
Mounting the Player / Screen for In-Car Use............................................................................................................................12
Playing a Disc.................................................................................................................................................................13-16
Playing MP3 and Regular Audio CD........................................................................................................................................17
Playing Picture CD................................................................................................................................................................18
Changing Settings..........................................................................................................................................................19-20
Adjusting LCD Screen...........................................................................................................................................................21
Troubleshooting...................................................................................................................................................................22
Specifications......................................................................................................................................................................23