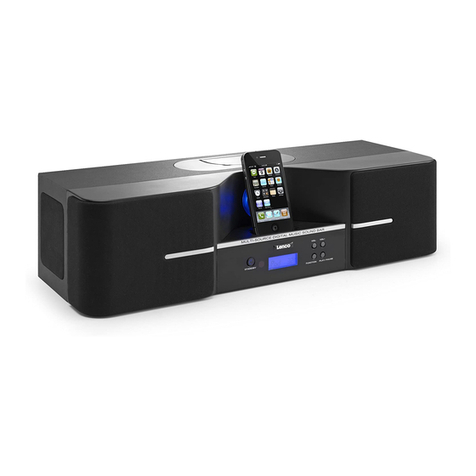
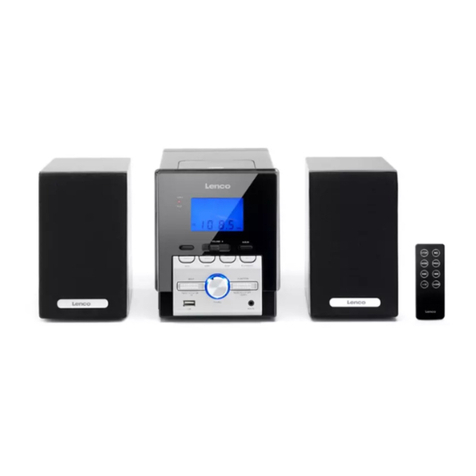
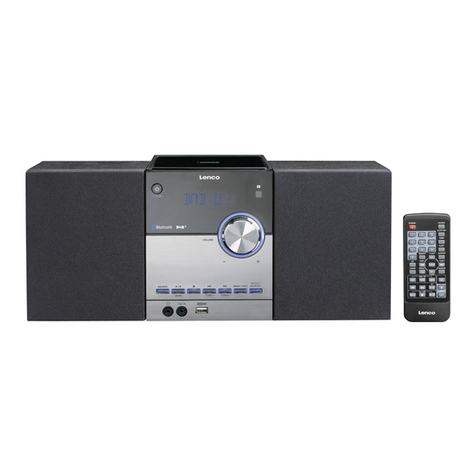
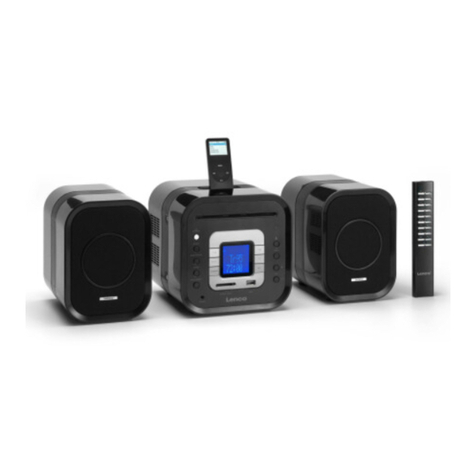
LENCO MCI-200 User manual

JOB: MCI-200(LENCO)(2207/09/04)
SIZE: 148.5(W) X 210(H)mm
INSTRUCTION MANUAL
MODEL: MCI-200
iPod not included
iPOD DOCK MICRO SYSTEM

ENG-2
ENG-1
Safety Precautions
• Never open the cabinet under any circumstances.Any repairs or internal adjustments should be made
only by a trained technician.
• Never operate this product with the cabinet removed.
• Do not use your system immediately after transporting it from a cold place to a warm place, as
condensation may cause the system to malfunction.
• Keep your unit away from humid areas and abnormally hot places.
• Do not touch the player with wet hands. If any liquid enters the player cabinet, take the player to a
trained technician for inspection.
• This compact disc player uses a laser to read the music on the disc. The laser mechanism
corresponds to the cartridge and stylus of a record player.Although this product incorporates a laser
pick-up lens, it is completely safe when operated according to directions.
• Discs rotate at high speed inside the player. Do not use damaged, warped, or cracked discs.
• Do not touch the pick-up lens which is located inside the disc compartment. To keep dust from
collecting on the pick-up lens, do not leave the compartment door open for an extended period of time.
If the lens becomes dirty, clean it with a soft brush, or use an air blower brush designed for camera
lenses.
• The apparatus shall not be exposed to dripping and splashing and that no objects filled with liquids,
such as vases, shall be place on the apparatus.
• No naked flame sources, such as lighted candles, should be placed on the apparatus.
• Minimum distances around the apparatus for sufficient ventilation.
CAUTION!
Invisible laser radiation when open. Avoid
exposure to beam. Class 1 laser product. This
system must be opened only by qualified
technicians to prevent accidents caused by the laser beam.
Rating Information: At bottom enclosure of the amplifier unit.
This unit comply with the existing requirements
In accordance with the rating plate of the unit,
this unit complies with current standards
concerning electrical safety and electromagnetic
compatibility.
Have a Blast- Just Not in Your Eardrums
Make sure you turn down the volume on the unit before
you put on headphones. Increase the volume to the
desired level only after headphone are in place.
Never touch the lens
10 cm
10 cm 10 cm
10 cm
5 cm
Front View
Side View
• The ventilation should not be impeded by covering the ventilation opening with items, such as
Attention: To ensure sufficient ventilation, keep the spacing shown as below:
Attention: Do not remove the plastic cover of FM Antenna (A) at the back of the unit.
newspaper, table-cloths, curtains, etc.
• The rating plate is located at the bottom enclosure of the amplifier unit.
• Mains plug is used as the disconnect device and it shall remain readily operable, To be completely
disconnected the power input, the mains plug of the apparatus shall be disconnected from the mains
completely.
• Attention should be drawn to the environmental aspects of battery disposal.
• The use of apparatus in moderate climates.
Headset Safety
• Do not play your headset at high volume. Hearing experts warn against extended high-volume play.
• If you experience ringing in your ears, reduce volume or discontinue use.
• You should use with extreme caution or temporarily discontinue use in potentially hazardous
situations.
• Even if your headset is an open-air designed to let you to hear outside sounds, do not turn up the
volume so high that you are unable to hear what is around you.
(A)

ENG-3 ENG-4
Main Unit Front Panel Description
CD Player.
ON/STANDBY button to turn on or off the unit. Press over 5 seconds. It turns to ECO mode and also back to
STANDBY mode when press over 5 seconds again.
SOURCE button to select TUNER, CD, UDISK (for USB), SD/MMC, iPod, and AUX source.
BAND/FOLDER button to select MW or FM band in radio or folder selection in MP3/WMA playback.
ST/MO button to select stereo or mono output for FM band.
PROG/PRESET button to enter program mode to select program playback, or memorize stations for tuner ,
auto scan and preset tuner stations when press over 5 secs.
button to select next track in CD/USB/SD-MMC/iPOD, long press it change to fast forward skip ,or adjust clock
in clock/timer/alarm setting or increase frequency in Tuner mode
button to select previous track in CD/USB/SD-MMC/iPOD, long press it change to fast back skip ,or adjust clock
in clock/timer/alarm setting or decrease frequency in Tuner mode.
RANDOM button to select random playback in CD/USB/SD-MMC/IPOD ,or select down preset channel in Tuner mode
Phones.
SD/MMC CARD slot for SD or MMC card memory.
USB slot for USB memory.
IR Remote sensor to receive remote control signal.
LCD display.
button to eject CD disc
MENU button to enable menu mode.
VOL + Button to increase the Volume
VOL– Button to decrease the Volume
button to play or pause track in CD/USB/SD-MMC/iPOD playback or to confirm selection in MEMU
mode.
button to stop CD/USB/SD-MMC/iPOD playback or escape to previous menu page.
RPT button to select repeat playback or select up memory channel in tuner mode
1.
2.
3.
4.
5.
6.
7.
8.
9.
10.
11.
12.
13.
14.
15.
16.
17.
18.
19.
20.
21. Remote Control
1.
2.
3.
4.
5.
6.
7.
8.
9.
10.
11.
12.
13.
14.
15.
16.
17.
18.
19.
20.
1.
2.
3.
4.
FM Antenna.
AM Antenna Input for connect to loop AM Antenna.
AUX Input to connect to external audio source.
Sound boxes wire connection jacks (Left/Right) to connect to the Speakers.
Main Unit Back Panel Description
Main Unit Top Panel Description
1. iPod docking
ON/STANDBY button to turn on and off the unit, Standby LED indicator
will be lighted up in STANDBY mode. Press over 5 seconds, it turns to
ECO mode or return to STANDBY mode when press it over 5 seconds
again.
SOURCE button to select TUNER, CD, UDISK (for USB), SD/MMC,
iPOD, and AUX source.
BAND/FOLDER button to select MW or FM band in radio or folder
selection in MP3/WMA playback
INTRO button to play the first 10 seconds of each track in
CD/UDisk/SD-MMC mode.
RPT/ button to select repeat playback or set channel number
/ select preset channel in TUNER mode.
/ ENTER button to play or pause track in CD/USB/SD-MMC/iPOD
playback or to confirm selection in MEMU mode.
to select next track in CD/USB/SD-MMC/iPOD, or adjust clock in
clock/timer/alarm setting or increase frequency in Tuner mode.
SLEEP button to enable and select time to sleep.
EQ button to select five preset EQ (FLAT/ROCK/JAZZ/CLASSIC/POP)
VOL + button to increase the Volume
button to eject the CD disc.
MENU button to enter menu mode
ST/MO button to select stereo or mono output for FM band.
PROG/PRESET button to enter program mode, or select program playback, or
memorize for tuner , auto scan and preset tuner channels when it press over 5
seconds
RAND/ button to select random playback or set channel number
/ select preset channel in TUNER mode.
/ ESC button to stop CD/USB/SD-MMC/iPOD playback or escape to
previous menu page.
to select previous track in CD/USB/SD-MMC/iPOD, or adjust clock in
clock/timer/alarm setting or decrease frequency in Tuner mode
MUTE button to mute the sound.
BASS button to turn on or off the super base effect.
VOL – button to decrease the Volume
1
11
9
10
654327
8
12 18 17
16
15
13
14
1
1
2
3
4
5
6
7
8
9
10
11
12
13
14
15
16
17
18
19
20
4
1
2
3

ENG-5 ENG-6
1.
2.
3.
4.
5.
1.
2.
3.
4.
5.
User Operations
To turn on the unit
After connecting the speaker cables and the power supply, the main unit ON/STANDBY button LED lights up. Press
ON/STANDBY button to turn on the unit and press it again to go to Standby mode. when press over 5 seconds, it turn to
ECO standby mode.and it can turn back Standby mode, when press over 5 seconds again.
Menu Setting
AM Loop Antenna iPod Plastic Tray x 8
Speaker Cable x 2
Accessories
Audio In Cable
Press MENU button will enter menu setting mode.
Menu setting model allows the user to set the following settings:
CLOCK – adjust the real time clock
TIMER – set timer on and off time
ALARM – set alarm time and select alarm source and cycle mode or off
EQ – set EQ mode (FLAT/ROCK/JAZZ/CLASSIC/POP)
BASS – set BASS on and off
Press MENU button repeatedly until the desired setting shows up.
Press / ENTER button to select the setting
Press / ESC button to quit or it will quite automatically if no button is pressed for 10 seconds.
1.
2.
3.
Setting the BASS
Press Menu button repeatedly until “BASS” is shown, then press /ENTER button to confirm.
Press MENU to select Bass ON or Bass OFF, then press /ENTER button to confirm.
Press / ESC button to escape or it will escape automatically to previous page if no button is pressed for 10 seconds.
Setting the Clock
Press Menu button repeatedly until “CLCOK” is shown, then press /ENTER button to confirm.
Press or button to select 24Hr or 12Hr display, then press /ENTER button to confirm.
Hour flashing. Press or button to adjust the time by 1 hour. Hold it down to adjust continuously, then press
/ENTER button to confirm and exit.
Minute flashing. Press or button to adjust the time by 1 minute. Hold it down to adjust continuously, then press
/ENTER button to confirm and exit.
Press / ESC button to escape or it will escape automatically to previous page if no button is pressed for 10 seconds.
1.
2.
3.
Setting the Timer
Press Menu button repeatedly until “TIMER” is shown, then press /ENTER button to confirm.
Press Menu button to select On Time or Off Time, then press /ENTER button to confirm.
Repeat “setting the clock” point 3 to 5.
1.
2.
3.
4.
5.
Setting the Alarm
Press Menu button repeatedly until “ALARM” is shown, then press /ENTER button to confirm.
Repeat “setting the clock” point 3 to 4.
Press MENU to select alarm for ONE (alarm once), OFF (alarm off) and ALWAYS (alarm always on), then press
/ENTER button to confirm.
Press MENU to select wake to Buzzer, CD, UDISK, SD/MMC, iPod or Tuner, then press /ENTER button to confirm.
Press / ESC button to escape or it will escape automatically to previous page if no button is pressed for 10 seconds.
1.
2.
3.
Setting the EQ
Press Menu button repeatedly until “EQ” is shown, then press /ENTER button to confirm.
Press MENU to select FLAT, ROCK, JAZZ, CLASSIC or POP, then press /ENTER button to confirm.
Press / ESC button to escape or it will escape automatically to previous page if no button is pressed for 10 seconds.
1.
Setting the SLEEP Timer
Press SLEEP button repeatedly on remote control to select desired sleep time or turn off the sleep timer.
1.
2.
Adjusting the Volume
Press VOL + on main unit or remote control to increase the Volume.
Press VOL – on main unit or remote control to decrease the Volume.
1.
2.
Muting the Output
Press MUTE button once to mute the output.
Press MUTE button once again will go back to normal playback mode.
1.
2.
3.
4.
5.
6.
7.
8.
9.
10.
11.
CD Operation
Note: Not compatible to 8cm CD disc.
Press SOURCE button to select CD.
Insert a disc through the CD window with the label side facing up.
After reading, total number of tracks and total duration will display for 2 seconds before playing from first track.
For MP3/WMA disc, total number of folders will be shown as well. then auto to play.
At “CD” model, use / button to search a desired track.
Press button to pause or play the track. Information of the track and the elapsed track duration will be shown.
Search function
Skip to next/ previous track
- Press button to skip to next track.
- Press button once to skip to the beginning of the current track. Press it twice to skip to previous track.
Search within a track
- During playback, long press / button to search for a desired point and then release the button. It will
resume normal playback from that point. Use BAND/FOLDER key to select folder in MP3/ WMA mode
For MP3/ WMA files, the elapsed track duration will display.
Also, the folder number and the track number will display a short moment alternately in cycle.
Press /ESC button to stop playback. Press button start playback from the first track
Repeat playback
- Press RPT button repeatedly, to select the following mode:
- When shown in display, current track will be repeated.
- When A--B shown in display, point A to point will be repeated
- When ALL shown in display, the whole disc will be repeated.
- When FOLDER” shown in display, the current folder will be repeated. (only for MP3/WMA playback).
- Repeat mode is turned off when no icon shown in display.
PROGRAM playback
For CD files programming:
- At STOP mode, press PROG/PRESET button and the track number “00” will flash
- Press / button to select the track number.
- Press PROG/PRESET button to confirm.
- Repeat above point 2 & 3 to program the other tracks.
- To playback the program, press button.
- To clear the program, press /ESC button twice or open/close the CD tray or go to Standby mode.
For MP3/ WMA files programming, the folder number needs to be selected on top of above procedure for
“CD files programming”.
Note: It allows maximum 64 tracks (or folders) to playback in desired order.
Programming works at STOP mode only.
RANDOM playback
Press RANDOM button on main unit or remote control to playback the files in random order. The symbol “ ”will
be shown in display.
Eject CD
Press button on main unit or remote control to eject the CD.

ENG-7
iPod Operation
1.
2.
3.
4.
5.
6.
Press SOURCE button to select “iPod” and the LCD display will show iPod Icon.
Press button to pause or play the track.
At “iPod” model, use / button to search a desired track.
During playback, long press / button to search for a desired point and then release the button. It will resume
normal playback from that point.
Press /ESC button to stop playback. Press button start playback from the first track.
Press RANDOM and RPT keys ,the function are also available in iPod mode.
Tuner Operation
Tuning a Radio Station
1.
2.
3.
4.
Press SOURCE button to select “TUNER”, the default station frequency is FM 87.5 HMZ.
Press BAND/FOLDER button to select the desired frequency band (FM or MW).
Press or button to search a desired radio station.
Long press / button 3 seconds and then release the button. It will search up / down until a radio station is
received. For fine-tuning, you can press / button repeatedly.
Selecting FM Stereo / Mono
1.
2.
3.
4.
To select stereo mode, press ST/MO button on the main unit or remote control repeatedly until “Stereo” is shown.
“Stereo” icon will be lit on when the receiving station is broadcasted in stereo.
To select mono mode, press ST/MO button again until “Mono” is shown.
When FM signal is weak and sound distortion occurs, it is better to select mono sound
Memorizing a Radio Station
Manual Store:
1.
2.
3.
4.
5.
6.
7.
Tune to a desired radio station by following steps described in Tuner Operation – Tuning a Radio Station.
Press PROG/PRESET button to enter tuning save mode. The symbol “MEM” will display. E.g. “FM 104.75 M01” with
01 flashing, where M01 is program number.
Within 10 seconds, press RPT or RANDOM button select the desired program number.
Within 10 seconds, press PROG/PRESET button to store that station in the selected memory. The “MEM” icon will be
shown and program number will stop flashing.
When using remote control, you can press / button to select a desired station number. Press PROG/PRESET
button again to confirm the setting.
If there is no key pressed within 10 seconds, it will exit tuning save mode and go back to go previous mode.
Repeat the first 5 steps to sets other stations, or change memorized stations.
There are total 20 program memories for FM and 10 program memories for MW.
Auto Store:
1.
2.
At FM mode, long press PROG/PRESET button 5 seconds to start auto store function. It will automatically search
upward and store the stations in the frequency range.
Repeat same procedure to auto stores the stations at MW mode.
Recall a Memorized Station:
1.
2.
Press the RPT or RANDOM button to select the desired station or memorized station.
The “MEM” icon will be turned on and the display will show the memorized station. E.g. “FM 104.75M: 01”.
The following default frequencies are stored in the memories when factory out.
Note:
For FM, 5 preset frequency are 87.50MHZ 90.00MHZ / 98.00MHZ / 106.00MHZ / 108.00 MHZ respectively, the rest
of 15 present frequency are 87.5MHZ.
For MW, same situation as FM status and 5 present frequency are 522KHZ / 603 KHZ / 999 KHZ / 1404KHZ / 1620KHZ,
The rest 5 present frequency are 522KHZ.
Achieve optimum reception :
1.
2.
At FM mode, extend and position the FM antenna to achieve optimum reception.
At MW mode, orientate the main unit to achieve optimum reception.
If at any time in the future you should need to dispose of this product please
note that: Waste electrical products should not be disposed of with household waste.
Please recycle where facilities exist. Check with your Local Authority or retailer for
recycling advice. (Waste Electrical and Electronic Equipment Directive)
Other manuals for MCI-200
1
Table of contents
Other LENCO Stereo System manuals

LENCO
LENCO MC-118 MP3 User manual

LENCO
LENCO MDV-2 User manual

LENCO
LENCO IPD-1003 User manual

LENCO
LENCO SCD-681 User manual

LENCO
LENCO CS171 USB User manual

LENCO
LENCO BT-9000 User manual

LENCO
LENCO MC-150 User manual

LENCO
LENCO MC-460BK User manual

LENCO
LENCO ID-2 User manual

LENCO
LENCO TCD-973 User manual

LENCO
LENCO MC-020 User manual

LENCO
LENCO MN-002 User manual

LENCO
LENCO SCR-94 User manual

LENCO
LENCO MDV-15 User manual

LENCO
LENCO MC-129 MP3 RDS User manual

LENCO
LENCO NXT-01 User manual

LENCO
LENCO SCD-37 USB User manual

LENCO
LENCO MC-150 User manual

LENCO
LENCO MC-144 User manual

LENCO
LENCO PA-45 User manual