manuals.online logo
Brands
  1. Home
  2. •
  3. Brands
  4. •
  5. Lennox
  6. •
  7. Air Conditioner
  8. •
  9. Lennox 12GCS Series Guide

Lennox 12GCS Series Guide

Other manuals for 12GCS Series

1

This manual suits for next models

1

Other Lennox Air Conditioner manuals

Lennox Comfair HD Series User guide

Lennox

Lennox Comfair HD Series User guide

Lennox MHA Series User manual

Lennox

Lennox MHA Series User manual

Lennox MHA Series User manual

Lennox

Lennox MHA Series User manual

Lennox FLATAIR FLHK User manual

Lennox

Lennox FLATAIR FLHK User manual

Lennox XC21 User manual

Lennox

Lennox XC21 User manual

Lennox HS27 Series User manual

Lennox

Lennox HS27 Series User manual

Lennox T?CLASS TPA024S4 Installation and operation manual

Lennox

Lennox T?CLASS TPA024S4 Installation and operation manual

Lennox Air Module CBWMV User manual

Lennox

Lennox Air Module CBWMV User manual

Lennox MFMA Series User manual

Lennox

Lennox MFMA Series User manual

Lennox TELECOOL THN045 User manual

Lennox

Lennox TELECOOL THN045 User manual

Lennox ROOFTOP FLEXY FCA Series User manual

Lennox

Lennox ROOFTOP FLEXY FCA Series User manual

Lennox LGH150H User manual

Lennox

Lennox LGH150H User manual

Lennox 20 Instruction manual

Lennox

Lennox 20 Instruction manual

Lennox LM018CI-115P432-1X User manual

Lennox

Lennox LM018CI-115P432-1X User manual

Lennox LNINV2610 User manual

Lennox

Lennox LNINV2610 User manual

Lennox VESD007N432U User manual

Lennox

Lennox VESD007N432U User manual

Lennox Merit ML17XC1 Series User manual

Lennox

Lennox Merit ML17XC1 Series User manual

Lennox MPA018S4M-*P User manual

Lennox

Lennox MPA018S4M-*P User manual

Lennox Elite AC13 Series User manual

Lennox

Lennox Elite AC13 Series User manual

Lennox LGA Series Installation and operation manual

Lennox

Lennox LGA Series Installation and operation manual

Lennox LM012CI-100V433 User manual

Lennox

Lennox LM012CI-100V433 User manual

Lennox 15GCSX Series Guide

Lennox

Lennox 15GCSX Series Guide

Lennox FLEXY FC 050 Series User manual

Lennox

Lennox FLEXY FC 050 Series User manual

Lennox LI009CO-160T432 User manual

Lennox

Lennox LI009CO-160T432 User manual

Popular Air Conditioner manuals by other brands

Fujitsu ASYG 09 LLCA installation manual

Fujitsu

Fujitsu ASYG 09 LLCA installation manual

York HVHC 07-12DS Installation & owner's manual

York

York HVHC 07-12DS Installation & owner's manual

Carrier Fan Coil 42B Installation, operation and maintenance manual

Carrier

Carrier Fan Coil 42B Installation, operation and maintenance manual

intensity IDUFCI60KC-3 installation manual

intensity

intensity IDUFCI60KC-3 installation manual

Frigidaire FAC064K7A2 Factory parts catalog

Frigidaire

Frigidaire FAC064K7A2 Factory parts catalog

Sanyo KS2432 instruction manual

Sanyo

Sanyo KS2432 instruction manual

LG MultiV Series installation manual

LG

LG MultiV Series installation manual

CLIMAVENETA a-CHD U-2T 606+2209 OPERATING AND INSTALLATION Manual

CLIMAVENETA

CLIMAVENETA a-CHD U-2T 606+2209 OPERATING AND INSTALLATION Manual

Midea EWK06CW5 user manual

Midea

Midea EWK06CW5 user manual

Pioneer FAB Series installation manual

Pioneer

Pioneer FAB Series installation manual

SPT WA-1511S user manual

SPT

SPT WA-1511S user manual

Mitsubishi Electric Mr.Slim MSZ-A24NA operating instructions

Mitsubishi Electric

Mitsubishi Electric Mr.Slim MSZ-A24NA operating instructions

Mitsubishi Electric PUHZ-RP50VHA4 Service manual

Mitsubishi Electric

Mitsubishi Electric PUHZ-RP50VHA4 Service manual

Panasonic CS-S18HKQ Service manual

Panasonic

Panasonic CS-S18HKQ Service manual

Panasonic CS-E15NKE3 operating instructions

Panasonic

Panasonic CS-E15NKE3 operating instructions

Gree GWH18TC-K3DNA1B/I Service manual

Gree

Gree GWH18TC-K3DNA1B/I Service manual

Friedrich ZoneAire Compact P08SA owner's manual

Friedrich

Friedrich ZoneAire Compact P08SA owner's manual

Daikin R32 Split Series installation manual

Daikin

Daikin R32 Split Series installation manual

manuals.online logo
manuals.online logoBrands
  • About & Mission
  • Contact us
  • Privacy Policy
  • Terms and Conditions

Copyright 2025 Manuals.Online. All Rights Reserved.

3DJH 
£
PRODUCT LITERATURE
¤
1998 Lennox Industries Inc.
Dallas, Texas, USA
RETAIN THESE INSTRUCTIONS
FOR FUTURE REFERENCE
/LWKR 86$
*&6  *&6
6(5,(6
*$6  (/(&75,&
Armstrong #38152A054
503,969M
3$&.$*('
81,76
WHAT TO DO IF YOU SMELL GAS:
,I WKH LQIRUPDWLRQ LQ WKLV PDQXDO LV QRW
IROORZHG H[DFWO\ D ILUH RU H[SORVLRQ
PD\ UHVXOW FDXVLQJ SURSHUW\ GDPDJH
SHUVRQDO LQMXU\ RU GHDWK
:$51,1*
Do not store or use gasoline or other
flammable vapors and liquids in the
vicinity of this or any other ap-
pliance.
Installation and service must be
performed by a qualified installer,
service agency or the gas supplier.
-Do not try to light any appliance.
-Do not touch any electrical switch; do not
use any phone in your building.
-Immediately call your gas supplier from a
neighbor’sphone.Followthegassupplier’s
instructions.
-If you cannot reach your gas supplier, call
the fire department.
-Extinguish any open flames.
10GCS
12GCS
3DJH 
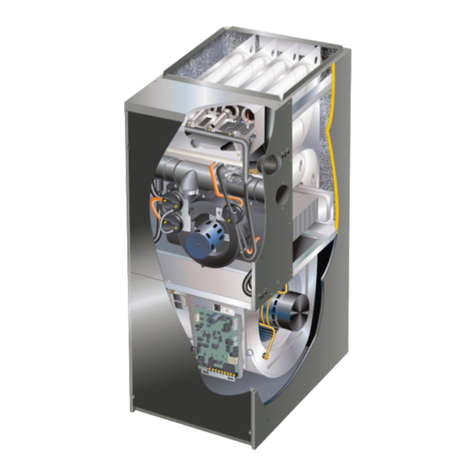
Parts Arrangement
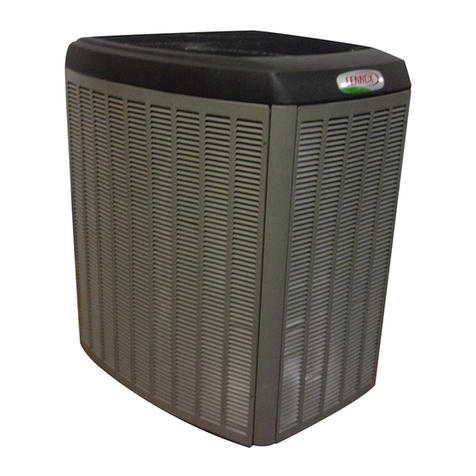
CONDENSER COIL
BLOWER
COMPRESSOR
CONDENSER FAN
COMBUSTION
AIR BLOWER
GAS VALVE
GAS
MANIFOLD BURNER BOX
HEAT EXCHANGER
ASSEMBLY
BLOWER MOTOR
CONTROL BOX SECTION
PRESSURE SWITCH
FIGURE 1
Any additions, changes, or conversions required in order for the appliance to satisfactorily meet the ap-
plication needs must be made by a Lennox service technician using factory specified and approved parts.
WARNING
Product contains fiberglass wool.
Disturbing the insulation in this product during
installation, maintenance, or repair will expose you
to fiberglass wool dust. Breathing this may cause
lung cancer. (Fiberglass wool is known to the State
of California to cause cancer.)
Fiberglass wool may also cause respiratory, skin,
and eye irritation.
To reduce exposure to this substance or for further
information, consult material safety data sheets
availablefromaddressshownbelow,orcontactyour
supervisor.
Lennox Industries Inc.
P.O. Box 799900
Dallas, TX 75379-9900
IMPORTANT
Any additions,changes, or conversions required in or-
der for the applicnace to satisfactorily meet the ap-
plication needs must be made by a Lennox service
technicain using factory specified and approved parts.
Important Directions
Keep the area clean and free of combustible material, gaso-
line, and other flammable vapors and liquids. The flow of com-
bustion and ventilation air must not be obstructed from enter-
ing the furnace or condenser coil. Do not permit overhanding
structures or shrubs to obstruct condenser fan discharge,
combustion air inlet or vent outlet.
3DJH 
Heating Start-Up
FOR YOUR SAFETY READ BEFORE LIGHTING
BEFORE LIGHTING, smell all around the appliance area
forgas.Besuretosmellnexttothefloorbecausesomegas
is heavier than air and will settle on the floor.
Electric shock hazard. Can cause injury
or death. Do not use this furnace if any
part has been under water. Immediately
call a qualified service technician to in-
spect the furnace and to replace any part
ofthe control system andanygascontrol
which has been under water.
:$51,1*

Danger of explosion. Can cause injury or
product or property damage. If overheating
occursor ifgas supply failsto shutoff,shut
off the manual gas valve to the appliance
before shutting off electrical supply.
:$51,1*

:$51,1*
Danger of explosion and fire. Can cause
injury or product or property damage. You
must follow these instructions exactly.

Electricshockhazard.Cancauseinjuryor
death. Before attempting to perform any
serviceormaintenance,turntheelectrical
power to unit OFF at disconnect switch(es).
Unit may have multiple power supplies.
:$51,1*

To place the unit into heating operation:
This unit does not have a pilot. It is equipped with an
ignition system which automatically lights the burner.
Do not try to light by hand.
Gas Valve Operation (Figures
3 and 4
)
1- STOP!Readthesafetyinformationatthe beginningof
this section.
2 - Set thermostat to lowest setting. See figure 2.
THERMOSTATS
FIGURE 2
3 - Turn off all electrical power to unit.
4 - This unit is equipped with an ignition device which au-
tomaticallylightsthepilot.Donottrytolightthepilotby
hand.
5 - Remove burner compartment access panel.
6-
Honeywell VR8205 Gas Valve
- Turn knob on gas
valve clockwise to OFF. Refer to figure 3.
Robertshaw7200GasValve
-Depressleverongas
controlandmovetoOFFandrelease.Donotforce.
Refer to figure 4.
21
2))
),*85( 
HONEYWELL VR8205 SERIES GAS VALVE
GAS VALVE SHOWN IN OFF POSITION
FIGURE 4
ROBERTSHAW 7200 GAS VALVE
GAS VALVE
SELECTOR ARM
IN OFF
POSITION
7 - Wait fifteen(15) minutes to clear out anygas. If you
then smell gas, STOP! Immediately call your gas
supplier from a neighbor’s phone. Follow the gas
supplier’s instructions. If you do not smell gas go to
next step.
8-
Honeywell VR8205 Gas Valve
- Turn knob on gas
valve counterclockwise to ON.
Robertshaw 7200 Gas Valve
- Depress lever on gas
control and move to ON and release.
9 - Replace the access panel.
10- Turn on all electrical power to unit.
11- Set thermostat to desired setting.
12- If the appliance still will not operate, follow the instruc-
tions “To Turn Off Gas To Unit” and call your service
technician or gas supplier.
3DJH 
To Turn Off Gas To Unit
1 - Set thermostat to lowest setting.
2 - Turnoffallelectricalpowertounitifserviceistobeper-
formed.
3 - Remove burner compartment access panel.
4 - HoneywellVR8205Gas Valves-Turnknobongas valve
clockwise to OFF. Do not force.
Robertshaw 7200 Gas Valve - Push in gas control le-
ver, move to OFF, and release.
5 - Replace access panel.
Filters
Filters are not supplied. Inspect the filters once a month
and replace or clean them as necessary. DO NOT replace
a permanent-type filter with a disposable filter.
Unitisequippedwithaninternalfilterclipwhichislocatedin
indoor coil compartment attached to side of the unit drain
pan.
7$%/( 
81,7 ),/7(5 6,=(6
GCS26 UNIT MODEL FILTER SIZE
-024, -030, -036 24 in. X 25 in.
-042 28 in. X 25 in.
-048, -060 30 in. X 30 in.
Maintenance
Normal Maintenance
Periodic inspection and maintenance normally consists of
chan
g
in
g
or cleanin
g
filters and (under some conditions)
cleanin
g
the main burners.
WARNING
Disconnect power before servicing unit.
WARNING
Improperinstallation,adjustment,alteration,service
ormaintenancecancausepropertydamage,person-
al injury or loss of life. Installation and service must
be performed by a qualified installer, service agency
or the gas supplier.
Motors
Indoor, outdoor fan and vent motors are permanently
lubricated and require no maintenance.
Outdoor Coil
Dirt and debris should not be allowed to accumulate on the
outdoorcoilsurface orother parts intheaircircuit. Cleanthe
coildwhennecessary.Useabrush, vacuum cleanerattach-
ment, or other suitable means. If water is used to clean the
coil, be sure the power to unit is shut off prior to cleanin
g
.
NOTE-Careshouldbeusedwhencleaningthecoilsothat
the coil fins are not damaged.
Donotpermitoverhan
g
in
g
structuresorshrubstoblockthe
hot condenser air dischar
g
e.
Heating System Inspection
The owner is responsible for ensurin
g
that a qualified ser-
vice technician inspects the entire heatin
g
portion of the
unitannually.Thisinspectionshouldincludetheburner,the
heat exchan
g
er, and flue for any corrosion or soot accu-
mulation. If any corrosion or soot accumulation is found,
the burner, the heat exchan
g
ers, and the flue may have to
be cleaned. The technician should also check the burner
and controls for proper operation.
Vent Outlet
Visually inspect vent outlet periodically to prevent excessive
buildup of soot anddirt. If necessary, clean the vent outlet to
maintain unobstructed dischar
g
e of the flue products.
Burner Flame
The burner flame is not adjustable; however, the flame
should be inspected at the be
g
innin
g
of each heatin
g
sea-
son and burners should be cleaned, if necessary. Burner
flame should be blue when burnin
g
natural
g
as.
Venting System Inspection
Annually (before heatin
g
season) inspect furnace ventin
g
system, vent cap, heat exchan
g
er and burners for corro-
sion, deterioration, or deposits of debris. Remove any ob-
structions.
Contact your Lennox dealer for a periodic unit inspection
by a qualified service technician.
Rollout Safety Switch
Your
g
as/electric unit is equipped with a roll-out safety
switch which shuts off the
g
as supply to the furnace in case
the heat exchan
g
er becomes blocked. If the heatin
g
section
oftheunit failstooperateduetothefunctionin
g
ofthissafety
switch, DO NOT attempt to place the unit into operation.
Contact a qualified service technician.
6(59,&( 5(0,1'(5
Call your service technician if unit is inoperative. Before
calling, always check the following to be sure service is re-
quired.
1 - Check that electrical disconnect switches are ON.
2 - Check room thermostat for proper setting.
3 - Replace any blown fuses or reset circuit breakers.
4 - Gas valve should be ON.
5 - Air filter should not be plugged limiting air flow.
6 - Is gas turned on at meter?
7 - Is manual main shut-off valve open?
To keep your Lennox gas heating system in peak operating
condition year after year, contact your independent Lennox
dealer about a planned service program.