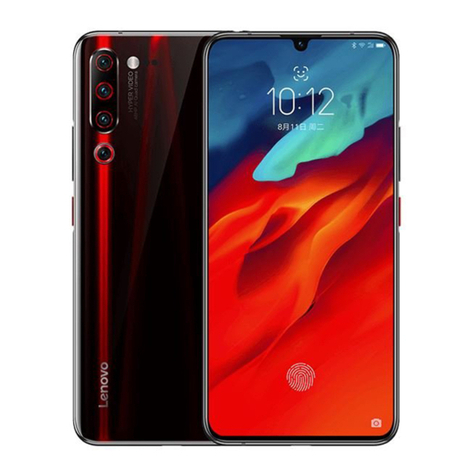
Lenovo Moto One Hyper Installation and operating manual

Moto One Hyper
Lenovo Moto One Hyper
Level 2 –Service and Repair Manual

Lenovo Moto One Hyper
Level 2 –Service and Repair Manual
Lenovo Confidential Restricted:
PAGE 2 Do not share without consent from Lenovo
REVISION HISTORY
Revision
Date
Notes
1
11/25/2019
Initial Release.

Lenovo Moto One Hyper
Level 2 –Service and Repair Manual
Lenovo Confidential Restricted:
PAGE 3 Do not share without consent from Lenovo
TABLE OF CONTENTS
Revision History.................................................................................................................................. 2
List of Tables....................................................................................................................................... 6
Table of Figures.................................................................................................................................. 6
Safety Information .............................................................................................................................. 7
Cautions and Warnings....................................................................................................................... 7
Battery Safety Guidelines.................................................................................................................... 7
Introduction......................................................................................................................................... 8
External Views..................................................................................................................................... 8
Main Exploded Views........................................................................................................................10
Disassembly and Recovery ............................................................................................................. 13
Disassembly and Recovery Map....................................................................................................... 13
Tools Required for Disassembly.......................................................................................................14
SIM Tray Removal ............................................................................................................................16
Water Detection Label Inspection.....................................................................................................17
IMEI Label Removal.......................................................................................................................... 18
Battery Inlay Removal.......................................................................................................................19
Top Carrier Removal......................................................................................................................... 29
Receiver Sub Board Removal........................................................................................................... 30
NFC Inlay Foam Removal.................................................................................................................31
NFC Removal....................................................................................................................................32
Battery Inlay Foam Removal............................................................................................................. 33
Top Carrier Graphite Removal..........................................................................................................34
Rear-Facing Camera Lens Removal ................................................................................................ 35
Speaker Box Removal ......................................................................................................................36
Speaker Box Copper Foil Removal................................................................................................... 37
Rear-Facing Camera Removal .........................................................................................................38
8M Rear Facing Camera Grommet Removal ...................................................................................39
Main Flex Removal ........................................................................................................................... 40
Main PCB Connectors Removal ....................................................................................................... 41
Coax Cable Removal ........................................................................................................................43
Main PCB Removal........................................................................................................................... 44
Water Detection Label Inspection.....................................................................................................45
TOF Sensor Grommet Removal .......................................................................................................46
Rear-Facing Flash Lens Removal..................................................................................................... 47
Headset Jack Grommet Removal.....................................................................................................48
Main PCB Graphite Removal............................................................................................................49
Main PCB Copper Foil Removal.......................................................................................................50

Lenovo Moto One Hyper
Level 2 –Service and Repair Manual
Lenovo Confidential Restricted:
PAGE 4 Do not share without consent from Lenovo
CPU Copper Pad Removal............................................................................................................... 51
Thermal Pads Removal.....................................................................................................................52
Sub Board Removal..........................................................................................................................53
Water Detection Label Inspection.....................................................................................................54
USB Grommet Removal....................................................................................................................55
Battery Removal................................................................................................................................ 56
Vibrator Removal .............................................................................................................................. 58
Primary MIC Grommet Removal.......................................................................................................59
Earpiece Speaker Removal .............................................................................................................. 60
8M Rear-Facing Camera Steel Sheet Removal................................................................................ 61
Front-Facing Camera Bracket Removal ........................................................................................... 62
Front-Facing Camera Removal.........................................................................................................64
Front-Facing Camera Waterproof Bracket Removal.........................................................................65
Secondary MIC Grommet Removal..................................................................................................66
Finger Print Sensor Removal............................................................................................................67
Finger Print Sensor Foam Removal.................................................................................................. 68
Finger Print Sensor Light Film Removal ...........................................................................................69
Parts Refresh..................................................................................................................................... 70
Tools Required for Parts Refresh ..................................................................................................... 70
Battery Inlay Cleaning.......................................................................................................................71
Front Housing Cleaning .................................................................................................................... 72
Speaker Box Cleaning ...................................................................................................................... 73
Top Carrier Cleaning......................................................................................................................... 74
Main PCB Cleaning........................................................................................................................... 75
Front Housing Cleaning .................................................................................................................... 76
Assembly........................................................................................................................................... 77
Assembly Map...................................................................................................................................77
Tools Required for Assembly............................................................................................................78
Earpiece Speaker Assembly............................................................................................................. 80
Front-Facing Camera Waterproof Bracket Assembly....................................................................... 81
Front-Facing Camera and Bracket Assembly................................................................................... 82
8M Rear-Facing Camera Steel Sheet Assembly..............................................................................86
Vibrator Assembly............................................................................................................................. 88
Secondary MIC Grommet Assembly.................................................................................................89
Primary MIC Grommet Assembly...................................................................................................... 90
Water Detection Label Assembly......................................................................................................91
Main PCB Thermal Pads Assembly..................................................................................................92
CPU Copper Pad Assembly..............................................................................................................93
Main PCB Copper Foil Assembly...................................................................................................... 94
Lenovo Moto One Hyper
Level 2 –Service and Repair Manual
Lenovo Confidential Restricted:
PAGE 5 Do not share without consent from Lenovo
Water Detection Label Assembly......................................................................................................95
Main PCB Graphite Assembly...........................................................................................................96
Headset Jack Grommet Assembly.................................................................................................... 97
Battery Assembly ..............................................................................................................................98
Thermal Gel Assembly....................................................................................................................100
Main PCB Assembly ....................................................................................................................... 106
Front-Facing Camera BtB Connector Adhesive Assembly.............................................................107
Rear-Facing Camera Assembly...................................................................................................... 108
USB Grommet Assembly................................................................................................................ 110
Sub Board Assembly....................................................................................................................... 111
Battery BtB Connector Foam Assembly ......................................................................................... 112
Coax Cable Assembly.....................................................................................................................113
Main Flex Assembly........................................................................................................................116
Rear-Facing Camera Flash Lens Assembly................................................................................... 117
TOF Sensor Grommet Assembly....................................................................................................118
Earpiece Speaker Board Assembly ................................................................................................ 119
Rear-Facing Camera Lens Assembly.............................................................................................120
Speaker Box Assembly...................................................................................................................121
Top Carrier Graphite Assembly.......................................................................................................123
NFC Assembly ................................................................................................................................ 124
Front-Facing Camera Deco Waterproof Adhesive Assembly......................................................... 125
Top Carrier Assembly ..................................................................................................................... 126
NFC Foam Assembly......................................................................................................................127
Light Film Assembly........................................................................................................................128
Side Key Cushion Assembly...........................................................................................................129
Battery Inlay Adhesive Assembly.................................................................................................... 130
Finger Print Sensor Foam Assembly ..............................................................................................132
Finger Print Sensor Assembly.........................................................................................................133
Battery Inlay Assembly....................................................................................................................134
IMEI Label Assembly ...................................................................................................................... 137
Sim Tray Assembly......................................................................................................................... 138

Lenovo Moto One Hyper
Level 2 –Service and Repair Manual
Lenovo Confidential Restricted:
PAGE 6 Do not share without consent from Lenovo
LIST OF TABLES
Table 1. External Views Parts List........................................................................................................9
Table 2. Assembly Exploded View Parts List.....................................................................................10
TABLE OF FIGURES
Figure 1. External Views.......................................................................................................................8
9BFigure 2. Assembly Exploded View....................................................................................................10

Lenovo Moto One Hyper
Level 2 –Service and Repair Manual
Lenovo Confidential Restricted:
PAGE 7 Do not share without consent from Lenovo
SAFETY INFORMATION
Cautions and Warnings
Electrostatic Discharge
The phone components may be damaged by electrostatic discharge (ESD). Always use an ESD mat and ground strap
when working with internal components.
Battery Safety Guidelines
Handle Battery with care. Ensure Battery edges and surfaces are not dented or deformed. If the Battery Pack is dropped
to the floor, it may be internally damaged and must be scrapped.
Ensure all surfaces, fixtures, and phone components contacting the Battery are smooth and clean.
Ensure Battery and its insulation are not damaged (e.g. scratched, dented, punctured) prior to and throughout assembly.
Prior to assembly, ensure Battery edges and surfaces are not dented or deformed, and that fixtures and parts that will
contact the Battery are free of foreign material.
Ensure screws and screwdrivers do not contact the Battery.
Failure to adhere to Safety Critical Note(s) may increase risk of rupture, burning, or failure to function safely when used
by the customer.

Lenovo Moto One Hyper
Level 2 –Service and Repair Manual
Lenovo Confidential Restricted:
PAGE 8 Do not share without consent from Lenovo
INTRODUCTION
External Views
Figure 1. External Views

Lenovo Moto One Hyper
Level 2 –Service and Repair Manual
Lenovo Confidential Restricted:
PAGE 9 Do not share without consent from Lenovo
Table 1. External Views Parts List
Reference #
Description
1
Headset Jack
2
Receiver Mesh
3
Pop-up Camera Bracket
4
Pop-up Camera Lens
5
Main Lens
6
Volume Key
7
Power Key
8
Battery Inlay
9
Flash Lens
10
Rear-Facing Camera Deco
11
Rear-Facing Camera Ring
12
Rear-Facing Camera Lens
13
FPS
14
FPS Bezel
15
Speaker Mesh
16
USB Port
17
Front Ring
18
Middle Plane
19
Sim Door

Lenovo Moto One Hyper
Level 2 –Service and Repair Manual
Lenovo Confidential Restricted:
PAGE 10 Do not share without consent from Lenovo
Main Exploded Views
9BFigure 2. Assembly Exploded View
Table 2. Assembly Exploded View Parts List
Reference #
Description
Recovery Part
1
Defender TPLCM Assy Etching ICE LATAM
Defender TPLCM Assy Etching SAN LATAM
Defender TPLCM Assy Etching TER LATAM
Defender TPLCM Assy Etching ICE EU
Defender TPLCM Assy Etching SAN EU
Defender TPLCM Assy Etching ICE APEM
Defender TPLCM Assy Etching TER APEM
Defender TPLCM Assy Etching ICE CN
Defender TPLCM Assy Etching TER CN
Defender TPLCM Assy Etching ICE RU
Defender TPLCM Assy Etching ICE BR
Defender TPLCM Assy Etching SAN BR
Defender TPLCM Assy Etching TER BR
Defender FRU TPLCM Front HSG Assy ICE
Defender FRU TPLCM Front HSG Assy SAN
Defender FRU TPLCM Front HSG Assy TER
Yes
2
SLG,Defenfer,4GB+128GB,LA
Defender FRU Mainboard LA 4+128G DS
Defender FRU Mainboard LA 4+128G SS
Defender FRU Mainboard ROW 4+128G DS
Defender FRU Mainboard CN 6+128G DS
Yes
3
ASSY,DTR BRD,Defender,REC PCBA,Defender
Defender FRU REC PCBA CS
Yes
4
Sub PCBA,Defender
Defender FRU Sub BRD CS
Yes
5
ASSY,FLX,Defender,ASM,Main FPC,Defenfer
Yes

Lenovo Moto One Hyper
Level 2 –Service and Repair Manual
Lenovo Confidential Restricted:
PAGE 11 Do not share without consent from Lenovo
Reference #
Description
Recovery Part
6
FINGERPRT SCANNER,ET520,iceberg,Kerr
FINGERPRT SCANNER,ET520,Magenta,Kerr
FINGERPRT SCANNER,Defender,ET520,Terraco
Yes
7
ACCY,BAT,BATTERY;4000mAh;KG50;ATL486770;
No
8
Defender FRU Pop-up Camera Assy ICE CS
Defender FRU Pop-up Camera Assy SAN CS
Defender FRU Pop-up Camera Assy TER CS
Yes
9
MDL,CAMR,48M,64M PDAF,Defende;rear64M;LG
Yes
10
MDL,CAMR,5M,8M,Defende;rear8M;L4H7FD0;Of
Yes
11
AU,SPKR,ASSY SPK BOX-SLS1216B-01
Yes
12
ANT,EXTRNL,Defender,Assy,NFC FPC,Deman
No
13
HSG,FRM,Defender,Assy, Top Carrier, 3D,I
HSG,FRM,Defender,Assy,Top CAR,3D,RED Gra
HSG,FRM,Defender,Assy,Top CAR,3D,Terraco
Yes
14
LENS,OTHR,Defender,Inlay, 3D, Iceberg Gr
LENS,OTHR,Defender,Inlay, 3D, Emerald Gr
LENS,OTHR,Defender,Inlay,3D,Terracotta G
LENS,OTHR,Defender,Inlay, 3D, Iceberg Gr
LENS,OTHR,Defender,Inlay, 3D,Terracotta
Yes
15
HDW,BRKT,Defender,BRKT, waterproof, POP-
Yes
16
LENS,CAMR,Defender,Lens_Rear_Camera
LENS,CAMR,Defender,Lens_Rear_Camera, RED
LENS,CAMR,Defender,Lens_Rear_Camera, BRC
Yes
17
LENS,FLSH,Defender,Assy, rear FLSH lens
No
18
CBL,RF,RF CBL,BLK
Yes
19
CBL,RF,RF CBL,WHT
Yes
20
HDW,TRAY,ASSY, SIM tray, Iceberg Gradien
HDW,TRAY,ASSY, SIM tray, BLK Gradient De
HDW,TRAY,Defender,ASSY, SIM tray, Terrac
HDW,TRAY,Defender,ASSY,SIM tray(Single S
HDW,TRAY,Defender,ASSY,SIM tray(Dual SIM
Yes
21
SHLD,CVR,Defender,METAL_BRACKET_FPS_BTB_
Yes
22
SHLD,CVR,Defender,METAL_CHASSIS_8M_DEFEN
Yes
23
HDW,SCR,SCR, M1.0 x 0.20 x 1.4 Cross, BL
HDW,SCR,Screws M1.2x0.25 x 1.7, SLVR
SCR,SCREWS M1.4X0,3X3
No
24
Receiver,30ohm,50mW,8x9x3mm
No
25
VIBR,LIN,R4xH3.25,0.205KHz,Vibrator,R4xH
No

Lenovo Moto One Hyper
Level 2 –Service and Repair Manual
Lenovo Confidential Restricted:
PAGE 12 Do not share without consent from Lenovo
Reference #
Description
Recovery Part
26
DICUT,PSA,Defender,PSA, CAMR deco, water
No
27
DICUT,PSA,Defender,ELE-PSA,MET CHAS,8M
No
28
DICUT,PSA,PSA, BAT,Defender
No
29
DICUT,ADHS,Defender,Cusion, NFC-Inlay
No
30
DICUT,COND CLTH,CUSH, CONN, BAT,Defender
No
31
DICUT,FOAM,Defender,CUSH, FPS Left
No
32
GROM,CUST,Defender,GROM, TOF
Yes
33
GROM,CUST,Defender,GROM,Mic1 sealing
Yes
34
GROM,CUST,Defender,GROMl,Mic2 sealing
Yes
35
GROM,CUST,Defender,Grommet_8M_Rear CAMR
Yes
36
KYPD,LT FLM,Defender,LGF (Light GDE film
No
37
THRM,COND,COP Foil,BX,Defender
No
38
HTSK,HT SPRD,HT SPRD, GRPH, top CAR
No

Lenovo Moto One Hyper
Level 2 –Service and Repair Manual
Lenovo Confidential Restricted:
PAGE 13 Do not share without consent from Lenovo
DISASSEMBLY AND RECOVERY
Disassembly and Recovery Map
*Shaded parts may be eligible for parts recovery.

Lenovo Moto One Hyper
Level 2 –Service and Repair Manual
Lenovo Confidential Restricted:
PAGE 14 Do not share without consent from Lenovo
Tools Required for Disassembly
The following tools are required to disassemble the Moto One Hyper phone.
Description
Part #
Picture/Drawing
Battery Inlay/Display Removal Fixture
MR-M2-001
Battery Inlay Removal Insert
MR-M2-001-047
Heating Plate
3-00-Z1-10000
3 mm Allen Wrench
--
Hot Plate
--
Thin Plastic Spudger
0-00-00-40826

Lenovo Moto One Hyper
Level 2 –Service and Repair Manual
Lenovo Confidential Restricted:
PAGE 15 Do not share without consent from Lenovo
Description
Part #
Picture/Drawing
SIM/SD Tray Removal Tool
--
Black Stick
--
Torque Driver
--
Shim
4-00-5L-10000
PH00 Bit
--
Torx T4 Bit
--
Plastic Tweezers
--
--
ESD Mat
--
--
Wrist Strap
--
--
Gloves
--
--

Lenovo Moto One Hyper
Level 2 –Service and Repair Manual
Lenovo Confidential Restricted:
PAGE 16 Do not share without consent from Lenovo
SIM Tray Removal
NOTE
The SIM Tray can be recovered and
reused after removal.
1. Power off the device before beginning with the
procedure. Use the SIM Tray Removal pin to
push into the SIM Tray hole.
2. Press the SIM Tray removal tool to make it pop-
out as shown.
3. Use fingers to take out the SIM Tray.

Lenovo Moto One Hyper
Level 2 –Service and Repair Manual
Lenovo Confidential Restricted:
PAGE 17 Do not share without consent from Lenovo
Water Detection Label Inspection
NOTE
If the Water Detection Label (WDL) has been
activated, the phone’s warranty no longer applies.
Inspect the WDL inside the SIM Tray Slot for signs of
activation. Use external light if needed.

Lenovo Moto One Hyper
Level 2 –Service and Repair Manual
Lenovo Confidential Restricted:
PAGE 18 Do not share without consent from Lenovo
IMEI Label Removal
NOTE
Remove the IMEI Label only if
necessary. After you remove it, you
cannot reuse it.
Use the Plastic Tweezer to remove the IMEI Label
from the SIM tray.

Lenovo Moto One Hyper
Level 2 –Service and Repair Manual
Lenovo Confidential Restricted:
PAGE 19 Do not share without consent from Lenovo
Battery Inlay Removal
Preheating for Battery Inlay Removal
NOTE
The Battery Inlay can be recovered
and reused after removal.
NOTE
Battery Inlay Removal Methods A and B have
the same preheating steps, as shown below.
// CAUTION //
Do not set the Hot Plate temperature higher than
80°C (176°F). Damage to the phone may occur.
1. Set the Hot Plate to 80°C (176°F).
NOTE
Preheating with an oven is also acceptable if the
oven is set to the same temperature.
2. Place the phone on the Heating Plate, with the
Battery Inlay side down.
3. Wait 10 minutes for the Battery Inlay Adhesive
to warm up.

Lenovo Moto One Hyper
Level 2 –Service and Repair Manual
Lenovo Confidential Restricted:
PAGE 20 Do not share without consent from Lenovo
4. Remove the phone from the Heating Plate or
the oven.
// CAUTION //
Wear protective gloves when handling heated
phones.
NOTE
Perform the Battery Inlay removal procedure
before the phone starts to cool off.
Table of contents
Other Lenovo Cell Phone manuals

Lenovo
Lenovo A606 User manual

Lenovo
Lenovo A6000-l User manual

Lenovo
Lenovo K8 User manual

Lenovo
Lenovo S660 User manual

Lenovo
Lenovo VIBE Z2 Pro User manual

Lenovo
Lenovo P780 User manual

Lenovo
Lenovo A2016b30 User manual

Lenovo
Lenovo P70 User manual

Lenovo
Lenovo A600e User manual

Lenovo
Lenovo K6 User manual