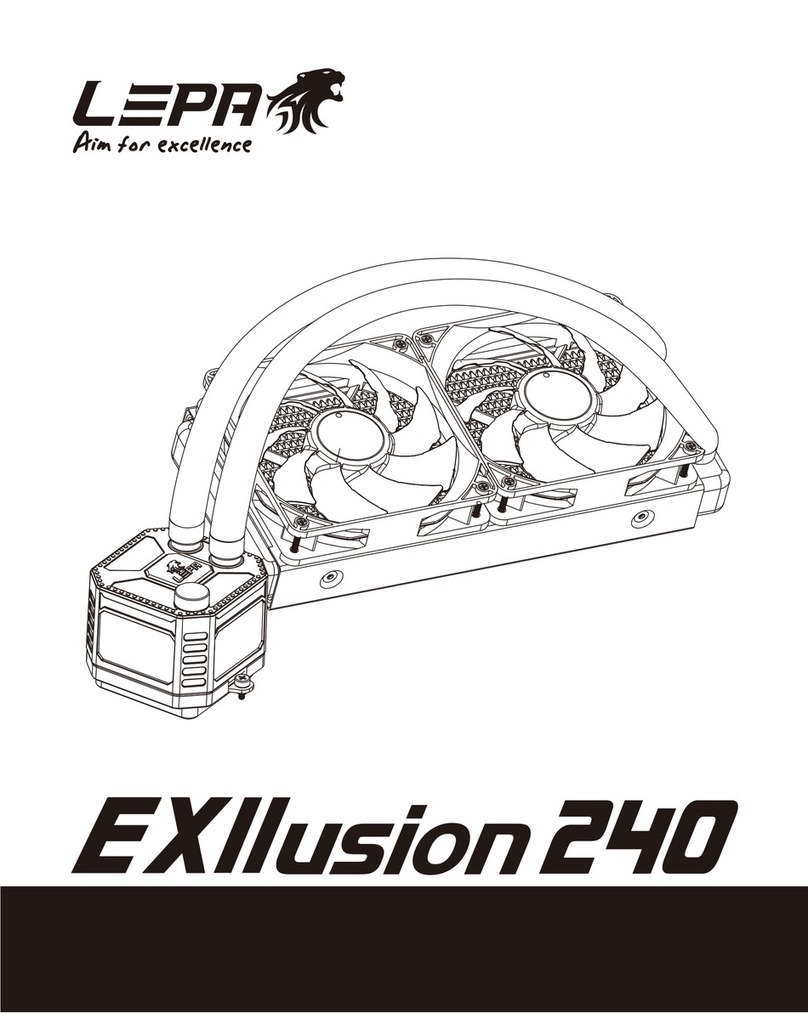
Lepa Exllusion 240 User manual

www.lepatek.com
AMD RYZEN
READY!
AM4

Please read this limited warranty carefully. Warranty is subject to void under following
criteria:
1. The serial number label or warranty seal is defaced, modified, or removed.
2. Taking apart of the product and/or modificaon of any component or cable without
LEPA’s wrien authorizaon.
3. Ignoring connector’s faulty-inseron-prevenon design by aaching a connector to a
device under incorrect orientaon.
4. Damage caused by natural phenomena or uncontrollable forces, such as lightning,
flooding, fire, earthquake, or misuse, abuse, negligence, accident, wear and tear,
mishandling, misapplicaon.
This LEPA Technology Corporaon product is warranted to be free from defects in material and
workmanship for a period of two (2) years from the date of purchase. LEPA Technology
Corporaon agrees to repair or replace the product, at its own opon and at no charge, if,
during the warranty period, it is returned to nearest LEPA Technology Corporaon
subsidiary/agent with all shipping charges prepaid and if inspecon reveals that the product is
defecve. Please present the proof of purchase for requesng RMA. Charges for removing or
installing the product are excluded under the terms of this warranty agreement. This warranty
shall not apply to any product, which has been subject to connecon to a faulty power source,
alteraon, negligence, or accident, or to any product, which has been installed other than in
accordance with these instrucons. In no event shall LEPA Technology Corporaon, or its
subsidiaries, or agents be liable for damages for a breach of warranty in an amount exceeding
the purchase price of this product.
If you are uncertain whether or not your LEPA liquid cooler is defecve, please contact your
dealer/reseller for support!
Web Site: hp://www.lepatek.com
E-mail: sales@lepatek.com
LEPA Technology Corporaon
13F-15, No 888, Jin-Guo Rd., Taoyuan City(330), Taiwan.
Tel.+886-3-3580584 FAX. +886-3-3580694
©2017 LEPA Technology Corporaon. All rights reserved. Specificaons are subject to change
without prior noce. Actual product and accessories may differ from illustraons. Omissions
and prinng errors excepted. Content of delivery might differ in different countries or areas.
Some trademarks may be claimed as the property of others. Reproducon in any manner
without the wrien permission of LEPA is strictly forbidden.
Limited Warranty

1
2
4
6
17
CONTENT
Specification
Part list
PRE-INSTALLATION
Installation
REFILLING COOLANT

Weight (w/o fan)
Material
Bearing
MTBF
Motor Speed
Rated Voltage
Rated Current
Dimension
Material
Material
Length
Dimension
Speed
Rated Voltage
Rated Current
Air Flow
Stac Pressure
Noise Level
Connector
Compability Intel® LGA 775/1150/1155/1156/1366/2011
AMD® AM2/AM2+/AM3/AM3+/AM4/FM1/FM2/FM2+
120 x 120 x 25 mm
500 ~ 1800 rpm ±10%
12 V
0.3 A
22.5 ~ 81.1 CFM
38.2 ~ 137.8 m3/h
0.2 ~2.8 mm-H2O
14 ~ 30 dBA
4 pin PWM
2 years
Copper
Ceramic Bearing
50,000 hrs
3000 rpm ±10%
12 V
0.3 A
274 x 120 x 32 mm
Aluminum
PU Plasc (ID-9.5mm/OD-12.5mm)
350 mm
1120 g
Pump
Cold Plate
Radiator
Tube
Warranty
Bracket
Fan
Model LPWEL240-HF
Specification
1

A Cooler x 1
B Fan x 2 C Back Plate x 1 D Posion Plate x 1
F Stand-off × 4
G Case Screw × 8 H Fan Screw × 8 I Set Screw x 4
M Scraper x 1 N Thermal Grease x 1
O 24P power adaptor x 1 P Dye x 3 Q Coolant 500 ml x 1 R Filler p x 1
S Fixed ring x 1 T Tray with hole x 1 U Tray x 1 V Indicaon scker x 1
J Washer x 4
K PWM Y cable x 1 L Molex Adaptor x 1
Part list
2
E Posion Screw x 4

3
Installation

O
4
Step A
PRE-INSTALLATION
EN
ID
TW
JP
KR
Unplug the PC power supply unit’s 24P main power and water block’s 3pin power connectors from
MB. Connect the above connectors to the included 24P power adaptor . Turn on the power supply
unit, this will also power on the pump. (Please perform this operaon outside the chassis.)
O
最初にポンプの動作を確認するため、電源ユニットの24ピンコネクタに付属の24ピンアダプタ を取り付
けてください。
アダプタの3ピンコネクタに水冷ヘッドの3ピンコネクタを接続し電源を入れ、水冷ポンプが動作することを
確認してください。動作確認後は電源を切り、コネクタを外してください。(上記作業を行う際はケースの外
で行って下さい)
O
CN
将电源供应器24P主接头与水泵3P电源插头从主机板移除,并将上述两个接头连接到附赠的
24P电源转接头 。打开电源供应器电源,让水冷头帮浦运转(以上动
作需在机箱外操作)。
O
PC 전원공급장치의 24P 메인 파워와 water block의 3pin 파워 컨넥터를 MB에서 제거
한 후 제공된 24 pin 파워 아답터 컨넥터 에 연결시켜 주세요. 전원공급장치에 전원을
켜면, 파워펌프에도 전원이 켜질 것 입니다. (이 작업은 케이스 밖에서 실행해주세요)
O
Cabut 24P daya utama PC power supply dan konektor daya 3pin water block dari motherboard.
Hubungkan konektor di atas termasuk power adapter 24P . Hidupkan power supply, Ini juga akan
menyalakan daya pada pump. (Lakukanlah kegiatan ini di luar casing)
O
將電源供應器24P主接頭與水泵3P電源插頭移除主機板,並將上述兩個接頭連接到附贈的24P
電源轉接頭 。打開電源供應器電源,讓水冷頭幫浦運轉(以上動作需在機殼外操作)。
O

Jika anda dak ingin mewarnai pendingin, abaikan lah langkah ini.
Buka filler cap dari water block, dan beri pewarna secukupnya (pendingin) P ke dalam water block.
Tutup kembali filler cap dengan kuat ke water block.
Peringatan : Jika filler cap dak ditutup dengan kencang kembali, akan memungkinkan terjadi nya
kebocoran pada pendingin dan menyebabkan kerusakan pada sistem komponen. Kerusakan tersebut
dak termasuk dalam garansi.
5
Step B
TW
ID
CN
JP
KR
EN
P
若不想將冷卻劑染色,可省略此步驟。
打開水冷頭注水口螺帽,將染劑 加入;將注水口螺帽確實鎖緊回水冷頭。
警告:若因不當安裝而造成水冷液外漏,可能會造成系統損壞,此行為並不在保固範圍內。
P
若不想将水冷液染色,可省略此步骤。
打开水冷头的注水口螺帽,将染剂 加入;将注水口螺帽紧紧锁回水冷头。
警告:若因不当安装而造成水冷液外漏,可能会造成系统损坏,此行为不在保固范围内。
P
水冷ヘッドのキャップを外し、適量の染色液(Dye) を水冷ヘッドに注入してください。
作業完了後はキャップをしっかりと締めてください。
注意: キャップをしっかり締めなかった場合、冷却液が漏れてシステムに破損が及ぶ恐れがあります。保証
対象外となりますので、しっかりと締まっているか必ず確認をしてください。(上記作業は冷却液を染色
するための作業となります。染色をしない場合はこのステップを省略してください)
P
Coolant 염색을 원하지 않는다면, 이 단계를 생략해주세요.
Water block필터뚜껑을 열어 water block에 물감 을 적당히 넣어주세요.
Water block 필터 캡을 볼트로 단단히 고정해 줍니다.
주의: 필터 캡이 단단히 잠가지지 않았다면, 냉각수가 샐 수 있고 시스템 부품에 손상을
입힐 수 있습니다. 이런 손상에 대해서는 보증에 포함되어있지 않습니다.
P
P
P
If you do not want to dye the coolant, please skip this step.
Open the filler cap from the water block, and drop the adequate dye (coolant) into the water block.
Firmly bolt the filler cap back to the water block.
Warning: If the filler cap are not firmly bolt back, the coolant might leak and cause damage to system
components. Such damage is not covered in the warranty.

6
Step 1
INSTALLATION
EN
Aach the fan and the radiator to the case.
ID
Pasang fan dan radiator ke dalam casing.
TW
請安裝風扇與散熱排於機殼上。
CN
请将风扇与水冷排安装在机箱上。
KR
Fan와 radiator를 케이스에 장착 합니다.
JP
Fan Screwを使用してファンをラジエーターに設置、
Case Screwを使用してラジエーターをケースに取り付けます。
H
G
H
B
A

7
Step 2-A-1
LGA775/1150/1155/1156/1366/All AMD Socket
EN
ID
<Jika socket CPU anda adalah LGA 2011, silahkan langsung ke langkah 2-B.>
Pasang sekrup/ baut ke dalam lubang sesuai dengan posisinya pada back plate untuk socket CPU anda.
TW
CN
KR
<Intel LGA 2011 경우에 바로step 2-B 참고함>
CPU socket에 맞게 설치 합니다.
JP
<設置後、CPUソケットがIntel LGA 2011の場合は、ステップ2-Bへお進み下さい。>
CPUソケットに合った Back Plateの取付穴をご確認いただき、 Position Screwを差し込みます。
CE
<如您系統平台為Intel LGA 2011,請直接跳至步驟2-B>
依系統腳位插入定位螺絲 於背板 相對應孔位上。
CE
<如您所使用的系统平台为Intel LGA 2011,请直接跳至步骤2-B>
按照系统脚位,在背板 相对应孔位上插入定位螺丝 。
CE
<If your CPU socket is Intel LGA 2011, please skip to step 2-B.>
Install the screw into the corresponding posion hole on the back plate for your CPU socket.
C
E
* If your CPU socket is AMD, please remove the original heatsink mount holder beforefurther installaon.
LGA775
LGA115X
LGA1366
All AM2/AM3/
FM1/FM2 bracket
E
C
AM4

8
EN
ID
TW
CN
JP
KR
Install the back plate on the back of motherboard, place the washer into the posion screw
and fix them with stand-off .
CJ
E F
將背版 置入主機板背面,將墊片 套入定位螺絲 ,並鎖上螺柱 以固定背板。
JF
CE
将背板 置入主板背面,将垫片 套入定位螺丝 ,并锁上螺柱 以固定背板。
CJE F
마더보드 뒷면 에 Back Plate를 설치하여, 와셔 를 나사부분 에 놓고 stand-off
와 같이 고정해 주세요
CJE
F
Pasang back plate ke belakang motherboard, letakkan ring ke sekrup posisi dan perbaiki
dengan stand off .
CJ E
F
C
J
F
Step 2-A-2
CJ
E
F
Back Plate をマザーボードの裏側にセットし、表側に出たPosition Screw にWasher とStand off
を挿し込んでください。

9
Step 2-A-3
I
D
EN
ID
TW
CN
JP
KR
Place posion plate on stand-off and use set screw to fix.
ID F
請於螺柱 上放置固定板 後,用固定螺絲 鎖上。
I
D
F
请在螺柱 上放置固定板 后,用固定螺丝 锁上
IDF
Position Plate をStand off の上にセットし、Set Screw で固定してください。
I
DF
Tempatkan dudukan piringan pada stand off dan gunakan set sekrup untuk mengencangkan.
I
DF
Stand-off 에 Plate 위치 에 맞춰 나사 를 이용해 고정해주세요.
IDF
F

10
Step 2-B
JP
EN
ID
TW
CN
KR
LGA 2011
Place posion plate on stand-off and use posion screw to fix. (Socket LGA 2011 does not
require the back plate.)
FD E
请在螺柱 上置放固定版 后,用定位螺丝 锁上。(LGA2011主板不需使用背板)
FD E
Position Plate をStand off の上にセットし、Position Screw で固定してください。
(LGA2011ソケットの場合、バックプレートは必要ありません)
F
DE
Plate 위치에 stand-off 을 놓고 나사 로 조여주세요.
(소켓 LGA 2011은 Back Plate가 필요하지 않습니다 )
FD E
Tempatkan dudukan piringan pada stand off dan gunakan sekrup posisi untuk mengencangkan
(Socket LGA 2011 dak memerlukan back plate)
F
DE
請於螺柱 上置放固定版 後,用定位螺絲 鎖上。(LGA2011主機板不需使用背板)
DF E
LGA 2011/2011-3
E D
F

11
Step 3
N
M
EN
Apply the thermal grease on the CPU surface.
ID
Oleskan thermal pasta pada permukaan CPU.
TW
將散熱膏塗抹於CPU表面。
CN
在CPU表面均匀的涂抹导热硅脂。
JP
KR
CPU 표면에 써멀구리스를 바릅니다.
Thermal GreaseをCPUの表面に均一になるように薄く塗ります。
N

12
Step 4
EN
Remove the protecon film on the cold plate.
ID
Lepaskan pita pelindung pada cold plate.
TW
請移除水冷頭保護膜。
CN
使用时,请将水冷头表面的保护膜去除。
JP
コールドプレートの保護フィルムを外してください。
KR
Cold plate의 보호막을 제거 합니다.

13
Step 5
EN
ID
TW
請將水冷頭放置CPU上並鎖上兩邊的螺絲固定。
CN
JP
KR
水冷ポンプの固定ネジをPosition Plate のネジ穴の向きに合わせ、水冷ポンプをCPUの上に設置し、
2本の固定ネジを均等に締め付けて固定します。
D
Place the pump on the CPU and ghten the two screws.
请将水冷头放置到CPU上并锁上两边的螺丝以固定。
CPU자리에 맞춰 펌프를 놓고 2개의 나사로 조여주세요.
Tempatkan pump pada CPU dan kencangkan kedua baut.

連接水泵電源於主機板上3-pin或4-pin接口。
注意: 為確保水泵維持長時間全速運轉,若您主機板上的CPU風扇或PWM插座未能提供足夠
電壓驅動水泵時,建議您使用內附4pin轉接線連接至電源供應器,以達到產品最佳效能。
14
Step 6
EN
ID
TW
CN
JP
KR
Pump
4 pin
Pump
3 pin
or
Hubungkan konektor pump power pada konektor 3 pin atau konektor 4 pin pada motherboard.
Catatan : jika anda menyadari socket power cpu fan atau pwm motherboard anda, dak bisa
memberikan daya yang cukup untuk pompa watercooling, silahkan menggunakan 4pin molex
adaptor dan sambungkan langsung ke power PSU.
将水泵电源连接在主板的3-pin或4-pin接口上。
注意:为确保水泵能长时间全速运转,若您主板上的CPU风扇或者PWM接口不能提供足够电
压带动水泵,建议使用内附4pin转接线连接至电源,以达到产品最佳效能。
水冷ポンプのコネクターをマザーボードの3-pin 又は 4-pinコネクターに接続して下さい。
注意: ご使用のマザーボードのCPUファンコネクターまたはPWMファンコネクターがポンプに十分な電圧
を供給しない場合は、付属の4-pin Molex変換アダプターをご使用いただき、電源ユニットに直接ポンプを
接続してください。
Pump power connector 를 motherboard위의 3 pin 이나 4 pin connector에 연결 합니다.
주의사항 : 메인보드 CPU Fan 또는 PWM 소켓에 연결 했을 시 충분한 전압을 펌프로
제공을 하지 못하면,별도로 제공한 4핀 Molex 케이블을 이용하여 파워서플라이에
직접연결 하십시요.
Connect the pump power connector to 3-pin or 4-pin connector on the motherboard.
Noce: If you recognize that your mainboard's CPU fan or PWM sockets do not provide enough
voltage to power the pump, please use the included 4-pin Molex adaptor and connect the pump
directly to your PSU.

15
Step 7
Connect the fan connector to the 4-pin connector on the motherboard.
Hubungkan fan konektor ke konektor 4-pin pada motherboard.
連接風扇電源於主機板上4-pin接口。
将风扇电源连接在主板的4-pin接口上。
冷却ファンのコネクターをマザーボードのCPUファンコネクター(4-pin)に接続してください。
Fan connector를 Motherboard의 4-pin connector에 연결 합니다.
B
K
EN
ID
TW
CN
JP
KR

16
Step 8
EN
ID
TW
CN
JP
KR
U
為防止注水口螺帽未鎖緊而造成水冷液外漏,建議可先置盛水盤 於顯卡上。
警告: 因不當安裝而造成水冷液外漏,可能會造成系統損壞,此行為並不在保固範圍內。
U
为防止注水口螺帽未锁紧而造成水冷液外漏,建议可先置盛水盘 于显卡上。
警告: 若因不当安装而造成水冷液外漏,可能会造成系统损坏,此行为并不在保固范围内。
U
キャップの緩みなどから起こる水漏れによるシステムの破損を防ぐため、専用トレイ をVGAカードに
設置して下さい。
注意: 水冷ヘッドのキャップがしっかり締められていない場合、冷却水が漏れてシステムが破損する恐
れがあります。この場合の破損は保障対象外となります。
U
Place tray on VGA card to isolate the possible leakage coolant from unsecure filler cap.
Warning: If the filler cap are not firmly bolt back, the coolant might leak and cause damage to
system components. Such damage is not covered in the warranty.
U
U
단단히 잠기지 않은 필터 캡으로부터 냉각수가 흐를 경우를 위하여 VGA 카드위에 Tray
를 놓습니다.
주의: 필터 캡이 단단히 잠겨 지지않으면 냉각수가 셀 수 있고 시스템 부품에 손상을
입힐 수 있습니다. 이런 손상에 대한 피해는 보증에 포함되어있지 않습니다.
U
Tempatkan tray pada VGA Card untuk mengisolasi kemungkinan terjadi nya kebocoran pendingin
dari filler cap yang dak aman.
Peringatan : Jika filler cap dak ditutup dengan kencang kembali, akan memungkinkan terjadinya
kebocoran pada pendingin dan menyebabkan kerusakan pada sistem komponen. Kerusakan tersebut
dak termasuk dalam garansi.

冷却水の点検
冷却水点検窓にIndication sticker を貼り付け、冷却水の量を確認します。
17
Step A
EN
ID
TW
CN
JP
KR
Indicaon scker:
If the water block is horizontally placed
and the coolant volume is below this
white indicator, please refill the coolant.
V
V
V
If the water block is vercally placed and
the coolant volume is below this white
indicator, please refill the coolant.
橫躺放時若水冷液低於此白線時,請
補充水冷液。
垂直立放若水冷液低於此白線時,請補
充水冷液。
水平横放时若水冷液低于此白线时,
请补充水冷液。
垂直竖放时若水冷液低于此白线时,请
补充水冷液。
水冷ヘッド(水平時):中心のホワイトイン
ジケーターラインに冷却水が満たない場合
は冷却水を補充してください。
水冷ヘッド(垂直時):上部のホワイトイ
ンジケーターラインに冷却水が満たない
場合は冷却水を補充してください。
water블록은 가로로 배치되어 있을
경우 냉각수 양이 하얀색 표시기
아래에 나타나있으면 리필 해 주기
바랍니다.
Water 블록이 세로로 배치되어 있을
경우 냉각수 양이 하얀색 표시기
아래에 나타나있으면 냉각수 리필 해
주시기 바랍니다.
Jika water block ditempatkan horizontal
dan volume pendingin di bawah indikator
puh, isilah kembali pendingin.
Jika water block ditempatkan secara verkal
dan volume pendingin di bawah indikator
puh, isilah kembali pendingin.
Refilling Coolant
This manual suits for next models
1
Table of contents
Other Lepa Computer Hardware manuals