manuals.online logo
Brands
  1. Home
  2. •
  3. Brands
  4. •
  5. Leviton
  6. •
  7. Measuring Instrument
  8. •
  9. Leviton 70D03 User manual

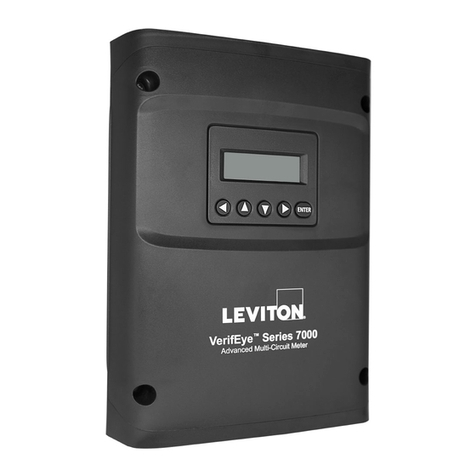
Leviton 70D03 User manual

Single-Circuit Power Meter
Quick Start Guide
Cat. No. 70D03, 71D03
FOR QUALIFIED PERSONNEL ONLY
INSTALLATION INSTRUCTIONS ENGLISH
PK-A3464-10-00-0A
WARNINGS
• HAZARD OF ELECTROCUTION, SHOCK, EXPLOSION, OR ARC FLASH. CAREFULLY READ AND
FOLLOW INSTRUCTIONS:
• TO AVOID FIRE, SHOCK OR DEATH, turn OFF all power supplying equipment before working on or inside the equipment.
Use a properly rated voltage sensing device to conrm power is OFF.
• Follow safe electrical work practices. See NFPA 70E in the USA, or applicable local codes.
• This equipment MUST be installed and serviced by an electrician or other qualied personnel with the requisite knowledge,
training and experience related to the installation and operation of this equipment.
• Product may use multiple voltage/power sources. Be sure all sources of power have been disconnected before servicing.
• Do not depend on this product for voltage indication.
• Only install this product on insulated conductors.
• If the meter appears damaged or defective, rst disconnect all power to the meter, and then call or e-mail Technical Support
for assistance.
CAUTIONS
• This product is not intended for life or safety applications.
• Do not install this product in hazardous or classied locations.
• The installer is responsible for compliance with all applicable codes.
• Mount this product inside a suitable re-proof and electrical enclosure.
• If the collector is connected directly to a source of voltage, the pulse isolator
immediately burns out and becomes non-responsive.
1. Attach DIN rail.
DO NOT EXCEED 346V Line to Neutral or 600V Line to Line (L-L). This meter is equipped to monitor loads up to 346V Line to Neutral (L-N). Exceeding this voltage will cause damage to the meter and danger
to the user. Always use a Potential Transformer (PT) for voltages in excess of 346V L-N or 600V L-L. VerifEye-branded meters are 600 Volt Over Voltage Category III devices.
For use in a Pollution Degree 2 or better environment only. A Pollution Degree 2 environment must control conductive pollution and the possibility of condensation or high humidity. Consider the enclosure, the
correct use of ventilation, thermal properties of the equipment, and the relationship with the environment. Installation category: CAT II or CAT III.
Provide a disconnect device to disconnect the meter from the supply source. Place this device in close proximity to the equipment, and within easy reach of the operator, and mark it as the disconnecting
device. The disconnecting device shall meet the relevant requirements of IEC 60947-1 and IEC 60947-3 and shall be suitable for the application. In the US and Canada, disconnecting fuse holders can be used.
Provide over-current protection and disconnecting device for supply conductors with approved current limiting devices suitable for protecting the wiring. If the equipment is used in a manner not specied by the
manufacturer, the protection provided by the device may be impaired.
For the complete safety information for this product, see the full user guide at www.leviton.com.
2. Mount.
Meter is IP30 TouchSƗITM (with internal cover installed).
5. Attach high-voltage cover.
4. Connect voltage leads. 6. Connect CT and
communications wiring.
L1NL2 L3
VerifEye®
T35 DIN Rail
35mm
7mm
Attach a section of T35 DIN rail within a suitable
UL-approved enclosure.
NOTE:
• Leave enough clearance for voltage, CT, and
communications wires to route within enclosure.
• The customer must supply the UL-approved enclosure.
• Press the top-edge of the meter’s DIN rail channel into the DIN rail.
• Push the meter rmly towards the DIN rail until it clicks into place.
PUSH
DIN Rail Channel
T35 DIN Rail
DIN Rail Tabs
Pull tabs with screwdriver to release.
3. Remove the high-voltage cover.
High-
Voltage
Cover
WARNING: RISK OF ELECTRICAL SHOCK. DO NOT
ENERGIZE METER WHEN VOLTAGE COVER IS REMOVED.
WARNING: RISK OF ELECTRIC SHOCK, EXPLOSION, OR
ARC FLASH. DO NOT ENERGIZE METER WITH VOLTAGE
COVER REMOVED. FOLLOW ALL STATE AND FEDERAL
ELECTRICAL CODES.
USE #14 AWG THHN, 600V AC rated wire to connect the
voltage leads (L1, L2, L3 and N, as needed) to the meter
through a dedicated disconnect or circuit breaker.
NOTES:
• Do not exceed 346V L-N or 600V L-L.
• The meter is powered through the voltage between L1 and
L2. For single-phase installations in which no L2 exists, install
a jumper from N to L2. This connection provides power to the
meter, maintaining L1-N as the metering voltage reference.
White (+)
Black or Brown (-)
Bare (RŌC) (S)
CT Connections (x3)
RS-485
USB-C Ethernet
Use only 333.3 mV (1/3 V) output CTs or RǀCoils.
PUSH
Wiring
WARNINGS:
• TO AVOID FIRE, SHOCK, OR DEATH; TURN OFF POWER at circuit breaker or
fuse and test that power is OFF before wiring!
• HIGH-VOLTAGE MAY BE PRESENT.
To be installed by an electrician or other
qualied personnel only.
Congurations shown, are for service types available in the
METER SETUP drop-down menu.
+
-
+
RS-485
4-WIRE, 3-PHASE WYE
3-WIRE, 3-PHASE DELTA
SHIELD
VOLTAGE
L3
L3
L2
L2
L1
L1
N
White
L3 CT
L3
L2
L1
N
CURRENT
LOAD
L2 CT
L1 CT
NEUTRAL
Blue
Red
Black
-
+
-
+
RS-485
SHIELD
VOLTAGE
L3
L3
L2
L2
L1
L1
N
White
L3 CT
L3
L2
L1
CURRENT
LOAD
L1 CT
Blue
Red
Black
-
TYPICAL LOADS:
Single-phase L1-N or L2-N 110V AC: lighting, appliance, or living zone
Single-phase L1-L2 220V AC: water heater or equipment with no neutral wire
Split-phase L1-L2 220V AC: service entrance, dryers, or equipment with neutral wire
Wiring in a 3-Wire, Split-Phase Service Panel
3-wire, single-phase used
on MAINS L1-N, L2-N
(RǀCoil CTs shown)
Single-phase
110V AC plug loads
L1-N or L2-N
(Split Core CTs shown)
Connect the NEUTRAL
wire to V INPUT 1 (N)
on the meter
Meter is powered
from L1 to L2 on
the V input 1 terminal
(label as disconnect)
Single-phase
220V AC plug load
L1-L2
3-wire, single-phase
split load
L1-N, L2-N
CT
CT
CT
CT
CT
CT
L1
N
L2
Wiring in a 4-Wire, 3-Phase Service Panel
4-wire, 3-phase
Mains Monitoring
L1-N, L2-N, L3-N
(RǀCoil CTs shown)
Single-phase
branch load
L1-N
4-wire, 3-phase
WYE load with
Neutral current
L1-N, L2-N, L3-N
Connect the
Neutral wire
or Ground wire
to V INPUT 1 (N)
on the meter
Meter power
connect all phases
to V INPUT 1
terminal
(label as disconnect)
3-wire, 3-phase
Delta load
(no possibility of
neutral current)
Two CTs on L1 and L3
CT
CT
CT
CT
CT
CT
Example 1
Example 2
DIN Rail Mount
Wall Mount
1. Remove covers. 2. Mount.
Use the enclosure as a template.
3. Follow steps 3 to 6 above to
complete the installation.
WEB VERSION
© 2023 Leviton Mfg. Co., Inc. For Technical Assistance Call: 1-800-824-3005 (USA Only) or 1-800-405-5320 (Canada Only) www.leviton.com
LIMITED 5 YEAR WARRANTY AND EXCLUSIONS
Leviton warrants to the original consumer purchaser and not for the benet of anyone else that this product at the time of its sale by Leviton is free of defects in materials and workmanship under normal and
proper use for ve years from the purchase date. Leviton’s only obligation is to correct such defects by repair or replacement, at its option. For details visit www.leviton.com or call 1-800-824-3005. This warranty
excludes and there is disclaimed liability for labor for removal of this product or reinstallation. This warranty is void if this product is installed impro perly or in an improper environment, overloaded, misused,
opened, abused, or altered in any manner, or is not used under normal operating conditions or not in accordance with any labels or instructions. There are no other or implied warranties of any kind, including
merchantability and tness for a particular purpose, but if any implied warranty is required by the applicable jurisdiction, the duration of any such implied warranty, including merchantability and tness for
a particular purpose, is limited to ve years. Leviton is not liable for incidental, indirect, special, or consequential damages, including without limitation, damage to, or loss of use of, any equipment,
lost sales or prots or delay or failure to perform this warranty obligation. The remedies provided herein are the exclusive remedies under this warranty, whether based on contract, tort or otherwise.
FOR CANADA ONLY:
For warranty information and/or product returns, residents of Canada should contact Leviton in writing at Leviton Manufacturing of Canada ULC to the attention of the Quality Assurance Department,
165 Hymus Blvd, Pointe-Claire (Quebec), Canada H9R 1E9 or by telephone at 1-800-405-5320.
FCC STATEMENT:
This device complies with Part 15 of the FCC Rules and ISED License-exempt RSS standard(s). Operation is subject
to the following two conditions: (1) This device may not cause harmful interference, and (2) This device must accept
any interference received, including interference that may cause undesired operation. Changes or modications not
expressly approved by Leviton could void the user’s authority to operate the equipment. These limits are designed to
provide reasonable protection against harmful interference in a commercial installation. This equipment generates, uses
and can radiate radio frequency energy and, if not installed and used in accordance with the instructions, may cause
harmful interference to radio communications. However, there is no guarantee that interference will not occur in a particular
installation. If this equipment does cause harmful interference to radio or television reception, which can be determined by
turning the equipment off and on, the user is encouraged to try to correct the interference by one or more of the
following measures:
- Reorient or relocate the receiving antenna.
- Increase the separation between the equipment and receiver.
- Connect the equipment into an outlet on a circuit different from that to which the receiver is connected.
- Consult the dealer or an experienced radio/TV technician for help.
This Class A digital apparatus complies with Canadian CAN ICES-3(A)/NMB-3(A).
TRADEMARK DISCLAIMER:
Use herein of third party trademarks, service marks, trade names, brand names and/or
product names are for informational purposes only, are/may be the trademarks of their respective owners; such use is not
meant to imply afliation, sponsorship, or endorsement. PhaseChek and
TouchSƗI
are trademarks of Dent Instruments.
Modbus is a trademark of Schneider Electric USA, Inc. and BACnetTM is a trademark of ASHRAE.
Patents covering this product, if any, can be found on Leviton.com/patents.
Navigating the Meter’s Display
KWH SYS:50.02
KW SYS:50.23
KVA SYS:50.02
KVAR SYS:50.23
V 1:120.2
2:120.4 3:120.2
A 1:50.23
2:4000 3:800.2
W 1:50.23
2:4000 3:800.2
KWH 1:453.2
2:445.3 3:800.2
VA 1:50.23
2:4000 3:800.2
VAR 1:50.23
2:4000 3:800.2
SYS aPF: 1.0
Pk Demand: 12874
CT1 Type: RoCoil
Rating: 4000
CT2 Type: RoCoil
Rating: 4000
CT3 Type: RoCoil
Rating: 4000
SN: P031501001
FW: v2.10
RS485: 115200
Addr: 1
Protocol: BACnet
192.168.100.101
Using the LCD Screen
The meter features a navigation thumb wheel, which allows the
user to scroll up or down and select menu options on the LCD
screen; however, you must use Power Meter Viewer software to
congure the meter.
Current Transformer Basics
To ensure safety and maintain UL listings, use only CTs provided
by Leviton.
• Do not use on services greater than 600V AC.
• CTs are 333.3 mV (1/3V) output voltage or RoCoil.
•
Select CTs with the appropriate current range for the
circuit (5-120% of CT
rating recommended).
• Ensure arrow points towards load (or as instructed
by CT label).
• Place CT on rst conductor of voltage reference.
Example: for L1-L2 circuits without neutral,
place CT on L1.
• Observe wiring color and polarity: For millivolt CTs,
the white wire is (+) and the black wire is (-). For
RǀCoils, the white is (+), brown is (-), and the bare
shield wire connects to the terminal marked “S”.
1. Display 7. USB-C 13.Circut Board
2. High-Voltage Cover 8. DIN Rail Channel 14.Voltage Connection
3. CT Connections (x3) 9. Ethernet Port 15.High-Voltage Cover
4. Serial RS-485 10. Conduit Connection
0.5” (x3) 16.ABS Plastic Enclosure
5. Alarm 11.
Wall Mount Enclosure Top
6. Thumb Wheel 12.Mounting Holes
Internal and External Meter Parts
DIN Rail Mount Enclosure
1
15
9
7
6
345
114
10
16
8
976
54 3
2
16
16
12 13
11
Wall Mount Enclosure
FCC SUPPLIER’S DECLARATION OF CONFORMITY:
Models 70D03 and 71D03 are sold by Leviton Manufacturing Inc. 201 N Service Rd, Melville, NY 11747. This
device complies with part 15 of the FCC Rules. Operation is subject to the following two conditions: (1) This
device may not cause harmful interference, and (2) this device must accept any interference received, including
interference that may cause undesired operation.
TECHNICAL SPECIFICATIONS
Service Types Single phase, split-phase, three-phase four-wire (WYE), three-phase three-wire (Delta)
Voltage Input Channels 90-346V AC line-to-neutral, 600V L-L, CAT III
For 48 Circuit Models Only: Two independent voltage reference inputs
Current Channels 3 channels, 0.525V AC max, 333 mV CTs, 0-4,000+Amps depending on current transducer
Maximum Current Input 150% of current transducer rating (mV CTs) to maintain accuracy. Measure up to 4,000A with
RõCoil CTs.
Measurement Type True RMS using high-speed digital signal processing (DSP) with continuous sampling
Line Frequency 50-60 Hz
Power From L1 Phase to L2 Phase. 90-600V AC RMS CAT III 50/60 Hz, 500 mA AC Max
Use of 12V auxiliary output requires 100V AC minimum input voltage.
AC Protection 0.5A Fuse 200 kA interrupt capacity
Power Out Unregulated 12V DC output, 200 mA, self-resetting fuse
Waveform Sampling 1.8 kHz
Parameter Update Rate 1 second
Measurements
Volts, Amps, kW, kVAR, kVA, aPF, dPF, kW demand, kVA demand, Import (Received) kWh, Export
(Delivered) kWh, Net kWh, Import (Received) kVAh, Export (Delivered) kVAh, Net kVAh, Import
(Received) kVARh, Export (Delivered) kVARh, Net kVARh, THD, Theta, Frequency. All parameters
for each phase and system total.
Accuracy 0.2% ANSI C12.20-2010 Class 0.2
Resolution Values reported in IEEE-754 single precision oating point format (32 bit).
Indicators 2-line display, tri-color backlight
Alarm Output Voltage Phase Loss Alarm (SPDT Relay - 30V DC) only
Communication
Hardware RS-485, Ethernet, and USB (for conguration only)
Supported Protocols
ModbusTM RTU or BACnetTM Master Slave Token Passing protocol (MS/TP)
Modbus (using SunSpec IEEE-754 single precision oating point model)
Modbus TCP
BACnet IP
Max Communication Length (RS485) 1,200 meters total length Belden 1,120A or equivalent cable,
with Data Range of 100K bits/second or less
RS-485 Loading 1/8 unit
Communication Rate (baud) Modbus: 9600 (Default), 19200, 38400, 57600, 76800, 115200
BACnet: 9600 (Default), 19200, 38400, 76800
Data Bits 8
Parity None, Even, Odd
Stop Bit 2, 1
Termination None provided
Mechanical
Wire Connections & Voltage 12-22 AWG 600V AC, Voltage connection must be #14 AWG or larger and rated 600V AC
Mounting Enclosure or Panel Mount
High-Voltage Cover IP30 (embedded version)
Operating Temperature -4 to 140oF (-20 to + 60oC )
Humidity 5% to 95% non-condensing
Enclosure ABS Plastic, 94-V0 ammability rating, connections sized for 1–inch EMT conduit
Dimensions
(L) 13.3 in. x (W) 9.8 in. x (H) 3.1 in. ((L) 33.7 cm x (W) 25.1 cm x (H) 8.0 cm) (enclosure version)
(L) 10.3 in. x (W) 9.5 in. x (H) 3.1 in. ((L) 26.2 cm x (W) 24.1 cm x (H) 8.0 cm) (mounting plate version)
PCBA Dimensions (L) 8.5 in. x (W) 8.5 in. x (H) 2.5 in. (21.6 cm x 21.6 cm x 6.4 cm)
VerifEye S7 Conguration Utilities Minimum System Requirements
Operating System Windows®7, Windows 8, Windows 10
Communications Port USB or Ethernet connectivity
Certications FCC Part 15 Class A
WEB VERSION

This manual suits for next models

1

Other Leviton Measuring Instrument manuals

Leviton VerifEye 72D48 User manual

Leviton

Leviton VerifEye 72D48 User manual

Leviton 4000-K Series User manual

Leviton

Leviton 4000-K Series User manual

Leviton VerifEye MDTFW User manual

Leviton

Leviton VerifEye MDTFW User manual

Leviton 6M Series Technical specifications

Leviton

Leviton 6M Series Technical specifications

Leviton Series 1000 Instruction Manual

Leviton

Leviton Series 1000 Instruction Manual

Leviton Verifeye 8000 Series User manual

Leviton

Leviton Verifeye 8000 Series User manual

Leviton VerifEye 71D48 User manual

Leviton

Leviton VerifEye 71D48 User manual

Leviton VerifEye S8112 User manual

Leviton

Leviton VerifEye S8112 User manual

Leviton VerifEye 6000 Series User manual

Leviton

Leviton VerifEye 6000 Series User manual

Leviton 4000 Series User manual

Leviton

Leviton 4000 Series User manual

Leviton 3300 series User manual

Leviton

Leviton 3300 series User manual

Leviton VerifEye 3300 Series User manual

Leviton

Leviton VerifEye 3300 Series User manual

Leviton Series 2000 User manual

Leviton

Leviton Series 2000 User manual

Leviton VerifEye 71D12 User manual

Leviton

Leviton VerifEye 71D12 User manual

Leviton 3300 series User manual

Leviton

Leviton 3300 series User manual

Leviton 4000-R series User manual

Leviton

Leviton 4000-R series User manual

Leviton Verifeye 8000 Series User manual

Leviton

Leviton Verifeye 8000 Series User manual

Leviton Series 1000 User manual

Leviton

Leviton Series 1000 User manual

Leviton VerifEye Series 4100 Operating and maintenance instructions

Leviton

Leviton VerifEye Series 4100 Operating and maintenance instructions

Leviton Verifeye 8000 Series User manual

Leviton

Leviton Verifeye 8000 Series User manual

Leviton LP8 Series User manual

Leviton

Leviton LP8 Series User manual

Leviton VerifEye User manual

Leviton

Leviton VerifEye User manual

Leviton 6F101 User manual

Leviton

Leviton 6F101 User manual

Leviton VerifEye Series 4100 User manual

Leviton

Leviton VerifEye Series 4100 User manual

Popular Measuring Instrument manuals by other brands

RaySafe x2 user manual

RaySafe

RaySafe x2 user manual

1-CUBE GMA quick guide

1-CUBE

1-CUBE GMA quick guide

Pfeuffer SLN3 manual

Pfeuffer

Pfeuffer SLN3 manual

UniData Communication Systems STARLOG 6529 User's manual supplement

UniData Communication Systems

UniData Communication Systems STARLOG 6529 User's manual supplement

Hanna Instruments HI84531-02 instruction manual

Hanna Instruments

Hanna Instruments HI84531-02 instruction manual

Ponpe 8916 Operation manual

Ponpe

Ponpe 8916 Operation manual

Rachio Wireless Flow Meter user manual

Rachio

Rachio Wireless Flow Meter user manual

Elma Instruments 2500A HandyAmp manual

Elma Instruments

Elma Instruments 2500A HandyAmp manual

Nikon ARROW ID 3000 instruction manual

Nikon

Nikon ARROW ID 3000 instruction manual

Citel LSCM-D user manual

Citel

Citel LSCM-D user manual

LaserLiner 4K5 FL 500 manual

LaserLiner

LaserLiner 4K5 FL 500 manual

Omega RH650 user guide

Omega

Omega RH650 user guide

Starrett 749.1 user guide

Starrett

Starrett 749.1 user guide

Honeywell Green Class meter installation instructions

Honeywell

Honeywell Green Class meter installation instructions

Lutron Electronics LX-1128SD Operation manual

Lutron Electronics

Lutron Electronics LX-1128SD Operation manual

NRG Systems IceFree3 user manual

NRG Systems

NRG Systems IceFree3 user manual

Metria HC-520 Operation manual

Metria

Metria HC-520 Operation manual

DOSER Messtechnik DM7 operating instructions

DOSER Messtechnik

DOSER Messtechnik DM7 operating instructions

manuals.online logo
manuals.online logoBrands
  • About & Mission
  • Contact us
  • Privacy Policy
  • Terms and Conditions

Copyright 2025 Manuals.Online. All Rights Reserved.