manuals.online logo
Brands
  1. Home
  2. •
  3. Brands
  4. •
  5. Leviton
  6. •
  7. Switch
  8. •
  9. Leviton 35A00-1 Mounting instructions

Leviton 35A00-1 Mounting instructions

INSTALLATION AND OPERATING INSTRUCTIONS ENGLISH
PK-93406-10-00-5AAR2243
(35I00-1)
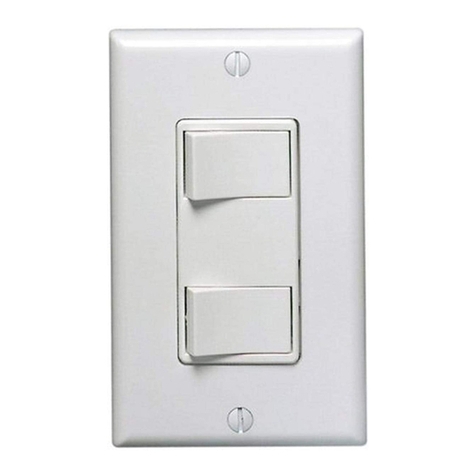
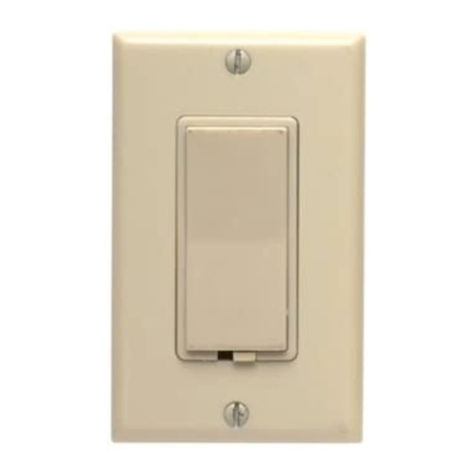
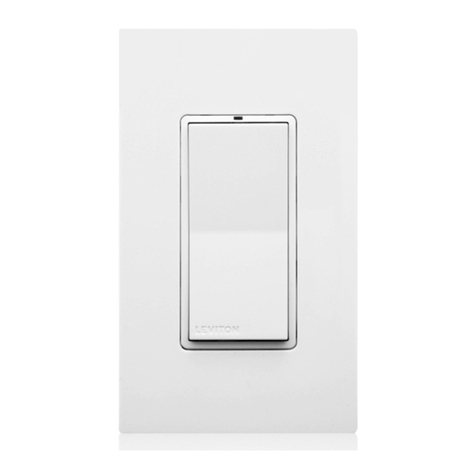
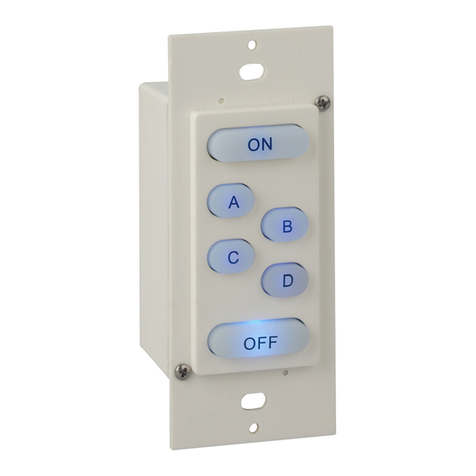
Figure 1 - Leviton UPB™ Wall Switch
WARNINGS AND CAUTIONS
• TO AVOID FIRE, SHOCK, OR DEATH; TURN OFF POWERatcircuitbreakerorfuseandtestthatpowerisoffbeforewiring!
•  To beinstalledand/orusedinaccordancewithappropriateelectricalcodesandregulations.
• Ifyouareunsureaboutanypartoftheseinstructions,consultanelectrician.
• SAVETHESEINSTRUCTIONS.
WARNINGS AND CAUTIONS
•  To reducetheriskofoverheatingandpossibledamagetootherequipment,whenconguredasdimming-capable,DONOT
installtocontrolareceptacle,amotor-operatedappliance,oratransformer-suppliedappliance.
• Usethisdevicewithcopper or copper-clad wire only.
• Forindooruseonly.
For the following Models:
35A00-1Leviton600WDimmerSwitch,35A00-1CFL600WCFL/LEDDimmer,35A00-3Leviton600WNon-Dimming
Switch(collectivelyreferredtoasLevitonUPB™WallSwitch,inthisdocument),and37A00-1LevitonAuxiliarySwitch
NOTE:AllLevitonUPB™WallSwitchesrequireaneutral(white)connectionwire.
Leviton UPB™ Wall Switch Overview
TheLevitonUPB™WallSwitch(Figure 1)allowsforlocalcontroloflightingbyusingtherockerswitch.Italso
incorporatestheUPB™two-waypowerlinecommunicationtechnologythatgivesittheabilitytoberemotelycontrolledby
UPB™compatiblecontrollers.TheLevitonUPB™WallSwitchisalsocapableoftransmittingUPB™messages(including
currentlightlevel)whentherockerswitchisturnedon,turnedoff,brightened,ordimmed.
Eachswitchcanbeconguredtocustomtanindividual’slifestyleanddesires.TheLevitonDimmerSwitchiscapableof
storingupto16presetlightlevelsandfaderatestocreatepowerfullightingscenes.TheLevitonNon-DimmingSwitchis
usedtocontrolsuchloadsasuorescentlightsandceilingfans.
Leviton Auxiliary Switch Overview
The37A00-1LevitonAuxiliarySwitch(Figure2)isanoptionalcompaniondeviceusedwiththeLevitonUPB™Wall
Switchformulti-waycircuits.TheLevitonAuxiliarySwitchhasarockerswitchthatcontrolsthelightingloadintheexact
samemannerastherockerswitchontheLevitonUPB™WallSwitch.
Figure 2 – Leviton Auxiliary Switch
Changing Switch Color
ThecoloroftheLevitonUPB™WallSwitchandAuxiliarySwitchmaybechangedtocomplementtheinteriordécor.The
LevitonUPB™WallSwitchandAuxiliarySwitchissuppliedwithawhiteswitchplate.Additionalcolorsareavailable;
contactyourLevitondistributorformoreinformation.Whenchangingtheswitchplate,makesurethattheswitchis
disconnectedfromallpower,andproceedasfollows:
Figure 3 – Changing Switch Color
Figure 4 – Air-Gap Switch Lever
TheswitchplateattachestotheLevitonUPB™WallSwitchandAuxiliarySwitchwithtwolatchesontherightandtwoon
theleft.Usingasmall-bladedscrewdriver,gentlydepresstheupperandlowerlatchononesidewhileliftinguponthe
plate.Oncethelatchesarereleasedononeside,removetheswitchplatefromtheotherside.
1. Alignthelatchesofthenewswitchplatetotheopeningsonthemountingplateandgentlysnapintoplace.
INSTALLATION INSTRUCTIONS
TheLevitonUPB™WallSwitchiswireddirectlytothelightingcircuitandcanbecontrolledbyaddingoneormoreoptional
LevitonAuxiliarySwitchesproducingmulti-waycircuits.Multi-waycircuitsmakeitpossibleforagroupofswitchesto
controlthesamelightorsetoflights.Thissectionwillillustratehowtomaketheconnections.
NOTES:
1. RefertoFigures 1 and 2todeterminethewirecolorsforeachconnection.
2. AllLevitonUPB™WallSwitchesrequireaneutral(white)connection.
3. TheLine(black)wiremustbeaccessiblefortheinstallationofallLevitonAuxiliarySwitches.Thiswiremaybe
connectedtoeitherphaseofthe120/240Vsupply.Theblueand/orgraywireontheLevitonAuxiliarySwitchcanbe
connectedtoeitherearthgroundorneutral.Theblueand/orgraywireisonlyusedtolighttheLEDontheswitch.This
LEDonlyindicatesthatpowerisappliedandservesasanight-light.ConnectthebluewireonlytolighttheLEDblue.
ConnectthegraywireonlytolighttheLEDred.ConnectboththebluewireandthegraywiretolighttheLEDmagenta.
Air-Gap Switch Lever
TheLevitonUPB™WallSwitchhasanair-gapswitchleverthatwillremoveallpowerfromtheloadforsafeswitch
installationandlightbulbreplacement.To activatetheair-gapswitch,usingyourngernail,pryopentheleveratthe
groove
(Figure 1).Swingtheleverfullyopensothatitisperpendiculartothebottomrim(Figure 4).Afterservicing,pushthe
leverfullyclosedsothatitisparalleltothebottomrim.Thelevermustbepushedfullyclosedfornormaloperation.
Installation Procedure
1. Besurethatallpowertotheloadhasbeendisconnectedbyturningoffthecircuitbreaker.
2.
Ifapplicable,removethefaceplatefromtheexistingwallswitch,removetheexistingwallswitchfromthewallbox,and
disconnectthewiresfromtheexistingwallswitch.Identifythe"Line","Neutral","Load"and"Traveler"(ifapplicable)wires.
3. Besurethattheair-gapswitchleverontheLevitonUPB™WallSwitchisfullyopen.
4. Remove3/4"ofinsulationfromeachofthewiresontheLevitonUPB™WallSwitch.InstalltheLevitonUPB™Wall
SwitchbyconnectingwiresperwiringcongurationshowninFigure 5.
5. InstallanyoptionalLevitonAuxiliarySwitchperwiringcongurationshowninFigure 5.
6. Afterallconnectionshavebeenmade,becertainthatallwireconnectorsarermlyattachedandthereisnoexposed
copper.
7. GentlyplacethewiresandLevitonUPB™WallSwitchintothewallboxwiththeLEDatthetopofdevice.Usingthe
suppliedscrews,attachtheLevitonUPB™WallSwitchtothewallbox.
8. Beforeinstallingthefaceplate,restorepowertothecircuit,andthenfullyclosetheair-gapswitchlever.
9. AftertestingtheLevitonUPB™WallSwitchandAuxiliarySwitchforproperlocaloperation(see Table 2 and Table 3),
installaDecora®faceplateovereachswitch.
(ON/BRIGHT)
LEVER GROOVE
AIR-GAP SWITCH
(OFF/DIM)
BOTTOM
LED
INDICATOR
TOP
GROUND
GREEN
RED
YELLOW
WHITE
LOAD
CONTROL
NEUTRAL
BLACK LINE
YELLOW
BLUE
GRAY
CONTROL
*NEUTRAL
*NEUTRAL
BLACK LINE
BOTTOM
(OFF/DIM)
(ON/BRIGHT)
TOP
(FOR RED INDICATOR)
(FOR BLUE INDICATOR)
INDICATOR
LED
Model Device Maximum Load Next to One Dimmer Next to Two Dimmers
35A00-1 600W 600W 500W
35A00-1CFL 600W 600W 500W
35A00-3 600W 600W 500W
Leviton UPB™ Wall Switch De-Rating
Intwo-ganginstallations,thereisnoneedtode-ratethe35A00-1,35A00-1CFL,or35A00-3.Inthree-ganginstallations,
eachswitchmustbede-ratedfrom600Wto500W.
Table 1 – Leviton Wall Switch De-Rating
Leviton DIMMER SWITCH OPERATION
TheLevitonDimmerSwitchhasmanycongurableitemsthatcanbesetusingtheUPB™UPStartcongurationsoftware.
ThefollowingdescribestheoperationoftheLevitonDimmerSwitchinitsfactorydefaultconguration.
Local Rocker Switch Operation
TheLevitonDimmerSwitchhasarockerswitchthatcanbeusedtocontrolthelightingloadasfollows.
Rocker Event Top Rocker Bottom Rocker
Single-Tap Brightensthelightto100%(on)at
defaultfaderateandrestartsauto
shut-offtimer(ifapplicable).
Fadethelightto0%(off)atdefault
faderate.
Double-Tap Snapsthelightto100%(on)and
overridesautoshut-off.
Snapsthelightto0%(off).
Hold Startsfading(brightening)thelight
towards100%atdefaultfaderate
andrestartsautoshut-offtimer(if
applicable).
Startsfading(dimming)thelight
towards0%atdefaultfaderate.
Release Stopsbrighteningthelightand
restartsautoshut-offtimer(if
applicable).
Stopsdimmingthelight.
Table 2 - Leviton UPB™ Dimmer Switch Local Operation
Leviton NON-DIMMING SWITCH OPERATION
TheLevitonNon-DimmingSwitchhasmanycongurableitemsthatcanbesetusingtheUPB™UPStartconguration
software.ThefollowingdescribestheoperationoftheLevitonNon-DimmingSwitchinitsfactorydefaultconguration.
Local Rocker Switch Operation
TheLevitonNon-DimmingSwitchhasarockerswitchthatcanbeusedtocontroltheloadasfollows.
Table 3 – Leviton Non-Dimming Switch Local Operation
RockerEvent To p Rocker BottomRocker
Single-Tap Turnstheloadonandstartsauto
shut-offtimer(ifapplicable).
Turnstheloadoff.
LEVITON UPB™ WALL SWITCH AND AUXILIARY SWITCH
Cat.No.35A00-1
Installation Instructions and User’s Guide
WEB VERSION
For Technical Assistance Call: 800-824-3005 - www.leviton.com
PK-93406-10-00-5AAR2243
(35I00-1)
© 2013 Leviton Mfg. Co., Inc.
LEVITON LIMITED WARRANTY
Leviton warrants to the original consumer purchaser and not for the benet of anyone else that products manufactured by Leviton under the Leviton brand name (“Product”) will be free from defects in material and workmanship for the time periods indicated below, whichever is shorter: • OmniPro II and Lumina Pro: three (3) years from installation or 42 months from manufacture date.
• OmniLT, Omni IIe, and Lumina: two (2) years from installation or 30 months from manufacture date. • Thermostats, Accessories: two (2) years from installation or 30 months from manufacture date. • Batteries: Rechargeable batteries in products are warranted for ninety (90) days from date of purchase. Note: Primary (non-rechargeable) batteries shipped in products are not warranted.
ProductswithWindows®Operating Systems:Duringthewarrantyperiod,Levitonwillrestorecorruptedoperatingsystemstofactorydefaultatnocharge,providedthattheproducthasbeenusedasoriginallyintended.Installationofnon-Levitonsoftwareormodicationoftheoperatingsystemvoidsthiswarranty.Leviton’sobligationunderthisLimitedWarrantyislimitedtotherepairorreplacement,atLeviton’soption,ofProductthatfailsduetodefectinmaterial
orworkmanship.LevitonreservestherighttoreplaceproductunderthisLimitedWarrantywithneworremanufacturedproduct.Leviton will not be responsible for labor costs of removal or reinstallation of Product.TherepairedorreplacedproductisthenwarrantedunderthetermsofthisLimitedWarrantyfortheremainderoftheLimitedWarrantytimeperiodorninety(90)days,whicheverislonger.ThisLimitedWarrantydoesnotcoverPC-basedsoftware
products.LevitonisnotresponsibleforconditionsorapplicationsbeyondLeviton’scontrol.Levitonisnotresponsibleforissuesrelatedtoimproperinstallation,includingfailuretofollowwrittenInstallationandoperationinstructions,normalwearandtear,catastrophe,faultornegligenceoftheuserorotherproblemsexternaltotheProduct.To viewcompletewarrantyandinstructionsforreturningproduct,pleasevisitusatwww.leviton.com.
FOR CANADA ONLY
Forwarrantyinformationand/orproductreturns,residentsofCanadashouldcontactLevitoninwritingatLeviton
Manufacturing of Canada Ltd to the attention of the Quality Assurance Department, 165 Hymus Blvd, Pointe-
Claire (Quebec), Canada H9R 1E9orbytelephoneat1 800 405-5320.
CFL = CompactFluorescentLamp
LED = SelfBallasted,Light-EmittingDiode
NOTE:Itisnormalforthisswitchtomakeaslightbuzzingsoundduringoperation.Itisalsonormalfortheswitchandwall
platetofeelwarmtothetouch.
LED Indicator
TheLevitonUPB™WallSwitchcomesequippedwithamulti-colorLEDindicatorthatisnormallylittobluewhentheload
isoff.TheLEDwillturnoffwhentheloadisturnedonorsettoanylevelabove0%.TheLEDwillashmagentawhilethe
autoshut-offtimerisrunning(iftheconguredLEDoptionisalwaysoff,theLEDwillremainoffduringthetimeoutperiod).
Ifused,theLEDintheLevitonAuxiliarySwitchisalwayslit.
Leviton AUXILIARY SWITCH OPERATION
TheLevitonUPB™WallSwitchcanbeconnectedtooneormoreLevitonAuxiliarySwitchesproducingmulti-waylighting
circuits.EachLevitonAuxiliarySwitchhasarockerswitchthatcontrolsthelightingloadintheexactsamemannerasthe
rockerswitchontheconnectedLevitonUPB™WallSwitch,aspreviouslydescribed.Whenconnected,theLEDremains
continuallyonatalltimeswhilepowerisapplied.
Setup Mode
To conguretheLevitonUPB™WallSwitchusinganLevitoncontrolleroraPCrunningtheUPB™UPStartconguration
software,itmustbeputintoSetupModeasfollows:
Table 4 – Leviton Wall Switch Setup
Step Operation
1Ta p therockerswitchquickly5times
2TheLevitonUPB™WallSwitchwillashthelightingloadonetimeandblinkitsLEDbluetoindicatethatitis
inSetupMode.Note:theswitchwillautomaticallyexitSetupmodeafter5minutes.
Step Operation
1OntheLevitonUPB™WallSwitchthatyouwanttoresettofactorydefault,taptherockerswitchquickly5
times.
2TheLevitonUPB™WallSwitchwillashthelightingloadonetimeandblinkitsLEDbluetoindicatethatitis
readytobereset.
3Ta p therockerswitchquickly10timestoresettofactorydefaultsetting.
4TheLevitonUPB™WallSwitchwillashthelightingloadonetimeandblinkitsLEDredtoindicatethatithas
beenreset.
5Ta p therockerswitchoncemoretostoptheLEDfromblinking.
NOTE:
Setupmodeandblinkmodetakeprecedenceoverautoshut-off.Iftheautoshut-offtimerisrunning,andtheneithersetup
modeorblinkmodeoccurs,theautoshut-offtimerwillberesetanddisableduntilsetuporblinkmodeexpire.
Reset to Factory Default Settings
To resettheLevitonUPB™WallSwitchtofactorydefaultsettings:
SPECIFICATIONS
Model Number 35A00-1 35A00-1CFL 35A00-3
IncandescentLoads
Dimming
Ye s Ye s Ye s (congurable)
InductiveLoadsDimming Ye s Ye s Ye s (congurable)
FlorescentLoadsNon-
Dimming
Ye s (congurable) Ye s (congurable) Ye s
PowerMaximumDimming 600W/600VA 600W/600VA 600W/600VA
CurrentMaximumNon-
Dimming
5A 5A 5A
Connections 18GA 18GA 18GA
LEDIndicator Ye s Ye s Ye s
Dimensions 4.1x1.75x1.45 4.1x1.75x1.45 4.1x1.75x1.45
Weight 0.25lb. 0.25lb. 0.25lb.
Mounting StandardJBox StandardJBox StandardJBox
InputPower 120±12VAC 120±12VAC 120±12VAC
InputFrequency 60±3Hz 60±3Hz 60±3Hz
OperatingTemperature -40°Fto104°F -40°Fto104°F -40°Fto104°F
RefertothefollowingTableforspecicmanufacturesandmodelnumbersofdimmableCFLandLEDbulbsapprovedfor
usewiththesedimmers:
CFL/LED LampManufacturer LampModel LampWattage(W)
CFL EcoSmart 2R3015DIM 15
CFL EcoSmart ES5CCDF052 5
CFL EcoSmart ES5M10123 23
CFL EcoSmart ES5R315DIM35K 15
CFL EcoSmart ES5R315DIM50K 15
CFL Feit BPESL15T/DM 15
CFL Feit BPESL23T/DIM 23
CFL GE/EnergySmart FLE15/2/DV/R30 15
CFL GE/EnergySmart FLE15HT3/2/DV/SW 15
CFL GE/EnergySmart FLE26/2/DV/R40 26
CFL GE/EnergySmart FLE26HT3/2/DV 26
CFL Litetronics 16AE5L092725 27
CFL Litetronics 18185K085141 5
CFL Litetronics 18185K088141 8
CFL Litetronics 18505A10111 11
CFL Litetronics 18BR5E09152 15
CFL Litetronics/EarthMate E05129LW 5
CFL Litetronics/EarthMate E2752AJLW 27
CFL Neptun 61920-ADIM 20
CFL Neptun/EarthTronics CF24SW1BDIM 24
CFL Phillips EL/APAR38 20
CFL Phillips EL/AR30DIM 16
CFL Phillips EL/AR40DIM 20
CFL Sylvania CF5EL/A15/827/DIM/BL 5
CFL Sylvania CF5EL/B10/827/C/ADP/DIM/BL 5
CFL Sylvania CF14EL/R20/DIM 14
CFL Sylvania CF14EL/TWIST/DIM 14
CFL Sylvania CF19EL/BR40/DIM 19
CFL Sylvania CF24EL/TWIST/827/DIM/RP 24
CFL TCP 2R2014DIM 14
CFL TCP 40123 23
CFL TCP 4R3016TD 16
CFL TCP CCA05 5
CFL ULA SDR23W2P-R30DIM 23
LED CooperLighting-HALO ML706830 14
LED Cree CR6-0210E 12
LED Cree CR6-0323E 12
LED EcoSmart ECO-GU24-575L-YOW 12
LED EcoSmart G2510003-005 8
LED EcoSmart R2010010-013 8
LED LemnisLighting Pharox300 6
LED Phillips 12E26A60 12.5
LED Phillips 3E12B11-E 3
LED Phillips 6E26R20 6
LED Phillips 7E26PAR20-E 7
LED Phillips 8E26A60 8
LED Sylvania LED8PAR20/DIM/827/FL36 8
LED Sylvania LED8PAR20/DIM/827/NFL25 8
LED Sylvania LED8PAR20/DIM/830/NFL25/HVP 8
LED Sylvania LED10PAR30/DIM/SG830/WSP15 10
LED Sylvania LED11PAR30/DIM/SG/830/SP10 11
LED TCP LDA153WH30K 3
LED Toshiba 218-50053 7.8
LED Utilitech 0171150 2
LED Utilitech 0338802 7.5
LED Utilitech 0352280 3.5
LINE
NEUTRAL
37A00 (OPTIONAL)
AUXILIARY SWITCH
AUXILIARY SWITCH
37A00 (OPTIONAL) 35A00
HAI Wall Switch
BLACK BLACK BLACK
REDWHITE
YELLOWYELLOW
*BLUE AND/OR GRAY*BLUE AND/OR GRAY
YELLOW
*CONNECTING THE BLUE AND/OR GRAY WIRE TO NEUTRAL SETS THE COLOR OF THE LED INDICATOR.
CONNECT BLUE FOR BLUE INDICATOR, GRAY FOR RED INDICATOR, OR BOTH FOR MAGENTA INDICATOR.
BLUE AND/OR GRAY WIRE MAY BE CONNECTED TO NEUTRAL OR EARTH GROUND. NEUTRAL IS RECOMMENDED.
GREEN
Line 120VAC, 60Hz
FCC Compliance
ThisequipmenthasbeentestedandfoundtocomplywiththelimitsforaClassBdigitaldevice,pursuanttopart15of
theFCCRules.Theselimitsaredesignedtoprovidereasonableprotectionagainstharmfulinterferenceinaresidential
installation.Thisequipmentgenerates,usesandcanradiateradiofrequencyenergyand,ifnotinstalledandusedin
accordancewiththeinstructions,maycauseharmfulinterferencetoradiocommunications.However,thereisnoguarantee
thatinterferencewillnotoccurinaparticularinstallation.Ifthisequipmentdoescauseharmfulinterferencetoradioor
televisionreception,whichcanbedeterminedbyturningtheequipmentoffandon,theuserisencouragedtotrytocorrect
theinterferencebyoneormoreofthefollowingmeasures:
• Reorientorrelocatethereceivingantenna.
• Increasetheseparationbetweentheequipmentandreceiver.
• Connecttheequipmentintoanoutletonacircuitdifferentfromthattowhichthereceiverisconnected.
• Consultthedealeroranexperiencedradio/TVtechnicianforhelp.
Usehereinofthirdpartytrademarks,servicemarks,tradenames,brandnamesand/orproductnamesarefor
informationalpurposesonly,are/maybethetrademarksoftheirrespectiveowners;suchuseisnotmeanttoimply
afliation,sponsorship,orendorsement.
WEB VERSION

This manual suits for next models

2

Other Leviton Switch manuals

Leviton 1755 User manual

Leviton

Leviton 1755 User manual

Leviton VSHUB User manual

Leviton

Leviton VSHUB User manual

Leviton Renu RE634 User manual

Leviton

Leviton Renu RE634 User manual

Leviton 1081 User manual

Leviton

Leviton 1081 User manual

Leviton decora smart DZ15S User manual

Leviton

Leviton decora smart DZ15S User manual

Leviton Decora L5614 User manual

Leviton

Leviton Decora L5614 User manual

Leviton 5655 User manual

Leviton

Leviton 5655 User manual

Leviton 1754 User manual

Leviton

Leviton 1754 User manual

Leviton DECORA LTB02 User manual

Leviton

Leviton DECORA LTB02 User manual

Leviton OSSNL-ID User manual

Leviton

Leviton OSSNL-ID User manual

Leviton LIT-32712-00 User manual

Leviton

Leviton LIT-32712-00 User manual

Leviton DECORA VPT24 Operating instructions

Leviton

Leviton DECORA VPT24 Operating instructions

Leviton decora smart DW15S User manual

Leviton

Leviton decora smart DW15S User manual

Leviton 41920-SW4 User manual

Leviton

Leviton 41920-SW4 User manual

Leviton 1461 User manual

Leviton

Leviton 1461 User manual

Leviton HCS10 User manual

Leviton

Leviton HCS10 User manual

Leviton powerswitch MDS3-AX User manual

Leviton

Leviton powerswitch MDS3-AX User manual

Leviton SS0AV-091 User manual

Leviton

Leviton SS0AV-091 User manual

Leviton 321 User manual

Leviton

Leviton 321 User manual

Leviton Vizia VZS15-1L User manual

Leviton

Leviton Vizia VZS15-1L User manual

Leviton PowerSwitch DS30-FAX User manual

Leviton

Leviton PowerSwitch DS30-FAX User manual

Leviton HKSWP-XDX User manual

Leviton

Leviton HKSWP-XDX User manual

Leviton renu RE154 User manual

Leviton

Leviton renu RE154 User manual

Leviton Z-MAX r24sd User manual

Leviton

Leviton Z-MAX r24sd User manual

Popular Switch manuals by other brands

CoolGear USBG-4U3MLR2 product manual

CoolGear

CoolGear USBG-4U3MLR2 product manual

D-Link KVM-440 Quick installation guide

D-Link

D-Link KVM-440 Quick installation guide

HIK VISION DS-3E0106P-E/M Series quick start guide

HIK VISION

HIK VISION DS-3E0106P-E/M Series quick start guide

Black Box IC562A installation guide

Black Box

Black Box IC562A installation guide

Tripp Lite NetDirector B064-016-02-IPG quick start guide

Tripp Lite

Tripp Lite NetDirector B064-016-02-IPG quick start guide

Xtreme EX-6010 TW user guide

Xtreme

Xtreme EX-6010 TW user guide

3One data PS5026G-2GS-24PoE Quick installation manual

3One data

3One data PS5026G-2GS-24PoE Quick installation manual

Planet WH-2400M user manual

Planet

Planet WH-2400M user manual

3One data IES2210 Series Quick installation guide

3One data

3One data IES2210 Series Quick installation guide

TV One One-Task 1T-SW8x1CVB instruction manual

TV One

TV One One-Task 1T-SW8x1CVB instruction manual

Black Box LPD100A manual

Black Box

Black Box LPD100A manual

High Sec Labs SC42DU-3 Quick setup guide

High Sec Labs

High Sec Labs SC42DU-3 Quick setup guide

SMART-AVI SM-UHN-8S user manual

SMART-AVI

SMART-AVI SM-UHN-8S user manual

Kromschroeder DG B Series technical information

Kromschroeder

Kromschroeder DG B Series technical information

Qlogic SANbox 5000 Series Interface guide

Qlogic

Qlogic SANbox 5000 Series Interface guide

Black Box SW1042A-MM manual

Black Box

Black Box SW1042A-MM manual

Black Box LH8112A Installation and user guide

Black Box

Black Box LH8112A Installation and user guide

Planet GSD-1022UP user manual

Planet

Planet GSD-1022UP user manual

manuals.online logo
manuals.online logoBrands
  • About & Mission
  • Contact us
  • Privacy Policy
  • Terms and Conditions

Copyright 2025 Manuals.Online. All Rights Reserved.