manuals.online logo
Brands
  1. Home
  2. •
  3. Brands
  4. •
  5. Lexmark
  6. •
  7. Printer Accessories
  8. •
  9. Lexmark T650 User manual

Lexmark T650 User manual

LEXMARK®T650 SERIES
TONER CARTRIDGE REMANUFACTURING INSTRUCTIONS
3232 West El Segundo Blvd., Hawthorne, California 90250 USA •Ph +1 424 675 3300 •Fx +1 424 675 3400 •techsuppor[email protected] •www.uninetimaging.com
© 2009 UniNet Imaging Inc. All trademark names and artwork are property of their respective owners. Product brand names mentioned are intended to show compatibility only. UniNet Imaging does not warrant downloaded information.
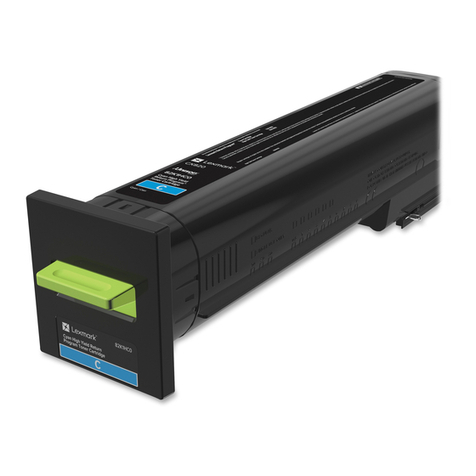
LEXMARK®T650 SERIES TONER CARTRIDGE
LEXMARK T650 SERIES •TONER CARTRIDGE REMANUFACTURING INSTRUCTIONS
3232 West El Segundo Blvd., Hawthorne, California 90250 USA •Ph +1 424 675 3300 •Fx +1 424 675 3400 •techsuppor[email protected] •www.uninetimaging.com
© 2009 UniNet Imaging Inc. All trademark names and artwork are property of their respective owners. Product brand names mentioned are intended to show compatibility only. UniNet Imaging does not warrant downloaded information.
First introduced in March 2009, the Lexmark T650 series is based on the Lexmark T650 1200 dpi engine. Depending on the
model, the print speed is from 45-55 pages per minute. As with all of Lexmark’s new heavy duty machines these machines are
loosely based on the older Optra S machines but these are much faster. Due to the speed and fuser characteristics, the toner is
completely different and unique to this series.
THE MACHINES CURRENTLY AVAILABLE BASED ON THE T650 ENGINE ARE:
Lexmark T650dn
Lexmark T650n
Lexmark T650dtn
Lexmark T652dn
Lexmark T652dtn
Lexmark T652n
Lexmark T654dn
Lexmark T654dtn
Lexmark T654n
As with the T640 machines, these cartridges have killer type chips installed in the Prebate or “Return Program” cartridges that
will not allow the cartridge to be used again until the chipboard is replaced. As with other Lexmark cartridges, the non-prebate or
standard cartridges will work with out replacing the chips. Replacement chips are currently being worked on and at the time of
this writing (July 2009), are not available. They should be available as you read this.
These cartridges have a huge profit potential. They are slightly different than previous versions, but still easy and very worthwhile
to do.
Lexmark has also released cartridges for different areas of the world.
The Americas are one region; Europe, Middle East and Africa are another (EMEA); Latin America, and Asia Pacific region is the
last.
As in the past, most likely the only difference in the cartridges besides the part numbers is the chips.
AMERICAS LEXMARK PART NUMBERS FOR THESE CARTRIDGES:
“Return Program” 7K* Cartridge T650A11A List $153.99**
“Return Program” 25K* Cartridge T650H11A List $430.99**
“Return Program” 36K* Cartridge T654X11A List $455.99** T654 Series only
Standard 7K* Cartridge T650A21A List $206.99**
Standard 25K* Cartridge T650H21A List $483.99**
Standard 36K* Cartridge T654X21A List $508.99** T654 Series only
EUROPE, MIDDLE EAST AND AFRICA (EMEA) LEXMARK PART NUMBERS FOR THESE CARTRIDGES:
“Return Program” 7K* Cartridge 0T650A11E
“Return Program” 25K* Cartridge 0T650H11E
“Return Program” 36K* Cartridge 0T654X11E T654 Series only
Standard 7K* Cartridge 0T650A21E
Standard 25K* Cartridge 0T650H21E
Standard 36K* Cartridge 0T654X21E T654 Series only
REMANUFACTURING THE LEXMARK T650 SERIES TONER CARTRIDGE
By Mike Josiah
LEXMARK T650 SERIES •TONER CARTRIDGE REMANUFACTURING INSTRUCTIONS
3232 West El Segundo Blvd., Hawthorne, California 90250 USA •Ph +1 424 675 3300 •Fx +1 424 675 3400 •techsuppor[email protected] •www.uninetimaging.com
© 2009 UniNet Imaging Inc. All trademark names and artwork are property of their respective owners. Product brand names mentioned are intended to show compatibility only. UniNet Imaging does not warrant downloaded information.
ASIA PACIFIC REGION LEXMARK PART NUMBERS FOR THESE CARTRIDGES:
“Return Program” 7K* Cartridge T650A11P
“Return Program” 25K* Cartridge T650H11P
“Return Program” 36K* Cartridge T654X11P T654 Series only
Standard 7K* Cartridge T650A21P
Standard 25K* Cartridge T650H21P
Standard 36K* Cartridge T654X21P T654 Series only
LATIN AMERICA REGION LEXMARK PART NUMBERS FOR THESE CARTRIDGES:
“Return Program” 7K* Cartridge T650A11L
“Return Program” 25K* Cartridge T650H11L
“Return Program” 36K* Cartridge T654X11L T654 Series only
Standard 7K* Cartridge T650A21L
Standard 25K* Cartridge T650H21L
Standard 36K* Cartridge T654X21L T654 Series only
* Yield based on ISO/IEC 19752. ** List prices current as of July 2009. List prices shown in U.S. American Dollars.
There are also two label cartridges: the T654X04A and the T650H04A.
For Europe change the “A” to an “E”, for Asia change it to an “R”, and for Latin America change it to an “L”.
Lexmark only lists the extra high yield cartridges (36K) for the T654 series.
If these EHY cartridges are installed in the T650/652 machines, you will get an “Unsupported Cartridge” error.
OPTRA S OPTRA SE
The T65x series of cartridges are slightly different physically from all the rest in the Optra and T series. Since all of the car-
tridges from the Optra S on are somewhat similar, we are showing all the different cartridge versions here and throughout
the next page.
LEXMARK T650 SERIES •TONER CARTRIDGE REMANUFACTURING INSTRUCTIONS
3232 West El Segundo Blvd., Hawthorne, California 90250 USA •Ph +1 424 675 3300 •Fx +1 424 675 3400 •techsuppor[email protected] •www.uninetimaging.com
© 2009 UniNet Imaging Inc. All trademark names and artwork are property of their respective owners. Product brand names mentioned are intended to show compatibility only. UniNet Imaging does not warrant downloaded information.
OPTRA T T-520
T-620 T-630
T-640 T-650
LEXMARK T650 SERIES •TONER CARTRIDGE REMANUFACTURING INSTRUCTIONS
3232 West El Segundo Blvd., Hawthorne, California 90250 USA •Ph +1 424 675 3300 •Fx +1 424 675 3400 •techsuppor[email protected] •www.uninetimaging.com
© 2009 UniNet Imaging Inc. All trademark names and artwork are property of their respective owners. Product brand names mentioned are intended to show compatibility only. UniNet Imaging does not warrant downloaded information.
It should be noted that because of the play between the toner hopper and the OPC drum, a shipping lock should be installed in
every cartridge. This holds true even if you are going to hand deliver the cartridge. This lock keeps the pressure off the develop-
er rollers and helps prevent flat spots form occurring during storage.
Machine/cartridge troubleshooting as well as how to run test prints will be covered at the end of this article.
REQUIRED TOOLS
1. Toner approved vacuum
2. Small screwdriver (common style)
3. Phillips head screwdriver (#1)
4. Needle nose pliers
5. Spring hook
REQUIRED MATERIALS
1. T650 toner
2. Drum padding powder
3. Cotton swabs
4. Isopropyl alcohol
5. Cotton pads
6. Long life OPC drum (optional)
7. Wiper blade
8. Shipping lock
9. Recovery blade (optional)
10. Retaining blades (optional)
1. Vacuum the exterior of the toner cartridge. Be careful of the
drum. Place the cartridge on the bench drum-side up (label
face down) with the toner supply towards you. With a spring
hook, remove the two springs from each end of the cartridge.
2. There are two plastic posts from the hopper that fit into the
cartridge shell. Pull the edge of the shell out to release the
posts, and lift up the hopper so that the posts are free.
3. Slide the hopper to the right, and remove from the cartridge.
Pull it out so that the large white bearing comes free. Place the
hopper aside.
4. Remove two small screws from the drum axle plate.
5. Press the drum axle plate out from the inside of the cartridge.
Hold the small helical gear while pulling it out so that the drum is not damaged in the process. Note the location of the spring.
LEXMARK T650 SERIES •TONER CARTRIDGE REMANUFACTURING INSTRUCTIONS
3232 West El Segundo Blvd., Hawthorne, California 90250 USA •Ph +1 424 675 3300 •Fx +1 424 675 3400 •techsuppor[email protected] •www.uninetimaging.com
© 2009 UniNet Imaging Inc. All trademark names and artwork are property of their respective owners. Product brand names mentioned are intended to show compatibility only. UniNet Imaging does not warrant downloaded information.
7. On the wiper blade, remove the contact spring. Remove the two screws on either end of the wiper blade.
LEXMARK T650 SERIES •TONER CARTRIDGE REMANUFACTURING INSTRUCTIONS
3232 West El Segundo Blvd., Hawthorne, California 90250 USA •Ph +1 424 675 3300 •Fx +1 424 675 3400 •techsuppor[email protected] •www.uninetimaging.com
© 2009 UniNet Imaging Inc. All trademark names and artwork are property of their respective owners. Product brand names mentioned are intended to show compatibility only. UniNet Imaging does not warrant downloaded information.
6. On the opposite side, turn the locking ring until it spins freely. Carefully pry off the locking ring and white drive gear.
Gently lift the drum up and out of the cartridge, if you are going to reuse the drum, place it in a light protected area.
8. Place the cartridge so that the waste bin is face-up. Take a
razor blade and cut the foam seal that runs along the back
edge of the wiper blade to separate it from the cartridge. Make
sure to cut along the plastic/foam and not the blade.
9. Hold the cartridge so that it is upright (standing up with the waste bin on the table). With one hand, hold the laser shutter open,
and with the other hand, remove the wiper blade. Work the blade off carefully so that the alignment pin does not break!
LEXMARK T650 SERIES •TONER CARTRIDGE REMANUFACTURING INSTRUCTIONS
3232 West El Segundo Blvd., Hawthorne, California 90250 USA •Ph +1 424 675 3300 •Fx +1 424 675 3400 •techsuppor[email protected] •www.uninetimaging.com
© 2009 UniNet Imaging Inc. All trademark names and artwork are property of their respective owners. Product brand names mentioned are intended to show compatibility only. UniNet Imaging does not warrant downloaded information.
10. Make sure that the two end foams are clean and in their
proper place.
11. Pad the new wiper blade with your preferred wiper blade lubricant.
Replace the blade and two screws into the cartridge. Install the wiper blade contact spring.
LEXMARK T650 SERIES •TONER CARTRIDGE REMANUFACTURING INSTRUCTIONS
3232 West El Segundo Blvd., Hawthorne, California 90250 USA •Ph +1 424 675 3300 •Fx +1 424 675 3400 •techsuppor[email protected] •www.uninetimaging.com
© 2009 UniNet Imaging Inc. All trademark names and artwork are property of their respective owners. Product brand names mentioned are intended to show compatibility only. UniNet Imaging does not warrant downloaded information.
12. Place a piece of clear tape along the edge of the wiper
blade. If the tape does not stick well, the area should be
cleaned with alcohol. It is very important to get a good seal
with the tape, otherwise the cartridge will leak. Trim away any
excess tape. Be careful not to allow any tape into the laser port
opening.
LEXMARK T650 SERIES •TONER CARTRIDGE REMANUFACTURING INSTRUCTIONS
3232 West El Segundo Blvd., Hawthorne, California 90250 USA •Ph +1 424 675 3300 •Fx +1 424 675 3400 •techsuppor[email protected] •www.uninetimaging.com
© 2009 UniNet Imaging Inc. All trademark names and artwork are property of their respective owners. Product brand names mentioned are intended to show compatibility only. UniNet Imaging does not warrant downloaded information.
13. On the supply hopper, take a pair of needle nose pliers and gently pry off the encoder wheel. Make sure you pry it off from
the center shaft so that the wheel does not become damaged. Also take great care to work the wheel off. If it is pulled straight
off, the shaft may pull through the clutch gear on the opposite side of the shaft. Place the wheel in a safe place. Remember, this
wheel tells the cartridge what type of cartridge it is: Prebate or Non-Prebate. The chip is what tells the machine what type of yield
the cartridge has. If this wheel becomes damaged, it must be replaced.
14. Remove the fill plug from the hopper.
Dump out all remaining toner.
LEXMARK T650 SERIES •TONER CARTRIDGE REMANUFACTURING INSTRUCTIONS
3232 West El Segundo Blvd., Hawthorne, California 90250 USA •Ph +1 424 675 3300 •Fx +1 424 675 3400 •techsuppor[email protected] •www.uninetimaging.com
© 2009 UniNet Imaging Inc. All trademark names and artwork are property of their respective owners. Product brand names mentioned are intended to show compatibility only. UniNet Imaging does not warrant downloaded information.
15. Turn the developer roller drive gear to unlock it (hold the other gears when doing this).
Remove the drive gear from the developer roller shaft.
16. Remove the doctor blade spring by pressing down on the
center of the spring.
LEXMARK T650 SERIES •TONER CARTRIDGE REMANUFACTURING INSTRUCTIONS
3232 West El Segundo Blvd., Hawthorne, California 90250 USA •Ph +1 424 675 3300 •Fx +1 424 675 3400 •techsuppor[email protected] •www.uninetimaging.com
© 2009 UniNet Imaging Inc. All trademark names and artwork are property of their respective owners. Product brand names mentioned are intended to show compatibility only. UniNet Imaging does not warrant downloaded information.
17. Remove the developer roller cover by releasing the tab on the left side, and sliding out the right from the pins.
18. On the left (fill plug) side of the static roller there is a small
metal bushing. Press down on the metal spring, take a small
screwdriver, and pry the bushing up so that the tab on the
bushing is facing up. This will release the bushing and devel-
oper roller.
19. Remove the developer roller. Note that there are no spac-
ers on these cartridges. NOTE: Always remove the doctor blade
spring before removing the developer roller. Failure to do this
will cause the doctor blade to slide down from its original posi-
tion and possibly ruin the alignment. Vacuum/blow the toner
hopper clean.
20. With a cotton swab dipped in alcohol, clean the developer
roller seals located on either end of the static roller section.
These seals are made of a white plastic. Also clean the electri-
cal contact that touches the developer roller shaft. Carefully
vacuum or blow off the developer roller. Be careful not to touch
the roller with your hands, or to damage the roller in any way.
21. Remove the doctor blade by sliding the blade down out of
the track.
LEXMARK T650 SERIES •TONER CARTRIDGE REMANUFACTURING INSTRUCTIONS
3232 West El Segundo Blvd., Hawthorne, California 90250 USA •Ph +1 424 675 3300 •Fx +1 424 675 3400 •techsuppor[email protected] •www.uninetimaging.com
© 2009 UniNet Imaging Inc. All trademark names and artwork are property of their respective owners. Product brand names mentioned are intended to show compatibility only. UniNet Imaging does not warrant downloaded information.
22. Inspect the inner and outer retaining blades. If they are
bent in any way, they must be replaced, as they will leak.
23. Clean and install the doctor blade. Make sure the contact
spring is on top of the blade.
LEXMARK T650 SERIES •TONER CARTRIDGE REMANUFACTURING INSTRUCTIONS
3232 West El Segundo Blvd., Hawthorne, California 90250 USA •Ph +1 424 675 3300 •Fx +1 424 675 3400 •techsuppor[email protected] •www.uninetimaging.com
© 2009 UniNet Imaging Inc. All trademark names and artwork are property of their respective owners. Product brand names mentioned are intended to show compatibility only. UniNet Imaging does not warrant downloaded information.
24. Place the longer keyed end of the developer roller into the cartridge and install the roller.
25. Install the bushing onto the developer roller shaft, turning
it so that the tab is facing down. This will lock the roller in
place.
26. Install the doctor blade spring.
27. Fill the hopper with the appropriate amount of toner.
Remember: the amount of toner that can be placed in the
cartridge is controlled by the chip. Install the fill plug.
28. Install the developer roller cover. Make sure the pins are
aligned correctly in the cover.
LEXMARK T650 SERIES •TONER CARTRIDGE REMANUFACTURING INSTRUCTIONS
3232 West El Segundo Blvd., Hawthorne, California 90250 USA •Ph +1 424 675 3300 •Fx +1 424 675 3400 •techsuppor[email protected] •www.uninetimaging.com
© 2009 UniNet Imaging Inc. All trademark names and artwork are property of their respective owners. Product brand names mentioned are intended to show compatibility only. UniNet Imaging does not warrant downloaded information.
29. Install the encoder wheel. 30. Take the OPC drum and lightly coat with your preferred
Lexmark drum lubricant. Place the OPC drum into the cartridge
with the long thin axle on the contact or non-chip side of the
cartridge. Make sure that the spring is in the proper position.
31. Install the drum axle plate and two screws as shown. 32. On the opposite side of the cartridge, install the black
plastic bushing. Turn it until it locks. Press on the white gear
inside the bushing.
LEXMARK T650 SERIES •TONER CARTRIDGE REMANUFACTURING INSTRUCTIONS
3232 West El Segundo Blvd., Hawthorne, California 90250 USA •Ph +1 424 675 3300 •Fx +1 424 675 3400 •techsuppor[email protected] •www.uninetimaging.com
© 2009 UniNet Imaging Inc. All trademark names and artwork are property of their respective owners. Product brand names mentioned are intended to show compatibility only. UniNet Imaging does not warrant downloaded information.
33. Take the toner hopper and install it left side first.
Make sure that the left side post and the white bearing are in their proper slot.
34. On the right side of the cartridge, pull the cartridge shell
out so that the right side post falls into its slot.
35. With the spring hook, replace both springs on to the toner
supply chamber.
36. Re-install the developer roller drive gear. Hold the gear
train and turn the gear until it locks. It’s a little hard to get on
now than if installed before, but it’s easier to install the hopper
this way. Either way is fine though.
37. Replace the chip by removing the screw and sliding the
chip out. When replacing the chip keep the contact side facing
the cartridge.
38. A shipping lock must now be installed. This lock should be
used even if you are going to hand deliver the cartridge. It will
prevent the toner hopper from coming in contact with the OPC
drum, and causing damage to either the drum or the develop-
er roller. Press the two red tabs into the sides of the cartridge
as indicated in the picture supplied with the lock.
LEXMARK T650 SERIES •TONER CARTRIDGE REMANUFACTURING INSTRUCTIONS
3232 West El Segundo Blvd., Hawthorne, California 90250 USA •Ph +1 424 675 3300 •Fx +1 424 675 3400 •techsuppor[email protected] •www.uninetimaging.com
© 2009 UniNet Imaging Inc. All trademark names and artwork are property of their respective owners. Product brand names mentioned are intended to show compatibility only. UniNet Imaging does not warrant downloaded information.
CARTRIDGE TROUBLESHOOTING
Cartridge Repetitive Defect Chart:
OPC Drum 94mm
Developer Roller 62mm
PCR (in machine) 38mm
Machine Error Codes
Most of the error messages appear to be in text, and do not need an explanation.
No numeric messages are listed in the user guide except for the following:
42.xy This is a cartridge region mismatch.
The 'x' = the printer region and the 'y' = the cartridge region.
Both must match each other.
Region Codes are as follows (see text at beginning of article):
0 Worldwide
1 America
2 Europe region
3 Asia region
4 Latin America
9 Invalid region
TAKING TEST PRINTS
Printer Menu:
1. Press the MENU key.
2. Press the DOWN ARROW until “CONFIG MENU” shows on the display.
3. Press the SELECT button.
4. Press the DOWN ARROW until the check mark is next to “PRT QUALITY PAGES.”
5. Press the SELECT button
Included on these pages are:
1. Device information
2. Printer revision
3. Cartridge information
4. Printer margin settings
5. Minimum stroke width

Other manuals for T650

4

This manual suits for next models

9

Other Lexmark Printer Accessories manuals

Lexmark T656 Series User manual

Lexmark

Lexmark T656 Series User manual

Lexmark 5500 MFP User manual

Lexmark

Lexmark 5500 MFP User manual

Lexmark 18L0042 User manual

Lexmark

Lexmark 18L0042 User manual

Lexmark Optra 312 User manual

Lexmark

Lexmark Optra 312 User manual

Lexmark 520-sheet Configuration guide

Lexmark

Lexmark 520-sheet Configuration guide

Lexmark 3200 - MFP - Option User manual

Lexmark

Lexmark 3200 - MFP - Option User manual

Lexmark 10G0149 - PrintCryption Card Encryption... User manual

Lexmark

Lexmark 10G0149 - PrintCryption Card Encryption... User manual

Lexmark CS410 series Use and care manual

Lexmark

Lexmark CS410 series Use and care manual

Lexmark CS410 series User manual

Lexmark

Lexmark CS410 series User manual

Lexmark C 752 User manual

Lexmark

Lexmark C 752 User manual

Lexmark 20T3600 - T 620 B/W Laser Printer User manual

Lexmark

Lexmark 20T3600 - T 620 B/W Laser Printer User manual

Lexmark X644E - With Modem Taa/gov User manual

Lexmark

Lexmark X644E - With Modem Taa/gov User manual

Lexmark ImageQuick User manual

Lexmark

Lexmark ImageQuick User manual

Lexmark T656 Series User manual

Lexmark

Lexmark T656 Series User manual

Lexmark 4600MFP User manual

Lexmark

Lexmark 4600MFP User manual

Lexmark C792 Family User manual

Lexmark

Lexmark C792 Family User manual

Lexmark 5500 MFP User manual

Lexmark

Lexmark 5500 MFP User manual

Lexmark X644E - With Modem Taa/gov User manual

Lexmark

Lexmark X644E - With Modem Taa/gov User manual

Lexmark W840 User manual

Lexmark

Lexmark W840 User manual

Lexmark X644E - With Modem Taa/gov User manual

Lexmark

Lexmark X644E - With Modem Taa/gov User manual

Lexmark 10N0016 User manual

Lexmark

Lexmark 10N0016 User manual

Lexmark ImageQuick SIMM User manual

Lexmark

Lexmark ImageQuick SIMM User manual

Lexmark 250d - E B/W Laser Printer User manual

Lexmark

Lexmark 250d - E B/W Laser Printer User manual

Lexmark 10N0026 User manual

Lexmark

Lexmark 10N0026 User manual

Popular Printer Accessories manuals by other brands

Avery Dennison Mobile Work Station (MWS) Monarch 9876 Operating & maintenance instructions

Avery Dennison

Avery Dennison Mobile Work Station (MWS) Monarch 9876 Operating & maintenance instructions

Canon imagePROGRAF SD-33 Setup guide

Canon

Canon imagePROGRAF SD-33 Setup guide

Epson R200 - Stylus Photo Color Inkjet Printer supplementary guide

Epson

Epson R200 - Stylus Photo Color Inkjet Printer supplementary guide

TonerRefillKits brother ReChargX RX350 instructions

TonerRefillKits

TonerRefillKits brother ReChargX RX350 instructions

TallyGenicom Intelliprint ML450 user guide

TallyGenicom

TallyGenicom Intelliprint ML450 user guide

3M 740B30 Technical data

3M

3M 740B30 Technical data

HP Ink Tank 110 series user guide

HP

HP Ink Tank 110 series user guide

Kyocera KM-C3225 installation guide

Kyocera

Kyocera KM-C3225 installation guide

Acronova Technology Nimbie Sidekick NK50Y installation guide

Acronova Technology

Acronova Technology Nimbie Sidekick NK50Y installation guide

HP DesignJet 800PS Brochure & specs

HP

HP DesignJet 800PS Brochure & specs

Sharp AR-FN7 Service manual

Sharp

Sharp AR-FN7 Service manual

Ricoh 1 Bin Tray  BN1030 Field service manual

Ricoh

Ricoh 1 Bin Tray BN1030 Field service manual

Mir-Aus CISS FLY V.3 installation instructions

Mir-Aus

Mir-Aus CISS FLY V.3 installation instructions

Wham Bam PEX quick start guide

Wham Bam

Wham Bam PEX quick start guide

HP LaserJet CF064A installation guide

HP

HP LaserJet CF064A installation guide

Xerox WorkCentre 123 installation guide

Xerox

Xerox WorkCentre 123 installation guide

Canon Shift Tray-E1 Service manual

Canon

Canon Shift Tray-E1 Service manual

Intermec PM4I user guide

Intermec

Intermec PM4I user guide

manuals.online logo
manuals.online logoBrands
  • About & Mission
  • Contact us
  • Privacy Policy
  • Terms and Conditions

Copyright 2025 Manuals.Online. All Rights Reserved.