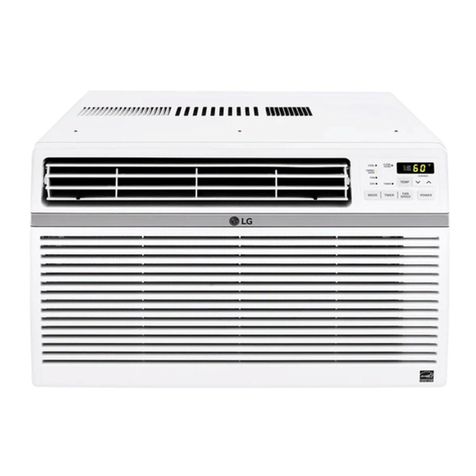
LG LWHD1006R Installation guide

Digital Appliance
LWHD1006R Air Conditioner
Spring 2007
Service
TRAINING MANUAL


LWHD1006R Page 1 of 40 Training Manual
LWHD1006R (Air Conditioner)
Contents 1
Safety Notices and Warnings 2
Warranty 3
Serial Number Interpretation 4
Specifications 5
Introduction 6
Packing/Unpacking 7
Safety 9
Installation Instructions 10
Features 15
Controls 15
Disassembly and Repair – Mechanical Parts 16
Front Grille 16
Cabinet 16
Control Box 17
Air Guide and Turbo Fan (Indoor Fan) 18
Condenser Fan (Outdoor Fan) 19
Shroud (Condenser) 19
Disassembly and Repair – Electrical Parts 20
Overload Protector (OLP) 20
Compressor 20
Capacitor 21
Power Cord 21
Motor (Fan) 22
Refrigeration Cycle 23
Condenser 23
Evaporator 23
Capillary Tube 24
Sealed System Repair Notes 24
Tools Required For Service 24
Service Equipment Setup and Connection 25
Schematic 26
Wiring Diagram and Parts Location 27
PCB Layout 28
Component Location 29
Troubleshooting Charts 30
Troubleshooting Guide 36
Exploded View 38
Parts List 39
070117

LWHD1006R Page 2 of 40 Training Manual
IMPORTANT SAFETY NOTICE
The information in this training manual is intended for use by persons possessing an adequate background
in electrical equipment, electronic devices, and mechanical systems. In any attempt to repair a major
appliance, personal injury and property damage can result. The manufacturer or seller maintains no liability
for the interpretation of this information, nor can it assume any liability in conjunction with its use. When
servicing this product, under no circumstances should the original design be modified or altered without
permission from LG Electronics. Unauthorized modifications will not only void the warranty, but may lead to
property damage or user injury. If wires, screws, clips, straps, nuts, or washers used to complete a ground
path are removed for service, they must be returned to their original positions and properly fastened.
CAUTION
To avoid personal injury, disconnect the power before servicing this product. If electrical power is required
for diagnosis or test purposes, disconnect the power immediately after performing the necessary checks.
Also be aware that many household appliances present a weight hazard. At least two people should be
involved in the installation or servicing of such devices. Failure to consider the weight of an appliance could
result in physical injury.
ESD NOTICE
Some of the electronics in appliances are electrostatic discharge (ESD) sensitive. ESD can weaken or
damage the electronics in these appliances in a manner that renders them inoperative or reduces the time
until their next failure. Connect an ESD wrist strap to a ground connection point or unpainted metal in the
appliance. Alternatively, you can touch your finger repeatedly to a ground connection point or unpainted
metal in the appliance. Before removing a replacement part from its package, touch the anti-static bag to a
ground connection point or unpainted metal in the appliance. Handle the electronic control assembly by its
edges only. When repackaging a failed electronic control assembly in an anti-static bag, observe these
same precautions.
REGULATORY INFORMATION
This equipment has been tested and found to comply with the limits for a Class B digital device, pursuant to
Part 15 of the FCC Rules. These limits are designed to provide reasonable protection against harmful
interference when the equipment is operated in a residential installation. This equipment generates, uses,
and can radiate radio frequency energy, and, if not installed and used in accordance with the instruction
manual, may cause harmful interference to radio communications. However, there is no guarantee that
interference will not occur in a particular installation. If this equipment does cause harmful interference to
radio or television reception, which can be determined by turning the equipment off and on, the user is
encouraged to try to correct the interference by one or more of the following measures: Reorient or relocate
the receiving antenna; Increase the separation between the equipment and the receiver; Connect the
equipment to an outlet on a different circuit than that to which the receiver is connected; or consult the
dealer or an experienced radio/TV technician for help.
DISCLAIMER
The information in this training manual was accurate at the time of publication. Every effort has been made
to ensure accuracy. Updates, changes, etc. are available online via GCSC and LGCSacademy.
COMPLIANCE
The responsible party for this device’s compliance is LG Electronics Alabama, Inc.; 201 James Record Road,
Huntsville, AL, 35813.

LWHD1006R Page 3 of 40 Training Manual
WARRANTY

LWHD1006R Page 4 of 40 Training Manual
SERIAL NUMBER
The serial number is unique to each product. It is required to be paid for
warranty service and to get the correct part in the event a running
production change was made.
Some models may have four (4) letters instead of two (2) for the product
code number. The third and fourth letters are significant only to the
manufacturing facility.

LWHD1006R Page 5 of 40 Training Manual
SPECIFICATIONS
*DB = Dry Bulb
*WB = Wet Bulb

LWHD1006R Page 6 of 40 Training Manual
INTRODUCTION
The LWHD1006R is a 115-volt window air conditioner. This product is a
consumer comfort appliance, not a precision climate control system.
GROUNDING
The power cord is equipped with a 3-prong grounding plug. It also incorporates
an AFCI (Arc Fault Current Interrupter) as an integral part of the power cord.
Press the TEST button to test the device. Then press the RESET button to reset
it. If the TEST button does not trip or the RESET button does not restore power,
unplug the air conditioner and call an Authorized Service Technician.
Be sure the wall outlet connection is secure. Poor contact can trip the device.
DO NOT tamper with or attempt to defeat or repair this device.

LWHD1006R Page 7 of 40 Training Manual
PACKING
Front view of air conditioner, showing
accessories, manual, and cord
packed inside the air guide.
Remove the package containing the
owner’s manual, product registration
card, remote controller, and batteries.
The customer should complete and
return the product registration card
immediately after purchase in order
to be notified in the event there is
ever a safety issue concerning the
product.
The model and serial numbers are
on a sticker on the right side of the
cabinet as you face the air
conditioner inside the house.
These are always visible if the air
conditioner is installed correctly.
There is another sticker on the left
side showing other important
information about the air conditioner,
including refrigerant type and charge.

LWHD1006R Page 8 of 40 Training Manual
•Cut the straps and open the
packing carton from the top.
•Remove the staples to avoid
being cut or tearing your
clothing.
•Remove the front grille
assembly and the upper
guide bar.
•Remove the foam packing
materials.
•Save the packing materials and
box in case you need to store
the air conditioner during the
cool season or if you move or
need to ship it someplace.
•Remove the accessory box. It
contains all the parts you need
for installation. (See page 11.)
Check the parts list to ensure
nothing is missing.
•Part # 3127A10015B.
•Be very careful when lifting the
air conditioner out of the box.
Both front and back have
exposed SHARP fins! Look
before you stick your hands into
the box or try to hold the
product.
•Use two people to lift this air
conditioner.

LWHD1006R Page 9 of 40 Training Manual
SAFETY
•Use a dedicated circuit and no extension cord.
•Be careful of sharp edges on the cabinet and the fins on the condenser
and evaporator.
•Use the air conditioner for its intended purpose, cooling and/or
dehumidifying a room. It is not designed to preserve books, artwork, etc.
or to maintain a strict climate control chamber such as a museum or
humidor.
•Do not use water to clean the air conditioner.
•Unplug the air conditioner to clean it. You don’t want it to switch on by
itself and cause an injury while you are cleaning.
OPERATION
Install the air conditioner in a window and plug it in. Adjust the controls using
either the control panel on the air conditioner or the remote control. Do not use
the power cord to turn the air conditioner on and off.
MAINTENANCE
This air conditioner is designed to operate with approximately ½” of water in the
base pan. The condenser (outdoor) fan is made with a ring around the edge of
the blades. This slinger fan runs in the condensate collected in the pan and
expels it through the condenser, which causes a slight increase in efficiency.
There is no need to add water if the pan is dry.
INSTALLATION
The air conditioner is designed to be installed in a double- or single-hung window
with an actual opening width of 25 ~ 36 inches (not through a hole in a wall or
other structural modification) and plugged into a single-outlet, dedicated 15-amp
circuit without using an extension cord. All applicable clearances should be
maintained. All side louvers on the cabinet must remain exposed on the outside
of the structure. (See drawing, below, and on page 8 of this manual.)
All installations should be in
accordance with the current NEC
(National Electric Code) regulations
and all local codes. Abbreviated
installation instructions are included
on page 8 of this manual to assist the
servicer in the event of having to
remove/reinstall the air conditioner.

LWHD1006R Page 10 of 40 Training Manual
INSTALLATION INSTRUCTIONS
Abbreviated installation instructions are included in the event the installer must
remove the air conditioner or replace it in the window.
•Be sure the air conditioner is
installed securely and firmly.
•Install the air conditioner so the
back (outside) is slightly lower than
the front. This will force water to the
drain at the back of the base pan.
•Install the air conditioner so it is
between 30 and 60 inches above
the floor.
•If excess water collects in the base
pan or the fan makes undesirable
noise running in the water, remove
the rubber plug and install the drain
pipe. You can connect a hose to the
pipe and route the overflow to a
convenient drain place.
•Plug the air conditioner into a
single-outlet 15-amp circuit.
•Be sure furniture and draperies do
not block the air inlet and outlet.
Drain plug (removed).
DIMENSIONS

LWHD1006R Page 11 of 40 Training Manual
INSTALLATION KIT
The installation kit (3127A10015B)
includes all the parts necessary to
install the air conditioner. The
panels (1) are different for the left
and right sides. Refer to the chart to
identify parts.
•Refer to the parts list to ensure
all parts are included.
•Sort the screws by size, shape,
and quantity to determine which
is which.
•The foam strip (PE = poly-
ethylene) with adhesive is to be
applied under the upper guide
before it is attached to the
cabinet.
PREPARATION FOR
INSTALLATION
•Remove the screws at the back
and the sides of the cabinet.
•Grip the base pan handle at the
front and pull the chassis out
while holding the cabinet.
•Remove the packing material
taped to the dryer inside the air
conditioner and discard it.

LWHD1006R Page 12 of 40 Training Manual
PREPARATION FOR INSTALLATION, continued
•Attach the adhesive foam
strip (11) to the bottom of the
upper guide (10).
(See chart, page 11 and right.)
•Attach the upper guide (10) to the
cabinet using three screws
(Type A).
Note that the screws are inserted
into the guide from inside the
cabinet into the upper guide, not
through the guide into the cabinet
on the top.
•Insert the frame guides (12) in the
bottom of the cabinet. Place the
rounded part in the center track and
the tabs into the rectangular slots.
Press the clip down toward the front
of the cabinet until the tabs click
into place.
•Insert the frame curtains into upper
and lower guides, then attach them
with 4 screws (Type A) on each
side. A long driver works best.

LWHD1006R Page 13 of 40 Training Manual
INSTALL THE CABINET
•Open the window.
•Mark the centerline on the sill.
Place the cabinet in the window
and align it with the centerline.
•Attach the cabinet to the sill with
wood screws (Type B).
•Lower the window to allow the
sash to fall behind the upper guide
so the cabinet can rest against it.
•Thread the nut onto the bolt and
thread the bolt into the sill support.
(Do this for both sides.) Use this
bolt to adjust the cabinet height so
it hangs out of the window with the
back (outside) slightly lower than
the front (inside).
•Use 2 screws to attach the sill
support to the bottom of the
cabinet from the inside. You may
have to slide it forward or back to
get it in the correct place.
•Attach the cabinet to the window
sill by driving 3 Type B screws
through the front angle of the
cabinet into the window sill.
•Attach the frame curtains to the
window sash (top) and track
(bottom) using Type C screws.

LWHD1006R Page 14 of 40 Training Manual
•Slide the chassis into the cabinet.
•Reinstall the Type A screws in the
sides and back of the cabinet.
•Place the foam strip in the gap
between the inner and outer
windows to keep drafts and
vermin out.
•Attach the window locking bracket
using a Type C screw. This
secures the window to keep the
air conditioner from falling out and
burglars from getting in.
•Attach the front grille by placing
the top on the cabinet and
engaging the tabs on the grille in
the slots on the cabinet.
•Push the grille down until it snaps
into place.
•Open the front panel and attach
the grille to the chassis using a
Type A screw.

LWHD1006R Page 15 of 40 Training Manual
FEATURES
•Dehumidifier function
•Powerful and quiet
•Slide-in chassis
•Top cool air discharge
•Low air intake
•Built-in adjustable thermistor
•Washable, reusable filter
•Compact size
•Rotary Compressor
•Remote Control
CONTROLS
This air conditioner is designed for window installation and cooling and/or
dehumidifying. There is no heat function.
CONTROL PANEL
1. POWER BUTTON
Turns the air conditioner
ON and OFF
2. TEMPERATURE CONTROL
Adjusts the set temperature
between 60° F and 86° F. It takes
approximately 30 minutes to adjust
the temperature by 5° F under
normal load conditions.
3. OPERATION MODE
Cycles between these settings:
COOL to cool the room
ENERGY SAVER so the fan turns
off with the compressor
FAN to ventilate without cooling
DRY to dehumidify the room
4. FAN SPEED SELECTOR
Cycles between LOW,MEDIUM,
and HIGH fan speeds (F1, F2, and
F3). DRY cycle uses F1 (LOW).
5. TIMER
Allows the air conditioner to be
turned ON or OFF up to 12 hours
later.
6. REMOTE CONTROL SENSOR
Receives signals from the remote.
REMOTE CONTROL

LWHD1006R Page 16 of 40 Training Manual
DISASSEMBLY AND REPAIR
MECHANICAL PARTS
FRONT GRILLE
1. Open the grille downward and
remove the air filter. Clean it if
necessary.
2. Remove the screw that fastens
the grille (bottom center).
3. Pull out on the right side and lift
the grille upward off the 4 hooks
along the top of the cabinet.
4. Replacement is the reverse of
these steps.
CABINET
1. After removing the front grille
(above), remove four screws,
one on each side of the cabinet
and two in the back.
2. Pull the chassis forward out of
the cabinet.
3. Replacement is the reverse of
these steps.
4. The chassis may be removed
from the cabinet for servicing
and the cabinet left in the
window if desired. This may
pose a security issue, as a
burglar may be able to enter the
house through the open cabinet.
Bugs, birds, and other vermin
may come in, as well. If the
service takes more than a
couple of hours, it is a good idea
to uninstall the cabinet.

LWHD1006R Page 17 of 40 Training Manual
CONTROL BOX
1. Remove the front grille.
2. Remove the cabinet.
3. Remove the 2 screws that
fasten the power cord.
4. Disconnect the ground screw
from the base pan.
5. Remove the screw that secures
the control box cover.
6. Remove the connector between
the PCB and the motor lead.
7. Remove the nut and the terminal
cover from the compressor.
8. Remove the leads from the
OLP. (Overload Protector)
(See page 20.)
9. Discharge the capacitor by
shorting it with a 20kΩresistor.
10.Lift the control box out of the
way.
11.Reinstallation is the reverse of
these steps.
Refer to the wiring diagram on
page 27of this manual.

LWHD1006R Page 18 of 40 Training Manual
AIR GUIDE and TURBO FAN (Indoor Fan)
1. Remove the front grille.
2. Remove the cabinet.
3. Remove the control box.
4. Remove the 4 screws that
secure the brace and lift it away.
5. Remove the 2 screws to remove
the upper air guide.
6. Remove 2 screws that secure
the evaporator.
7. Lift the evaporator slightly and
fold it forward, as shown.
8. Press the plastic tabs to remove
the plastic orifice (fan guide).
9. Use pliers to remove the clamp
on the fan shaft. Slide the fan off
the shaft.
10.Remove 2 screws that secure
the lower air guide to the base
pan.
11.Carefully push the lower air
guide backward and pull it out of
the base pan.
12.Replacement is the reverse of
these steps.
Other manuals for LWHD1006R
3
Table of contents
Other LG Air Conditioner manuals

LG
LG SS-H106T4A1 User manual

LG
LG VR242HW NKM1 User manual

LG
LG ARNU243S8R2 User manual

LG
LG Multi Type Air Conditioner User manual

LG
LG Multi V ARNU153B1G2 User manual

LG
LG AK-Q2408C00 User manual

LG
LG LSN090HEV1 User manual

LG
LG LS180HSV5 Installation and operation manual

LG
LG C18AWU.U81 User manual

LG
LG PQDSBC1 User manual
Popular Air Conditioner manuals by other brands

Mitsubishi Electric
Mitsubishi Electric Mr.Slim MS-GK36VA operating instructions

Daikin
Daikin RX15RMVJU installation instructions

Fujitsu
Fujitsu ASY7FSACW Service manual

Carrier
Carrier 50VL-D installation instructions

Frigidaire
Frigidaire FFMS121CQ10 installation manual

INVENTOR
INVENTOR V3MFI-24 user manual