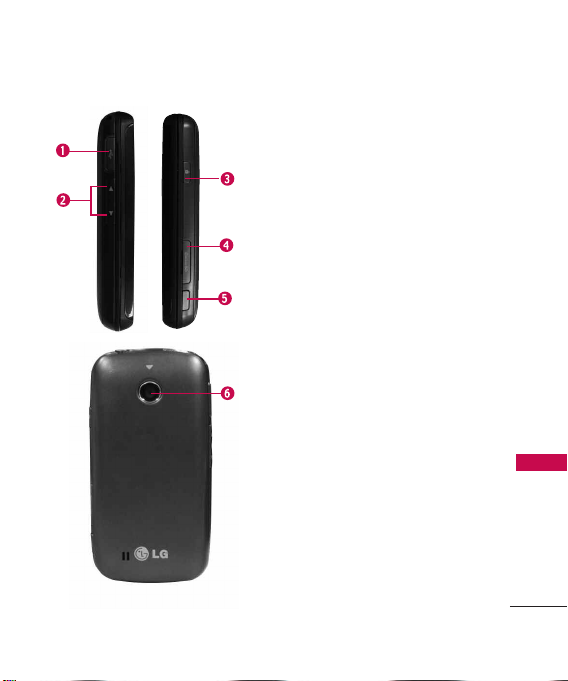
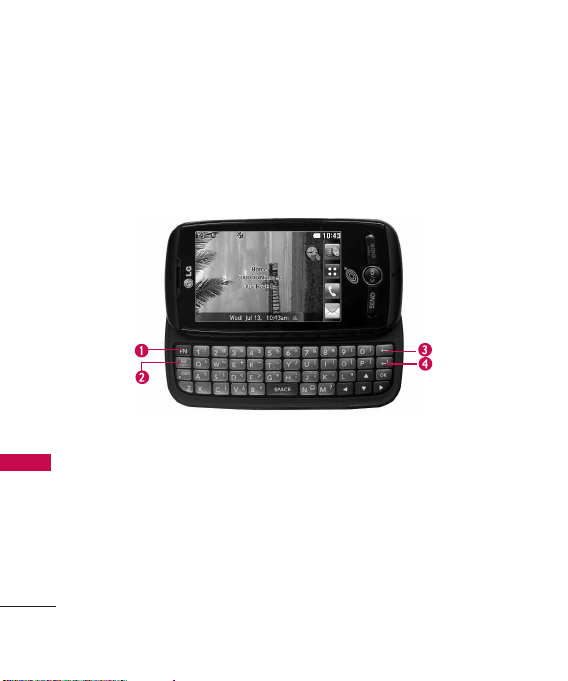
LG 505C User manual

USER GUIDE
USER GUIDE
P/NO : MFL67280901 (1.0)
Printed in China H
LG505C
LG505C

Copyright ©2012 LG Electronics, Inc. All rights reserved.
LG and the LG logo are registered trademarks of LG
Group and its related entities. All other trademarks are the
property of their respective owners.

LG505C User Guide
- English
Some of the contents in this manual may differ from your phone
depending on the software of the phone or your service provider.

Phone Overview
2
Phone Overview
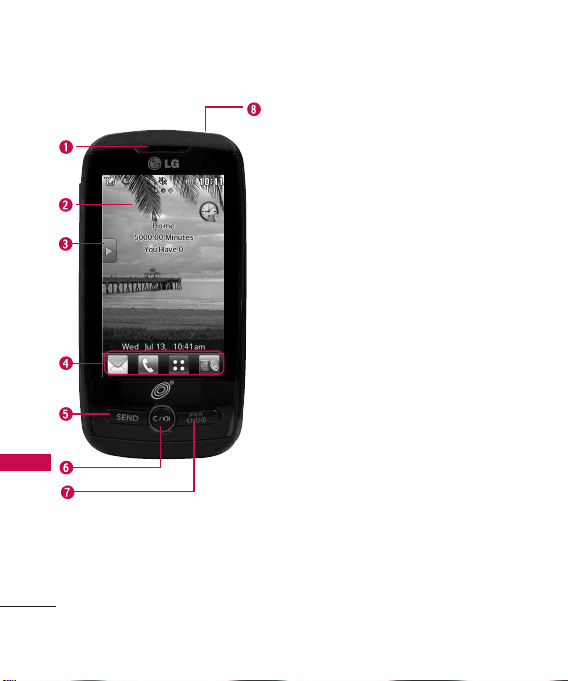
1.Earpiece Lets you hear the caller.
2.
Touchscreen
Displays incoming calls, messages and
status icons as well as a wide variety of content you
select to view.
3.
Shortcuts Key
Allows quick access to a customizable
Shortcut Menu.
4.
Quick Keys
The Quick Keys provide easy access to
Messages, the phone Dial pad, the Main Menu, and the
Prepaid menu, which easily activate with the touch of
your fingertip.
5.
Send Key
Use to answer incoming calls and to place
calls from the Dial pad. From Standby mode, pressing
this key will open the All Calls list of your Recent Calls
menu.
6. Clear/Speaker Key Deletes single spaces or characters.
Also backs out of menus, one level at a time. Press and
hold on the Home screen or press it once during a call
to turn the Speaker on and off.
7.
PWR/End Key
Use toturn the power on and off and to
end a call. Also returns to Standby mode.
8.
Earphone Jack
Allowsthe use of a headsettohear
caller's voice.

3
Phone Overview
1.
Accessory/Charger Port
Connects the phone to
the battery charger or other compatible accessories.
2.
Volume Keys
Use to adjust the Master Volume in
Standby mode and the Earpiece Volume during a
call.
3.
Lock/Unlock Key
Press to lock or unlock the
touchscreen and keys.
4.
microSD™ Slot
Accommodatesoptional
microSD cards up to 16GB.
5.
CameraKey
Press and hold for 3 seconds to
access the Camera function. When pressed once,
the Multimedia menu will be displayed.
6.
Camera Lens
Used for taking pictures. Keep it
clean for optimal photo quality.

Phone Overview
4
Phone Overview
Qwerty Keyboard
Your phone features a QWERTY keyboard specifically designed for
easy and comfortable text entry. The QWERTY keyboard uses a
standard layout.
1. Function Key Allows you enter the alternate
character (such as ~for the W key) on the
QWERTY keyboard. To lock the function key
(as when entering a series of numbers or
alternate characters), press it twice.
2. Shift Key Lets you change letter capitalization
when entering text using the QWERTY
keyboard.
3. Clear Key Use to delete a letter, words or
sentences. Also use it to exit the menu and go
back to standby mode.
4. Enter Key Use to send a message or to make a
selection on the Browser.

Menus Overview
5
Menus Overview
Prepaid
1. Add Airtime
2. Buy Airtime
3. My Phone Number
4. My Airtime Info
5. Airtime Display
6. Serial Number
7. Code Entry Mode
Contacts
1. New Contact
2. Contact List
3. Groups
4. My vCard
5. Speed Dials
Messages
1. New Text Message
2. New Picture
Message
3. Inbox
4. Drafts
5. Outbox
6. Voicemail
7. Templates
8. Delete All
1. Delete Inbox
2. Delete Outbox
3. Delete Drafts
4. DeleteAll
Messages
9. Settings
1. Reply Setting
2. Entry Mode
3. Signature
Recent Calls
1. Missed Calls
2. Received Calls
3. Dialed Calls
4. All Calls
5. Call Timer
6. Data Counter
Games
1. Buy Games
2. Let's Go Bowling
3. Platinum Solitaire 3
4. UNO
Menu Access
Touch Menu to access the phone's main menu.

Menus Overview
6
Menus Overview
Browser
Multimedia
1. Take Photo
2. Record Voice
3. My Stuff
1. Images
2. Sounds
4. Music
1.
Last Song Played
2. All Songs
3. Artists
4. Albums
5. Genres
6. My Playlists
7. Settings
New Text Message
Take Photo
My Schedule
1. Alarm Clock
2. Calendar
3. Notepad
Tools
1. Voice Command
1. Call <Name or
Number>
2. Send Msg to
<Name or
Number or
Group>
3. Check <Item>
4. Contacts
<Name>
5. Play
6. Help
2. Calculator
3. Ez Tip Calculator
4. World Clock
5. Unit Converter
1. Currency
2. Area
3. Length
4. Mass
5. Temperature
6. Volume
7. Velocity
6. Drawing Panel
7. Stopwatch

7
Menus Overview
Settings
1. Sound Profiles
1. Master Volume
2. Call Sounds
3. Message Alerts
4. Button Sounds
5. Service Alerts
6. Power On/Off
2. Display Settings
1. Display Backlight
2. Keypad
Backlight
3. Wallpaper
4. Clocks &
Calender
5. Theme
6. Font Settings
7. Dial Font Size
8. Clock Format
9. Name Match for
Dialing
3. Call Settings
1. Answer Options
2. Auto Retry
3. TTY Mode
4. One Touch Dial
5. Voice Privacy
4. Touch Settings
1. Auto Touch Lock
2. Vibrate Type
3. Vibrate Level
4. Tone Type
5. Calibration
5. Phone Settings
1. Airplane Mode
2. Languages
3. Location
4. Security
5. System Select
6. Bluetooth
7. USB Mass Storage
On/ Off
8. Memory
1. Phone Memory
2. Card Memory
3. Save Options
9. Phone Info
1. My Number
2. ESN/MEID
3. Icon Glossary
4. SW/HW Version

Getting Started with Your Phone
8
Getting Started with Your Phone
The Battery
The phone comes with a
rechargeable battery. The battery
charge level is shown at the top
right corner of the screen.
Installing the Battery
1. Hold the phone
securely with
both hands (as
demonstrated)
and slide the
back cover
downwards to remove it.
2. Align the battery contacts
with the phone terminals at
the top of the battery
compartment and gentlypush
down on the battery until it
clicks into place.
3. Align the back
cover so that
the hooks on
the battery
cover are
placed in the
phone's slot.
4. Slide the back
cover upwards
until it clicks into
place.
Removing the Battery
1. Turn the phone off and
removethe back cover.
2. Use the fingertip cutout at
the bottom of the battery
compartment to lift the
battery out.
Slot
Note
It is important to fully charge the
battery before initial use of the
phone.

Charging the Battery
To use the charger provided with
your phone:
Warning! Use only the charger
provided with the phone. Using
any charger other than the one
included with the L
L
G
G
5
5
0
0
5
5
C
C
may
damage your phone or battery.
1. Gently uncover the phone's
Accessory/Charger Port.
2. Plug the charger into the
Accessory/Charger Port and
the other end into an
electrical outlet. The charge
time varies depending upon
the battery level.
Battery Charge Level
The battery charge level is shown
at the top right corner of the
screen. When the battery charge
level becomes low, the low
battery sensor alerts you in three
ways: sounding an audible tone,
blinking the battery icon, and
displaying a warning message. If
the battery charge level becomes
exceedingly low, the phone
automatically turns off and any
function in progress is not saved.
Turning the Phone On and Off
Turning the Phone On
1. Install a charged battery or
connect the phone to an
external power source if the
battery level is low.
2. Press the
PWR
/
End Key
for about 3 seconds until the
screen turns on.
9
Getting Started with Your Phone
Notice
Please make sure that the'B' side is facing up
before inserting a charger or USB data cable
into the Accessory/Charger Port of your phone.

Getting Started with Your Phone
10
Getting Started with Your Phone
Turning the Phone Off
1. Press and hold the
PWR
/
End
Key
until the screen
turns off.
Signal Strength
Call quality depends on the signal
strength in your area. You can tell
how much signal strength you
have by the number of bars next
to the signal strength icon at the
top left corner of the screen; the
more bars, the stronger the signal.
If you’re having problems with
signal quality, move to an open
area or, when inside a building, try
moving near a window.
Screen Icons
To see the icon glossary, go to
Menu> Settings >
Phone Info
>
Icon Glossary
on
your phone. Then select the type
of icons you would like to see.
Making Calls
1. Make sure the phone is turned
on. If not, press and hold the
PWR/End Key
for about
3 seconds to turn it on.
2. Touch the
Phone Quick Key
and enter the phone
number (include the area
code if needed).
3. Press the
Send Key
or
touch to dial the
number.
4. Press the
PWR/End Key
or touch to end the call.
Correcting Dialing Mistakes
If you make a mistake while
dialing a number, press the
Clear/Speaker Key
once to
erase the last digit entered or
press and hold the
Clear/Speaker Key
down
to delete all digits.

11
Getting Started with Your Phone
Redialing Calls
With the touchscreen unlocked,
press the
Send Key
once to
view a list of all of your recent
calls. The last 270 calls (90
Received, 90 Missed and 90
Dialed) are stored in the call
history list. Touch the
Dial Key
next to any of the entries to
place a call to that number.
You can also press the
Send Key
twice to redial the last
number you dialed, received or
missed in the call history.
Receiving Calls
1. When the phone rings and/or
vibrates, press the
Send Key
to answer the call.
2. Press the
PWR/End Key
or touch to end the call.
Tip
To choose your answer options:
Menu
>
Settings
>
Call Settings
>
Answer Options
.
Choose from the following options:
Any Key/Auto with Handsfree/
Slide Open(Speakerphone)
Note
If you press the
PWR/End Key
or the
Volume Keys
while the phone is ringing, the
ringing or vibration is muted for
that call.

Lock Mode
Sets your phone to require a 4-
digit password in order to use
the phone.
To set Lock Mode on, touch
Menu > Settings >
Phone Settings
>
Security
>
OK
> Enter the Lock Code >
Lock
Phone
. Then choose from
Unlock
,
Lock
, or
On Power Up
.
Mute Function
The Mute function is available
during a phone call. To quickly
activate Mute during a call, touch
. To deactivate Mute, touch
.
Quick Volume Adjustment
Quickly adjust the Master Volume
and Earpiece Volume by pressing
the upper Volume Key to increase
and lower Volume Key to decrease.
Call Waiting
Your cellular service may offer
call waiting. While a call is in
progress, a beep indicates another
incoming call. When call waiting
is enabled, you may put the active
call on hold while you answer the
other incoming call. Check with
your cellular service provider for
information about this function.
Note
Until you change it, the default
lock code/password is the last 4
digits of your phone number.
Quick Access to Convenient Features
12
Quick Access to Convenient Features
Note
The Earpiece Volume can only be
adjusted by the Volume Keys during
a call. To turn sounds off, unlock the
phone, and press and hold the lower
Volume Key for 3 seconds. To return
to Normal Mode, press and hold the
upper Volume Key.

13
Quick Access to Convenient Features
1. Press the
Send Key
to
automatically put the first call
on hold and answer the new call.
2. Press the
Send Key
again to alternate between
calls.
Caller ID
Caller ID displays the phone
number or name of the incoming
call. If the caller’s identity is stored
in Contacts, the name will appear
along with the phone number.
Check with your service provider
for availability.
Speed Dialing
Speed dialing is a convenient
feature that allows you to make
phone calls quickly. A number
key can be assigned to a specific
phone number. By pressing and
holding down a number key, your
phone will recall the phone
number associated from the
Contact List and dial that phone
number for you. Speed Dial
Number 1 is set to Voicemail by
default and cannot be changed.
Dialing Single Digit Speed Dials
(from 2 to 9)
Touch and hold the Speed Dial
number on the Dial pad.
OR
Enter the Speed Dial number and
press the
Send Key
.
Dialing Double Digit Speed
Dials (from 10 to 99)
Enter the first digit and then
touch and hold the key of the
second digit on the Dial pad.
OR
Enter the first and second digits
and press the
Send Key
.

Text Input
Each time you touch a text entry field, the touchscreen automatically
displays a keypad allowing you to enter text, numbers, and symbols. For
example, in a text field, an alphabet keypad appears but you can also
switch to number mode to enter digits.
Entering and Editing Information
14
Entering and Editing Information
Options: Displays available options.
Pen Mode: Allows you to switch to
handwriting mode.
Touch to delete text.
Touch to change to T9, Abc, ABC, 123, or
Symbols mode.
Touch to hide the keypad.

Shortcuts Menu
15
Shortcuts Menu
The Shortcuts menu allows instant access to menus and phone features
with the quick touch of your fingertip. To use the Shortcuts Menu:
1. Unlock the touch screen by pressing and holding or press the
Unlock Key
on the right side of your phone.
2. Touch the
Shorcuts Key
on the Home screen.
3. Drag the desired shortcuts to the top part of the screen to place
them on the Home screen.
4. To close the Shortcuts menu, press the
Clear/Speaker Key
or
the
PWR/End Key
.
Shorcut Tips
●
Touch a shortcut on the Home screen to open the the corresponding tool.
●
To remove a shortcut from the Home screen, touch and hold it and drag it
to .

To view other Home screen panes
Slide your finger left or right across the Home screen. If you slide your
finger Left, you could access and edit Favorites. If you slide your finger
right, you can access Messages.
16
Toview other Home screen panes
Favorites
Allows you to add up
to 11 Contact entries
or Contact Groups to
your list of Favorites
to easily view, call, or
send messages.
Allows you to view
your received
messages.

Contacts in Your Phone’s Memory
17
Contacts in Your Phone’s Memory
The Basics of Storing
Contacts Entries
1. Touch the
Phone Quick Key
and enter the phone
number you want to save (up
to 48 digits).
2. Touch
SAVE
and select either
Add New Contact
or
Update
Existing
.
3. Touch a Phone Label.
Mobile 1/ Home 1/ Office
1/ Mobile 2/ Fax/ Home 2/
Office 2
4. Touch the
Name
field and
enter a name for the contact
(up to 32 characters). Then
touch and . A
confirmation message is
displayed briefly.
Phone Numbers With
Pauses
When you call automated
systems, such as voice mail or
credit billing numbers, you often
have to enter a series of numbers
to navigate through the system.
Instead of entering these
numbers by hand, you can store
the numbers in your Contacts
separated by special pause
characters (W and P). There are
two different types of pauses you
can use when storing a number:
Wait
The phone stops dialing until
you touch
RELEASE
to advance
to the next number.
2-Sec Pause
The phone waits 2 seconds
before sending the next string of
digits.
SAVEDONE
Note
Use
Update Existing
to add
another phone number to a
contact already stored in memory.

Storing a Number with Pause
or Wait
1. Touch the
Phone Quick Key
.
2. Touch .
3. Touch
New Contact
.
4.
Enter a name (up to 32
characters) and a number.
5. Touch
Options
and select
Add 2-Sec Pause
or
Add
Wait.
6. Enter the additional
number(s), touch and
.
Adding a Pause or Wait to an
Existing Number
1. Touch the
Phone Quick Key
.
2. Touch .
3. Scroll through the list and
touch the Contact entry you
wish to edit.
4. Touch
EDIT
.
5. Touch the number.
6. Touch
Options
.
7. Touch
Add 2-Sec Pause
or
Add Wait.
8. Enter the additional
number(s), touch and
then .
Searching Your Phone’s
Memory
The LG505C phone is able to
perform a dynamic search of the
contents in your phone’s
Contact List. A dynamic search
compares entered letters or
numbers on the Dial pad against
the entries in your Contacts. A
matching list is displayed in
descending order. You can then
select a number from the list to
call or view it.
SAVE
DONE
CONTACTS
SAVE
DONE
CONTACTS
Contacts in Your Phone’s Memory
18
Contacts in Your Phone’s Memory
Other manuals for 505C
1
This manual suits for next models
1
Table of contents
Languages:
Other LG Cell Phone manuals