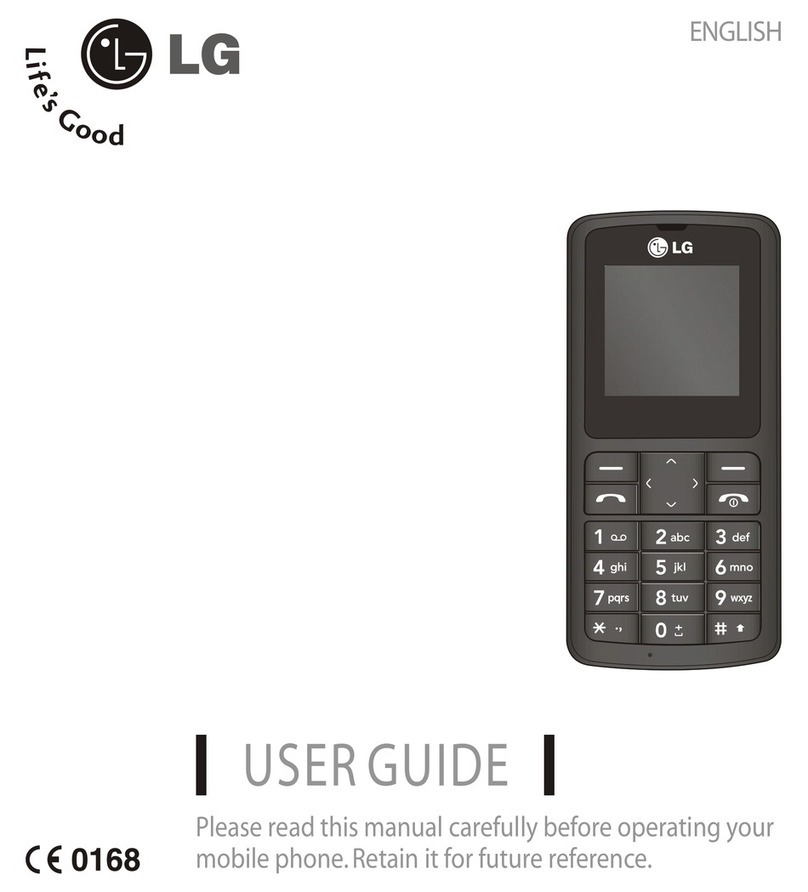
LG LGC-320W User manual

LGC-320/330W
USER GUIDE

LG Information & Communications, Ltd.
Please read this manual before you use this product.
LGC-320/330W
CLR
12
ABC
3
DEF
4
GHI
5
JKL
6
MNO
7
PRS
8
TUV
9
WXY
0
OPER
SND
END/PWR
D
CDMA
DUAL MODE
CELLULAR PHONE
CLR
12
ABC
3
DEF
4
GHI
5
JKL
6
MNO
7
PRS
8
TUV
9
WXY
0
OPER
SND
END/PWR
D
CDMA
DUAL MODE
CELLULAR PHONE

C
ONTENTS
Introduction 7
Highlights 7
Important information 8
Getting Started 11
Phone Parts and Function Key Description 12
LCD Icons 13
Basic Functions 18
Turning the Phone On and Off 18
Making a Call 19
Correcting Dialing Mistakes 19
Receiving Calls 20
Call Waiting 20
Mute 21
Redialing Last Outgoing Number 21
Adjusting Volume 21
Signal Strength 22
Emergency Dialing 23
Viewing Your Telephone Number 23
Phone Book Feature 24
Two Types of Phone Book 24
Personal Phone Book Memory 24
Entering Characters 26
Recent Call History List 27
Retrieving Numbers 28
LG Information & Communications, Ltd.
This manual is based on the production version of the
LGC-320/330W telephone. Software changes may have
occurred after this printing.
LG reserves the right to make changes in technical and
product specifications without prior notice.
Any software relevant to the product is subject to change
after the manual is printed.

INTRODUCTION
Congratulations on your purchase of the LGC-320/330W
phone that has been designed to operate on the latest
digital mobile communication technology, Code Division
Multiple Access (CDMA). This CDMA digital technology
has greatly enhanced voice clarity and can provide a
variety of advanced features. The LGC-320/330W is a
dual mode phone that can also operate on analog cellular
systems (Advanced Mobile Phone Service - AMPS). It is a
new, compact phone with many useful features including:
Large, easy-to read, 4-line, backlight LCD with status
icons.
EVRC (Enhanced Variable Rate Codec)
Paging, Messaging, Voice Mail, and Caller I.D.
18-button lighted keypad.
Exceptionally long battery life built on state-of-the-art
Lithium-ion battery technology and ultra-power saving
circuitry.
Choice of 4 ring sounds and 6 melodies.
Menu-driven interface with prompts for easy operation
and configuration (Soft keys).
Call privacy inherent with CDMA encoding (in CDMA
Mode).
Any key” answer, auto-redial, one-touch, and speed
dial with 99 memory locations.
Optional accessories.
Highlights
Changing the Personal Phone Book 31
Dialing Numbers from Your Phone Book 33
Advanced Phone Book Features 34
Menu Feature 37
Main Menu 37
General Guidelines to Menu Access and Setting 37
Menu Item Descriptions 38
M
essaging Feature
45
New Message Alert 45
Message ACK 46
Reading Newly Received Text Messages 46
Reading Previously Stored Messages 48
Deleting All the Messages 49
Selection of Alert and Sound Types 49
Checking Voice Mailbox 50
Caller I.D. 52
Using Caller I. D. 52
Stored Phone Numbers with Names 52
Radio Frequency (RF) Energy 53
Safety Information 54
Menu Tree 59
Summary Table 61

Optimal Phone Performance
To obtain the best performance possible when operat-
ing your phone:
Fully extend the antenna.
Do not hold the antenna at any time.
Do not use the phone with a damaged antenna.
Speak directly into the microphone.
This User’s Guide contains important information about
how to use and operate the phone. Please read through the
information carefully for optimal performance and to
prevent damaging or misusing the phone.
Any changes or modifications not expressly approved in
this User’s Guide could void your warranty for this
equipment.
Check Components
Each standard unit comes with the LGC-320/330W
phone, a one-slot desk top charger, and one
rechargeable battery. Please make sure that these
components are all included.
Available optional accessories are as follows:
Cigarette lighter adapter
Leather Carrying case
Travel charger
Hands-free car kit
Data kit
Charge the battery fully before using the phone
for the first time.
Important Information

G
ETTING STARTED
This section provides an introduction to the LGC-
320/330W. It includes illustrations and descriptions of the
important phone parts and instructions for getting your
phone powered up and ready to use.
CLR
12
ABC
3
DEF
4
GHI
5
JKL
6
MNO
7
PRS
8
TUV
9
WXY
0
OPER
SND
END/PWR
D
CDMA
DUAL MODE
CELLULAR PHONE
Red light
Antenna
END/PWR
key
CLR key
Scroll
Soft keys
Microphone
Volume
switch
(Side keys)
LCD
screen
Active
Flip
Front of the Phone (LGC-330W)
CautionUsing the phone in proximity to receiving equipment
(i.e., TV or radio) may cause interference.
Keep your phone in a safe place when not in use.
Use only the batteries, antennas, and chargers
provided by LG. The warranty will not be applied to
products provided by other suppliers.
Only authorized personnel should use the phone and
its accessories. Faulty installation or service may
result in accidents and consequently invalidate the
warranty.
Do not hold the antenna while the phone is in use.
OIL
Do not use the phone in designated “no cellular
phone use” areas.
Do not expose the phone to high temperature or
humidity.
Avoid getting your phone wet. If the phone gets wet,
turn the power off immediately and remove the
battery pack. If the phone is inoperable, return it to
the dealer for service.
Avoid shock or impact to the phone
LGC-320W (bar type) has no active flip

Icons are displayed at the top of the LCD screen. Different
indicators appear according to phone’s operating mode.
Signal Strength
Current signal strength is indicated by the
number of lines shown.
No Service
The phone is not receiving system signal.
In Use
Call is in progress.
Note : No Icon indicates the phone is in standby.
Digital indicator
Digital service is available.
Indicates vibration ring feature is enabled.
Roaming
The phone is outside of its home service area.
V : voice message
There is a voice mail message waiting.
T : text message
There is a text message waiting.
Message
Message or page waiting.
[Charge level]
Indicates battery charge level.
D
Rm
V
T
LCD Icons
V
T
Phone Parts and Function Key Descriptions
SNI/Red light
Silent Notification Indicator lights when
END/power key is pressed and when
there are incoming calls and messages.
Volume Switch
Used to adjust volume or to scroll
(Side keys) menus.
LCD Screen
Displays messages and indicator icons.
SEND Key
Allows user to place or answer calls.
END/PWR Key
Used to disconnect a call or get back
to the stand-by mode without affecting
any current settings. Also, used to power
on/off the phone.
MSG Key
Allows quick access to text and voice
mail features
Flip Switch
When closed, terminates a call in
progress, and activates key guard. When
opened, allows user to answer an
incoming call.
CLR Key
Used to clear letters (characters) or to
return to the previous menu. Allows
user to erase one character when
pressed once or to erase all characters
and go back to the standby mode when
pressed and held on for a few seconds.
Soft Keys
The current function of a Soft Key is
defined by the word at the bottom of the
display.
Scroll
Scrolls through the memory locations
and menu items.
1,2,3,...keys
Enters numbers, characters and chooses
menu items.
Antenna
Microphone
SND
END/PWR
CLR
D
Rm

Removing the Battery
1. Turn the power off. (If power is not off, a loss of
stored numbers and messages may occur.)
2. Push and hold down the battery release latch on the
back of the phone and slide out the battery.
Battery Charge level
The battery charge level is shown at the top right of
the LCD screen on the phone.
When the battery charge level
becomes low, the low battery
sensor will alert you in three
ways: sounding an audible tone,
blinking the battery icon outline,
and displaying LOW BATTERY
WARNING”. If the battery charge
level becomes exceedingly low,
the phone will automatically
switch off and any function in
progress will not be saved.
D
Rm
LOW BATTERY
WARNING!
D
Rm
Low BATTERY
WARNING
Phone is Turning off
!
Charge the battery fully before the initial use of the
phone.
The phone comes with a rechargeable battery pack. On
purchasing the phone, one must charge the battery fully.
Keep the battery charged while not in use in order to
maximize talk time and standby time when using the
phone remotely.
Installing the Battery
The Battery pack is keyed so it can only fit one way.
1. Align the groove in the battery pack with the rail on
the back of the phone until the battery pack rests
flush with the back of the phone.
2. Slide the battery pack forward until it clicks. This
locks the battery in place.
Groove
Rail
Using the Battery Pack

Caring for the Battery
You do not need to completely discharge the battery
before recharging. Unlike other battery systems,
there is no memory effect that could compromise the
battery’s performance.
Use only LG batteries and chargers. LG’s chargers
are designed to maximize the battery life.
Do not disassemble or short-circuit the battery pack.
Do not charge the battery pack out of the
temperature range, 32 F to 122 F (0 to 50 ).
Keep the metal contacts of the battery pack clean.
Replace the battery when it no longer provides
acceptable performance. The battery pack may be
recharged hundreds of times before it needs
replacing.
Recharge the battery if it has not been used for a
long time to maximize usability.
Do not expose the battery charger to direct sunlight
or use it in high humidity areas, such as the
bathroom, etc.
Do not leave the battery in hot or cold places, this
may deteriorate the battery performance.
Using the Desktop Charger
The LGC-320/330W desktop charger has a slot for
recharging batteries. The slot accommodates phone
and battery pack for charging.
Warning: Use only the desktop charger provided with
the phone. Using the wrong charger may cause
damage to your phone or battery.
1. Plug the charger into a wall outlet.
The charger should operate on a
110V source.
Once AC power is connected to
the desktop charger, the green
LED blinks once.
2. Insert the phone with an installed
battery pack or a spare battery pack
into the charger’s slot.
Red light indicates the battery is
being charged.
Green light indicates the battery is
fully charged.
If completely discharged, the battery will take 3
hours to recharge. If you leave the phone on while it is
in the desktop charger, the battery will take longer to
charge.

Turning the Phone Off
1. Make sure the active flip is open.
2. Press and hold until “Powering Off” text is
displayed on the LCD, and then release the button.
3. Push the antenna back into the phone, if extended, to
protect it.
When you place a call, follow these
simple steps :
1. Make sure the phone is turned on.
If not, press .
2. Enter the phone numbers together
with area code, if needed.
3. Press .
If the phone is locked or restrict-
ed, enter the Lock Code and press
.
“Call Failed” indicates that the
call did not go through.
4. Press to disconnect the call.
1. Press to erase the most recent digit or letter entered.
2. Press and hold for at least one second to delete all
digits or letters entered.
END/PWR
END/PWR
END/PWR
Placing a Call
D
Rm
202-818-4777
[Save] [Find]
D
Rm
Calling...
202-818-4777
D
Rm
ENTER
LOCK CODE----
[QUIT]
D
Rm
CALL FAILED
Redial in
10 Secs
SND
SND
(auto retry : on)
Correcting Dialing Mistakes
CLR
CLR
BASIC FUNCTIONS
Turning the Phone On
1. Attach a charged battery pack to the phone or
connect the phone to an external power source such
as the cigarette lighter adaptor or car kit.
2. Press for a few seconds until the red light at
the top of the phone flashes.
initial screen is dis-
played and a “beep” sound
will alert you.
As the LCD displays
“[unlock]”, you will see
Security under Menu
Features.
Turning the Phone On and Off
END/PWR
D
Rm
LGC-330W
or LGC-320W
D
Rm
LGC-330W
000-000-000
D
Rm
LGC-330W
Oct 15, Thu
1:00pm
[MENU] [BOOK]
D
Rm
LGC-330W
Oct 15, Thu
1:00pm
[unlock]

This function prevents your voice from being transmitted,
but you can still hear the other party talking.
1. Press [MENU] and while
on a call.
2. To release Mute, press [MENU] and
again.
1. Press to redial the last dialed number.
You can also redial any of the last ten numbers you
have dialed. The last 10 numbers are stored in the
recent call history list(See Phone Book, Recent Call
History List).
The volume buttons on the left top/side of the phone can be
used to adjust the earpiece, ringer, and key beep volumes.
The upper button increases, and the lower button decreases
the volume.
You may adjust the earpiece
volume while you are on a call.
8 4
8 4
D
Rm
MUTE : 0:11
Oct 15, Thu
1:01pm
[MENU][BOOK]
D
Rm
Time : 2:30
Oct 15, Thu
1:01pm
[MENU][BOOK]
Redialing Last Outgoing Number
SND
Adjusting the Volume
D
Rm
EARPIECE 13
VOLUME
[OK] [NEXT]
Mute
1. Press any Key (except or
Volume Keys) to answer, or simply
open Flip Switch.
2. Pressing the key once when
receiving an incoming call mutes
the ringer.
3. Press to disconnect the call.
Your service provider may offer call waiting. While you
are on a call, you may hear two beeps indicating another
incoming call. When call waiting has been enabled, you
can answer other incoming calls, leaving the active call on
hold. Check with your service provider about this feature.
1. Press to receive a waiting call.
2. Press again to switch between calls.
Receiving Calls
D
Rm
Incoming
Call
D
Rm
Time : 0:01
Oct 15, Thu
1 :O1pm
[MENU][BOOK]
Call Waiting
SND
SND
END/PWR
END/PWR
END/PWR

Extend the antenna when the signal
strength is weak.
If you are in a building, the reception
may be better near a window.
As long as your phone is registered on a system, you can
place calls to emergency numbers such as 911-even if
your phone is locked or restricted.
1. Press .
2. Press .
1.Press [MENU] and will
display your phone number for 5
seconds.
Emergency Dialing
9
0
SND
1 1
Viewing Your Telephone Number
D
Rm
Calling...
911
D
Rm
LGC-330W
000-000-000
- The earpiece volume can also
be adjusted through the Menu
Feature.
You may adjust the ringer volume
while the phone is ringing or in
standby mode :
- The ringer volume can also be
adjusted through the Menu
Feature.
- If you adjust the ringer volume
to minimum, the LCD displays
“-Ringer Off-” and you won’t
hear the ringer sound.
The key beep volume is adjusted
through the Menu Feature.
The quality of calls depends on the
signal strength in your area. The
stronger the signal, the better the call
quality. The signal strength icon
indicates the current strength by
means of the number of bars.
If you are outside a service area, the
“No service” icon will be displayed.
No calls can be placed or received,
including emergency calls.
D
Rm
RINGER 11
VOLUME
[ok] [next]
D
Rm
LGC-330W
-Ringer off-
1:23pm
[menu] [book]
D
Rm
KEY BEEP 12
VOLUME
[ok] [next]
Signal Strength
D
Rm
LGC-330W
[MENU] [BOOK]
D
Rm
LGC-330W
OCT 15. THU
1:01 Pm
[MENU] [BOOK]
D
Rm
LGC-330W
OCT 15. THU
1:01 Pm
[MENU] [BOOK]
(Weakest signal)
(Strongest signal)
(No signal received)

3. Enter the Name (up to 12
characters) corresponding to a
phone number and then press
[ok]. If you don t want to enter
a name, press [ok] to proceed
without entering characters.
Note : See Entering Characters
for more details.
4. The phone will ask you to
assign a memory location
where the number will be saved.
Press [ok] to automatically store
the number in the first available
memory location. Or, you also
have the option to enter the
specific two digits of a memory
location number.
5. The phone will ask if you want
to keep this number secret.
Setting memory locations to
“Secret” hides the phone
number, which can only be
deleted, not edited. Choose
“Yes” or “No” using [NEXT]
or or .
6. Press [ok] to save the number.
The LCD will show the number
of memory locations used, and
empty.
D
Rm
Mike
Location ??
auto = 03
[ok] [next]
D
Rm
Make Secret?
No
[ok] [next]
D
Rm
Make Secret?
[ok] [next]
D
Rm
MEMORY
09 u s e d
90 empty
D
Rm
Mike
202-818-4777
[ok] [x X]
PHONE BOOK FEATURE
You can store up to 99 numbers into the Phone Book
giving you easy access to your most frequently dialed
phone numbers. There are two types of phone books :
Personal Phone Book Memory and Recent Call History
List.
The phone has 99 personal phone book memory locations
where you can store up to 32 digits with an associated
name of up to 12 characters.
Saving Numbers to Your Personal Phone Book
Memory locations 1 through 9
should be used for one-touch
dialing of your most commonly
used phone numbers.
1. Enter the phone number that
you want to save (up to 32
digits).
2. Press [SAVE], and the cursor
will appear in the upper left of
the top line which indicates that
the phone is in the Alpha mode.
Two Types of Phone Books
Personal Phone Book Memory
D
Rm
202-818-4777
[save] [find]
D
Rm
?
202-818-4777
[ok] [X X]

Upper or Lower Case Letters
When entering a name, you can use both upper and
lower case letters. By default, letters will be displayed
in upper case. Following are the appropriate steps for
entering lower case letters.
1. Press [X x] once to change
from upper to lower case.
2. Enter desired letter(s).
3. Press [x X] to return to upper
case if needed.
4. Press [ok] when you’re finished.
The phone keeps a list of the last 10 calls you have placed
accepted, missed, or added (using the scratch pad feature)
allowing you to redial any of these numbers quickly and
easily.
Retrieving Recent Call History
1. Press [Book].
2. Press [CALLS].
D
Rm
M?
202-818-4777
[ok] [X x]
D
Rm
Mike
202-818-4777
[ok] [x X]
Recent Call History List
D
Rm
LOOK UP
Location ?
[NAME] [CALLS]
D
Rm
> 202-818-4777
619-635-3333
213-599-3748
[view]
1. Press the key labeled with the letter you want.
2. Press the same key repeatedly to change the letter or
number at the flashing cursor LCD on the screen.
When you have the correct letter or number at the
corresponding cursor, wait two seconds for the
cursor to automatically move to the next space or
manually shift the cursor to the left or right by
pressing or , press to correct any
mistakes.
Punctuation Characters
There are a total of 18 punctuation characters available
to help enter or edit names for phone book storage.
1. Follow the instructions for
Entering Characters.
2. When you want to enter a
punctuation character, press
. You will then see a menu
of the punctuation characters.
3. Press the or to see
all the 18 characters available.
4. Enter the number next to the
character you want to insert.
5. Continue entering any other
characters.
6. Press [ok] when you’re finished.
CLR
D
Rm
PUNCTUATION
1: - 2: . 3: &
4: 5: 6:
7: _ 8: ! 9: ?
D
Rm
PUNCTUATION
1: 2: # 3: %
4: 5: : 6:
7: < 8: > 9: =
Entering Characters

A zero must be prefixed to single digit number
(e.g. 01, 02, 03....).
“Empty Location” will be displayed momentarily
if the memory location is empty.
3. Press to place the call.
Retrieving by Name Search
1. Press [Book].
2. Press [NAME].
3. Enter the letter(s) that you want
to search for. At least two
letters are required for a quick
search.
4. Press [FIND].
The phone searches for the
names starting in those let-
ters. You will see a list of
matches.
5. Press or to scroll
through the list.
6. Press [VIEW] to see details in
that memory location, or press
to place the call.
D
Rm
LOOK UP
Location ??
[NAME CALLS]
D
Rm
SEARCH FOR
MI?
[FIND]
D
Rm
> 03:Mike
05:Michael
[view]
D
Rm
Memory 03
Mike
202-818-4777
[edit erase]
SND
SND
3. Press or to scroll
through the last ten calls until
the arrow prompt points to the
number you want to call.
4. Choose one of the following
options.
Press to place the call.
Press [VIEW] to see details of
the call.
To save the number in a mem-
ory location, Press [SAVE], the
cursor will then appear on the
screen. Follow the steps above
to save numbers in your per-
sonal phone book.
That a name appears in the recent call history means it
already occupies a memory location.
Retrieving Phone Numbers by Memory Location
1. Press [Book].
2. Enter the two-digit memory
location number if you already
know the memory location. The
phone number and the stored
name in that memory location
will be displayed.
SND
Retrieving Numbers
D
Rm
Calling....
202-818-4777
D
Rm
CALL TO
202-818-4777
[SAVE]
D
Rm
LOOK UP
Location ??
[NAME CALLS]
D
Rm
Memory 03
Mike
202-818-4777
[edit erase]

Deleting Phone Numbers in Memory
1. Retrieve and view the memory
location you want to delete.
Follow the steps for “Retrieving
Numbers” on pages 28 thru 30.
2. Press [erase]. The LCD screen
will display “Erase #?” in order
to make sure that you really
want to delete the memory
location. However, if the
memory location is set to
secret, the phone will ask you
to enter “Lock Code”.
3. Press [ok], or enter your Lock
Code as necessary.
4. “-erased-” will be displayed
momentarily to confirm that the
entry has been erased. You may
store new numbers into those
empty memory locations.
D
Rm
LOOK UP
Location ??
[NAME/CALLS]
D
Rm
Memory 11
Nixon
202-888-7777
[edit/erase]
D
Rm
ERASE #11?
Nixon
202-888-7777
[ok] [quit]
D
Rm
ENTER
LOCK CODE
[QUIT]
D
Rm
-erased-
Changing the Personal Phone Book
D
Rm
Memory 11
Nixon
-secret-
[erase]
Retrieving all Stored Memory Locations
1. Press [Book].
2. Press [NAME], [FIND], and
then press or to
scroll through the memory list
until the arrow prompt points to
the number you want to dial.
3. Press [VIEW] to see details in
that memory location.
4. Press to make a call.
D
Rm
Memory 03
Mike
202-818-4777
[edit erase]
SND
D
Rm
LOOK UP
Location ??
[NAME CALLS]
D
Rm
01:Susan
02:Carol
>03:Mike
[view]

10. The phone will display a mes-
sage asking whether or not to
keep the number secret. Select
“NO” or “YES” using [next]
or .
11. Then press [ok].
You can make a call from any memory location either by
speed dialing from the memory list or by pressing
while viewing the full contents of the memory
location.
One-Touch Dialing
One-touch dialing is a convenient feature which
enables you to dial frequently used numbers in your
personal phone book through a single key press (for
memory locations 1 through 9).
1. Press and hold a key (1 through 9) corresponding to
the appropriate memory location for a few seconds.
Two-Touch Dialing (Speed Dialing)
This dialing feature enables you to dial numbers in
your phone book through two key presses (for loca-
tions 10 to 99).
1. Press the first digit.
2. Press and hold the key for the second digit.
Dialing Numbers from your Phone Book
SND
Editing a Stored Memory Location
1. Retrieve and view the memory
location you want to edit.
Follow the steps for “Retrieving
Numbers” on page 28 to 30.
2. Press [edit]. Only the name and
number will remain on the
screen. “Secret” memory loca-
tions cannot be edited.
3. Press to clear the number
to be edited.
4. Enter new number(s).
5. Press [ok] to store the new
number in memory.
6. Edit the name using
and to erase the current
characters. Enter new charac-
ters using the keypad.
7. Press [ok]. Then, you’ll be
asked whether or not to store
the number into the original
memory location.
8. Press [ok] to overwrite the
original memory location. Or,
enter the new two-digit memo-
ry location number.
9. Press [ok] again to confirm the
overwrite or [next] to go back
to the previous screen.
Press to cancel.
D
Rm
Memory 03
Mike
202-818-4777
[edit/erase]
D
Rm
Mike
202-888-7857
[ok]
D
Rm
?ike
202-888-7854
[ok] [X x]
D
Rm
Michael
202-888-7854
[ok] [X x]
D
Rm
Michael
Location ??
original = 01
[ok] [next]
D
Rm
Overwrite?
Michael
01:02-888-7854
[ok] [next]
CLR
CLR
END
D
Rm
LOOK UP
Location ??
[NAME/CALLS]

Storing a Number with Pauses
1. Enter the phone number.
2. Press .
3. Select from the following:
Press for Hard Pause.
Press for Timed Pause.
Press for Hyphens,
hyphens WILL NOT pause a
number.
4. Enter additional number (s) (e.g.
pin number or credit card number).
5. Press [SAVE] to save this number with pauses.
Prepending a Stored Number
Prepend” can be used if you are
out of your home system and need
to prefix the area code to an exist-
ing phone book number. When a
phone book entry, call history, or
message callback number shows
up on the screen, you can make
additions before the original
number. However, you can t edit
the original number during
“Prepending.”
1. Recall a number in memory.
2. Enter the appropriate digits to prepend to the stored
number. Digits entered will be inserted before the
recalled number.
3. Press to dial the prepend digits and the phone
number.
1
2
3
D
Rm
1 H hardPause
2 T TimePause
3- Hyphen
D
Rm
019200-2000
H1234T1234
[save] [find]
D
Rm
CALL TO
888-7777
[save]
SND
D
Rm
PREPENDING
202-888-7777
Dialing from a Memory List
1. Press [Book].
2. Search and find the memory location you want
using or .
3. Press .
Dialing from a Memory Location
On viewing and checking the memory location to call,
press .
Pause Feature
When you call automated systems (such as voice mail
or credit card billing numbers), you may often have to
enter a series of numbers. Instead of entering these
numbers by hand, you can store the numbers in your
phone book separated by special characters called
pauses. There are two kinds of pauses:
Hard pause (H) : The phone pauses until you press
[Resume]to go to the next number.
Timed Pause (T) : The phone will pause for two
seconds before sending the next
set of numbers. Each additional
timed pause will add two more
seconds to the original pause length.
Hyphens : Hyphens are used for appearance
only (e.g. 1-800-555-1234). They
will not add a pause between
numbers.
SND
SND
Advanced Phone Book Features

M
ENU FEATURE
Menus help you browse a variety of
features with the phone and modify
the existing settings as well.
Details about each of the menu items
will be given in the section.
The figures on the right show the
main menu.
1. Press [MENU]. Then the first 3 menu items will appear.
2. Press , or side keys to go through the list of
menu items.
3. Press the number corresponding to the menu item that
you want to select. Then the sub-menu list will appear
on the screen.
4. Press the appropriate number key to select the sub-
menu you want to access.
5. Select preferred settings using the and keys
or right side softkeys. Press to go one step backward
while accessing menu or changing settings.
6. Press [ok] to save the setting or to cancel.
Main Menu
D
Rm
MAIN MENU
1:Volume
2:Display
3:SelectRing
D
Rm
MAIN MENU
4:System
5:Alerts
6:Call Info
D
Rm
MAIN MENU
7:Security
8:Features
0:Own no.
General Guidelines to Menu Access and Settings
CLR
CLR
Prepending a Call History Number
The phone keeps a list of the last 10 calls made,
accepted, missed, or added (using the scratch pad
feature). The most recent entry comes at the top of the
list. If there is no more space left in the memory, the
oldest entry will be lost upon a new entry coming in.
Depending on the operating mode and available
features from your service provider, each entry may
contain the phone number and name.
You may see one of the following messages :
Missed Indicates an unanswered incoming call.
Called By Indicates a call you received.
Call To Indicates a call you placed.
Added Indicates the number added using the
scratch pad feature.

LGC-330W (flip type) is equipped with the function
“on when flip up”, which literally means that
backlight will turn on while flip opens.
2. Banner
Enter banner (up to 12 characters) that is displayed
on the top line when the phone powers up and when
it is in standby. Press [edit] to make changes to
existing banner. Enter a string of characters you
want when storing a name tag in a memory
location. Then press [ok].
3. Show time
Choose whether to display date and time when
available.
4. Auto Hyphen
Automatically inserts hyphens to be consistent with
U.S. phone numbers.
5. Version
View the software version.
Menu 3 Select Ring
This menu allows you to adjust the various ringer
sounds and types.
1. Ring Sound
Select the ringer sound using /or the right
soft key or press [next] on the screen. The first four
are ring sounds and the remaining six are melodies.
Menu 1 Volume
1. Ringer
Adjust ringer and new message alert volume. You
can also adjust the ringer volume by pressing the
side keys while the phone is ringing or in standby
mode.
2. Key Beep
Adjust the key beep volume (the sound the phone
makes when the keys are pressed).
3. Earpiece
Adjust the earpiece volume. You can also adjust this
during a call by pressing the side keys.
Menu 2 Display
1. Backlight
Choose the setting of the LCD and keypad
backlighting. There are four basic choices available;
10 seconds, 30 seconds, always on, always off. “10
seconds” turns the backlight off 10 seconds after the
last key was pressed. “30 seconds” waits 30
seconds after the last key press. “always on” means
that the backlight is on whether the flip is open or
closed. Choosing “always on” will significantly
drain battery. “always off” means that the backlight
is never on.
LGC-320W(bar type) does not include “on when
flip up” function.
Menu Item Descriptions
Other manuals for LGC-320W
1
This manual suits for next models
1
Table of contents
Other LG Cell Phone manuals