LG ARNU363DDA4 User manual

ECONOMIZER FOR
SPLIT ROOFTOP UNITS (RTU)
INSTALLATION MANUAL
Vertical or Horizontal Applications
Compatible Models:
ARNU363DDA4, ARNU483DDA4,
ARNU603DDA4, ARNU723DDA4
Accessory Model Numbers:
Dry-Bulb Economizer: ZCEC01000DB
Single Enthalpy Economizer: ZCEC01000SE
Dual Enthalpy Economizer: ZCEC01000DE

For continual product development, LG Electronics U.S.A., Inc. reserves the right to change specifications without notice.
© LG Electronics U.S.A., Inc.
PROPRIETARY DATA NOTICE
For more technical materials such as submittals, visit www.lghvac.com.
Do not throw away, destroy, or lose this manual.
Please read carefully and store in a safe place for future reference.
Content familiarity is required for proper installation.
The instructions included in this manual must be followed to prevent product malfunction, property damage, injury, or death to the user or
other people. Incorrect operation due to ignoring any instructions will cause harm or damage. The level of seriousness is classified by the
symbols described by the summary list of safety precautions on page 4.
This document, as well as all reports, illustrations, data, information,
and other materials are the property of LG Electronics U.S.A., Inc., and are
disclosed by LG Electronics U.S.A., Inc. only in confidence.

3
Due to our policy of continuous product innovation, some specifications may change without notification.
©LG Electronics U.S.A., Inc., Englewood Cliffs, NJ. All rights reserved. “LG” is a registered trademark of LG Corp. 3
TABLE OF CONTENTS
Introduction��������������������������������������������������������������������������������������������������������������������������������������������������������������������������������������������������������������������� 4
Safety Precautions ������������������������������������������������������������������������������������������������������������������������������������������������������������������������������������������������������ 5-6
Product Data ���������������������������������������������������������������������������������������������������������������������������������������������������������������������������������������������������������������� 7-8
Installation������������������������������������������������������������������������������������������������������������������������������������������������������������������������������������������������������������������ 9-14
Vertical Type Installation ������������������������������������������������������������������������������������������������������������������������������������������������������������������������������������������ 9-10
Horizontal Type Installation������������������������������������������������������������������������������������������������������������������������������������������������������������������������������������ 11-12
Air Flow Separator Installation������������������������������������������������������������������������������������������������������������������������������������������������������������������������������� 13-14
Filter Access ����������������������������������������������������������������������������������������������������������������������������������������������������������������������������������������������������������������� 15
Vertical / Horizontal Orientation ���������������������������������������������������������������������������������������������������������������������������������������������������������������������������������� 15
Vertical and Horizontal Applications �������������������������������������������������������������������������������������������������������������������������������������������������������������������������� 16
Wiring Diagrams������������������������������������������������������������������������������������������������������������������������������������������������������������������������������������������������������ 17-22
Wiring Harness �������������������������������������������������������������������������������������������������������������������������������������������������������������������������������������������������������� 23-24
Single Outside Air Enthalpy Sensor��������������������������������������������������������������������������������������������������������������������������������������������������������������������������� 25
Installing Differential Return Air Sensor �������������������������������������������������������������������������������������������������������������������������������������������������������������������� 26
TITLE 24 / Remote Monitoring������������������������������������������������������������������������������������������������������������������������������������������������������������������������������������� 27
Economizer Controller�������������������������������������������������������������������������������������������������������������������������������������������������������������������������������������������� 28-35
General Information���������������������������������������������������������������������������������������������������������������������������������������������������������������������������������������������������� 28
Menu Structure������������������������������������������������������������������������������������������������������������������������������������������������������������������������������������������������������ 29-35
Troubleshooting ������������������������������������������������������������������������������������������������������������������������������������������������������������������������������������������������������ 36-37

4
Split Rooftop Unit Economizer Installation Manual
Due to our policy of continuous product innovation, some specifications may change without notification.
©LG Electronics U.S.A., Inc., Englewood Cliffs, NJ. All rights reserved. “LG” is a registered trademark of LG Corp.
INTRODUCTION
Installation Supplement
JADE™ Economizer used with LG Split Rooftop Units with 3D Plug Indoor Fan.
(JADE is a is a trademark of Honeywell International, Inc. or its subsidiaries or afiliates.)
In the event that this JADE W7220 economizer is used with an LG 3 to 6 ton rooftop unit with 3D Plug (Centrifugal) Fan, the harness provided with
the accessory kit must be eld-connected to the JADE W7220 economizer controller.
Kit Instructions:
1. Install the JADE W7220 controller and transformer in the unit control box, per economizer instructions. Do not connect wire.
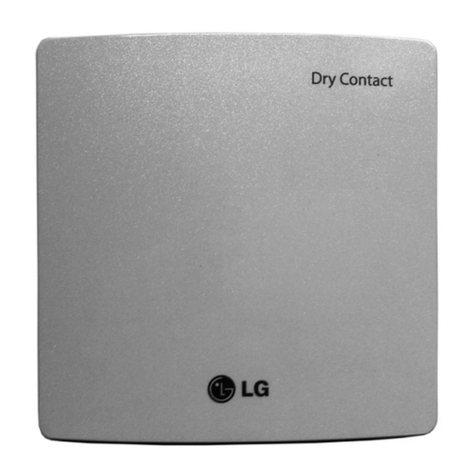
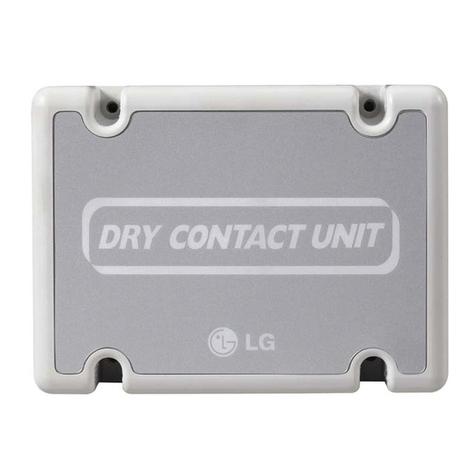
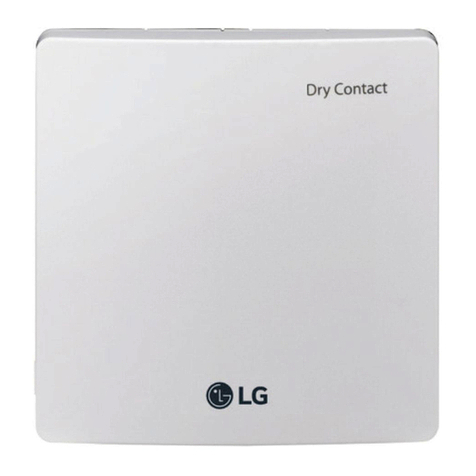
2. Install the LG Dry Contact in the unit control box. The dry contact model names that should be used according to the type of thermostat
are as follows.
LG Dry Contact must be purchased separately�
TABLE OF SYMBOLS
DANGER
This symbol indicates an imminently hazardous situation which, if not avoided, will result in death or serious injury�
WARNING
This symbol indicates a potentially hazardous situation which, if not avoided, could result in death or serious injury�
CAUTION
This symbol indicates a potentially hazardous situation which, if not avoided, may result in minor or moderate injury�
This symbol indicates situations that may result in equipment or property damage accidents only�
This symbol indicates information related to the current procedure�
This symbol indicates an action that should not be performed�
Read these instructions completely before attempting to install the Economizer Accessory.
NOTE
Remote Controller Dry Contact Model No�
LG Thermostat PDRYCB400
Third-Party Thermostat PDRYCB320
Table 1: LG Dry Contacts.

5
Due to our policy of continuous product innovation, some specifications may change without notification.
©LG Electronics U.S.A., Inc., Englewood Cliffs, NJ. All rights reserved. “LG” is a registered trademark of LG Corp.
Introduction
SAFETY PRECAUTIONS
WARNING
Because of system pressure, electrical components, and the
equipment, installation of this accessory may result in death
or serious injury. Only trained qualied installer and service
technicians should install, start-up, and service this equip-
ment.
Electrical Shock Hazard
Before performing service or maintenance operations on the
unit, always turn o main power switch to unit and install
lock(s) and lockout tag(s). Unit may have more than one
power switch. Ensure electrical service to rooftop unit agrees
with voltage and amperage listed on the unit rating plate.
Failure to follow this warning can cause personal injury or death�
Safety Precautions
When installing this accessory, observe precautions in the literature and on any labels attached to the equipment and all
other safety precautions may apply.
• Follow all safety codes�
• Wear safety glasses and work gloves�
• Use care in handling and installing the accessory�
Installation
CAUTION
Cut Hazard
• Failure to follow this caution could result in minor or moderate
injury� Sheet metal parts may have sharp edges or burrs�
• Use care and wear appropriate protective clothing, safety glasses,
and gloves when handling parts and servicing rooftop units�
Cover the duct opening as a pre-caution so individuals can-
not fall into the return duct opening. Be sure to remove the
cover when installation is complete.
Failure to follow this caution may cause minor or moderate injury�
NOTE
Failure to follow this caution may result in damage to the unit� Cover the duct opening as a precaution so objects cannot fall into the return duct
opening� Be sure to remove the cover when installation is complete�

6Due to our policy of continuous product innovation, some specifications may change without notification.
©LG Electronics U.S.A., Inc., Englewood Cliffs, NJ. All rights reserved. “LG” is a registered trademark of LG Corp.
SAFETY PRECAUTIONS
WARNING
The information contained in this manual is intended for use
by an experienced, trained electrician familiar with the U.S.
National Electric Code (NEC) who is equipped with the proper
tools and test instruments.
Failure to carefully read and follow all instructions in this manual can
result in injury or death�
Ensure the unit is connected to a dedicated power source
that provides adequate power.
If the power source capacity is inadequate or the electric work is not
performed properly, it may result in re, electric shock, physical injury or
death�
Refer to local, state, and federal codes, and use power wires
of sucient current capacity and rating.
Wires that are too small may generate heat and cause a re and physi-
cal injury or death�
Secure all eld wiring connections with appropriate wire
strain relief.
Improperly securing wires will create undue stress on equipment power
lugs. Inadequate connections may generate heat, cause a re and
physical injury or death�
Properly tighten all power connections.
Loose wiring may overheat at connection points, causing a re, physical
injury or death�
The information contained in this manual is intended for use by an experienced, trained electrician familiar with the U.S.
National Electric Code (NEC) who is equipped with the proper tools and test instruments.
Failure to carefully read and follow all instructions in this manual can result in equipment malfunction or property damage�
NOTE
Wiring
DANGER
High voltage electricity is required to operate this system.
Adhere to the National Electrical Codes and these
instructions when wiring.
Improper connections and inadequate grounding can cause accidental
injury or death�
Always ground the unit following local, state, and National
Electrical Codes.
Turn the power o at the nearest disconnect before servicing
the equipment.
Electric shock can cause physical injury or death�
Properly size all circuit breakers or fuses.
There is risk of re, electric shock, explosion, physical injury or death.

7
Due to our policy of continuous product innovation, some specifications may change without notification.
©LG Electronics U.S.A., Inc., Englewood Cliffs, NJ. All rights reserved. “LG” is a registered trademark of LG Corp.
Product Data
General Product Data
The economizer system utilizes the latest technology available for integrating the use of free cooling with mechanical cooling for packaged
rooftop units. The code compliant JADE W7220 control system optimizes energy consumption, zone comfort, and equipment cycling by oper-
ating the compressors when the outdoor-air is too warm or humid, integrating the compressor with outdoor air when free cooling is available,
and locking out the compressor when outdoor-air temperature is too cold. Demand control ventilation is supported.
This economizer can be used with variable speed indoor fan motor units. (1 speed fan setup).
Economizer actuators are spring return for full 100% shutdown upon power loss. The economizer system comes standard with fault detec-
tion and diagnostics (FDD), an outdoor air sensor, and mixed air temperature sensor (also called supply air temperature sensor). Outdoor
enthalpy and CO2 sensors are available for field installation. See Table 2 for sensor usage.
Standard integrated barometric relief dampers provide natural building pressurization control. A power exhaust system is available for ap-
plications requiring even greater exhaust capabilities. Refer to LG’s power exhaust documentation (examples: submittals and installation
manual) for more details.
PRODUCT DATA
Accessory List
Table 2: Package Contents.
Economizer Model No� Quantity Contents
ZCEC01000DB
1 Economizer Damper Assembly with Communicating Actuator
1 JADE (HW:W7220) Controller with attached Harness*
1 Mixed Air Sensor (C7250A1001)
1 Outside Air Sensor (C7250A1001)
1 Hood Assembly with Top, Bottom and 2 Sides
2 Separators (Horizontal [1], Vertical [1])
2 Aluminum Filter
1 Hardware Kit (Wiring harness, Transformer)
ZCEC01000SE
1 Economizer Damper Assembly with Communicating Actuator
1 JADE (HW:W7220) Controller with attached Harness*
1 Mixed Air Sensor (C7250A1001)
1 Single Enthalpy Sensor Sylkbus (C7400S1000)
1 Hood Assembly with Top and 2 Sides
2 Separators (Horizontal [1], Vertical [1])
2 Aluminum Filter
1 Hardware kit (Wirings, Transformer)
ZCEC01000DE
1 Economizer Damper Assembly with Communicating Actuator
1 JADE (HW:W7220) Controller with attached Harness*
2 Single Enthalpy Sylkbus Sensor (C7400S1000)
1 Mixed Air Sensor (C7250A1001)
1 Hood Assembly with Top and 2 Sides
2 Separators (Horizontal [1], Vertical [1])
2 Aluminum Filter
1 Hardware Kit (Wirings, Transformer)
* Shipped in hardware kit for eld installation.
HW = Honeywell® (Honeywell is a registered trademark of Honeywell International Inc. or its subsidiaries or afiliates).

8
Split Rooftop Unit Economizer Installation Manual
Due to our policy of continuous product innovation, some specifications may change without notification.
©LG Electronics U.S.A., Inc., Englewood Cliffs, NJ. All rights reserved. “LG” is a registered trademark of LG Corp.
PRODUCT DATA
Accessory List, continued�
Table 3: Economizer Sensor Usage.
Application Economizer with Outdoor Air Dry Bulb Sensor
Outdoor Air Dry Bulb Outside air dry bulb (C7250A1001) sensor is factory installed on economizer.
Single Enthalpy Outside air enthalpy sensor(C7400S1000) is factory provided and field installed.
Mixed Air Sensor Factory provided and field installed.
Differential Enthalpy Sensor Outside air enthalpy sensor (C7400S1000) is factory mounted.
Return air enthalpy sensor (C7400S1000) is factory provided and field mounted in return duct.*
* Includes C7400S sensor and wiring harness.
Compliance
• Economizers meet California Energy Commission Title 24 mandatory section 120.2.i for Fault Detection and Diagnostic controls.
• Economizers meet ASHRAE®90.1 Fault Detection and Diagnostic requirements.
• Economizers meet IECC Fault Detection and Diagnostic requirements.
(ASHRAE and the ASHRAE logo are registered trademarks of the American Society of Heating, Refrigerating, and Air-Conditioning Engineers, Inc.)
IECC requires differential return air sensor, which must be ordered separately� See Honeywell C7400S sensor�

9
Due to our policy of continuous product innovation, some specifications may change without notification.
©LG Electronics U.S.A., Inc., Englewood Cliffs, NJ. All rights reserved. “LG” is a registered trademark of LG Corp.
Installation
Figure 1: Access Panel Locations.
INSTALLATION
Vertical Type Installation
Step 1:
Remove the existing panels, as shown in
Figure 2.
Figure 2: Remove Panels (Step 1).
Step 2:
Insert the adaptor over the return air opening.
Secure the adaptor to the unit floor using the
provided pilot holes, located on the bottom side
flange of the adaptor. See Figure 3.
Figure 3: Insert the adaptor (Step 2).

10
Split Rooftop Unit Economizer Installation Manual
Due to our policy of continuous product innovation, some specifications may change without notification.
©LG Electronics U.S.A., Inc., Englewood Cliffs, NJ. All rights reserved. “LG” is a registered trademark of LG Corp.
INSTALLATION
Vertical Type Installation
Vertical Type Installation, continued�
Step 3:
Insert the bottom of the economizer in the top of
the adaptor, using the alignment rails. See Figure
4.
Figure 4: Insert the economizer in top of the adaptor (Step 3).
Step 4:
Ensure all the connections from the economizer to
the unit are properly installed.
Step 5:
Install the down shot outside air panel, secure the
OA panel to the unit along the vertical side flanges.
Figure 5: Install outside air panel (Step 5).

11
Due to our policy of continuous product innovation, some specifications may change without notification.
©LG Electronics U.S.A., Inc., Englewood Cliffs, NJ. All rights reserved. “LG” is a registered trademark of LG Corp.
Installation
INSTALLATION
Horizontal Type Installation
Step 1:
Remove the existing panels and horizontal cover, see Figure 6.
Figure 6: Remove Panels (Step 1).
Step 2:
Insert the adaptor over the return air opening. Secure the adap-
tor to the unit floor using the provided pilot holes, located on the
bottom side flange of the adaptor.
Figure 7: Insert the adaptor (Step 2).
Step 3:
Install the adaptor cover, see Figure 8.
Figure 8: Install the adaptor cover (Step 3).
Step 4:
Insert the economizer on its side, ensuring that the bottom open-
ing of the economizer is inserted into the horizontal opening.
Secure the economizer to the horizontal opening side flange and
the top of the adaptor cover, by using the provided screws. See
Figure 9.
Figure 9: Insert the economizer (Step 4).

12
Split Rooftop Unit Economizer Installation Manual
Due to our policy of continuous product innovation, some specifications may change without notification.
©LG Electronics U.S.A., Inc., Englewood Cliffs, NJ. All rights reserved. “LG” is a registered trademark of LG Corp.
INSTALLATION
Horizontal Type Installation
Horizontal Type Installation, continued�
Step 5:
Rotate all three (3) barometric relief dampers to the horizontal position. See Figure 10.
Figure 10: Rotate three (3) barometric relief
dampers.
Step 7:
Remove the OA hood from the down shot outside air
panel and re-install it on to the provided horizontal
panel. Ensure to also install the filter access panel.
See Figure 11.
Figure 11: Install horizontal panel (Step 7).
Step 6:
Ensure all the connections from the economizer to the unit are properly installed.
Step 8:
Install the horizontal outside air panel with the horizontal filter access
panel, secure the OA panel to the unit along the vertical side flanges. See
Figure 12.
Figure 12: Install horizontal lter access panel (Step 8).

13
Due to our policy of continuous product innovation, some specifications may change without notification.
©LG Electronics U.S.A., Inc., Englewood Cliffs, NJ. All rights reserved. “LG” is a registered trademark of LG Corp.
Installation
INSTALLATION
Air Flow Separator Installation
The installation of the air ow separator is the same process for both the vertical and horizontal orientation, only the separator itself changes.
Step 1:
Remove one of the filters exposing the economizer. See Figure 13.
Figure 13: Vertical or Horizontal (Step 1).
Vertical Orientation
Horizontal Orientation
Step 2:
If you are using the economizer in the vertical orientation
use the separator shown in Figure 14, otherwise use the
separator shown in Figure 15 for the horizontal orientation.
Once which separator required has been chosen, attach
the black bulb gasket on to the edge opposite of the pilot
holes. If necessary, trim the bulb gasket to length.
Figure 14: Vertical Separator (Step 2). Figure 15: Horizontal Separator Step 2).

14
Split Rooftop Unit Economizer Installation Manual
Due to our policy of continuous product innovation, some specifications may change without notification.
©LG Electronics U.S.A., Inc., Englewood Cliffs, NJ. All rights reserved. “LG” is a registered trademark of LG Corp.
INSTALLATION
Air Flow Separator Installation
Air Flow Separator Installation, continued�
Step 3:
Insert the separator into the economizer with the bulb gas-
ket facing the opening.
For the horizontal orientation, ensure that the notch on
the splitter is facing upward and the edge follows the filter
contour.
Figure 16: Vertical Orientation (Step 3). Figure 17: Horizontal Orientation Step 3).
Step 4:
Secure the filter separator to the splitter using the pilot
holes.
Figure 18: Vertical Orientation (Step 4). Figure 19: Horizontal Orientation Step 4).

15
Due to our policy of continuous product innovation, some specifications may change without notification.
©LG Electronics U.S.A., Inc., Englewood Cliffs, NJ. All rights reserved. “LG” is a registered trademark of LG Corp.
Installation
FILTER ACCESS
Vertical / Horizontal Orientation
Filter Access, Vertical Orientation
Filter access is gained by removing the unit horizontal panel. Push the middle filter rack up allowing the bottom filter to be pulled out.
Figure 20: Removing the Horizontal Panel. Figure 21: Pushing Middle Filter Rack Up. Figure 22: Pulling Out the Bottom Filter.
Filter Access, Horizontal Orientation
Filter access is gained by removing the filter panel. Push the middle filter rack up allowing the bottom filter to be pulled out. Rotate the filter
90° inside the unit, and then pull the filter out.
Figure 23: Removing the Filter Panel. Figure 24: Pushing Middle Filter Rack Up. Figure 25: Pulling Out the Bottom Filter.

16
Split Rooftop Unit Economizer Installation Manual
Due to our policy of continuous product innovation, some specifications may change without notification.
©LG Electronics U.S.A., Inc., Englewood Cliffs, NJ. All rights reserved. “LG” is a registered trademark of LG Corp.
VERTICAL AND HORIZONTAL APPLICATIONS
Figure 26: Economizer: Vertical and Horizontal Applications.

17
Due to our policy of continuous product innovation, some specifications may change without notification.
©LG Electronics U.S.A., Inc., Englewood Cliffs, NJ. All rights reserved. “LG” is a registered trademark of LG Corp.
Installation
Figure 27: Economizer Wiring Diagram with PDRYCB400.
WIRING DIAGRAMS
11/21

18
Split Rooftop Unit Economizer Installation Manual
Due to our policy of continuous product innovation, some specifications may change without notification.
©LG Electronics U.S.A., Inc., Englewood Cliffs, NJ. All rights reserved. “LG” is a registered trademark of LG Corp.
WIRING DIAGRAMS
Figure 28: Economizer Wiring (Single Dry Bulb) with PDRYCB400.
Figure 29: Economizer Wiring (Single Enthalpy) with PDRYCB400.

19
Due to our policy of continuous product innovation, some specifications may change without notification.
©LG Electronics U.S.A., Inc., Englewood Cliffs, NJ. All rights reserved. “LG” is a registered trademark of LG Corp.
Installation
WIRING DIAGRAMS
Figure 30: Economizer Wiring (Dual Enthalpy) with PDRYCB400.

20
Split Rooftop Unit Economizer Installation Manual
Due to our policy of continuous product innovation, some specifications may change without notification.
©LG Electronics U.S.A., Inc., Englewood Cliffs, NJ. All rights reserved. “LG” is a registered trademark of LG Corp.
WIRING DIAGRAMS
Figure 31: Economizer Wiring Diagram with PDRYCB320.
11/21
Other manuals for ARNU363DDA4
2
This manual suits for next models
3
Table of contents
Other LG Control Unit manuals
Popular Control Unit manuals by other brands

Wheelock
Wheelock MZC-RM installation instructions

Bradley
Bradley EFX 60 S19-2200 Series Installation and maintenance instructions

Advantech
Advantech AMAX-175 Series user manual

Rtelligent
Rtelligent R110PLUS user manual

Mitsubishi Electric
Mitsubishi Electric MELSEC iQ-R Series user manual

Honeywell
Honeywell SV2 Series user manual