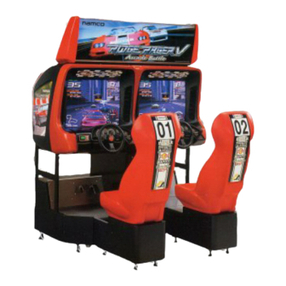
LIGHT & WONDER Kascada SK-1V227ST User manual

Kascada™ (SK-1V227ST) Service
Manual
Upright Cabinet with Dual 27-Inch Video and Slant Back Top
August 2022
1581413[A]
Original Instructions: All non-English editions of this
document are translations of the original instructions.
CONFIDENTIAL

© 2022 Light & Wonder, Inc. and its Subsidiaries. All rights reserved. CONFIDENTIAL
Kascada™ (SK-1V227ST) Service Manual
1581413 [A] August 2022 2
The look and feel of the games described and displayed herein and the individual components and displays of such games are trade dress of
Light & Wonder, Inc. and its Subsidiaries.
©2022 Light & Wonder, Inc. and its Subsidiaries. All rights reserved. Unauthorized distribution prohibited. CONFIDENTIAL.
This document (“Document”) has been provided to you by Light & Wonder, Inc. or one or more of its directly or indirectly wholly owned
companies (collectively, “Light & Wonder”). This Document contains a variety of: (a) materials and other items relating to products or
services of Light & Wonder or its licensors or other third parties, including layout, information, text and scripts, data, files, images,
photographs, pictures, artwork, designs, graphics, logos, drawings, charts, button icons, instructions, illustrations, advertising copy,
technology, interactive features, “look and feel,” and the compilation, assembly and arrangement of the materials of the Document, and
copyrightable material; (b) service marks, trademarks, logos, trade names and trade identities of Light & Wonder or its licensors or third
parties, when applicable; and (c) other forms of intellectual property (all of the foregoing in (a), (b) and (c), collectively, “Content”). This
Document and the Content are owned or controlled by Light & Wonder or its licensors or third parties, when applicable. All right, title, and
interest in and to the Content is the property of Light & Wonder or its licensors, when applicable, and is protected by the intellectual property
laws of the United States and elsewhere to the fullest extent possible. All ® notices signify marks registered in the United States by Light &
Wonder or its licensors, when applicable. Light & Wonder grants the intended recipient a limited, non-exclusive, revocable, non-assignable,
personal, and non-transferable license to view and/or print one copy of the Content, to be used only for its original intended purpose and
otherwise to be kept confidential, but Light & Wonder or its licensors, as the case may be, retain ownership of such Content. The foregoing
limited license does not provide the intended recipient with any ownership of, or any other intellectual property interest in, any Content and
this license may be immediately suspended or terminated for any reason, by Light & Wonder in its sole discretion, and without advance notice
or liability.
This Document and Content have been provided to you solely for use in operating the product(s) described herein. Except as otherwise
provided hereunder, duplication of Light & Wonder products and programs in whole or in part without written authorization from Light &
Wonder is expressly prohibited. The specifications and information contained in this documentation are subject to change without notice. All
statements, information, illustrations, specifications, and recommendations in this documentation are believed to be accurate, but are
provided without warranty of any kind, express or implied. The product(s) referenced in this Document is/are being provided by Light &
Wonder as-is.
Light & Wonder, Inc.
6601 Bermuda Road, Las Vegas, Nevada 89119, USA
Phone: 1 (702) 897-7150
Email: [email protected]
www.lnw.com

© 2022 Light & Wonder, Inc. and its Subsidiaries. All rights reserved.CONFIDENTIAL
Kascada™ (SK-1V227ST) Service Manual
1581413 [A] August 2022 3
Contents
Preface . . . . . . . . . . . . . . . . . . . . . . . . . . . . . . . . . . . . . . . . . . . . . . . . . . . . . . . . . 6
Revision History . . . . . . . . . . . . . . . . . . . . . . . . . . . . . . . . . . . . . . . . . . . . . . . . . . . . . . . . . . . . . . . . . . . .6
Reference Information . . . . . . . . . . . . . . . . . . . . . . . . . . . . . . . . . . . . . . . . . . . . . . . . . . . . . . . . . . . . .6
Contact Information . . . . . . . . . . . . . . . . . . . . . . . . . . . . . . . . . . . . . . . . . . . . . . . . . . . . . . . . . . . . . . . .6
Preventing Injury and Damage . . . . . . . . . . . . . . . . . . . . . . . . . . . . . . . . . . . . . . . . . . . . . . . . . . . . . .6
Conventions Used . . . . . . . . . . . . . . . . . . . . . . . . . . . . . . . . . . . . . . . . . . . . . . . . . . . . . . . . . . . . . . . . . .7
Environmental Protection and Recycling . . . . . . . . . . . . . . . . . . . . . . . . . . . . . . . . . . . . . . . . . . . . .7
Chapter 1 Cabinet . . . . . . . . . . . . . . . . . . . . . . . . . . . . . . . . . . . . . . . . . . . . . . . . 8
Cabinet Overview . . . . . . . . . . . . . . . . . . . . . . . . . . . . . . . . . . . . . . . . . . . . . . . . . . . . . . . . . . . . . . . . . .8
Cabinet Locks . . . . . . . . . . . . . . . . . . . . . . . . . . . . . . . . . . . . . . . . . . . . . . . . . . . . . . . . . . . . . . . . . . . . .9
External Cabinet Lock Locations . . . . . . . . . . . . . . . . . . . . . . . . . . . . . . . . . . . . . . . . . . . . . . . 10
Internal Cabinet Lock Locations . . . . . . . . . . . . . . . . . . . . . . . . . . . . . . . . . . . . . . . . . . . . . . . . 10
Cabinet Troubleshooting . . . . . . . . . . . . . . . . . . . . . . . . . . . . . . . . . . . . . . . . . . . . . . . . . . . . . . . . . 13
Cabinet Troubleshooting Flowchart . . . . . . . . . . . . . . . . . . . . . . . . . . . . . . . . . . . . . . . . . . . . 13
Chapter 2 Bill Acceptor. . . . . . . . . . . . . . . . . . . . . . . . . . . . . . . . . . . . . . . . . . . 14
Bill Acceptor Overview . . . . . . . . . . . . . . . . . . . . . . . . . . . . . . . . . . . . . . . . . . . . . . . . . . . . . . . . . . . 14
Bill Acceptor Instructions . . . . . . . . . . . . . . . . . . . . . . . . . . . . . . . . . . . . . . . . . . . . . . . . . . . . . . . . . 15
Bill Acceptor Troubleshooting . . . . . . . . . . . . . . . . . . . . . . . . . . . . . . . . . . . . . . . . . . . . . . . . . . . . . 16
Chapter 3 Printer . . . . . . . . . . . . . . . . . . . . . . . . . . . . . . . . . . . . . . . . . . . . . . . . 17
Printer Overview . . . . . . . . . . . . . . . . . . . . . . . . . . . . . . . . . . . . . . . . . . . . . . . . . . . . . . . . . . . . . . . . . 17
Printer Troubleshooting Flowchart . . . . . . . . . . . . . . . . . . . . . . . . . . . . . . . . . . . . . . . . . . . . . 18
Chapter 4 CPU Control System. . . . . . . . . . . . . . . . . . . . . . . . . . . . . . . . . . . . 19
CPU Overview . . . . . . . . . . . . . . . . . . . . . . . . . . . . . . . . . . . . . . . . . . . . . . . . . . . . . . . . . . . . . . . . . . . 19
CPU Troubleshooting . . . . . . . . . . . . . . . . . . . . . . . . . . . . . . . . . . . . . . . . . . . . . . . . . . . . . . . . . . . . . 20
Codes Displayed by the CPU . . . . . . . . . . . . . . . . . . . . . . . . . . . . . . . . . . . . . . . . . . . . . . . . . . . 20
Why doesn’t the game work after turning on the machine? . . . . . . . . . . . . . . . . . . . . 20
Why did the CPU overheat? . . . . . . . . . . . . . . . . . . . . . . . . . . . . . . . . . . . . . . . . . . . . . . . . . 20
Why is the game not starting up when the power is on? . . . . . . . . . . . . . . . . . . . . . . . 21
Why do I see clear NVRAM messages during a RAM clear? . . . . . . . . . . . . . . . . . . . . 21
CPU Control Subsystem Troubleshooting Flowchart . . . . . . . . . . . . . . . . . . . . . . . . . . . . . 22
Chapter 5 Backplane Board. . . . . . . . . . . . . . . . . . . . . . . . . . . . . . . . . . . . . . . 23
Backplane Board Overview . . . . . . . . . . . . . . . . . . . . . . . . . . . . . . . . . . . . . . . . . . . . . . . . . . . . . . . 23
Backplane Board Instructions . . . . . . . . . . . . . . . . . . . . . . . . . . . . . . . . . . . . . . . . . . . . . . . . . . . . . 32
Removing the Backplane Board from the Housing . . . . . . . . . . . . . . . . . . . . . . . . . . . . . . . 32
Backplane Troubleshooting . . . . . . . . . . . . . . . . . . . . . . . . . . . . . . . . . . . . . . . . . . . . . . . . . . . . . . . 34

Contents
© 2022 Light & Wonder, Inc. and its Subsidiaries. All rights reserved. CONFIDENTIAL
Kascada™ (SK-1V227ST) Service Manual
1581413 [A] August 2022 4
Backplane Board Troubleshooting Flowchart . . . . . . . . . . . . . . . . . . . . . . . . . . . . . . . . . . . . 34
Chapter 6 Power Supplies . . . . . . . . . . . . . . . . . . . . . . . . . . . . . . . . . . . . . . . . 35
Power Supply Overview . . . . . . . . . . . . . . . . . . . . . . . . . . . . . . . . . . . . . . . . . . . . . . . . . . . . . . . . . . 35
AC Power Module . . . . . . . . . . . . . . . . . . . . . . . . . . . . . . . . . . . . . . . . . . . . . . . . . . . . . . . . . . . . . 35
DC Power Module . . . . . . . . . . . . . . . . . . . . . . . . . . . . . . . . . . . . . . . . . . . . . . . . . . . . . . . . . . . . . 36
Power Supply Instructions . . . . . . . . . . . . . . . . . . . . . . . . . . . . . . . . . . . . . . . . . . . . . . . . . . . . . . . . 37
Replacing the AC Power Module . . . . . . . . . . . . . . . . . . . . . . . . . . . . . . . . . . . . . . . . . . . . . . . 37
Replacing the DC Power Module . . . . . . . . . . . . . . . . . . . . . . . . . . . . . . . . . . . . . . . . . . . . . . . 37
Power Supply Troubleshooting . . . . . . . . . . . . . . . . . . . . . . . . . . . . . . . . . . . . . . . . . . . . . . . . . . . . 38
Power Supply Troubleshooting Flowchart . . . . . . . . . . . . . . . . . . . . . . . . . . . . . . . . . . . . . . . 38
Chapter 7 Deck. . . . . . . . . . . . . . . . . . . . . . . . . . . . . . . . . . . . . . . . . . . . . . . . . . 39
Deck Overview . . . . . . . . . . . . . . . . . . . . . . . . . . . . . . . . . . . . . . . . . . . . . . . . . . . . . . . . . . . . . . . . . . . 39
Deck Instructions . . . . . . . . . . . . . . . . . . . . . . . . . . . . . . . . . . . . . . . . . . . . . . . . . . . . . . . . . . . . . . . . 40
Removing the iDeck Monitor . . . . . . . . . . . . . . . . . . . . . . . . . . . . . . . . . . . . . . . . . . . . . . . . . . . 40
iDeck Troubleshooting . . . . . . . . . . . . . . . . . . . . . . . . . . . . . . . . . . . . . . . . . . . . . . . . . . . . . . . . . . . 41
Deck Troubleshooting Flowchart . . . . . . . . . . . . . . . . . . . . . . . . . . . . . . . . . . . . . . . . . . . . . . . 41
Chapter 8 Monitors . . . . . . . . . . . . . . . . . . . . . . . . . . . . . . . . . . . . . . . . . . . . . . 42
Monitor Overview . . . . . . . . . . . . . . . . . . . . . . . . . . . . . . . . . . . . . . . . . . . . . . . . . . . . . . . . . . . . . . . . 42
Backplane Displayport Connectors . . . . . . . . . . . . . . . . . . . . . . . . . . . . . . . . . . . . . . . . . . . . . 43
Removing Monitors . . . . . . . . . . . . . . . . . . . . . . . . . . . . . . . . . . . . . . . . . . . . . . . . . . . . . . . . . . . . . . 44
Removing the Dual Monitors . . . . . . . . . . . . . . . . . . . . . . . . . . . . . . . . . . . . . . . . . . . . . . . . . . . 44
Monitor Troubleshooting . . . . . . . . . . . . . . . . . . . . . . . . . . . . . . . . . . . . . . . . . . . . . . . . . . . . . . . . . 45
Frequently Asked Questions (FAQ) . . . . . . . . . . . . . . . . . . . . . . . . . . . . . . . . . . . . . . . . . . . . . 45
Why is there no video when the power indicator LEDs are on? . . . . . . . . . . . . . . . . . 45
Why is there no video when the cabinet power is on? . . . . . . . . . . . . . . . . . . . . . . . . . 45
Why doesn’t the touchscreen respond? . . . . . . . . . . . . . . . . . . . . . . . . . . . . . . . . . . . . . 45
Monitor Troubleshooting Flowchart . . . . . . . . . . . . . . . . . . . . . . . . . . . . . . . . . . . . . . . . . . . . 46
Chapter 9 Topper . . . . . . . . . . . . . . . . . . . . . . . . . . . . . . . . . . . . . . . . . . . . . . . . 47
Topper Overview . . . . . . . . . . . . . . . . . . . . . . . . . . . . . . . . . . . . . . . . . . . . . . . . . . . . . . . . . . . . . . . . . 47
Topper Assembly Replacement Instructions . . . . . . . . . . . . . . . . . . . . . . . . . . . . . . . . . . . . . . . 48
Topper Replacement Campaign . . . . . . . . . . . . . . . . . . . . . . . . . . . . . . . . . . . . . . . . . . . . . . . . . . 50
Topper Troubleshooting . . . . . . . . . . . . . . . . . . . . . . . . . . . . . . . . . . . . . . . . . . . . . . . . . . . . . . . . . . 50
Topper Troubleshooting Flowchart . . . . . . . . . . . . . . . . . . . . . . . . . . . . . . . . . . . . . . . . . . . . . 50
Chapter 10 Tower Light . . . . . . . . . . . . . . . . . . . . . . . . . . . . . . . . . . . . . . . . . . 51
Tower Light Overview . . . . . . . . . . . . . . . . . . . . . . . . . . . . . . . . . . . . . . . . . . . . . . . . . . . . . . . . . . . . 51
Tower Light Troubleshooting . . . . . . . . . . . . . . . . . . . . . . . . . . . . . . . . . . . . . . . . . . . . . . . . . . . . . . 53
Tower Light Troubleshooting Flowchart . . . . . . . . . . . . . . . . . . . . . . . . . . . . . . . . . . . . . . . . 53

Contents
© 2022 Light & Wonder, Inc. and its Subsidiaries. All rights reserved. CONFIDENTIAL
Kascada™ (SK-1V227ST) Service Manual
1581413 [A] August 2022 5
Appendix A Periodic Maintenance. . . . . . . . . . . . . . . . . . . . . . . . . . . . . . . . . 54
Maintenance Schedule . . . . . . . . . . . . . . . . . . . . . . . . . . . . . . . . . . . . . . . . . . . . . . . . . . . . . . . . . . . 54
Cabinet Periodic Maintenance . . . . . . . . . . . . . . . . . . . . . . . . . . . . . . . . . . . . . . . . . . . . . . . . . . . . 55
Cabinet Interior Maintenance . . . . . . . . . . . . . . . . . . . . . . . . . . . . . . . . . . . . . . . . . . . . . . . . . . 55
Cabinet Exterior Maintenance . . . . . . . . . . . . . . . . . . . . . . . . . . . . . . . . . . . . . . . . . . . . . . . . . 55
Glass and Plexiglas Maintenance . . . . . . . . . . . . . . . . . . . . . . . . . . . . . . . . . . . . . . . . . . . . . . 55
Illumination Maintenance . . . . . . . . . . . . . . . . . . . . . . . . . . . . . . . . . . . . . . . . . . . . . . . . . . . . . 55
Cable Periodic Maintenance . . . . . . . . . . . . . . . . . . . . . . . . . . . . . . . . . . . . . . . . . . . . . . . . . . . . . . 55
Cable Maintenance . . . . . . . . . . . . . . . . . . . . . . . . . . . . . . . . . . . . . . . . . . . . . . . . . . . . . . . . . . . 55
Testing Cable Continuity using a Continuity Tester (or Multimeter) . . . . . . . . . . . . . . . 56
Door and Key Switch Periodic Maintenance . . . . . . . . . . . . . . . . . . . . . . . . . . . . . . . . . . . . . . . . 56
Door and Key Switch Maintenance . . . . . . . . . . . . . . . . . . . . . . . . . . . . . . . . . . . . . . . . . . . . . 56
Replacing a Door or Key Switch . . . . . . . . . . . . . . . . . . . . . . . . . . . . . . . . . . . . . . . . . . . . . . . . 56
Lock, Cam, and Key Periodic Maintenance . . . . . . . . . . . . . . . . . . . . . . . . . . . . . . . . . . . . . . . . . 57
Locks and Key Switch Maintenance . . . . . . . . . . . . . . . . . . . . . . . . . . . . . . . . . . . . . . . . . . . . 57
CPU Periodic Maintenance . . . . . . . . . . . . . . . . . . . . . . . . . . . . . . . . . . . . . . . . . . . . . . . . . . . . . . . . 58
CPU Maintenance . . . . . . . . . . . . . . . . . . . . . . . . . . . . . . . . . . . . . . . . . . . . . . . . . . . . . . . . . . . . 58
Power Supply Periodic Maintenance . . . . . . . . . . . . . . . . . . . . . . . . . . . . . . . . . . . . . . . . . . . . . . . 58
Power Supply Maintenance . . . . . . . . . . . . . . . . . . . . . . . . . . . . . . . . . . . . . . . . . . . . . . . . . . . . 58
Deck Periodic Maintenance . . . . . . . . . . . . . . . . . . . . . . . . . . . . . . . . . . . . . . . . . . . . . . . . . . . . . . . 58
Interactive Touch Panel Deck (iDeck) Maintenance . . . . . . . . . . . . . . . . . . . . . . . . . . . . . 58
Player Panel Buttons Maintenance . . . . . . . . . . . . . . . . . . . . . . . . . . . . . . . . . . . . . . . . . . . . . 58
Monitor Periodic Maintenance . . . . . . . . . . . . . . . . . . . . . . . . . . . . . . . . . . . . . . . . . . . . . . . . . . . . 58
Viewable Area . . . . . . . . . . . . . . . . . . . . . . . . . . . . . . . . . . . . . . . . . . . . . . . . . . . . . . . . . . . . . . . . 58
Bill Acceptor Periodic Maintenance . . . . . . . . . . . . . . . . . . . . . . . . . . . . . . . . . . . . . . . . . . . . . . . . 59
Flash Media . . . . . . . . . . . . . . . . . . . . . . . . . . . . . . . . . . . . . . . . . . . . . . . . . . . . . . . . . . . . . . . . . . 59
Bill Path . . . . . . . . . . . . . . . . . . . . . . . . . . . . . . . . . . . . . . . . . . . . . . . . . . . . . . . . . . . . . . . . . . . . . . 59
Timing Belts . . . . . . . . . . . . . . . . . . . . . . . . . . . . . . . . . . . . . . . . . . . . . . . . . . . . . . . . . . . . . . . . . . 59
Sensor . . . . . . . . . . . . . . . . . . . . . . . . . . . . . . . . . . . . . . . . . . . . . . . . . . . . . . . . . . . . . . . . . . . . . . . 59
Printer Periodic Maintenance . . . . . . . . . . . . . . . . . . . . . . . . . . . . . . . . . . . . . . . . . . . . . . . . . . . . . 59
Flash Media . . . . . . . . . . . . . . . . . . . . . . . . . . . . . . . . . . . . . . . . . . . . . . . . . . . . . . . . . . . . . . . . . . 59
Print Head . . . . . . . . . . . . . . . . . . . . . . . . . . . . . . . . . . . . . . . . . . . . . . . . . . . . . . . . . . . . . . . . . . . . 59
Tower Light Periodic Maintenance . . . . . . . . . . . . . . . . . . . . . . . . . . . . . . . . . . . . . . . . . . . . . . . . . 60
LEDs . . . . . . . . . . . . . . . . . . . . . . . . . . . . . . . . . . . . . . . . . . . . . . . . . . . . . . . . . . . . . . . . . . . . . . . . . 60
Maintenance Before Storing Machine . . . . . . . . . . . . . . . . . . . . . . . . . . . . . . . . . . . . . . . . . . . . . 60

© 2022 Light & Wonder, Inc. and its Subsidiaries. All rights reserved.CONFIDENTIAL
Kascada™ (SK-1V227ST) Service Manual
1581413 [A] August 2022 6
Preface
This preface includes the following topics:
Revision History on page 6
Reference Information on page 6
Contact Information on page 6
Preventing Injury and Damage on page 6
Conventions Used on page 7
Environmental Protection and Recycling on page 7
Revision History
Reference Information
Revocation Bulletins, Service Manuals, and other documents are available online at https://www.lnw.com.
To log in or request access, select Gaming | Customer Portal.
Contact Information
Preventing Injury and Damage
Preventing Shock: Always remove power from the machine before starting any service tasks.
Preventing ESD: Always use appropriate ESD mitigation procedures.
Replacing the Power Cord: If the Power Cord is damaged, it must be replaced by the manufacturer (Light &
Wonder, Inc.), its service agent, or similarly qualified persons to avoid a hazard.
Properly Secure and Vent All Equipment: Before starting any service tasks, the cabinet, top or accessory box,
and machine must be correctly secured and installed, with adequate ventilation, as described in the
corresponding product manual or guide to avoid injury and equipment damage.
Ladder Safety: Follow all company mandated ladder safety procedures. Do not exceed the maximum load rating
of a ladder. Be aware of the ladder load rating and of the weight it is supporting, including the weight of any tools
or equipment.
Part Number Revision Date Changes
1581413 A August 2022 Initial release.
Region Telephone Email
Singapore 65 8522 7465
New Zealand 0800 476 321

Conventions Used Preface
© 2022 Light & Wonder, Inc. and its Subsidiaries. All rights reserved. CONFIDENTIAL
Kascada™ (SK-1V227ST) Service Manual
1581413 [A] August 2022 7
Conventions Used
The following are conventions used in this guide.
NOTE
Notes contain additional optional information.
CAUTION
Caution indicates possible damage to the product or equipment.
WARNING
Warning indicates possible permanent damage to the product or equipment.
DANGER
Danger indicates possible personal injury.
Environmental Protection and Recycling
This product bears a recycling mark in accordance with the Waste from Electrical
Electronic Equipment (WEEE) European Commission Directive 2012/19/EU. This mark
indicates that the product should be deposited at an appropriate facility to enable recovery
and recycling in accordance with all applicable laws. To identify an environmentally sound
disposal method for this product or its component parts, please contact the responsible
government authority in your area. For information on available product take-back
programs, see our website https://www.lnw.com.

© 2022 Light & Wonder, Inc. and its Subsidiaries. All rights reserved.CONFIDENTIAL
Kascada™ (SK-1V227ST) Service Manual
1581413 [A] August 2022 8
Chapter 1 Cabinet
This chapter includes the following topics:
Cabinet Overview on page 8
Cabinet Locks on page 9
Cabinet Troubleshooting on page 13
Cabinet Overview
The cabinet is the housing which encloses the machine components. The cabinet is also a base for a topper and lighting.
All cabinets and most machine components are serialized for records maintained by the regulator, manufacturer, and
the property.
The cabinet is designed for serviceability, providing ample space for peripherals. The front-opening doors provide for
easy access without disturbing nearby players. The modular design allows repair and maintenance procedures using
standard tools.
The cabinet is of high-quality metal construction with durable die-cast player-facing surfaces and LED-illuminated
molded accents controlled by game software. The finish for the cabinet and player-facing surfaces is selectable from a
vast selection of colors and high-quality laminates.

Cabinet Locks Chapter 1 Cabinet
© 2022 Light & Wonder, Inc. and its Subsidiaries. All rights reserved. CONFIDENTIAL
Kascada™ (SK-1V227ST) Service Manual
1581413 [A] August 2022 9
CAUTION
Never remove or alter the cabinet serial number plate.
Figure 1 Cabinet example
Cabinet Locks
The cabinet requires five to seven locks and a locking key switch to control access to the cabinet and specific machine
components. Configuration can require one or two keys and depends upon jurisdictional requirements. External locks
include the following:
Main door
Lower door
Bill acceptor door
Attendant key switch
Internal locks include the following:
CPU assembly
Bill acceptor inner door
Bill acceptor stacker

Cabinet Locks Chapter 1 Cabinet
© 2022 Light & Wonder, Inc. and its Subsidiaries. All rights reserved. CONFIDENTIAL
Kascada™ (SK-1V227ST) Service Manual
1581413 [A] August 2022 10
External Cabinet Lock Locations
The following figures show the locations of lock mechanisms and the Attendant key switch.
Figure 2 External lock locations
Table 1 External lock location legend
Internal Cabinet Lock Locations
Figure 3 CPU assembly
Reference Description
A Main Door Locks (one or two)
B Lower (Belly) Door Locks (one or two)
C Cash Box Door Locks (one or two)
D Attendant Key Switch (one)
A
BC
D

Cabinet Locks Chapter 1 Cabinet
© 2022 Light & Wonder, Inc. and its Subsidiaries. All rights reserved. CONFIDENTIAL
Kascada™ (SK-1V227ST) Service Manual
1581413 [A] August 2022 11
Figure 4 Bill acceptor inner door
Figure 5 Bill acceptor stacker

Cabinet Locks Chapter 1 Cabinet
© 2022 Light & Wonder, Inc. and its Subsidiaries. All rights reserved. CONFIDENTIAL
Kascada™ (SK-1V227ST) Service Manual
1581413 [A] August 2022 12
Figure 6 Lock assembly example
Table 2 Lock assembly figure legend
Callout Description
A Key, Shape May Vary
B1 7 Pin Tumbler with Circular Key way and 3/4-Inch Diameter Body
B2 Barrel, Length May Vary
B3 Locked Position, Key Removable
B4 Counter Clockwise Rotation Locked Position
B5 Clockwise Rotation Locked Position
C Mounting Nut
D Cam Stop Plate
E 3-Prong Washer or Star Washer
F Hex Nut
AB2
D
C
E
F
F
E
E
D
C
B1
B4 B5
B3

Cabinet Troubleshooting Chapter 1 Cabinet
© 2022 Light & Wonder, Inc. and its Subsidiaries. All rights reserved. CONFIDENTIAL
Kascada™ (SK-1V227ST) Service Manual
1581413 [A] August 2022 13
Cabinet Troubleshooting
Cabinet Troubleshooting Flowchart
Use the following flowchart to troubleshoot cabinet issues.
Figure 7 Troubleshooting flowchart for the cabinet

© 2022 Light & Wonder, Inc. and its Subsidiaries. All rights reserved.CONFIDENTIAL
Kascada™ (SK-1V227ST) Service Manual
1581413 [A] August 2022 14
Chapter 2 Bill Acceptor
This chapter includes the following topics:
Bill Acceptor Overview on page 14
Bill Acceptor Instructions on page 15
Bill Acceptor Troubleshooting on page 16
Bill Acceptor Overview
A bill acceptor examines currency or tickets and communicates the value to the machine. A bill acceptor provides the
ability to accept printed currency or tickets. The bill acceptor registers accepted items as credits and returns rejected
items to the Player. The location of the bill acceptor is at the right front of the cabinet above the deck.
Figure 8 Bill acceptor location
IVIZION
IVIZION

Bill Acceptor Instructions Chapter 2 Bill Acceptor
© 2022 Light & Wonder, Inc. and its Subsidiaries. All rights reserved. CONFIDENTIAL
Kascada™ (SK-1V227ST) Service Manual
1581413 [A] August 2022 15
Bill Acceptor Instructions
For optimal performance, keep the bill path, rollers, and belts clean. Use a soft lint-free cloth to clean the sensor lenses.
Do not use any harsh solvent that will harm the transparent polymer material.
To access the bill acceptor for maintenance, use the following steps.
1With the main door open, press the bill acceptor lift locking pin, Figure 9 (A).
Figure 9 Locking pin
2Use the lift assembly to raise the bill acceptor and printer assemblies for easy access.
The locking pin will engage at the top to ensure it is locked into place.
Figure 10 Bill acceptor in raised position
3To lower the bill acceptor and printer assemblies, press the lever downward with the assistance of the gas strut
that is part of this assembly.
A

Bill Acceptor Troubleshooting Chapter 2 Bill Acceptor
© 2022 Light & Wonder, Inc. and its Subsidiaries. All rights reserved. CONFIDENTIAL
Kascada™ (SK-1V227ST) Service Manual
1581413 [A] August 2022 16
Bill Acceptor Troubleshooting
Figure 11 Bill acceptor troubleshooting flowchart

© 2022 Light & Wonder, Inc. and its Subsidiaries. All rights reserved.CONFIDENTIAL
Kascada™ (SK-1V227ST) Service Manual
1581413 [A] August 2022 17
Chapter 3 Printer
This chapter includes the following topic:
Printer Overview on page 17
Printer Overview
A printer provides a machine the ability to create documents on thermal ticket stock. Typical documents created by a
machine printer are vouchers, accounting statistics reports, diagnostic reports, and receipts for jackpots and other
payments by Attendants. The location of the printer is at the right front of the cabinet above the deck.
Figure 12 Printer location
Figure 13 Printer interior location

Printer Overview Chapter 3 Printer
© 2022 Light & Wonder, Inc. and its Subsidiaries. All rights reserved. CONFIDENTIAL
Kascada™ (SK-1V227ST) Service Manual
1581413 [A] August 2022 18
Printer Troubleshooting Flowchart
Use the following flowchart to troubleshoot printer issues.
Figure 14 Printer troubleshooting flowchart

© 2022 Light & Wonder, Inc. and its Subsidiaries. All rights reserved.CONFIDENTIAL
Kascada™ (SK-1V227ST) Service Manual
1581413 [A] August 2022 19
Chapter 4 CPU Control System
This chapter includes the following topics:
CPU Overview on page 19
CPU Troubleshooting on page 20
CPU Overview
The central-processing unit (CPU) is the hardware component that controls the machine.
Figure 15 CPU control subsystem location
Figure 16 CPU components

CPU Troubleshooting Chapter 4 CPU Control System
© 2022 Light & Wonder, Inc. and its Subsidiaries. All rights reserved. CONFIDENTIAL
Kascada™ (SK-1V227ST) Service Manual
1581413 [A] August 2022 20
CPU Troubleshooting
Codes Displayed by the CPU
Why doesn’t the game work after turning on the machine?
Confirm the following:
All cables are connected properly.
With the CPU door closed, the four power LEDs are lit (3.3V, 5V,12V, and POWER GOOD).
If power indicator LEDs are not lit, set the game Power Switch to OFF and verify that the CPU is securely seated.
BIOS/JUR SPI module is installed and fully seated.
Why did the CPU overheat?
The fans may not be functioning. Confirm that the fans are functioning.
Figure 17 CPU cooling fans
Table 3 Error codes
Code Error Comment
Three horizontal bars on the left digit BMC switched to low power mode, CPU
off Normal display when power is switched
off
6C/GC Missing PEG graphics card The graphics card may not be fully
connected
AC AC fail signal Bad power supply
bP CPU not fully seated in backplane Ensue the CPU is fully connected to the
backplane
DC A DCM (backplane power regulator)
problem Devices relying on backplane power will
not work
FP Problem loading firmware into FPGA Contact Support
lo FPGA lockup FPGA is not enabled
on Normal operation No problems detected. This is what you
want to see
P + hex digit Power problem. The hex digit indicates
where it’s stuck Contact Support
tt Thermal Trip (your CPU is way to hot) Contact Support
Table of contents
Popular Arcade Game Machine manuals by other brands

Benchmark Games
Benchmark Games GOLDZONE manual

Innovative Concepts in Entertainment
Innovative Concepts in Entertainment Monopoly Roll -N- Go Assembly guide

IGS
IGS Golden Master Operator's manual

Sega
Sega PIRATES of MONSTER ISLAND owner's manual

Ace Amusement
Ace Amusement Wild West Shoot Out manual

jakar
jakar CRAZY COW Operator's manual