manuals.online logo
Brands
  1. Home
  2. •
  3. Brands
  4. •
  5. Lightmybricks
  6. •
  7. Light Fixture
  8. •
  9. Lightmybricks 75181 User manual

Lightmybricks 75181 User manual

Light My Bricks: LEGO Star Wars UCS Y-Wing
Starfighter 75181 Lighting Kit
in between each stud.
CAUTION: Forcing LEGO® to connect over a cable can result in damaging the cable and light.
Connecting cable connectors to Expansion Boards
Take extra care when inserting connectors to ports of Expansion Boards. Connectors can be
inserted only one way. With the expansion board facing up, look for the soldered “=” symbol on
the left side of the port. The connector side with the wires exposed should be facing toward the
soldered “=” symbol as you insert into the port. If a plug won’t fit easily into a port connector, do
not force it.
Incorrectly inserting the connector can can result in bent pins inside the port or possible
overheating of the expansion board when connected.
Connecting cable connectors to Strip Lights
Take extra care when inserting connectors to ports on the Strip Lights.
Connectors can be inserted only one way. With the Strip Light facing up, ensure the side of the
connector with the wires exposed is facing down. If a plug won’t fit easily into a port connector,
don’t force it. Doing so will damage the plug and the connector.
Installing Bit Lights under LEGO® bricks and plates.
When installing Bit Lights under LEGO® pieces, ensure they are placed the correct way up
(Yellow LED component exposed). You can either place them directly on top of LEGO® studs or in
between.
OK, Let’s Begin!
1.) We will first install lights to the cannons on the front of the star fighter. Firstdisconnect the
following pieces surrounding the front, then disconnect the two cannon sections.
Continue to remove sections which make up the windows and roof cannons.
2.) Disassemble the two cannons as per below, then discard the two grey barsand replace
them with the provided 2x Trans Bright Green Lightsaber bars that come in this kit.
Take a Green 30cm Bit Light and thread the connector end of the cable through the top of the
technic piece on one of the cannon bases as shown below:
Thread the cable all the way through and before pulling the Bit Light inside the technic piece,
slightly bend the LED so that it is facing up.
3.) Insert one of the Trans Bright Green Bars inside, then reconnect the othercannon pieces.
Repeat steps 2 and 3 to install another Green 30cm Bit Light to the other cannon section, then
reconnect both to the front of the starfighter.
4.) Disconnect the following tiles along the top of the starfighter, thendisconnect all the angled
bricks along the left side as shown below.
Lift up the white top and bottom flap piece on the back of this cockpit section:
Take the cable from the left cannon and thread it toward the end of the cockpit, in between the
gaps underneath the pieces we removed earlier, then slip it in between the light grey round 2×2
plate and side of the ship. Pull the cable underneath and then secure it in place by closing the
top and bottom flap pieces.
5.) Repeat previous step to secure the cable along the right side of thestarfighter.
6.) Take the Multi Effects Board and connect both bit light cables from the cannons to the OUT
ports (side with 2 ports). Take the AA Battery Pack and insert 3x AA Batteries to it. Connect
the battery pack cable to the IN port (side with 1 port). Turn ON the battery pack to test the
cannon lights are working OK, then adjust the settings on the Multi Effects Board for the
“firing” effect. Set the switch to the middle setting and turn the speed wheel all the way to
the left for the slowest speed.
Your cannons should be firing away like the below example video:
7.) Once you are happy with the cannon effect, disconnect the AA Battery Packand connect a
15cm Connecting Cable to the IN port. Take 4x Adhesive Squares and stick them to the
back of the multi effects board, then flip the YWing over and stick the effects board
underneath in the following position.
8.) Flip the Y-Wing back over and place it back onto it’s stand, then eliminate excess cable from
the right cannon bit light by tucking the cable in behind pieces along the side of the ship as
shown below:
Pull any remaining excess cable toward the front of the starfighter as shown below:
9.) Turn the Y-Wing around to the left side and repeat the previous step toeliminate excess
cable from the left cannon bit light by tucking the cable behind pieces along the left side of
the Y-Wing.
10.) Turn the Y-Wing back around to the right side, then take the other end ofthe 15cm
Connecting Cable from the multi effects board and pull it toward the front then up and
secure it in place by opening and closing the dark grey technic piece (which pulls out and
folds back in over the cable).
Take an 8-Port Expansion Board and connect the other end of the 15cm Connecting Cable to it,
then set it aside for now.
11.) Turn the Y-Wing around to the left side, then disconnect the followingpieces from the front
of the cockpit.
Take the following section and disconnect the trans orange 1×2 plate from underneath.
Take 2x Cool White 30cm Bit Lights and hold them together as shown below. With both cables
facing the front of the cockpit, place them over the two light grey studs then secure them down
by reconnecting the trans orange 1×2 plate over the top.
12.) Lay each cable out the side in between studs as shown below, then run thecable down each
side of the starfighter ensuring you tuck it under the white flap piece toward the back of
the cockpit.

Other Lightmybricks Light Fixture manuals
Lightmybricks 75257 User manual

Lightmybricks

Lightmybricks 75257 User manual

Lightmybricks 75351 User manual

Lightmybricks

Lightmybricks 75351 User manual

Lightmybricks LEGO Land Rover Defender 42110 User manual

Lightmybricks

Lightmybricks LEGO Land Rover Defender 42110 User manual

Lightmybricks 43197 User manual

Lightmybricks

Lightmybricks 43197 User manual

Lightmybricks 21325 User manual

Lightmybricks

Lightmybricks 21325 User manual

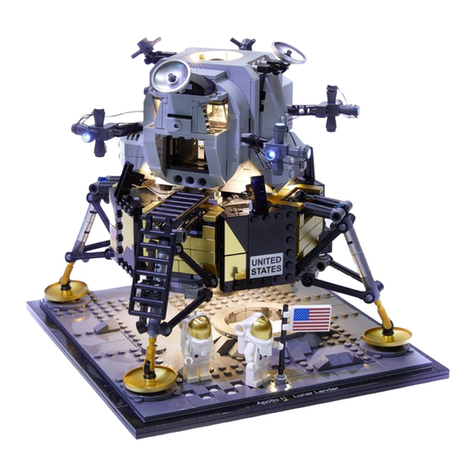
Lightmybricks LEGO NASA Apollo 11 Lunar Lander User manual

Lightmybricks

Lightmybricks LEGO NASA Apollo 11 Lunar Lander User manual

Lightmybricks LEGO R2-D2 75308 User manual

Lightmybricks

Lightmybricks LEGO R2-D2 75308 User manual

Lightmybricks 21335 User manual

Lightmybricks

Lightmybricks 21335 User manual

Lightmybricks 21321 User manual

Lightmybricks

Lightmybricks 21321 User manual

Lightmybricks 21339 User manual

Lightmybricks

Lightmybricks 21339 User manual

Lightmybricks LEGO UCS IMPERIAL SHUTTLE 10212 User manual
Lightmybricks

Lightmybricks LEGO UCS IMPERIAL SHUTTLE 10212 User manual

Lightmybricks LEGO LAMBORGHINI SIAN FKP 37 42115 User manual

Lightmybricks

Lightmybricks LEGO LAMBORGHINI SIAN FKP 37 42115 User manual

Lightmybricks The Louvre LED Lighting Kit User manual

Lightmybricks

Lightmybricks The Louvre LED Lighting Kit User manual

Lightmybricks 10273 User manual

Lightmybricks

Lightmybricks 10273 User manual

Lightmybricks Palace Cinema User manual

Lightmybricks

Lightmybricks Palace Cinema User manual

Lightmybricks 75953 User manual

Lightmybricks

Lightmybricks 75953 User manual

Lightmybricks LEGO Book Shop 10270 Lighting Kit User manual

Lightmybricks

Lightmybricks LEGO Book Shop 10270 Lighting Kit User manual

Lightmybricks 75257 User manual

Lightmybricks

Lightmybricks 75257 User manual

Lightmybricks 21322 User manual

Lightmybricks

Lightmybricks 21322 User manual
Popular Light Fixture manuals by other brands

Griven ACROBAT PE 1200 manual

Griven

Griven ACROBAT PE 1200 manual

Lightmaxx PLATINUM LINE LIG0007903-000 user manual

Lightmaxx

Lightmaxx PLATINUM LINE LIG0007903-000 user manual

ecolight UC1040-BR2-09LF2-E quick start guide

ecolight

ecolight UC1040-BR2-09LF2-E quick start guide

GERA Z LED 60 operating instructions

GERA

GERA Z LED 60 operating instructions

Trilux SIELLA ZBB/4 Mounting instructions

Trilux

Trilux SIELLA ZBB/4 Mounting instructions

Philips Calculite 8091CB specification

Philips

Philips Calculite 8091CB specification

Modulex UB9451D/1.2/RB installation guide

Modulex

Modulex UB9451D/1.2/RB installation guide

Lightolier Calculite C6P38MHL specification

Lightolier

Lightolier Calculite C6P38MHL specification

Philips Calculite 8044 specification

Philips

Philips Calculite 8044 specification

Modulex SX-B9451D/CE installation guide

Modulex

Modulex SX-B9451D/CE installation guide

Lucci CONNECT 220992 installation instructions

Lucci CONNECT

Lucci CONNECT 220992 installation instructions

Lightolier IS-RGB Assembly and installation

Lightolier

Lightolier IS-RGB Assembly and installation

Griven VESUVIO OS CYM 250 HFT owner's manual

Griven

Griven VESUVIO OS CYM 250 HFT owner's manual

Pixlip PX 200 user manual

Pixlip

Pixlip PX 200 user manual

Intermatic AL408 Series Assembly procedures

Intermatic

Intermatic AL408 Series Assembly procedures

Beamz 550923507 instruction manual

Beamz

Beamz 550923507 instruction manual

Occhio Sento faro Series Mounting instructions

Occhio

Occhio Sento faro Series Mounting instructions

Klus STOS-MDF Mounting instructions

Klus

Klus STOS-MDF Mounting instructions

manuals.online logo
manuals.online logoBrands
  • About & Mission
  • Contact us
  • Privacy Policy
  • Terms and Conditions

Copyright 2025 Manuals.Online. All Rights Reserved.