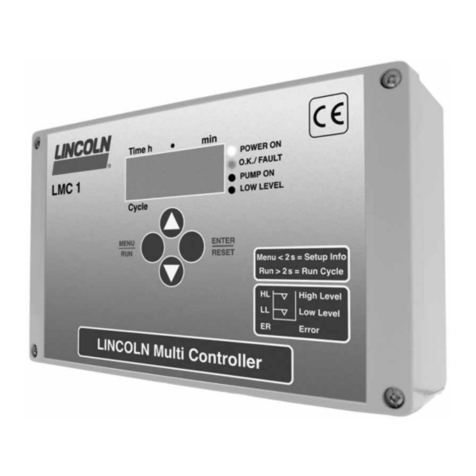
Lincoln CENTRO-MATIC SYSTEM SYSTEM SENTRY B Series Owner's manual

my @e @‘jw Model 84530
U.S. Patent SYSTEM SENTRY”
‘R 60891 IND. CONT. EO. No. 5,182,720 Series “B”
CENTRO-MATIC SYSTEM -OWNER/OPERATOR MANUAL
It is the responsibility of the Owner/Operator to properly use and maintain this equipment.
The Instructions and Warnings contained in this manual shall be read and understood by the Owner/Operator prior to
operating this equipment.
It is the responsibility of the Owner/Operator to maintain the legibility of all Warning and Instruction labels.
The Owner/Operator shall retain this manual for future reference to important Warnings, Operating and Maintenance
Instructions.
CONTENTS PAGE SPECIFICATIONS
Specifications ......................1 Input Voltage . . . . . . . . . . . . . . . . . . . . . . . . . 120 VAC50/60Hz
Description .........................1 230 VAC 50/60 I-Iz
Liquid Crystal Display ..............2 24 VDC
Programming Mode . . . . . . . . . . . . . . ...2 Current Consumption . . . . . . . . . . . . . ...85 MA at 120 VAC (less load)
Run Mode ..........................5 45 MA at 230 VAC (less load)
Alarm Messages . . . . . . . . . . . . . . . . . . . . 5250 MA at 24 VDC (less load)
Field Connections ..................6 External Pump Load ................. 360VA Pilot Duty Rating at 120/230 VAC
Service Parts . . . . . . . . . . . . . . . . . . . . . ..7 External Alarm Load 5amps at 24 VDC
Electrical shock hazard.
Turn off and lock out power
before opening enclosure.
Ampacity for Switches
connected to Terminal Strip B.... 8MA at 15 VDC
Enclosure . . . . . . . . . . . . . . . . . . . . . . . . . . .. Nema12 enclosure
Ambient Temperature Range ......... 10° Fto 130° F(LCD limited)
Net Weight . . . . . . . . . . . . . . . . . . . . . . . . . . . 10lbs.
Off Time . . . . . . . . . . . . . . . . . . . . . . . . . . . . . . 1minute minimum
9,900 minutes maximum
Off Counts ............................l count minimum
99,000 counts maximum
Alarm Time ........................... 1minute minimum
99 minutes maximum
Timing Accuracy ..................... .01% (crystal controlled)
Count Rate ........................... 30 countslsec. at 50% duty cycle
/- 5“6’fKi%‘0’” 3:8’
When programmed as a Centro-Matic Controller, Model 84530
will have complete control of your lubrication system. The
system status is continuously updated and displayed on atwo
line liquid crystal display.
Due to the numerous options available, the customer can field
program the controller to match the system requirements.
Programming is easily accomplished by following auser friendly
menu displayed on the LCD and pressing the active buttons
beneath the display. An internal jumper pin provides security
against unauthorized programming. All programmed parameters
are automatically stored in anonvolatile memory. AReview
Screen can be easily activated to display what has been
programmed. Programmed values can be changed
whenever necessary.
There are three Iiahts on the enclosure door to indicate the
2’ ‘
❑ODD b
❑llEllEl ,,y”’ ,
II I 9-1;2”
—8-151WA’”3’4’
-6’4
DIMENSIONS
—4-718” —
The LCD is capable of displaying the following messages
status of the system. Time or Counts left until next lube cycle.
Green -Power On Amber- Pump On Red -Alarm Amount of time system has been lubricating,
Will indicate if in aStandby Mode.
If an alarm occurs, the cause of the alarm will appear on the Controller Reset Failure Alarm
LCD. Turning off power to the controller when in alarm will Low Level Alarm
always initiate alube cycle when turned back on. Vent Pressure Switch Alarm.
One Lincoln Way Copyright 1993 Section -C8
St. Louiq Missouri 63120-1578 Printed in U.S.A
(314) 679-4200 Page -247-1 A
JAN-93 FORM 402431

LIQUID CRYSTAL DISPLAY
The LCD has abottom to top viewing angle. It is recommended
that the controller be mounted slightly above eye level for
optimum viewing.
The first line of the LCD is an instruction line ora message. The
second line can have up to four commands, each corresponding
to the button beneath it. Pressing the corresponding button
will invoke that command.
The following example shows the MAIN MENU.
IMAIN MENU PLEASE SELECT I
ISETUP REVIEW RUN I
❑oun
SETUP -Pressing the button beneath SETUP will display the
SETUP MENU
REVIEW- Pressing the button beneath REVIEW will display
the REVIEW SCREENS.
RUN -Pressing the button beneath RUN will cause the
controller to function as it was programmed in the
SETUP MENU.
PROGRAMMING MODE
To program anew controller, use the following example as a
guide to match the controller to your system requirements.
The internal jumper pin will be in the Program position for a
new controller,
t-l—all
RUN
PROGRAM [
JUMPER IN JUMPER IN
“PROGRAM” POSITION “RUN” POSITION
If acontroller already in use needs to be reprogrammed,
.
the
internal jumper pin must be moved from the Run position to
the Program position. WARNING: Turn power off before
opening enclosure door to move jumper pin.
If no buttons are pressed within a 30 second period, the display
will automatically change to “SET JUMPER TO RUN”. Pressing
the button under “<” will display the MAIN MENU.
EXAMPLE:
The following instructions will illustrate how to program
Centro-Matic System with these sample parameters.
STEP
4TIMER OR COUNTER . . . . . . . . . . . . . . . . . . TIMER
5OFF TIM E.............................. 30 min.
6ALARM TIM E........................... 5min.
7ALARM LOCKOUT ...................... YES
8ALARM INTERLOCK LOW LEVEL NO
9ALARM RELAY ENERGIZED . . . . . . . . . . NO
10 PRELUDE .............................. YES
11 3HOUR MEMORY ..................... YES
12 MAN UALLUBE ON DOOR . . . . . . . . . . . . . YES
13 MANUAL LUBE WHILE IN ALARM . . YES
14 IS STAN DBY MODE USED . . . . . . . . . . NO
15 IS VENT PRESSURE SWITCH USED. NO
2
a
1)Reminder that if the Run Mode is desired the jumper
must be set to Run.
SET JUMPER TO RUN
<
I
Press button under “<”.
2) Main Menu options
MAIN MENU PLEASE SELECT
SETUP IREVIEW ]RUN
tlnnn
SETUP- All programming options are available in the
Setup Menu.
REVIEW- Can review all system parameters that have been
programmed in the Setup Menu.
RUN -Controller will function as it was programmed in the
Setup Menu.
Press button under “SETUP”.
3) Setup Menu options.
SETUP MENU PLEASE SELECT
CM ML SENSOR <
I
thou
CM -Programming options for aCentro-Matic Controller
ML- Programming options for aModular Lube Controller (see
ML Manual).
SENSOR -Programming options for aSensor Controller (see
Sensor Manuals).
<-Will return you to the previous screen.
Press button under “CM”.
4) Choice of Timer or Counter.
ITIMER OR COUNTER ?I
TIMER ICOUNTER I<>I
I
TIMER -Time will be the measurement between lube Cycles.
COUNTER -Counts will be the measurement between lube
cycles.
<-Previous screen.
>-Next screen.
Press button under “TIMER”.

5) Amount of time between lube cycles. 8) Option for Low Level Alarm.
[ALARM INTERLOCK LOW LEV ?I
OFF TIME 30 MIN
30xl SET IYES NO >I
tlt!ltltl YES- Will follow the program option set in Step 7.
Pressing either of the first two buttons will increment number
above it by one.
First Two Buttons- Determines the first two digits of the
Off Time.
NO- System continues to operate with the following
conditions:
An alarm message will alternate with the lube screen.
Alarm relay contact will not change.
Red light on enclosure door will turn on.
>-Next Screen,
Third Button -Amultiplier for the first two digits.
xl Multiplies first two digits by 1. Range: 1to 99 min.
Xl OMultiplies first two digits by 10. Range: 10 to 990 min.
Xl 00 Multiplies first two digits by 100. Range: 100 to 9900 min. Press button under “NO”.
SET -Stores value displayed on screen.
9) Option for A/arm Re/ayj to be used with externa/ device.Press first button until a 3 appears.
Press second button until aOappears.
Press third button until an Xl appears.
Press button under “SET” to input 30 min. IALARM RELAY ENERGIZED ?I
IYES NO >I
6) Amount of pumping time system has before an alarm will
occur.
ALARM TIME MINUTES: 05
05SET >❑tlncl
YES -Alarm relay contact will open if afault occurs.
NO -Alarm relay contact will close if afault occurs.
>-Next screen.
Press button under “NO”.
Pressing either of the first two buttons will increment number
above it by one.
First Two Buttons- Determines alarm time.
Range: 1to 99 Min.
10) Option of using Prelube.
PRELUBE ?
YES NO >
SET -Stores value displayed on screen
>- Next screen.
Press first button until aOappears.
Press second button until a 5 appears.
Press button under “SET” to input 5min.
Press button under “>” YES- When power is applied to controller alube cycle will
occur. If the 3Hour Memory in Step 11 is set to “YES”
and power has been off for less than 3hours, aprelube
will not occur.
NO- Prelube will not take place.
>-Next screen.
7) Choice of locking system out from lubricating again
during an alarm condition.
IALARM LOCKOUT? IPress button under “YES”.
m11) Choice of using Three Hour Memory.
I3HR MEMORY ?I
IYESINOI>I IYES -If an alarm condition occurs the system will not lubricate
again and the following will happen:
Alarm message will appear.
Alarm relay contact will change over.
Red light on enclosure door will turn on
NO -If an alarm condition occurs the system will try to lubricate
again and the following will happen:
An alarm message will alternate with the lube screen.
Alarm relay contact will change over.
Red light on enclosure door will turn on.
YES -If power has been turned off less than 3hours and then
is reapplied, lube cycle will continue from point of
interruption. If power has been turned off longer than
3hours and then is reapplied, the controller will begin as
programmed in Step 10.
NO -Memory option turned off.
>-Next screen.
If asuccessful lube event occurs the alarm will be cleared.
>-Next screen.
Press button under “YES”. 3
Press button under “YES”.

12) Choice of manually Iubing from enclosure door. 15) Option of using Vent Pressure Switch.
IACTIVATE MAN LUBE DOOR ?I I IS VENT PRESS SW USED? I
lYESINO[>l IIYESINOI>I I
YES -Can manually lube system from door.
NO- Cannot manually lube system from door
>-Next screen.
Press button under “YES”.
13) Choice of manually Iubing from enclosure door
during alarm.
MANUAL LUBE IN ALARM ?
YES NO >
YES -Can manually lube system from door during an alarm
condition.
NO -Cannot manually lube system from door during alarm.
>-Next screen.
Press button under “YES”.
14) Option of using Standby Mode, to temporarily suspend
controller operation using an external switch.
IS STANDBY MODE USED ?
YES NO >
I
❑tlnn
YES -Aswitch closure at terminal strip Bterminals 13 and 14
will suspend operation of controller without removing
power.
NO -Standby Mode not used.
>-Next screen
YES -The Vent Pressure Switch is located in the pressure line
and will indicate if the supply line has not vented low
enough to reset the injectors. Vent Pressure Switch is
ignored when Manual Lube Switch is used.
NO -Vent Pressure Switch is not used.
>-Next screen.
Press button under “NO”.
16) Option for Vent Pressure Switch Alarm.
IALARM INTERLOCK VENT SW ?I
lyEslNOl>l I
❑oun
This display appears if “YES” option is selected in Step 15.
YES -Will follow the program option set in Step 7.
NO -System continues to operate with the following
conditions:
An alarm message will alternate with the lube screen.
Alarm relay contact will not change.
Red light on enclosure door will turn on.
>-Next screen.
This display does not appear in our example because aVent
Pressure Switch is not used (see Step 15).
17) When programming is complete, set internal jumper pin
to the Run position. WARNING: Turn power off before
opening enclosure door to move jumper pin.
Press button under “NO”. JUMPER IN JUMPER IN
“PROGRAM” POSITION “RUN” POSITION
4

ALARM MESSAGES:
RUN MODE
The following alarm messages can appear if an alarm
condition occurs.
To access the Run Mode the internal jumper must be in the
Run position. WARNING: Turn power off before opening
enclosure door to move jumper pin.
If no pushbuttons are pressed within 30 seconds, while in the
Main Menu options, the controller will enter the RUN MODE. Indicates that the system reservoir needs to be replenished.
LOW LEVEL ALARM
MANUAL NEXT
The following screens can appear when in the Run Mode.
Main Menu Options ❑000
MAIN MENU PLEASE SELECT
SETUP IREVIEW IRUN
MANUAL -Will appear .if programmed. Pressing the corre-
sponding button will initiate alube cycle.
❑EIDD NEXT -Indicates that there is more than one alarm message.
Pressing the corresponding button will display the
next alarm message.
SETUP -All programming options are available in the Setup
Menu.
REVIEW -Can review all system parameters that have been
programmed in the Setup Menu. Indicates that the system pressure switch has failed to
activate within the alarm time setting that was programmed
in setup.
RUN -Controller will function as it was programmed in the
Setup Menu. ICONTROLLER RESET FAILURE 1
MANUAL NEXT I
Indicates the amount of time or counts remaining before
the next lube cycle. ❑oon
NEXT LUBE IN: 30 MIN
MANUAL MENU MANUAL- Will appear if programmed. Pressing the corre-
sponding button will initiate alube cycle.
noun NEXT -Indicates that there is more than one alarm message.
Pressing the corresponding button will display the
next alarm message.
MANUAL -Pressing the corresponding button will initiate a
lube cycle.
MENU -Pressing the corresponding button will cause the
Main Menu to appear. The supp/y line failed to vent below the setting of the vent
pressure switch, therefore the injectors did not recharge.
IVENT PRESSURE SW ALARM I
/ndicates the amount of time that the system has been
Iubing. IMANUALI INEXT II
NOW LUBRICATING 1MIN
II I ❑oun
II I I
MANUAL -Will appear if programmed. Pressing the corre-
sponding button will initiate alube cycle.
❑000 NEXT- Indicates that there is more than one alarm message.
Pressing the corresponding button will display the
next alarm message.
Indicates that the controller is in aStandby Mode due to the
contact closure at terminals 13 and 14 on terminal B.
STANDBY MODE
II I
0000
5

FIELD CONNECTIONS (Refer To Figure 1)
TERMINAL STRIP A- HIGH VOLTAGE
Incoming Power Source -Terminals 1&2,
Connect the black wire to Terminal 1.
Terminals 1and 7are connected together internally
on Terminal Strip A.
Connect the neutral or white wire to Terminal 2.
Terminals 2, 9and 12 are connected together internally.
120 VAC 50/60 Hz -Must set power switch to 120 VAC.
230 VAC 50/60 Hz -Must set power switch to 230 VAC.
External Pump Load -Terminals 8&9.
360VA Pilot Duty Rating at 120/230 VAC,
5amps at 24 VDC.
External Alarm Load -Can be used two ways.
1. Terminals 10 &11 -N.O. Contact.
2. Using the Controller Line Voltage at Terminals 1&2
(see Figure 2).
a) Jumper wire between Terminals 7&10.
b) Connect alarm load to Terminals 11 &12.
360VA Pilot Duty Rating at 120/230 VAC,
5amps at 24 VDC.
TERMINAL STRIP B-LOW VOLTAGE
Low Level Switch -N.O. Switch, Terminals 2&3.
Switch Ampacity 8MA at 15 VDC.
Count Switch -N.O. or N.C. Switch, Terminals 6&7,
Switch Ampacity 8MA at 15 VDC.
Pressure Switch -N.O. Switch, Terminals 8&9.
Switch Ampacity 8MA at 15 VDC.
Pressure Switch must be used.
Remote Manual Lube -N.O. Switch, Terminals 11 &12.
Switch Ampacity 8MA at 15 VDC.
Standby Switch -N.O. Switch, Terminals 13 &14.
Switch Ampacity 8MA at 15 VDC.
Vent Switch -N.O. Switch, Terminals 17 &18.
Switch Ampacity 8MA at 15 VDC.
o
TERMINAL
TERMINAL
TERMINAL
c 11213141516171819 [,+,,1,21, +,+,+,6
~11122122222222 2313
E34 3434371 +3+U+41 42p+++ +71
m
o
D
oc1
POWER SW,
m
TERMINAL
:
24 VDC PIN
.TERMINAL A
B
7!!
230 VK 50/60 HZ LOAD SOLENOID
1
120/230 VAC
FIELD CONNECTIONS
Figure 1
POWER SW.
<m
.
24 VDC PIN :
TERMINAL A
1II II II II II II II II II II II II II [1
2345078 9 10 11 12 13 14
Oj
II
:OMING POWER
120 VAC 50/60 HZ mALARM
230 VAC 50(60 HZ
120 VAC 50/60 HZ
230 VAC 50/60 HZ
CONTROLLER LINE VOLTAGE FOR ALARM
Figure 2
Cut 24 VDC pin.
\
OPTIONAL
24 VDC
INCOMING
POWER
SOURCE
N.O. VENT SW.
N.0. 5TANDBY SW.
NO. REMOTE
MANUAL LUBE
N.O. PRESS. SW.
N.O. /N.C.
COUNT Sw.
N.O. LOW
LEVEL SW
(01
LOAD
f.%
24
23 ~;24 VOC
22
21
20
24 VDC Power- Controller can operate from 24 VDC instead of
120/230 VAC (see Figure 3).
1. Cut 24 VDC pin on power supply board. 24 VDC PIN
2. Power In: Connect Battery Positive Voltage at Terminal 23. TERMINAL A
Connect Battery Negative Voltage at Terminal 24. I II II II II II II II II II II II II II II
23456789 ?031?21314
3. Power for Load& Alarm relay contacts: Oi {/o
Connect Battery Positive Voltage at Terminal 1on BAT. +IOAT. -
Terminal Strip A. 24 VDC
Connect Battery Negative Voltage at Terminal 2on
Terminal Strip A. PUMP SOLENOID
24 VDC 24 VDC
24 VDC CONNECTIONS
Figure 3
6

(o 01
{\
242857
‘=QOcln
Is
242850
242851
242852
v
a
\(0 OJ
o
[0]
242856
@—
kq’ o
=
239425 0
:0
\
o0
SERVICE PARTS
Part Qty. Description
239425 1Jumper Shunt (strip of ten)
242850 1Green L.E.D., Green Lens& Chrome Bezel
242851 1 Amber L.E.D., Amber Lens &Chrome Bezel
242852 1 Red L.E. D., Red Lens &Chrome Bezel
242853 4 Standoff &Screw
242854 1 Processor Board Assembly
242855 1 Power Supply Board Assembly
242856 1 Ribbon Cable Assembly
242857 1 Seal for Switches
7
This manual suits for next models
1
Table of contents
Other Lincoln Controllers manuals