Viale Vicenza 14
36063 Marostica VI - Italy
www.vimar.com
01417EN 02 2001
01417
Actuator and RGB(W) dimmer, 4 PWM outputs up to 5 A 12-48 VDC with
constant voltage control, brightness control of max. 4 monochrome LEDs or
RGB(W) LED strips or spotlights or Dynamic White LED strips or spotlights, 1
NO relay output 6 A 120-240 V~ for LED power supply units, push buttons for
local control, By-me home automation, installation on DIN rail (60715 TH35),
occupies 4 modules size 17.5 mm.
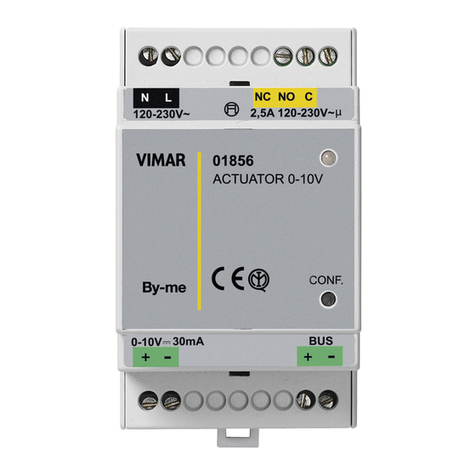
The device is fitted with 4 amber front LEDs which indicate the status of the outputs, 4 front
buttons to test the outputs, 1 red LED to signal any anomalies, 1 relay contact to pilot the mains
voltage of the auxiliary power supply unit of the LEDs and 4 independent output channels.
CHARACTERISTICS
• BUS Rated supply voltage: 29 V
• Absorption from the BUS: 10 mA
• VIN LED auxiliary supply voltage (min-max): 12-48 VDC (SELV)
• Maximum output current per channel: up to 5 A (see table in fig. CONTROLLABLE LOADS)
• Output voltage: 0-Vin VDC
• LED auxiliary input current (max): 12 A
• Terminals:
- 2 for TP bus
- 4 for LED auxiliary power supply
- 2 for relay contacts (C, NO)
- 8 for the 4 RGB(W) LED channels
• Operating temperature -5 °C + 45 °C (indoor)
• Max. casing temperature: 80 °C
• IP20 protection degree
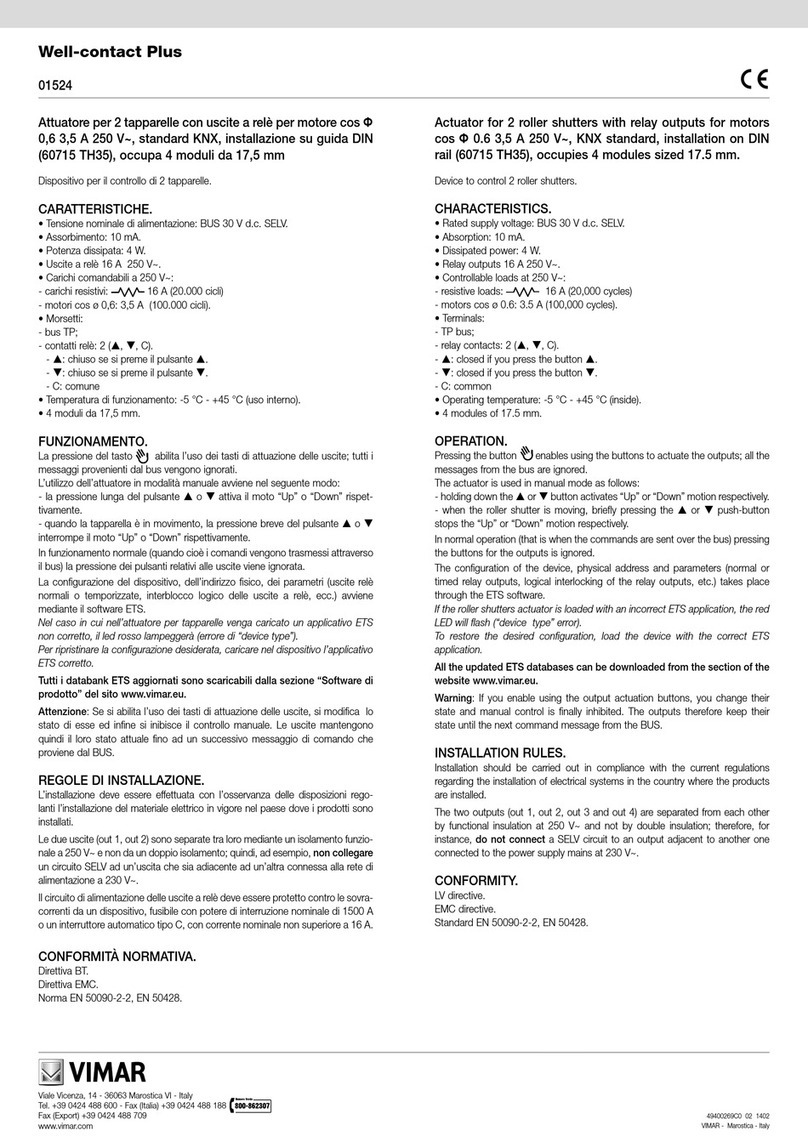
• The device 01417 should be configured with the Automation Gateway 01410-01411 and
App VIEW Pro.
• Not compatible with By-me control panels 21509 and EasyTool Professional.
CONTROLLABLE LOADS
• Relay output:
- controllable loads at 120 - 240 V~, NO contact:
auxiliary power supply units for LED auto overload-protected (direct current limitation,
automatically resumes operation after the error condition is removed): 6 A (20,000 cycles)
• RGB(W) outputs: monochrome LED, RGB(W) or dynamic white LED strips and spotlights.
OPERATION
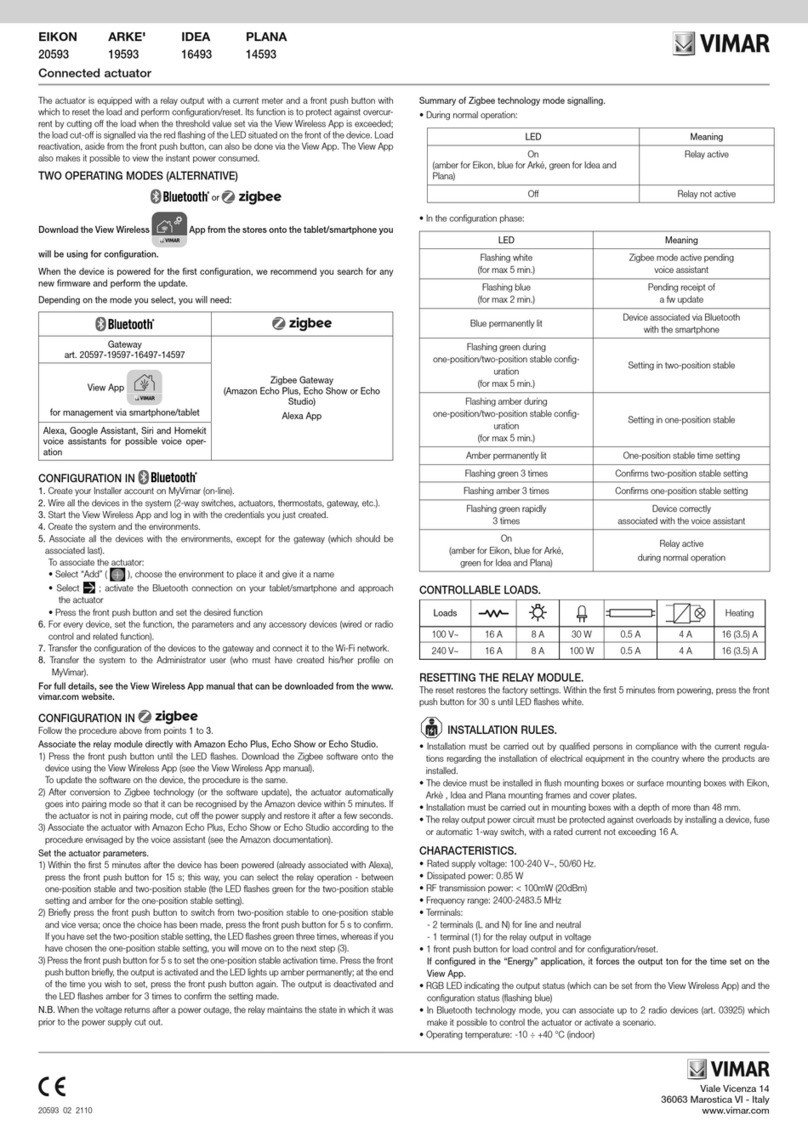
The actuator 01417 can be configured with the home automation Gateway 01410-01411.
• ON/OFF switching
Upon receipt of the ON/OFF controls, the device activates the last brightness value stored or
deactivates (0%) the corresponding channel.
• Relative brightness control (White)
Allows you to increase or decrease the brightness value of the channel according to the
controls received from other By-me devices. Upon receipt of a stop control, the control stops
and the brightness value reached at that moment is maintained.
• Absolute brightness control (White)
Allows you to set the absolute brightness percentage value defined by the control received. The
brightness value is reached via a ramp.
• Relative RGB(W) colour control
When the device is configured to control a RGB(W) LED strip, you the shade, saturation and
brightness values can be increased or decreased independently.
• Absolute RGB(W) colour control
When the device is configured to control a RGB(W) LED strip, the absolute RGB coordinate can
be set. The transition occurs via a ramp, the duration of which can be configured.
• Dynamic control of “Dynamic White” white
The dynamic white technology makes it possible to adjust the colour temperature of the white
light between 2,500 K and 7,000 K. The device in dynamic white mode simulates natural
daylight, adapting to the setting and to personal taste.
• Timed switching (Staircase Light)
The device activates the channel corresponding to the last brightness value stored for the time
set on the “ON duration” parameter and deactivates it (brightness value 0%) when the time
expires (not available in RGB(W) mode).
Protections
The device is fitted with the following integrated protections:
• Over-temperature (reversible auto-off)
• Anti polarity inversion of auxiliary LED power supply
• Over-current including the short-circuit of the 4 LED outputs
• Over-voltage
Over-temperature
The possible over-temperature of the device is signalled by the red flashing of the front Alarm
LED while the amber channel status LEDs are off. During the over-temperature, the 4 LED
outputs are fixed with PWM at 1% and every manual control or control received from the bus is
ignored. Once the cause of the over-temperature has been remedied and the normal operating
temperature has been reached, the amber LEDs of the 4 output channels flash and the red
Alarm LED remains flashing. Normal operation can resume and the over-temperature signal can
WEEE - User information
The crossed bin symbol on the appliance or on its packaging indicates that the product at the end of its life
must be collected separately from other waste. The user must therefore hand the equipment at the end of its
life cycle over to the appropriate municipal centres for the differentiated collection of electrical and electronic
waste. As an alternative to independent management, you can deliver the equipment you want to dispose of
free of charge to the distributor when purchasing a new appliance of an equivalent type. You can also deliver
electronic products to be disposed of that are smaller than 25 cm for free, with no obligation to purchase, to
electronics distributors with a sales area of at least 400 m2. Proper sorted waste collection for subsequent re-
cycling, processing and environmentally conscious disposal of the old equipment helps to prevent any possible
negative impact on the environment and human health while promoting the practice of reusing and/or recycling
materials used in manufacture.
be deactivated by manually pressing any of the front buttons of the 4 channels (1-R, 2-G, 3-B,
4-W) or via bus control.
LED indications
Description amber
channel
status LED
amber manual
operation LED
Red Alarm
LED
No fault, load piloted On Manual on
Bus off
Off
No fault, load off On Manual on
Bus off
Off
Over-temperature Off Off On flashing
Return below threshold
over-temperature
On flashing Off On flashing
Reset test after
over-temperature
On flashing Off Red
permanently
on
Polarity inversion or absence
of auxiliary voltage
Off Off Red
permanently
on
CONFIGURATION
For the configuration operations, see the By-me Plus system manual.
• Functional units: 8
- Dimmer (1-R), Dimmer (2-G), Dimmer (3-B), Dimmer (4-W), Dimmer (1-R + 2-G)
- Dynamic white dimmer (1-R + 2-G), Dynamic white dimmer (3-B + 4-W)
- RGB/RGBW dimmer (1-R + 2-G + 3-B + 4-W)
INSTALLATION RULES
• Installation must be carried out by qualified persons in compliance with the current regulations
regarding the installation of electrical equipment in the country where the products are installed.
• The power supply units used to power the auxiliary input must have the SELV or SELV
Equivalent output.
• The loads controllable from the LED outputs must be in class III.
• The relay output power circuit must be protected against overloads by installing a device, fuse
or automatic 1-way switch, with a rated current not exceeding 10 A.
• This device is compliant with the reference standard, in terms of electrical safety, when it is
installed in the related control unit.
• If this device is used for purposes other than those specified by the manufacturer, the protection
provided may be compromised.
• Observe the maximum current and voltage values given for the device.
• Ensure minimum clearance distances all round the device in order to provide sufficient
ventilation. The device must not be exposed to water drip, splash or spray.
REGULATORY COMPLIANCE
LV Directive. EMC directive. EN 60669-2-5, EN 50491 standards.
REACH (EU) Regulation no. 1907/2006 – Art.33. The product may contain traces of lead.
