manuals.online logo
Brands
  1. Home
  2. •
  3. Brands
  4. •
  5. Lindy
  6. •
  7. Cables And Connectors
  8. •
  9. Lindy 38406 User manual

Lindy 38406 User manual

© LINDY ELECTRONICS LIMITED & LINDY-ELEKTRONIK GMBH - FIRST EDITION (September 2013)
2 Port DisplayPort Expander View Splitter
User Manual English
Benutzerhandbuch Deutsch
Manuel Utilisateur Français
Manuale d’uso Italiano
No. 38406
www.lindy.com
Tested to Comply with
FCC Standards
For Home and Office Use!
User Manual English
Introduction
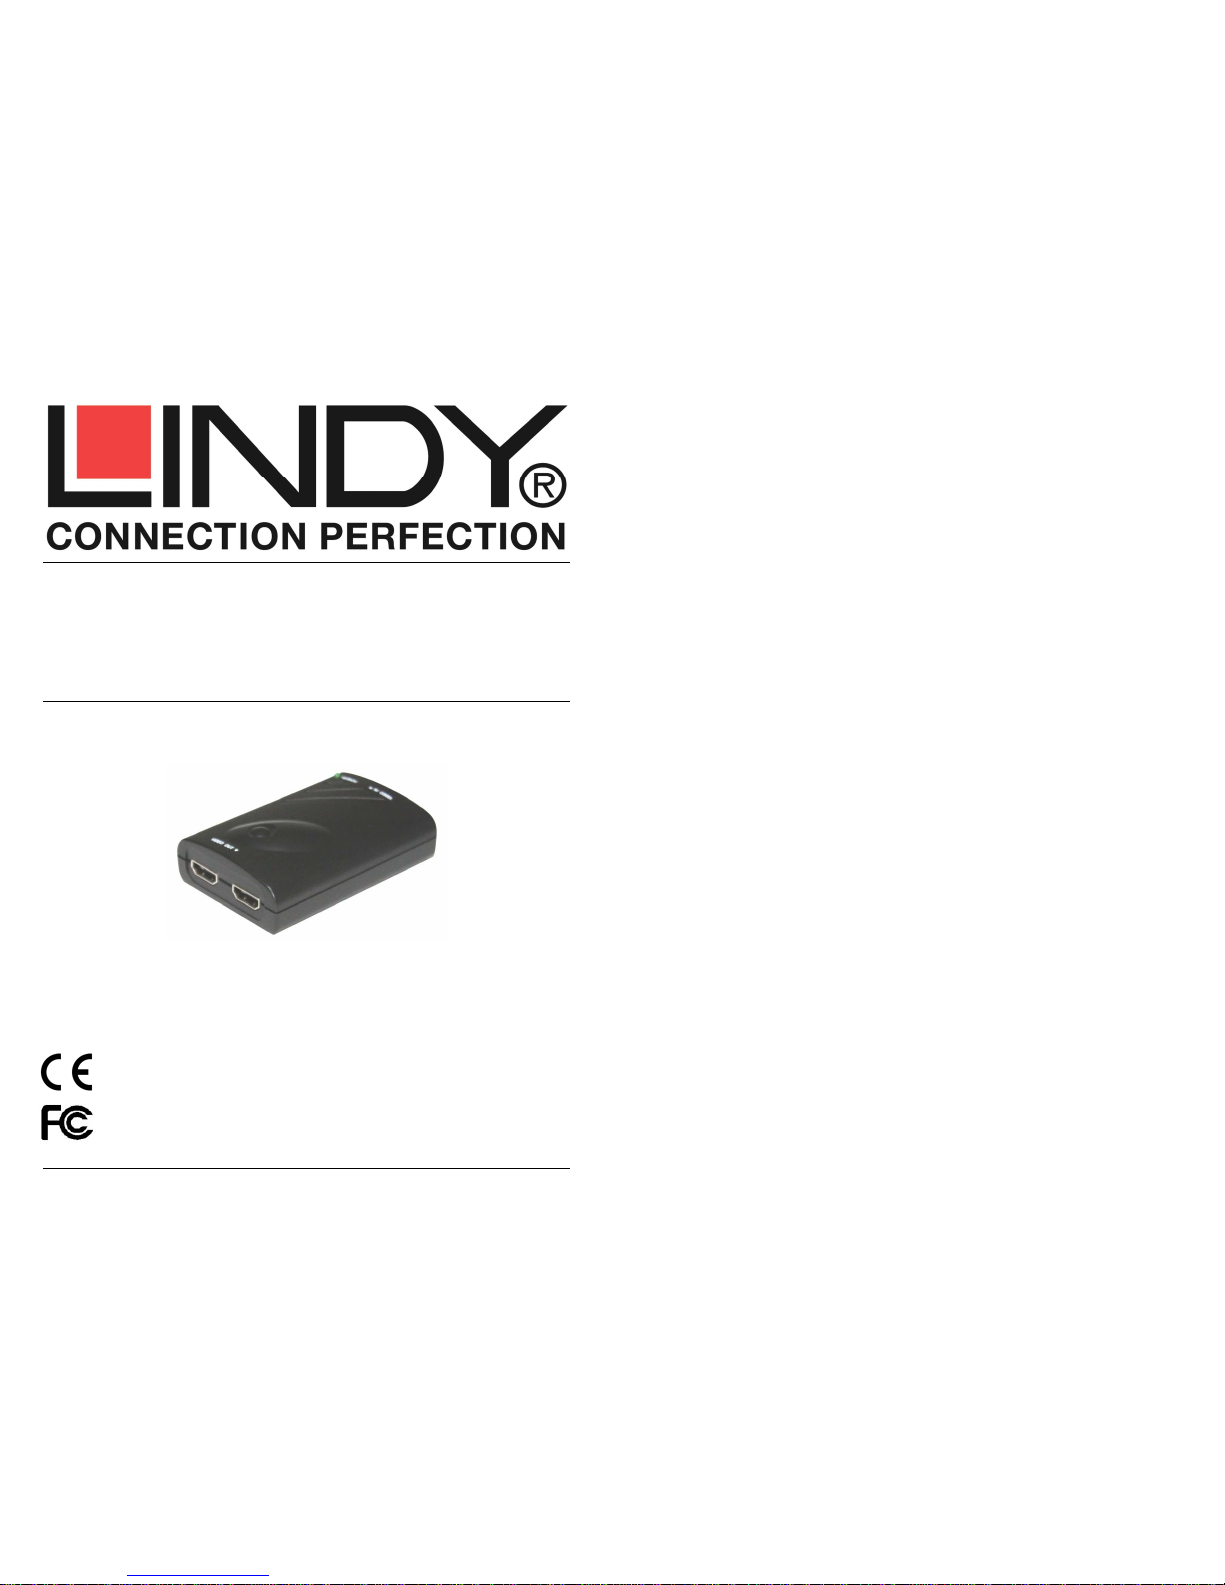
Thank you for purchasing the LINDY 2 Port DisplayPort Splitter with Expander-view. This device is a
high performance DisplayPort splitter which allows one DisplayPort source to be shown simultaneously
on 2 different DP displays or extended across the displays to show one picture. The Expander-view
function detects how many displays are connected and generates a combined resolution EDID that
allows the picture to be extended across 2 displays.
Package Contents
LINDY 2 Port DP Expanderview Splitter
DP Male to Male Cable
This manual
Features
Supports DisplayPort 1.1 signals up to 1920x1200
We recommended you use identical monitors for the best performance
Supports cable lengths of 5m in and 5m out
Maximum resolution depending on the monitors:
Clone Mode:
1920x1200@60Hz with 1 or 2 displays
Extender Mode:
3840x1200@60Hz with 2 displays (2 x 1920x1200)
Resolutions above 1920x1200 per monitor are not supported
Operation
The LINDY 2 port DisplayPort splitter is a plug and play device that does not need to be
configured with software or driver support. The splitter automatically switches between “clone”
mode and “extended” mode by controlling the output resolution on the computers graphics card.
Before you install the splitter, make sure all your devices are switched off.
1. Connect a DP cable from your PC to the DP “in” port of the splitter.
2. Connect the DP splitter to the “in” port of your displays.
NOTE: We strongly suggest using monitors of the same resolution and size. If using
monitors with different native resolutions, connect the monitor with the lowest resolution
to port 1. Otherwise the screen may remain blank and not work at all.
3. Power on the computer and then the displays. The splitter is powered from the DP port.
4. If you don’t get a picture, reboot again. If this does not help, attach one monitor. If this
does not work the monitor model may be incompatible and would need changing.
5. When you have a picture on your displays, adjust the resolution on your PC to the
maximum supported for clone mode or the required resolution for multiple displays.
Benutzerhandbuch Deutsch
Einführung
Dieser DisplayPort Expander View Splitter kann nicht nur ein DP-Bildsignal auf zwei Ausgängen
gleichzeitig wieder auszugeben, sondern die Expander-View-Technologie erlaubt es auch, über
den einen DP-Eingang zwei unterschiedliche Bilder eines „erweiterten Desktops“ auf zwei DP-
Monitore zu verteilen. Die Expander-View-Technologie kombiniert die Auflösungen der zwei
angeschlossenen Bildschirme zu einem großen virtuellen Desktop.
Lieferumfang
2 Port DP Expander View Splitter
Dieses Handbuch
DisplayPort Anschlusskabel
Eigenschaften
Unterstützt DisplayPort 1.1 Signale und pro Bildschirm eine Auflösung bis 1920x1200
Es wird empfohlen identische Monitore zu verwenden
Unterstützt Kabellängen bis 5m an Ein- und Ausgang
Maximale Auflösungen abhängig von Monitoren:
Clone Mode (beide Monitore zeigen das gleiche Bild): 1920x1200@60Hz
Expander Mode (Monitore zeigen erweiterten Desktop):
3840x1200@60Hz mit 2 Displays (2x 1920x1200)
Höhere Auflösungen als 1920x1200 pro Monitor (z.B. 2560x1600) werden NICHT unterstützt
Betrieb
Der 2 Port DisplayPort Splitter mit Expander-View-Technologie wird nicht konfiguriert. Er
schaltet automatisch in den “Clone”- oder “Expander”-Modus, je nachdem welche Auflösungen
die Monitore unterstützen und welche Auflösung an seinem DP-Eingang durch Einstellung der
Grafikkarte im Betriebssystem angeliefert wird.
Schalten Sie vor der Installation bitte alle Geräte aus.
1. Schließen Sie Ihren Rechner mit einem DisplayPort Kabel an den Eingang des Splitters an.
2. Schließen Sie ihre DP Monitore an den Splitter an
HINWEIS: Verwenden ausschließlich Monitore mit den gleichen Auflösungen, am besten
identische Monitore. Bei Monitoren mit unterschiedlichenAuflösungen schließen Sie den mit
der niedrigsten Auflösung an Port 1 an, andernfalls wird möglicherweise kein Bild angezeigt;
möglicherweise wird dies aber auch nicht funktionieren.
3. Schalten Sie den Rechner und alle Geräte ein, Der Splitter wird über DP mit Strom versorgt.
4. Wenn Sie kein Bild erhalten booten Sie den Rechner erneut. Wenn das nicht hilft schließen
Sie nur einen Monitor an; zeigt auch dieser kein Bild, so booten Sie erneut. Wenn er weiter
kein Bild zeigt ist entweder der Monitor oder die Grafikkarte inkompatibel.
5. Wenn Sie auf allen Monitoren ein Bild sehen stellen Sie die maximale Auflösung für den
Clone-Modus ein, oder die große kombinierteAuflösung des erweiterten Desktop für den
Expander-View-Modus.
Manuel Utilisateur Français
Introduction
Merci d’avoir choisi ce splitter Displayport 2 ports LINDY avec fonction d’affichage étendu. Cet appareil
est un splitter DisplayPort hautes performances qui permet l’affichage d’une source DP sur trois écrans
DP ou en mode étendu pour n’afficher qu’une seule image. La fonction de mode étendu détecte le
nombre d’écrans connectés et génère une résolution combinée EDID qui permet à l’image d’être
affichée en mode étendu sur 2 écrans.
Contenu de l’emballage
Splitter DisplaPort 2 ports LINDY
Câble DP mâle/mâle
Ce manuel
Spécifications
Prise en charge des signaux DisplayPort 1.1 et par écrans les résolutions jusqu’à
1920x1200
Il est fortement recommandé d’utiliser des écrans identiques !
Supporte des longueurs de câbles de jusqu’à 5m, en entrée comme en sortie
Résolution maximum dependante des écrans:
Mode clone:
1920x1200@60Hz avec 1ou 2 écrans
Mode étendu:
3840x1200@60Hz avec 2 écrans (2x 1920x1200)
Les résolutions supérieures à 1920x1200 par écrans ne sont pas prises en charge.
Mise en route
Le splitter DisplayPort 2 ports LINDY est un périphérique plug and play qui ne nécessite pas de
paramétrage logiciel ou de pilote. Le splitter peut automatiquement commuter entre le mode
“clone” et “étendu” (extended) en contrôlant tout simplement la résolution en sortie de carte
graphique de l’ordinateur.
Veuillez-vous assurer que vos appareils soient hors tension avant d’installer ce splitter.
1. Connectez un câble DP de votre PC au port d’entrée DP “in” du splitter.
2. Connectez le splitter DP au port d’entrée “in” de vos écrans.
NOTE: Nous recommandons fortement d’utiliser des écrans de tailles et de résolutions
identiques !!! Dans le cas d’utilisation d’écrans ayant une résolution native différente,
connectez l’écran avec la plus basse résolution au port 1 du splitter. Autrement l’écran
peut ne rien afficher et rester blanc.
3. Démarrez votre PC (redémarrage) puis le splitter et les écrans. Le splitter est alimenté
par le port DP
4. Si rien ne s’affiche, redémarrez une seconde fois l’ordinateur. Si cela ne fonctionne pas,
raccordez un seul écran. Si vous n’avez toujours pas d’affichage, changez de modèle
d’écran, il se peut qu’il soit incompatible.
5. Si vous obtenez une image sur vos écrans, ajustez la résolution sur votre PC au
maximum pris en charge par le mode clone ou à la résolution requise pour plusieurs
écrans.
Manuale d’uso Italiano
Introduzione
Grazie per aver scelto lo Splitter LINDY DisplayPort 2 porte con Expander-view. Questo dispositivo ad
alte prestazioni consente di visualizzare una sorgente DisplayPort su 2 monitor in simultanea oppure di
visualizzare una sola immagine estesa sui monitor. La funzione Expander-view riconosce i monitor
connessi e genera una risoluzione EDID combinata che permette di estendere l’immagine su 2 monitor.
Contenuto della confezione
Splitter DP 2 porte
Cavo Display Port Maschio/Maschio
Questo manuale
Caratteristiche
Supporta segnali DisplayPort 1.1 e risoluzioni fino a 1920x1200 per monitor
E’ consigliato utilizzare monitor identici!
Supporta la connessione di cavi lunghi fino a 5m in ingresso e in uscita
La risoluzione massima dipende dai monitor in uso (testato con HP LA2405wg 1920x1200):
Clone Mode:
1920x1200@60Hz con 1 o 2 monitor
Extender Mode:
3840x1200@60Hz con 2 monitor (2x 1920x1200)
Non sono supportate risoluzioni superiori a 1920x1200 per monitor
Utilizzo
Questo splitter DisplayPort è un dispositivo plug and play che non necessita di driver o di
essere configurato con un software. Lo splitter è in grado di commutare automaticamente tra le
modalità “clone” ed “extended” semplicemente regolando la risoluzione in uscita della scheda
grafica del computer.
Prima di installare lo splitter, assicuratevi che tutti i dispositivi siano spenti.
1. Collegate un cavo DP dal PC alla porta DP “in” dello splitter
2. Collegate lo splitter all’ingresso dei monitor.
N.B.: è consigliabile utilizzare monitor con le stesse risoluzioni e dimensione per un
risultato ottimale. Se ci sono monitor con risoluzioni diverse, selezionate il monitor con la
risoluzione più bassa e collegarlo alla porta 1 dello splitter. Se si collega il monitor con la
risoluzione più alta alla porta 1 potrebbe non visualizzarsi nulla dato che l’altro monitor
non è in grado di raggiungere tale risoluzione.
3. Accendete il computer e i monitor. Lo splitter è alimentato dalle porte DP.
4. Se non viene visualizzata alcuna immagine riavviate tutto ancora una volta. Se il
problema rimane può significare che il monitor utilizzato non è compatibile e dovrebbe
essere sostituito.
5. Se è presente la stessa immagine su tutti i monitor basta regolare la risoluzione dal PC
impostando la massima supportata per passare alla modalità clone.
CE/FCC Statement
CE Certification
This equipment complies with the requirements relating to Electromagnetic Compatibility Standards
EN55022/EN55024 and the further standards cited therein. It must be used with shielded cables only.
It has been manufacturererd under the scope of RoHS compliance.
CE Konformitätserklärung
Dieses Produkt entspricht den einschlägigen EMV Richtlinien der EU für IT-Equipment und darf nur
zusammen mit abgeschirmten Kabeln verwendet werden.
Diese Geräte wurden unter Berücksichtigung der RoHS Vorgaben hergestellt.
Die formelle Konformitätserklärung können wir Ihnen auf Anforderung zur Verfügung stellen
FCC Certification
This device complies with part 15 of the FCC Rules.
Operation is subject to the following two conditions:
1. This device may not cause harmful interference, and
2. This device must accept any interference received, including interference that may cause undesired
operation.
LINDY Herstellergarantie – Hinweis für Kunden in Deutschland
LINDY gewährt für dieses Produkt über die gesetzliche Regelung in Deutschland hinaus eine zweijährige
Herstellergarantie ab Kaufdatum. Die detaillierten Bedingungen dieser Garantie finden Sie auf der LINDY Website
aufgelistet bei den AGBs.
Recycling Information
WEEE (Waste of Electrical and Electronic Equipment),
Recycling of Electronic Products
Europe, United Kingdom
In 2006 the European Union introduced regulations (WEEE) for the collection and recycling of all waste electrical
and electronic equipment. It is no longer allowable to simply throw away electrical and electronic equipment.
Instead, these products must enter the recycling process.
Each individual EU member state has implemented the WEEE regulations into national law in slightly different
ways. Please follow your national law when you want to dispose of any electrical or electronic products. More
details can be obtained from your national WEEE recycling agency.
Germany / Deutschland
Die Europäische Union hat mit der WEEE Direktive Regelungen für die Verschrottung und das Recycling von
Elektro- und Elektronikprodukten geschaffen. Diese wurden im Elektro- und Elektronikgerätegesetz – ElektroG in
deutsches Recht umgesetzt. Dieses Gesetz verbietet das Entsorgen von entsprechenden, auch alten, Elektro- und
Elektronikgeräten über die Hausmülltonne! Diese Geräte müssen den lokalen Sammelsystemen bzw. örtlichen
Sammelstellen zugeführt werden! Dort werden sie kostenlos entgegen genommen. Die Kosten für den weiteren
Recyclingprozess übernimmt die Gesamtheit der Gerätehersteller.
France
En 2006, l'union Européenne a introduit la nouvelle réglementation (DEEE) pour le recyclage de tout équipement
électrique et électronique.
Chaque Etat membre de l’ Union Européenne a mis en application la nouvelle réglementation DEEE de manières
légèrement différentes. Veuillez suivre le décret d’application correspondant à l’élimination des déchets électriques
ou électroniques de votre pays.
Italy
Nel 2006 l’unione europea ha introdotto regolamentazioni (WEEE) per la raccolta e il riciclo di apparecchi elettrici
ed elettronici. Non è più consentito semplicemente gettare queste apparecchiature, devono essere riciclate. Ogni
stato membro dell’ EU ha tramutato le direttive WEEE in leggi statali in varie misure. Fare riferimento alle leggi del
proprio Stato quando si dispone di un apparecchio elettrico o elettronico.
Per ulteriori dettagli fare riferimento alla direttiva WEEE sul riciclaggio del proprio Stato.
LINDY No 38406
1
st
Edition, September 2013
www.lindy.com
Tested to Comply with
FCC Standards
For Home and Office Use!

Other Lindy Cables And Connectors manuals

Lindy 43250 User manual

Lindy

Lindy 43250 User manual

Lindy 42761 User manual

Lindy

Lindy 42761 User manual

Lindy 40774 User manual

Lindy

Lindy 40774 User manual

Lindy 42817 User manual

Lindy

Lindy 42817 User manual

Lindy 43333 User manual

Lindy

Lindy 43333 User manual

Lindy 43380 User manual

Lindy

Lindy 43380 User manual

Lindy 43270 1 User manual

Lindy

Lindy 43270 1 User manual

Lindy 38231 User manual

Lindy

Lindy 38231 User manual

Lindy 32356 User manual

Lindy

Lindy 32356 User manual

Lindy 20275 User manual

Lindy

Lindy 20275 User manual

Lindy 32407 User manual

Lindy

Lindy 32407 User manual

Lindy 20980 User manual

Lindy

Lindy 20980 User manual

Lindy 38320-6 User manual

Lindy

Lindy 38320-6 User manual

Lindy 32569 User manual

Lindy

Lindy 32569 User manual

Lindy 41300 User manual

Lindy

Lindy 41300 User manual

Lindy 38490-4 User manual

Lindy

Lindy 38490-4 User manual

Lindy 39307-8 User manual

Lindy

Lindy 39307-8 User manual

Lindy 42815 User manual

Lindy

Lindy 42815 User manual

Lindy 42867 User manual

Lindy

Lindy 42867 User manual

Lindy 38405 User manual

Lindy

Lindy 38405 User manual

Lindy 43273 User manual

Lindy

Lindy 43273 User manual

Lindy 43353 User manual

Lindy

Lindy 43353 User manual

Lindy 38358 User manual

Lindy

Lindy 38358 User manual

Lindy 41307 User manual

Lindy

Lindy 41307 User manual

Popular Cables And Connectors manuals by other brands

Hama 102173 Operating	 instruction

Hama

Hama 102173 Operating instruction

Cisco SR2016T-NA reference guide

Cisco

Cisco SR2016T-NA reference guide

Philips Sonicare 300 SerieS user manual

Philips

Philips Sonicare 300 SerieS user manual

3Com SS II ADVANCED RPS PWR Y-CABLE user guide

3Com

3Com SS II ADVANCED RPS PWR Y-CABLE user guide

Solinst 101 operating instructions

Solinst

Solinst 101 operating instructions

Philips SWV3504W Specification sheet

Philips

Philips SWV3504W Specification sheet

Renkforce 1783459 operating instructions

Renkforce

Renkforce 1783459 operating instructions

Radiall SOLYNEO CO15CAN product manual

Radiall

Radiall SOLYNEO CO15CAN product manual

Sonifex CM-AESX3 User handbook

Sonifex

Sonifex CM-AESX3 User handbook

Siemens 3VA1 100 630A Series operating instructions

Siemens

Siemens 3VA1 100 630A Series operating instructions

Smart-M HDS4P user manual

Smart-M

Smart-M HDS4P user manual

Philips SWV3434S specification

Philips

Philips SWV3434S specification

SECO-LARM Enforcer CA-1510-3FLQ Specification sheet

SECO-LARM

SECO-LARM Enforcer CA-1510-3FLQ Specification sheet

Panduit FK2BJ installation instructions

Panduit

Panduit FK2BJ installation instructions

AUSLIFT 915320 Service manual

AUSLIFT

AUSLIFT 915320 Service manual

Euvision Split 16 4x4 Service notes

Euvision

Euvision Split 16 4x4 Service notes

COMSOL HD1024K user manual

COMSOL

COMSOL HD1024K user manual

PEAKnx PNX-005-A17-00001 user manual

PEAKnx

PEAKnx PNX-005-A17-00001 user manual

manuals.online logo
manuals.online logoBrands
  • About & Mission
  • Contact us
  • Privacy Policy
  • Terms and Conditions

Copyright 2025 Manuals.Online. All Rights Reserved.