Batca Fitness Systems 2LD-8 Owner's Manual
__________ Page
Instructions 2
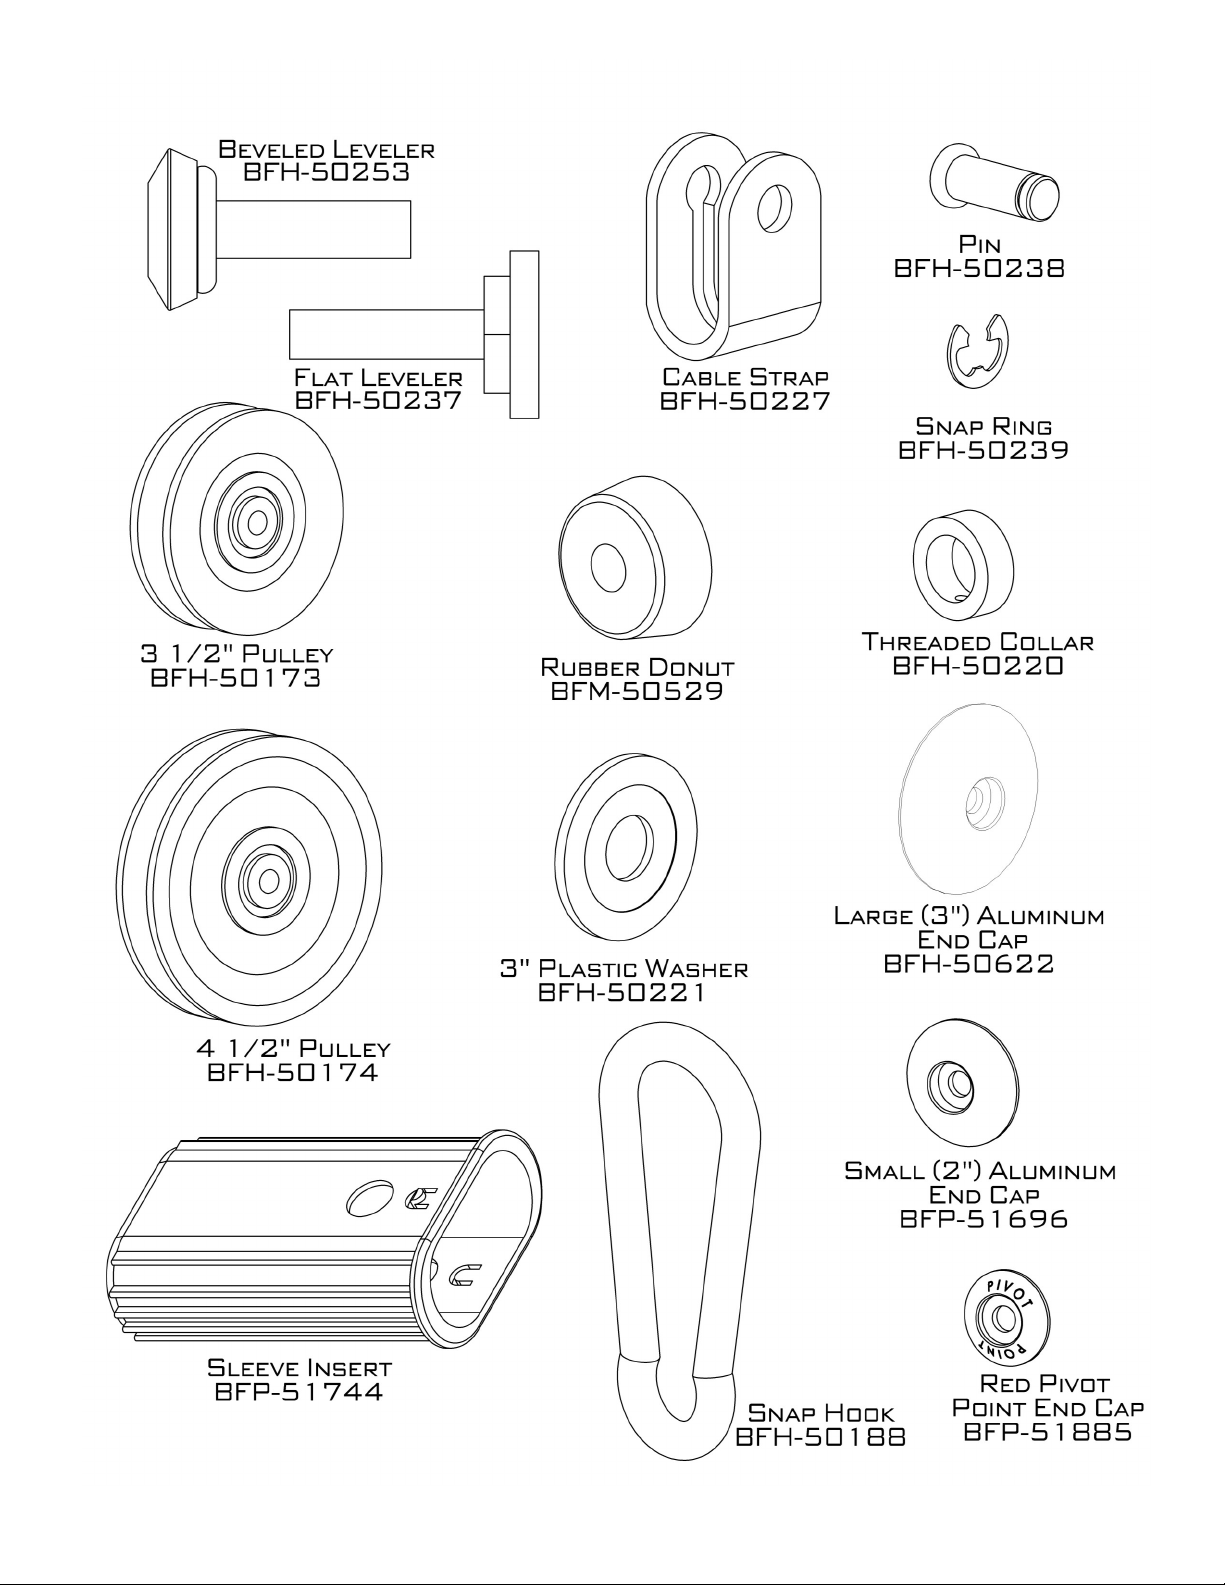
Parts Listing 3
Hardware Comparison 4-7
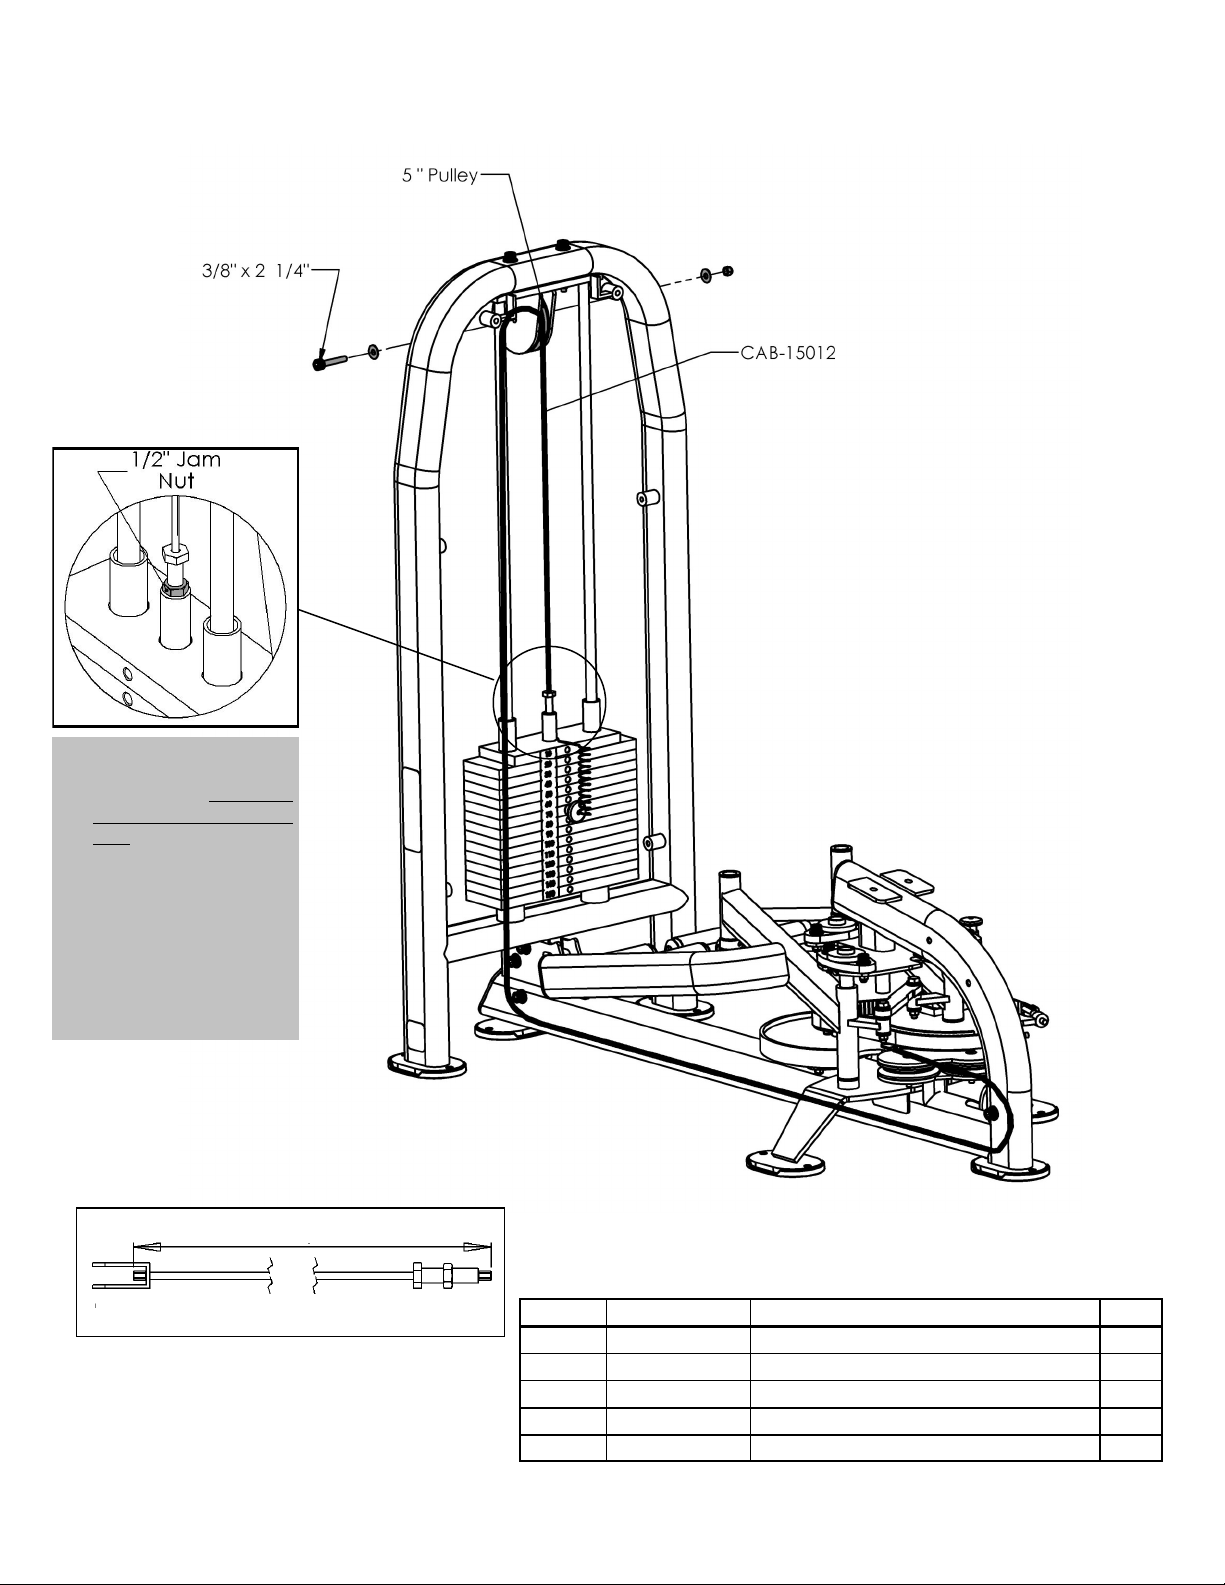
Main Assembly 8-16
Upholstery 14
Cable Routing 10
Batca Fitness Systems has built this gym to give you a safe, effective and enjoyable
workout. However, there is a risk assumed by individuals who use this type of equipment. It is
very important that all warnings and instructions are read and followed before beginning any
exercise program.
It is also very important to read and follow the preventative maintenance schedule
described in this manual. If any of the warning labels or stickers are worn, faded, torn,
scratched or missing they should be replaced immediately.
WARNING: There is a risk assumed by individuals who use this type of equipment. To minimize
risk always follow these rules.
1) It is essential that you consult with your physician before beginning any exercise program.
2) Inspect equipment before each use for loose, worn, or frayed parts (including cables, nuts
and bolts). Replace parts at first signs of wear (use only genuine BATCA replacement
parts). Use of equipment that is damaged, worn, frayed or not completely assembled on a
solid, level surface may result in injury.
3) Make sure all adjustment pins are fully engaged before using equipment.
4) Keep all parts of the body and clothing outside the path of any moving parts of the gym. Be
alert to the possibility of injury. Do not be careless.
5) Minors and children should not be allowed to play on or around this gym.
__________ Page
Final Assembly and Troubleshooting 17
Cable Tension and Adjustments 18
Maintenance 19
Warranty 20
Floor Plan Layout 21
Table of Contents
Instructions
Warning
Congratulations on the purchase of your new Batca LD-8. This gym will provide you with a lifetime of
enjoyment to meet your strength training needs. Batca Fitness Systems strives to build the best quality gyms
and to package these gyms in such a way to avoid any damage during shipping.
In order to get started with your assembly you should first familiarize yourself with this manual. It is
recommended that you read through each step thoroughly before you begin. Begin by opening your boxes and
separating all of your parts. Verify that all parts are accounted for and have no damage. When all parts are
accounted for, you may begin your assembly. Some items may have been pre-assembled for your convenience.
Please note that hardware quantities shown reflect total quantities for your gym and may not reflect actual
quantities in each bag. Assemble your gym on a solid level surface. This will ensure the best possible perfor-
mance, function, and safety for the gym and your workout.
Assemble your gym according to the step by step instructions found in this manual. Failure to do so
will void your warranty and may result in personal injury. After assembly, you should check each station to
ensure correct operation. If a problem arises, recheck your assembly with these instructions to verify cor-
rect assembly. If you are unable to correct a problem or have questions with your assembly please contact
your authorized Batca dealer.