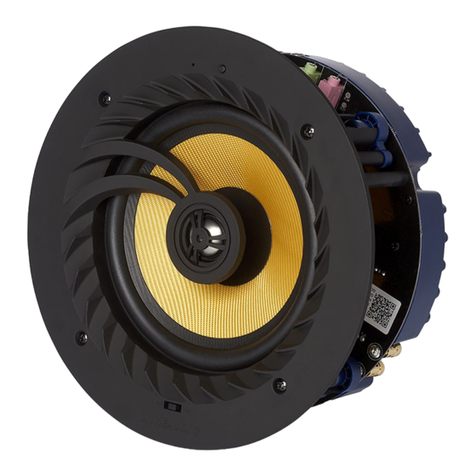
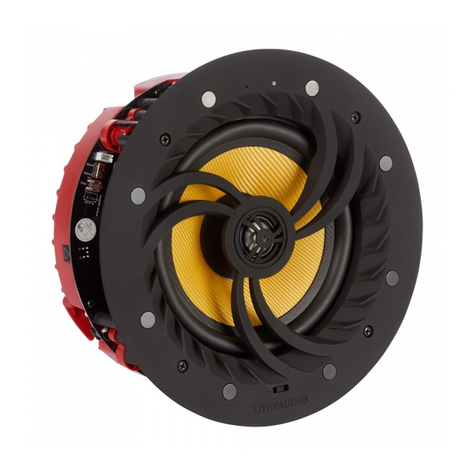
Lithe Audio iO1 Series User manual

INSTRUCTION
MANUAL

THANK YOU FOR
CHOOSING LITHE AUDIO
SHARE YOUR
INSTALL TO WIN
REGISTER YOUR
PRODUCT
LITHE PLAYLIST’S
FOR EVERY OCCATION
Innovative design and advanced engineering are built in to our iO1 series of wireless Wi-Fi surface
mount speakers. Designed for easy installation and high quality sound, within seconds each room
or outdoor space is setup and ready.This manual describes the installation of iO1 series speakers.
For video installation guides and advice visit:
SUPPORT.LITHEAUDIO.COM
We’re giving you a chance to win a selection of
Lithe Audio products simply by sharing a photo
of your installed ceiling speakers. Show off your
installation and creativity by tagging us in your
photo and using the hashtag #LitheAudioInstall
Good luck!
Register your Lithe Audio product today and
unlock exclusive bene ts! By registering your
product, you’ll receive warranty protection,
access to software updates, and priority
technical support. Plus, you’ll be the rst to
know about new products and promotions.
Looking for the perfect playlist for any occasion?
Look no further than Lithe Audio’s curated
playlists! From soft jazz for evening relaxation to
summer vibes for a garden party, our playlists
have got you covered. Get the party started
with Lithe Audio’s playlists today.
12
WORKS WITH
VOICE CONTROL
WIRELESS
MULTI-ROOM AUDIO
WORKS WITH
VOICE CONTROL
POWER VIA:
PLUG
SOCKET
OUTDOOR
SOCKET
OR
CONNECT SECOND SPEAKER
VIA SPEAKER CABLE
OPTICAL
ETHERNET
WIRELESS
CONNECT SECOND SPEAKER
VIA SPEAKER CABLE

USA REGULATIONS
BEFORE USE PLEASE READ COMPLETELY AND USE THE PRODUCT IN
ACCORDANCE WITH THESE SAFETY INSTRUCTIONS.
In accordance with US National Electrical Code. It is Important to hire a qualied electrician or
contractor who fully understands the NEC codes and regulations to ensure that your electrical
installation is in compliant with all relevant safety standards, as each state or locality may have their
own additional or stricter codes to be followed.
IMPORTANT: Before commencing any electrical works , locate your electrical panel for your
home or building. Turn OFF the power to panel by ipping the main breaker.
INSTALLATION GUIDE IN ACCORDANCE WITH US NEC CODE
A typical installation guide for tting Lithe Audio iO1 Speakers into your home.
The Lithe Audio speaker is designed for outdoor use IP6X rated. Recommend the plug is ter-
minated into an outdoor outlet Example:Taymac in use cover outlet (NM410C). Ensure power
supply unit is xed above the ground 6 inches.
Connect the DC connector into the dc receptacle on the speaker push into place to ensure a
solid connection.
READ THE INSTRUCTIONS CAREFULLY BEFORE STARTING THE IN-
STALLATION PROCESS AND KEEP THEM SAFE FOR FUTURE REFER-
ENCE.
• Failure to follow the instructions in this guide voids all warranties on your speakers.
• Warning: Do not use the product in water.
• Warning: Do not install speaker directly above any heat sources such as radiators, or other
apparatus that produces heat.
• Warning: Do not install insulation directly on top of the speaker
• Protect the power cable from being damaged, do not over stretch cable.
• Only use attachments/accessories specied by the manufacturer Lithe Audio.
• Turn off the power to the speaker when unused for long periods of time.
• Ensure the back housing cover to the speaker is fully secured and xed in place as without this,
shall invalidate the water proong integrity to the speaker.
• Ensure speaker location is free from obstructions such as electrical conduit, HVAC ducts or
Water lines.
4
IMPORTANT SAFETY WARNING
BEFORE USE PLEASE READ COMPLETELY AND USE THE PRODUCT
IN ACCORDANCE WITH THESE SAFETY INSTRUCTIONS.
Before commencing any electrical work ensure the supply is switched OFF at the mains. Either
by switching off the consumer unit or by removing the appropriate fuse.This product should
be installed in accordance with the relevant sections of the building regulations code and in
accordance with the latest edition of IEE regulations (BS 7671).
If the unit is to be used as a replacement for an existing product, remove the existing unit from its
location and disconnect the wiring. Connect the wires as shown in diagram. Ensure terminals are
properly tightened and ensure no bare wires are visible. When tting the speaker into the ceiling,
ensure no wires are trapped.
READ THE INSTRUCTIONS CAREFULLY BEFORE STARTING THE
INSTALLATION PROCESS AND KEEP THEM SAFE FOR FUTURE
REFERENCE.
• Failure to follow the instructions in this guide voids all warranties on your speakers.
• Warning: Do not use the product in water.
• Warning: Do not install speaker directly above any heat sources such as radiators, or other
apparatus that produce heat.
• Warning: To reduce the risk of re or electric shock, do not expose this speaker to rain or
moisture (directly above bath or shower area) or in Bathroom Zone 0 or Zone 1.
• Protect the power cable from being damaged, do not over stretch cable.
• Only use attachments/accessories specied by the manufacturer Lithe Audio.
• Turn off the power to the speaker when unused for long periods of time.
• A Fire and Acoustic speaker hood must be used in accordance with UK building and IEE
Regulations with a re rating of up to 60 minutes, is Parts B, L, C and E compliant.
• Do not open the back cover to the speaker as this protects the PCB as this will invalidate the
warranty and could cause electric shock.
• Ensure speaker location is free from obstructions such as electrical conduit, HVAC ducts or
Water lines.
3

5
KNOW YOUR SPEAKER
The Lithe Audio iO1 range of speakers have various inputs and outputs as listed below:
SPEAKER OUTPUT - To connect one additional passive (Slave) speaker (Gold Plated)
OPTICAL INPUT - To connect directly from TV Output, CD Player, DVD Player etc..
POWER INPUT - To connect (as supplied) Power Driver
ETHERNET INPUT/OUTPUT - To connect ethernet RJ45 cable for hard wired data connection
Power input 24V/5A
R+ (Red) R- (Black)
POWER
SERVICE
Speaker output (Right)
Optical Input
2 x 3”Waterproof coating paper cone
0.75” Waterproof coating silk dome tweeter
Built in Amplier & Wi-Fi chipset
Ethernet in and out
Magnets for Cover
IPX6 Rated all weather casing
LED indicator
Connection Reset Button
In built over voltage, under voltage, over temperature, and short circuit protection, if there is an electrical fault,
the power supply to the amplier will cut off automatically and restart when the speaker has stabilised.
6
Please ensure you read the entire instruction manual carefully before you commence any work.
Carefully unpack the speakers from the packaging. Please check to ensure all the parts shown
below are included.
If any parts of the speaker appear damaged, please contact your dealer/reseller immediately or
BOX CONTENTS
Listed below is the hardware equipment needed to install the speaker, with the addition of
a ladder to ensure the installation is done safely. A mounting template is included in the box.
PREPARATION EQUIPMENT YOU WILL NEED
i01 SURFACE MOUNT SPEAKER
WITH MOUNTING BRACKET
MOUNTING GUIDE 7M SPEAKER CABLE
SCREWDRIVER MEASURING TAPE
PENCIL PROTECTIVE EYEWEAR 5M DC EXTENSION
CABLE (OPTIONAL)
POWER DRIVER
WITH 5M CABLE
DRILL WIRE CUTTERS
SPEAKER GRILLE
MODEL i01 PAIR MODELS
ALSO INCLUDE
PASSIVE i01 SPEAKER
RESET PAIR
OPTICAL
ETHERNET ETHERNET
5

HOW TO MOUNT ONE SPEAKER SIX WAYS
8
2.WALL MOUNT
3. COUNTER TOP
1. Using the hole template, mark out the holes on the wall, make sure
to check for water pipes or electrical cable before drilling holes for
wall plugs (2 positions).
2. Fix the mounting bracket to the wall using m4 x 40mm
(2 Positions)
3. As per g1 attach the cables into the back of the speaker
4. Remove metal grille and the rubber bungs as shown, insert the m4
x 90mm screws through the speaker.
5. Ensure to add the spacers 2 positions between speaker and wall
bracket.
6. Index the wall mount on speaker groove. Be careful not to over
tighten the screws. Ret the 2 rubber bungs and metal grille.
1. Attach the mounting bracket to the speaker as shown using m4
x 10mm (2 Positions)
3. As per g1 attach the cables into the back of the speaker
3. Carefully rest on the desktop for horizontal counter top position.
With 3 positions options this method is ideal for any wall mount
application where you want to focus audio and direct to a indoor
or outdoor seating area.
Ideal for on a bookcase, dining room sideboard, a desk or
above a kitchen unit.
1.FLUSH MOUNT
1. Using the hole template, mark out the holes on the wall, make
sure to check for water pipes or electrical cable before drilling
holes for wall plugs (4 positions).
2. Fix the bracket to the wall with m4 x 90mm screws (4 positions).
3. As per g1 attach the cables into the back of the speaker.
4. Remove metal grille (magnetic) and the 2 x rubber bungs as
shown, insert the m4 x 90mm screws through the speaker.
5. Ensure to add the spacers 4 positions between speaker and wall
bracket. Be careful not to over tighten the screws.
6. Ret the 2 rubber bungs and metal grille.
Ideal for any corner such as eaves in the garden or corners of
rooms.You can mount horzontally or vertically.
CABLE ASSEMBLY (FIG 1)
1. Remove the rear cable enclosure as shown (4 positions)
2. Remove the 3 screws as shown which xes the metal pressure
plate into place and remove both.
3. Remove the Rubber cable clamp from the plastic rear cover.
4. Insert the speaker, power, ethernet, optical cables through the
rear cover opening and through rubber cable clamp into the
position on the back of the speaker.
CHECK the cable has been pushed and secured into place.
5. Place the rear cover back into place and fasten (4 positions)
6. Push back the rubber cable clamp and t around the cables
and push into place making a water tight seal. Be careful not to
pull on the cables during assembly
For all the mounting option you will need to follow this cable
Scan to watch
install video guide
Scan to watch
install video guide
Scan to watch
install video guide
Scan to watch
install video guide
7

Scan to watch
install video guide
10
POWER INSTALLATION
IMPORTANT: BEFORE COMMENCING ANY ELECTRICAL WORK ENSURE
THE SUPPLY IS SWITCHED OFF AT THE MAINS. IF YOU ARE UNSURE HOW TO
FIT SEEK HELP FROM A PROFESSIONAL ELECTRICIAN / INSTALLER
WITH OPTIONAL ACCESSORY PACKS
1. Mark out the position of the speaker
using a tape measure and mark using a
pencil with the template supplied. Check
to make sure no obstruction is present
prior to drilling holes.
2. Use suitable screws and wall plugs to
ensure a secure t to the wall or surface
the speaker is being mounted too.
4. OUTDOOR USE:
DO NOT CUT THE PLUG OFF THE POWER
SUPPLY AS THIS IS NOT PERMITTED.
Plug into an outdoor plug socket only.
PAINTABLE GRILLES ( INDOOR USE ONLY)
Do NOT paint the speaker grilles if using in an outdoor application. Lithe Audio does NOT rec-
comend spray painting as the paint may ake off over time if used in an outdoor application. For
Indoor use you can use spray paint to colour any colour required.Apply 2xThin coats from 30cm
distance.
3. INDOOR USE:
Plug in or Cut the plug off and terminate
into fused spur (5A fuse) OR connect plug
into plug socket directly.
4. PENDANT MOUNT
5. GARDEN SPIKE
1. As per g1 attach the cables into the back of the speaker
2. Remove metal grille and the rubber bungs as shown, insert the m4
x mm screws through the speaker.
43 The screw xing shall petrude through the back of the speaker by
10mm. Fix the pendent eyelet to petruding screws (2 Positions)
5. Ensure to tighten but not overtighten. Where required you can use
3M thread lock. (not supplied)
7. With the eyelets in place you can now suspend from your ceiling
via metal wire or hangers to suit. (not supplied)
1.Attach the spike arm to the back of the wall mounting bracket using
xin. (2 Positions)
2. As per g1 attach the cables into the back of the speaker
3.Follow the steps in the wall mounting to attach wall bracket to the
speaker.
4. Attach the spike to the upright of the spike stem. using xing (4
positions)
5. If bolting the spike to a patio or at slab, use the metal base plate
and x with 1 xing. Where required bolt through to the oor for
perminant xing (4 positions)
Note:To adjust the angle of the speaker loosen the nut and and fasten
back at the set angle required
If you have purchased the additional Pendent
mounting Kit please follow the steps below
to t into the speaker.
If you have purchased the additional Garden Spike Kit please follow
MOUNTING KIT SOLD SEPERATLY
GARDEN SPIKE SOLD SEPERATLY
Scan to watch
install video guide
Scan to watch
install video guide
9

YOUR HOME WI-FI NETWORK
To enable the Lithe Audio Wi-Fi ceiling speakers, your device must be on the same network.
• Ensure your network has a high speed internet connection, as the speakers are designed to
provide you with free online software/ rmware updates.
• High speed DSL / cable modem, or ber to the home broadband is recommended for best
possible playback of music services.
• Lithe Audio communicates over a 2.4GHz & 5GHz Wi-Fi home network supporting
802.11 a, b, g, n, ac wireless technology only.
• For larger homes where Wi-Fi signal is not stable, we suggest adding access points/mesh
network to strengthen the network or updating your router to a higher speci cation model to
suit the demand OR connect via hard wired ethernet connection.
• For connections to computer or NAS drive for playing personal music library, we recommend
for best performance connecting via Ethernet cable.
LITHE AUDIO APP SETUP
• To enhance your listening experience download Lithe Audio app via the app store on your
device follow the setup procedures within this instruction manual.
• The app will allow you to setup singular rooms, groups of speakers for multiroom
• You can set the speaker sound settings, equalier & speaker pro les for each mounting method.
STATUS INDICATOR LIGHT
Located on the rear of the speaker, the LED Indicates the status of your speaker:
• Red solid: Speaker booting up
• Red slow ash (3s 1 time): Speaker under standby mode, waiting for user operation
• Green solid: Speaker is active and connected to Wi-Fi
• Green slow ash(1s 1 time): Speaker trying to connect to the precon gured Wi-Fi
• Solid purple: Speaker under WiSA mode
• Green quick ash(1s 4 times): Speaker in WAC/SAC mode, user to con gure Wi-Fi
• Green breath: When device is playing the Spotify connect & Cast playbacks.
• Blue Solid : When device is connected to Bluetooth.
• Blue breath: When device is playing the Bluetooth connect & playbacks.
OPTIONAL ETHERNET CONNECTION
The hardwire data connection ports allow to connect to the speaker via ethernet cable for data
using either of the RJ45 ports and a CAT5 or CAT6e cable.
This is particularly useful in outdoor applications where the WiFi signal maybe poor in certain
areas of the garden or in indoor locations where walls may be thick or commercial applications
where a lot of wi signals are present.
12
RESET & PAIR BUTTON
Reset button: short press is used to reset the speaker and clear the previous wi and Bluetooth
con guration records.
Pair button is used to put the device in WiSA mode
11
WORKS WITH
VOICE CONTROL
WIRELESS
MULTI-ROOM AUDIO
POWER VIA:
PLUG
SOCKET
OUTDOOR
SOCKET
OR
CONNECT SECOND SPEAKER
VIA SPEAKER CABLE
OPTICAL
ETHERNET

14
1. Swipe down from the top right of
the screen to open control panel
2. Click on the right corner icon
to show available AirPlay devices
PLAY VIA IOS AIRPLAY 2
To play directly to speaker(s) using a iOS devices (iPad, iMac, iPhone, Apple TV etc) you can
connect via AirPlay 2. Please follow the steps below:
ENSURE THE SPEAKER IS CONNECTED TO THE POWER SUPPLY, AND THE WIFI
NETWORK.
Note:When using AirPlay 2 the Lithe app grouping and playback functions for mutiple speakers
becomes redundant.The ability to play any source is is now possible. As well as playing with other
brands in an multi room environment.
3. Audio display screen shall show
available devices to play music
through as per list
4. Select the speaker(s) to play music through
open any app and play your music
SETUP FOR APPLE IOS AirPlay 2
NOTE: If you are connecting via ethernet cable no
setup is necessary
1. Ensure the Wi-Fi speaker is connected to the power supply and is
turned on, the LED indicator will ash red slowly.
2. Press and hold the ‘Connection Reset Button’ for 5 seconds &
release, the LED indicator will ash Green and the speaker is now
ready to connect to your Wi-Fi network.
3. Open the Wi-Fi setting menu on
your phone or tablet
4. Select the new AirPlay speaker listed you
would like to add to your network
5. Select your network and change the
‘Speaker Name’ to something easily
identi able e.g. Kitchen and click Next
6. The Lithe Audio Wi-Fi speaker
setup is now complete, return to
the Lithe Audio app
3.
Open the Wi-Fi setting menu on
your phone or tablet
Image shows Apple iPhone but visuals may change from device to device.
Apple and iPhone are trademarks of Apple Inc., registered in the U.S. and other countries.
Select your network and change the
identi able e.g. Kitchen and click Next
6.
The Lithe Audio Wi-Fi speaker
setup is now complete, return to
the Lithe Audio app
OPEN CAMERA & SCAN TO
DOWNLOAD THE APP
Use of the Works with Apple badge means that an accessory has been designed to work specifi cally with the technology identifi ed in the badge and
has been certifi ed by the developer to meet Apple performance standards. To control this AirPlay 2–enabled speaker, iOS 11.4 or later is required.
Apple, iPad, iPad Air, iPad Pro, iPhone and AirPlay are trademarks of Apple Inc., registered in the U.S. and other countries.
13

1. To group speakers, click +,
create speaker group
2. Click on the speakers you want to
group, next, name group
PLAY VIA GOOGLE
To play directly to speaker(s) using Google Cast. Please follow the steps below:
ENSURE THE SPEAKER IS CONNECTED TO THE POWER SUPPLY, AND THE WIFI
NETWORK.
Note:When using Google Cast the Lithe app grouping and playback functions for mutiple speak-
ers becomes redundant.The ability to play any source is is now possible. As well as playing with
other brands with Google Cast built in within an multi room environment.
3. Audio display screen shall show
available devices to play music
through as per list
4. Select the speaker to play music
through and press play on your source
player
5. Click set up device, New devices Setup
new device
7. Select speaker, Next, click on Lithe
Audio Speaker all set.
SETUP FOR GOOGLE HOME
1. Download the Google Home app from thhe Google Play store
2. Ensure the Wi-Fi speaker is connected to the power supply and is
turned on, the LED indicator will ash red slowly.
3 . Press the + top left hand corner, Click set up device, choose home to
start looking for devices on your network, choose Speaker, Next.
4. Open Google Home and click the +
sign top left hand corner
6. Select existing home or create new
home to start looking for devices
Google, Chromecast built-in are trademarks of Google LLC.
Chromecast Built-in
1615

SPECIFICATIONS
GENERAL
• Power Input Supply : 100 - 240V, 50/60Hz /
2.5A
• Transformer Output Supply : DC24V / 5.25A
• Dimensions 465 x 170 x 100mm
(18.3 x 6.7 x 3.9 in)
• Weight 2.75kg (6 lbs)
• IP rating: IPX6
• Operating Temperature 0º to 50º C
(32º to 122º F)
• Storage Temperature -20º to 70º C
(4º to 158º F)
* Specications subject to change without notice.
** Power Consumption depends on the type of music & volume
- Increased Bass & volume requires more power loading on the
amplier.
- Internet functionality may require payment of separate fee to a
service provider.
5.15~5.25GHz Band
Operations in the 5.15-5.25GHz band are restricted to indoor
use only.The working state of the two 5G modules is controlled
by the internal hardware SWITCH module, 2:1 multiplexing, and
the default wireless module works. By operating on APP,
sending “Select” command, controlling internal hardware switch
to select corresponding working wireless module, will not work at
the same time.
SPEAKER
• RMS Power: 100W RMS (2x 50W)
• Frequency Reponse 55Hz-20kHz (+/- 3dB)
• Sound Quality THD+N<0.009%,
• Impedance: 4 Ohms nominal (8 8)
• Sensitivity (1W/1m): 82dB
• Line In Analog (Optical), auto-detecting
• Type: Class D (Digital)
• Audio Compression: 192Khz/24bits
• Bluetooth 5.0
• Woofer: 2 x 3” waterproof coated
paper cone
• Tweeter: 0.75” waterproof coated
silk dome
MUSIC ACCESS
• Audio Formats Supported: MP3,WMA,
AAC (MPEG4), AAC+, ALAC, FLAC, APE,
WAV, OGG, LPCM
• Audio Sample Rate: up to 192kHz 24bit
• Music Services Supported by Lithe Audio
include; Airable Radio, Podcast,Tidal, Deezer,
Soundmachine, Amazon Music, Napster,
Spotify, etc..
• Operating Systems (for stored les) Win-
dows XP SP3 and higher; Mac OS X 10.6.8
and higher; NAS (network-
attached storage) devices supporting CIFS
MULTI ROOM
• Expandable to any AirPlay2 or Google
Chromecast within same Wi-Fi network
WIRELESS NETWORKING
• Wi-Fi Connectivity:Wi-Fi CERTIFIED™
802.11 a, b, g, n, ac WPA™ - Personal
WPA2™ -
Personal WMM®, Wi-Fi
Protected Setup™
• Wireless connectivity works on your home
Wi-Fi network with both 2.4GHz/5GHz
broadcast routers
• Internet connection required for access
to Internet radio stations, online music
services and software updates.
11
SPOTIFY CONNECT
CREATE STEREO PAIR
PLEASE NOTE: iO1DOES NOT INCLUDE PASSIVE SPEAKER.
The Lithe Audio Master iO1 surface mount speaker is able to connect to and power an
addtional passive speaker and output the right speaker channel for Stereo.
Use wire cutters to strip the ends of the speaker cable (if required).
18
Use your phone, tablet or computer as a remote
control for Spotify.
Go to www.spotify.com/connect to learn how.
Note:The Spotify software is subject to third party
licenses found here: www.spotify.com/connect/
third-party-licenses “
HARD WIRED OPTICAL
To connect other devices such as CD player, BluRay
player etc) to play through the Wi-Fi speakers
please follow the steps below:
Optical Connection:
To play music via speaker Optical connection connect an Optical
cable to the speaker and play through your device. Within the
Lithe Audio App click on source to activate Optical to be able to
play through the speaker.
POWER
SERVICE PAIR
OPTICAL
ETHERNET ETHERNET
RESET
17
REGULATION INFORMATION
FCC STATEMENT
This equipment has been tested and found to comply with the limits for a class b digital device,
pursuant to part 15 of the FCC rules. these limits are designed to provide reasonable
protection against harmful interference in a residential installation. this equipment generates,
uses and can radiate radio frequency energy and, if not installed and used in accordance with
the instructions, may cause harmful interference to radio communications. however, there is
no guarantee that interference will not occur in a particular installation. if this equipment does
cause harmful interference to radio or television reception, which can be determined by
turning the equipment off and on, the user is encouraged to try to correct the interference by
one or more of the following measures:
- Reorient or relocate the receiving antenna.
- Increase the separation between the equipment and receiver.
- Connect the equipment into an outlet on a circuit different from that to which the receiver is
connected.
- Consult the dealer or an experienced radio/tv technician for help.
To assure continued compliance, any changes or modications not expressly approved by the
party responsible for compliance could void the user’s authority to operate this equipment.
(example- use only shielded interface cables when connecting to computer or peripheral
devices).
FCC RADIATION EXPOSURE STATEMENT
This equipment complies with FCC RF radiation exposure limits set forth for an uncontrolled
environment. this transmitter must not be co-located or operating in conjunction with any
other antenna or transmitter.This equipment should be installed and operated with a minimum
distance of 20 centimeters between the radiator and your body.
This device complies with part 15 of the FCC rules. Operation is subject to the following two
conditions: (1) this device may not cause harmful interference, and
(2) this device must accept any interference received, including interference that may cause
undesired operation.
EUROPE
Lithe Audio declares that this product herewith complies with the requirements of the EMC
Directive 2004/108/EC, Low Voltage directive 2006/95/EC, Eco-Design Directive 2005/32/EC,
RoHS Directive 2011/65/EU and the R&TTE Directive 1999/5/EC when installed and used
in accordance with the manufacturer’s instructions. A copy of the full Declaration of Confor-
mance may be obtained at www.litheaudio.com/support/policies.
Lithe Audio Speakers have a standby mode or remove the power cord from the AC mains.
13
TROUBLESHOOTING
If a problem arises, please try the troubleshooting guide below. If the problem is not listed
please contact Lithe Audio Customer Service Support
Q: Speaker has not been found during setup
A: Please check power cord is correctly connected into speaker and transformer, Check the
red light is ON. Press reset button for 5 seconds on the speaker (discoverable mode), green
light shall ash, follow the instructions for Android or AirPlay 2 setup.
*Before commencing any electrical work ensure the supply is switched OFF at the mains.
Q: Speaker connected to AirPlay 2 but not playing through device
A: Please ensure device has good Wi-Fi strength and battery power, check the led indicator is
solid green, if not press reset button for 3 secs. Failing this, turn the speaker power off then on.
Q: Device is connected to Wi-Fi speaker but no sound
A: Ensure your device volume is NOT muted, increase the volume within app and try again.
Restart the app which the audio is playing from and try again.
Q: Lithe Audio App not showing connected speakers
A: Ensure your speakers green light are on, and connected as per setup.The app shall
automatically nd active speakers, if not, restart app or press reset on speaker for 3 secs to
wake speaker. to show green status light.
Q: Lithe Audio App not working correctly
A: Ensure your speaker rmware/app are up to date, OR restart/reinstall app fully.
Q: I have a new router and speakers are not visible anymore
A: If you have purchased a new router or reset the router back to defualt, you shall need to
install the speakers again. Please follow the setup procedures for IOS or Android.
For further queries and support questions please visit www.support.litheaudio.com
hours)
2019

WARRANTY COVERAGE
This warranty may not be valid if the product was purchased via an un-authorised dealer.
The warranty only applies to individual that made the orginal purchase, not transferable..
The purchaser must show proof of purchase by way of receipt (hard copy or digital copy)
The warranty is null and void if:
- product altered in any way from its orginal manufactured state
- security seal has been removed
- product defaced
No one is authorised to make or modify any warranty on behalf of Lithe Audio Ltd.
RECYCLING INFORMATION
This symbol on the product or on its packaging indicates that this product shall not be treated as household
waste. Instead please deliver it to the applicable collection point for the recycling of electrical and electronic
equipment. By recycling this product correctly, you will help
conserve natural resources and prevent potential negative environmental consequences. For more detailed
information about recycling of this product, please contact your local council of ce, your household waste
disposal service or the shop where you
purchased the product(s) from.
THIS DOCUMENT CONTAINS INFORMATION THAT IS SUBJECT TO CHANGE WITHOUT
NOTICE.
No part of this publication may be reproduced or transmitted in any form or by any means, electronic or
mechanical, including but not limited to photocopying, recording, information retrieval systems, or computer
network without the written permission of Lithe Audio Ltd
Use of the Works with Apple badge means that an accessory has been designed to work speci cally with
the technology identi ed in the badge and has been certi ed by the developer to meet Apple performance
standards.
To control this AirPlay 2–enabled speaker, iOS 11.4 or later is required.
Apple, iPad, iPad Air, iPad Pro, iPhone and AirPlay are trademarks of Apple Inc., registered in the U.S. and other
countries.
Windows® is a registered trademark of Microsoft Corporation in the United States and other countries.
Android™ is a trademark of Google, Inc.
Google, Chromecast built-in are trademarks of Google LLC.
The Bluetooth® word mark and logos are registered trademarks owned by Bluetooth SIG, Inc. and any use
of such marks by Lithe Audio Ltd is under license. Other trademarks and trade names are those of their
respective owners.
Wi-Fi CERTIFIED™ is a registered trademark of Wi-Fi Alliance®
Spotify software is subject to third party licenses found here: http://www.spotify.com/connect/third-party-li-
censes
All other products and services mentioned may be trademarks or service marks of their
respective owners.
©2023 by Lithe Audio Ltd. All rights reserved.
REGULATION INFORMATION
2221

For detailed warranty conditions please refer to the following web link
www.litheaudio.com/warranty/iO1
This Speaker is of excellent quality and construction. However, if any defects in materials or
workmanship do appear during the guarantee period, we will, at our discretion, either repair or
replace the defective parts, free of charge, subject to the terms and conditions of our Guarantee
shown below.
This Guarantee covers both parts and labour. Carriage is not included.
This Guarantee provides bene ts which are additional to, and do not affect, your statutory rights.
This Guarantee does not cover the cost of returning the product to the dealer from whom it was
purchased or to ourselves.This Guarantee applies only to products sold and located in mainland
Great Britain. It does not cover liability in respect of or replacement of plugs, cables or fuses and
also does not cover defects due to:
• Failure to use or maintain product in accordance with Lithe Audio instructions.
• The product being connected to an unsuitable electricity supply.
• Accidental damage to or abuse or misuse of the product.
• Product modi cation, except by Lithe Audio or approved agent.
• Dismantling of or interference with the product.
Before returning any product under this Guarantee, please check that:
• You have followed the product instructions correctly.
• Your mains electricity supply is functional.
• The defect is not due to a blown fuse.
If you wish to claim under this guarantee you should:
• Send the product, postage or carriage paid, to the dealer from whom it was purchased or to
Lithe Audio direct.
• Ensure that the product is clean and packed carefully (preferably in its original carton).
• Enclose details of your name, address and telephone number and when and where the product
was purchased, together with proof of purchase (e.g. a invoice or till receipt).
• Give exact details of the nature of the defect.
This Guarantee does not cover any other claims whatsoever, including, without limitation, any
liability for incidental, indirect or consequential damage, nor does it cover any claims for conversion
or modi cation or for the costs of repair carried out by any third party without the prior consent
of Lithe Audio. If replacement parts are tted to the product this will not extend the period of the
Guarantee. For further advice contact the Lithe Audio customer services.
LITHEAUDIO.COM
IO1GBA
2 YEAR GUARANTEE
Lithe Audio products marked with the CE mark comply with
the EC Low Voltage Directive: 73/23/EEC, Electromagnetic
Compatibility Directive 89/336/EEC
Table of contents
Other Lithe Audio Speakers manuals

Lithe Audio
Lithe Audio LHS300 User manual

Lithe Audio
Lithe Audio LWF1 User manual

Lithe Audio
Lithe Audio LWF1V2 User manual

Lithe Audio
Lithe Audio LBT2 User manual

Lithe Audio
Lithe Audio LWF2/IP User manual

Lithe Audio
Lithe Audio PRO Series User manual

Lithe Audio
Lithe Audio LWF1V2 User manual

Lithe Audio
Lithe Audio LBT2 User manual

Lithe Audio
Lithe Audio LBT2 User manual

Lithe Audio
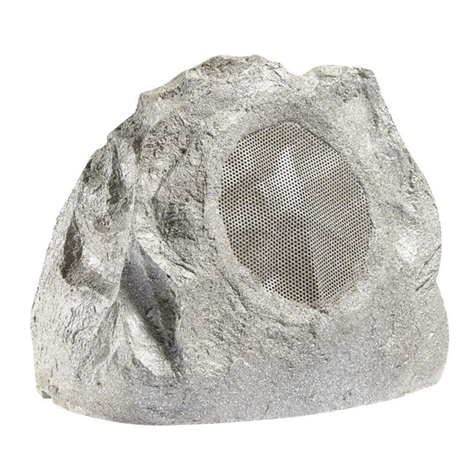
Lithe Audio Garden Rock User manual