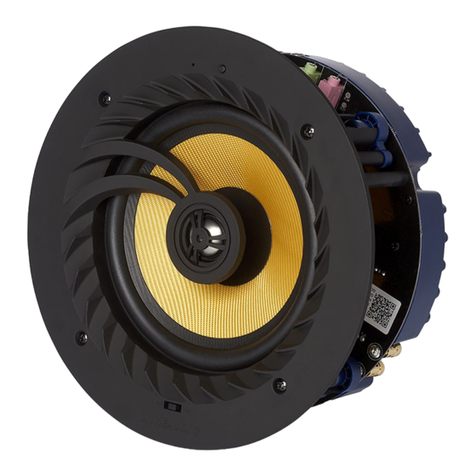
Lithe Audio LBT2 User manual

SUPPORT.LITHEAUDIO.COM
SUPPORT VIDEOS & TO REGISTER YOUR SPEAKER:
INSTRUCTION MANUAL
ENG
ESP
FR

1
Before commencing any electrical work to avoid the risk of electric shock locate and remove fuse
or lock circuit breaker in the POWER OFF position before proceeding. Test the power is OFF
before wiring. Wiring with the power on can result in serious personal injury, re and death.
WARNING: If you are unsure about any part of these instructions, please consult an electrician.
IMPORTANT NOTES CODES: Before use please read completely the safety instructions and
installed and/or used in accordance with all local and national electrical codes and regulations or
latest edition of IEE regulations (BS 7671) in the UK.
BREAKER: Proper short-circuit and overload protection must be provided at the distribution pan-
el. Up to a 10 A maximum circuit breaker/MCB may be used (with adequate short-circuit breaking
capacity for your installation) if used in conjunction with lighting circuit, OR dedicated circuit for
speakers, a 3 A maximum circuit breaker/MCB may be used.
If the unit is to be used as a replacement for an existing product, remove the existing unit from
its location and disconnect the wiring. Connect the wires correctly in the power driver. Ensure
terminals are properly tightened and ensure no bare wires are visible. When tting the speaker into
the ceiling, ensure no wires are trapped
NOTE: To meet US local and national NEC code, for these types of installations you will need
contact your local contractor for installation. Please visit support.litheaudio.com for latest
installation guides/updates.
READ THE INSTRUCTIONS CAREFULLY BEFORE STARTING THE
INSTALLATION PROCESS AND KEEP THEM SAFE FOR FUTURE
REFERENCE.
• Failure to follow the instructions in this guide voids all warranties on your speakers.
• Warning: Do not use the product in water.
• Warning: Do not install speaker directly above any heat sources such as radiators, or other
apparatus that produce heat.
• Warning: To reduce the risk of re or electric shock, do not expose this speaker to rain or
moisture (directly above bath or shower area) or in Bathroom Zone 0 or Zone 1.
• Protect the power cable from being damaged, do not over stretch cable.
• Only use attachments/accessories specied by the manufacturer Lithe Audio.
• Turn o the power to the speaker when unused for long periods of time.
• A Fire and Acoustic speaker hood must be used in accordance with local and national
electrical codes and regulations. For the UK, building and IEE Regulations with a fire rating of
up to 60 minutes, is Parts B, L, C and E compliant.
• Do not open the back cover to the speaker as this protects the PCB, doing so will invalidate
the warranty and could cause electric shock.
• Ensure speaker location is free from obstructions such as electrical conduit, HVAC ducts or
Water lines.
PENCIL
SPEAKER CABLE
PROTECTIVE EYEWEAR TAPE
WIRE CUTTERS
STUD FINDER SCRE WDRIVER
MEASURING TAPE DRILL
EQUIPMENT YOU WILL NEED
Listed below is the hardware equipment needed to install the speaker, with the addition of
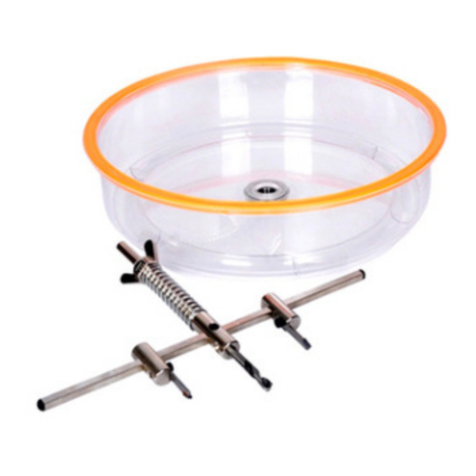
a ladder to ensure the installation is done safely. A cutting template is included in the box.
CUTTING SAW
Please ensure you read the entire instruction manual carefully before you commence any work.
Carefully unpack the speakers from the packaging. Please check to ensure all the parts shown
below are included.
If any parts of the speaker appear damaged, please contact your dealer/reseller immediately or
contact support@litheaudio.com for contact details.
MODEL LBT2 OR LBT2/IP PAIR MODELS
2
INSTALLATION WARNING
PREPARATION
BOX CONTENTS
LED COVER BLUETOOTH CEILING
SPEAKER
POWER DRIVER
SPEAKER GRILLE
CUTTING GUIDE 5M SPEAKER CABLE
PASSIVE CEILING SPEAKER
ALSO INCLUDE
BLUETOOTH CEILING SPEAKER
EEN
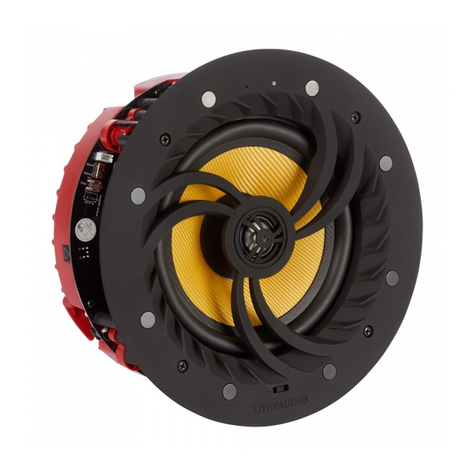
KNOW YOUR SPEAKER INSTALLATION
3
Enviromental
equalizer (+/- 3db)
Magnets for Cover (8)
Power input 24V/2.5A
Stereo / Mono selector
50% Volume cap switch
Lithe Link connections
Built-in Amplier
& Bluetooth 5.0
RCA Input
6.5” (165mm) Woofer cone
Speaker output
R+ (Red) R- (Black)
Dog leg easy install xings (4)
The Lithe Audio LBT2 range of Bluetooth ceiling wireless speakers have various inputs:
SPEAKER OUTPUT - To connect one additional passive (Slave) speaker (Gold Plated)
LITHE-LINKTM - Connect 2 additional LBT speakers (Total 3 masters & 3 passives)
RCA INPUTS - To connect directly from TV Output, Amazon echo, projector etc..
POWER INPUT - To connect (as supplied) Through Power driver
Connection Reset ButtonRequires a in ceiling depth of
3.8” (95mm)
LED indicator
Power Driver
3. Connect a 110V/240V feed into the Power 4. Insert speaker into the ceiling then using a
Driver. Check Live, Neutral and Earth cables are screwdriver lock the 4 dog leg xings to secure
in correct terminals. Use xing holes to screw to the speaker in place, do not over tighten.
joists. Ensure cables are tight and cover is in place. Attach the magnetic grille to the speaker front.
PAINTING THE SPEAKER GRILLE
Do not paint the speaker grilles whilst attached to the speaker. Lithe Audio reccomends spray paint-
ing using 5 parts thinning agent to 1 part paint. Spray thinly to ensure speaker cover grille holes are
not blocked as this will eect the sound quality of the speakers.
INSTALLATIONS IN FIRE-RATED CEILINGS
If you plan to mount your speakers in a re-rated ceiling, you should purchase a re hood for the
speaker. Visit www.litheaudio.com for more information and recommended hoods.
IMPORTANT: BEFORE COMMENCING ANY ELECTRICAL WORK ENSURE
THE SUPPLY IS SWITCHED OFF AT THE MAINS. IF YOU ARE UNSURE HOW TO FIT SEEK HELP FROM
A PROFESSIONAL ELECTRICIAN/AV INSTALLER
1. Mark out the position of the speaker using a, 2. Drill a pilot hole and cut the speaker hole using
tape measure and mark using a pencil with the a cutting saw. Take caution when
template supplied. Check using a stud nder to cutting to keep ngers away from cutting
make sure no obstruction is present prior to blade and wear protective eyewear.
cut ting .
4
RC A-(Black) RC A+(Red)
Neutral wire = N
Earth wire = E
Live feed = L
In built over voltage, under voltage, over temperature, and short circuit protection, if there is an electrical fault,
the power supply to the amplier will cut o automatically and restart when the speaker has stabilised.
BLUETOOTH CEILING SPEAKER
EEN
5
3. Click Lithe Audio BT2 to
connect and pair to the speaker.
NOTE: ENSURE THE BLUETOOTH WIRELESS SPEAKER IS CONNECTED TO THE POWER
SUPPLY AND TURNED ON.
The Led indicator will ¯ ash Blue when ready to pair, turn solid Blue whilst the device is
connected to the speaker and music is playing
1. Open the setting menu and 2. Turn on Bluetooth
select Bluetoothand search devices
4. Open your phone camera and scan the
below QR code to download the Setup App to
change speaker name or add a pin:
The Lithe Audio Master Bluetooth ceiling
speaker is able to connect to and power an
addtional passive speaker via the speaker output
(+/-). Use wire cutters to strip the ends of the
speaker cable (if required).
This setup is ideal for Kitchen diners or larger
rooms where you want a true stereo setup.
Do you have multiple Bluetooth speakers in your home?
Use the Lithe Audio setup App to identify each speaker easily, by giving each zone a unique
name and password. Con gure the speaker to work with Amazon Alexa, Google home or
TV’s wirelessly. For more information visit:
To cycle between the playback modes press the ‘Connection Button’ under the grill to change
the mode betweek them.
1. AUTOMATIC MODE: (Flashing Blue) RCA is priority, then Bluetooth then Optical.
2. BLUETOOTH ONLY MODE: (Flashing Blue): RCA and Optical are disabled
3.RCA ONLY MODE: (Flashing Green): Bluetooth and Optical are disabled
4. OPTICAL MODE: (Solid Blue): Bluetooth and RCA are disabled.
To connect other devices that may not have a Bluetooth connection (such as Turn tables, CD
players, mp4 player or mini-discs!)
RCA CONNECTION: To play music via speaker RCA connection connect an RCA cable to
the speaker and play through your device. Ensure ALL Bluetooth connections are turned o to
be able to play through the speaker. The LED will turn green when playing using RCA.
6
www.litheaudio.com/bluetooth-5-setup-app.html
SETUP AND PAIRING
PLAYBACK MODES
HARD WIRED INPUT
ADDITIONAL SPEAKER
PLEASE NOTE: LBT1 DOES NOT INCLUDE PASSIVE SPEAKER
BLUETOOTH SETUP APP
- RCA INPUT
- OPTIONAL
Image shows Apple iPhone but visuals may change from device to device. Apple and iPhone are trademarks of Apple Inc., registered in the U.S. and other countries.
2
2
EEN

Lithe Audio products marked with the CE mark comply with the EC Low Voltage
Directive: 73/23/EEC, Electromagnetic Compatibility Directive 89/336/EEC
This Ceiling Speaker is of excellent quality and construction. However, if any defects in materials
or workmanship do appear during the guarantee period, we will, at our discretion, either repair or
replace the defective parts, free of charge, subject to the terms and conditions of our Guarantee
shown below.
This Guarantee covers both parts and labour. Carriage is not included.
This Guarantee provides benefits which are additional to, and do not affect, your statutory rights. This
Guarantee does not cover the cost of returning the product to the dealer from whom it was purchased
or to ourselves. This Guarantee applies only to products sold and located in mainland Great Britain. It
does not cover liability in respect of or replacement of plugs, cables or fuses and
also does not cover defects due to:
• Failure to use or maintain product in accordance with Lithe Audio instructions.
• The product being connected to an unsuitable electricity supply.
• Accidental damage to or abuse or misuse of the product.
• Product modification, except by Lithe Audio or approved agent.
• Dismantling of or interference with the product.
Before returning any product under this Guarantee, please check that:
• You have followed the product instructions correctly.
• Your mains electricity supply is functional.
• The defect is not due to a blown fuse.
If you wish to claim under this guarantee you should:
• Send the product, postage or carriage paid, to the dealer from whom it was purchased or to Lithe
Audio direct.
• Ensure that the product is clean and packed carefully (preferably in its original carton).
• Enclose details of your name, address and telephone number and when and where the product was
purchased, together with proof of purchase (e.g. a invoice or till receipt).
• Give exact details of the nature of the defect.
This Guarantee does not cover any other claims whatsoever, including, without limitation, any
liability for incidental, indirect or consequential damage, nor does it cover any claims for conversion or
modification or for the costs of repair carried out by any third party without the prior consent
of Lithe Audio. If replacement parts are fitted to the product this will not extend the period of the
Guarantee. For further advice contact the Lithe Audio customer services.
WWW.LITHEAUDIO.COM
TEL: 01293 922 015 EMAIL: INFO@LITHEAUDIO.COM
LBT2_D
2 YEAR GUARANTEE
This is a UK Guarantee.
For global warranty
information contact your
local distributor.
Other manuals for LBT2
2
This manual suits for next models
1
Table of contents
Other Lithe Audio Speakers manuals

Lithe Audio
Lithe Audio LWF2/IP User manual

Lithe Audio
Lithe Audio PRO Series User manual

Lithe Audio
Lithe Audio LBT2 User manual

Lithe Audio
Lithe Audio LBT2 User manual

Lithe Audio
Lithe Audio LHS300 User manual

Lithe Audio
Lithe Audio LWF1 User manual

Lithe Audio
Lithe Audio LWF1V2 User manual

Lithe Audio
Lithe Audio Garden Rock User manual

Lithe Audio
Lithe Audio LWF1V2 User manual

Lithe Audio
Lithe Audio iO1 Series User manual