LIVARNO LUX 273024 Technical specifications
Other LIVARNO LUX Lantern manuals

LIVARNO LUX
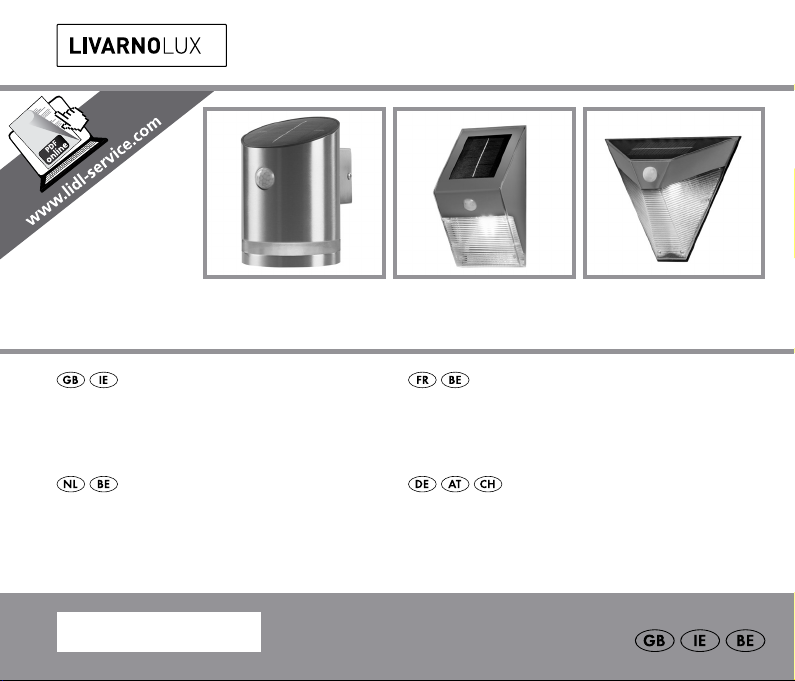
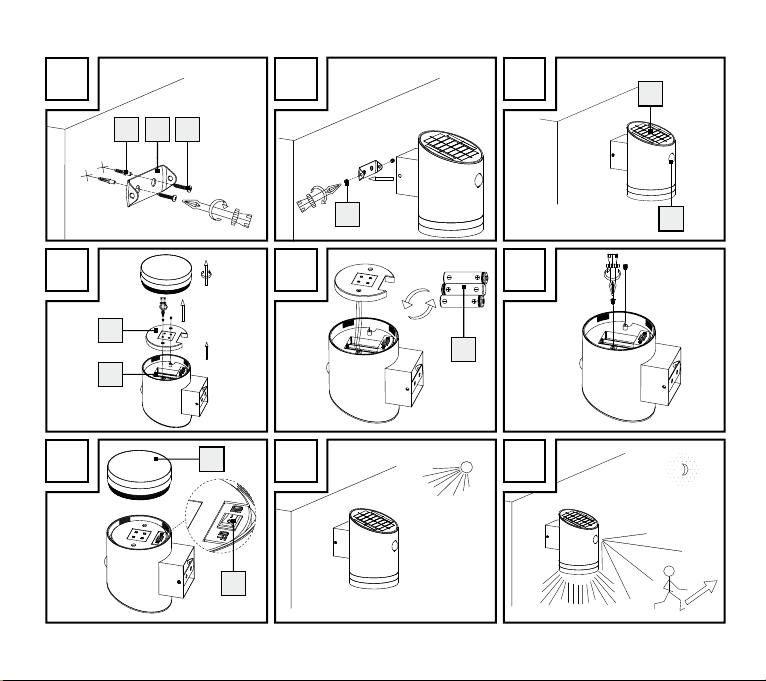
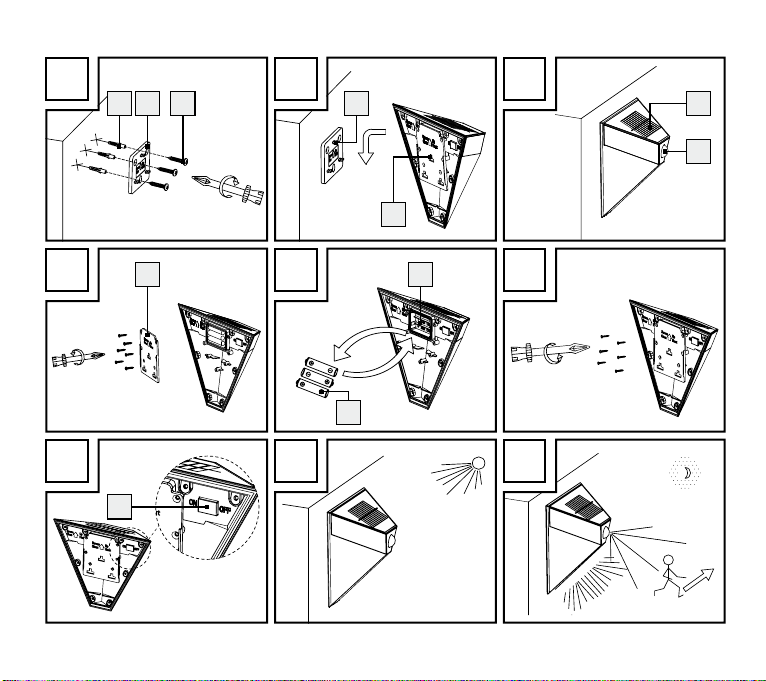
LIVARNO LUX 284725 User manual

LIVARNO LUX
LIVARNO LUX 295794 Technical specifications

LIVARNO LUX
LIVARNO LUX 273745 Technical specifications

LIVARNO LUX
LIVARNO LUX 311685 Technical specifications

LIVARNO LUX
LIVARNO LUX 43174 User manual

LIVARNO LUX
LIVARNO LUX Z31906 Technical specifications

LIVARNO LUX
LIVARNO LUX 106339 Technical specifications

LIVARNO LUX
LIVARNO LUX HG03508B Technical specifications

LIVARNO LUX
LIVARNO LUX 10603A Technical specifications

LIVARNO LUX
LIVARNO LUX 284725 User manual

Popular Lantern manuals by other brands


shada
shada 1000436 instruction manual

BEGA
BEGA 84 036 Instructions for use

BEGA
BEGA 33 596 Instructions for use

Dale Tiffany
Dale Tiffany GT701162 Assembly instructions

Wagan
Wagan Brite Nite Pop-Up USB Lantern user manual

Eaton
Eaton Crouse-Hinds Pauluhn DLLA M2 Series Installation & maintenance information