manuals.online logo
Brands
  1. Home
  2. •
  3. Brands
  4. •
  5. llaza
  6. •
  7. Accessories
  8. •
  9. llaza STORBOX 300 User manual

llaza STORBOX 300 User manual

1
Manual de instalación
Installation manual
Fecha / Date: 31 octubre 2017 / 31st October 2017
REF. 45098062000
REV. 3.1
STORBOX 300
2
STORBOX 300
0.1–Descripción del producto / Product description
0.2–Leyenda / Icon legend
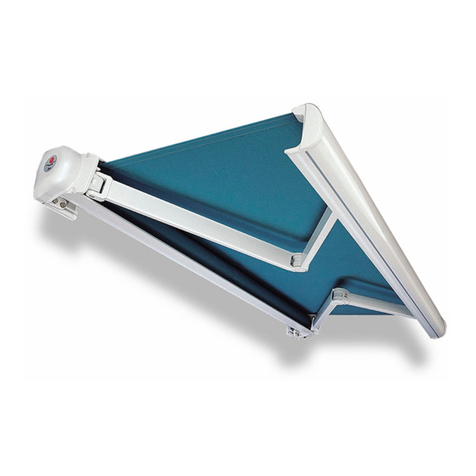
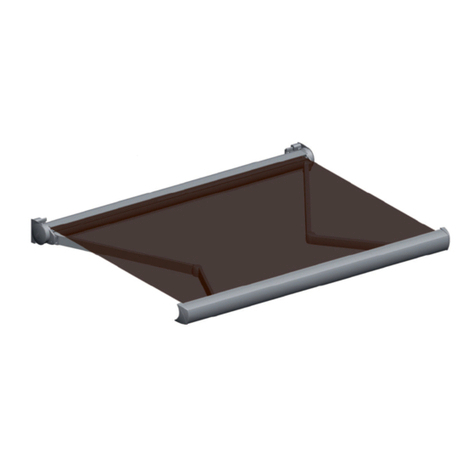
This cassee awning oers great possibilies and loads of versality, as it can be congured to a variety of dimensions.
Using the reinforced prole, it can reach widths of up to 6 m (with a maximum projecon of 3 m), and with the Ø80 rolling
tube it can reach projecons of up to 3.50 m (with a maximum width of 5 m).
It is compable with the arm models ART 350, ONYX, ONYX LUX and SPLENDOR 400.
It features full-slope cycle adjustment in a single phase using a lng system with easy front access.
Its eecve arm alignment system ts perfectly into the cassee to ensure complete closure.
Usar con sol
Use with sun
No usar con nieve
Do not use with snow
No usar con lluvia
Do not use with rain
No usar con granizo
Do not use with hail
Uso con sol y lluvia
Use with sun or rain
Clasicación por ciclos
Class by no. of cycles
Manivela
Crank
Motorizado
Motorised
¡Atención! tensión brazos
Danger! Tensioned arms
ART-250
Splendor 300
ART-350
Splendor 400
Onyx
WIN
ART-500
Barra de carga EVO
EVO front prole
B. carga Univers
Univers front prole
0-27 km/h
28-37 km/h
+38 km/h
Información
Informaon
Fabricado en Europa
Made in Europe
Marcado CE
CE marking
Inox
Stainless steel
Línea
Width
Salida
Projecon
2 años de garana
2-year warranty
3 años de garana
3-year warranty
Eco-friendly
Toldo cofre de grandes posibilidades y versalidad al permir diferentes conguraciones de medidas.
Con el perl reforzado puede llegar a 6 m. de línea (con una salida máxima de 3,00 m.)
Con tubo de enrolle de Ø80 obtenemos salidas de hasta 3,50 m. (con una línea máxima de 5,00 m)
Es compable con los modelos de brazos: ART 350, ONYX, ONYX LUX y SPLENDOR 400.
Regulación de la inclinación de ciclo completo en una única fase mediante un sistema basculante de fácil acceso frontal.
Ecaz sistema de alineación de los brazos para que encajen ajustadamente en el alojamiento cofre lo que garanza un cierre
3
3 -Despiece del producto / Product parts
4 –Nomenclatura / Terms
STORBOX 300
Aconsejables siempre en instalaciones a techo /
Recommended for ceiling installaons
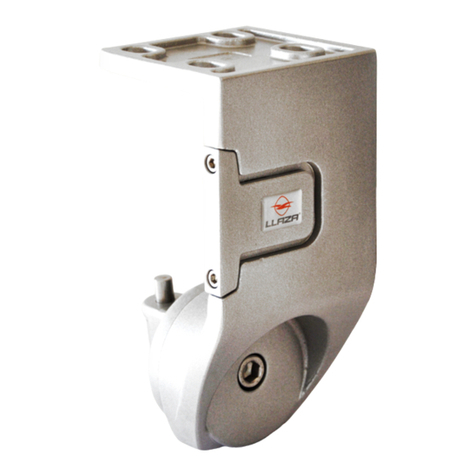
❶ Juego soportes Storbox 300 / Storbox 300 bracket set
❷Placa larga / Long mounng plate for cassee
❸Fijación a techo (oponal) / Top mounng (oponal)
❹Kit perles / Prole kit
❺Juego de brazos ART 350 / ART 350 arms
❻Kits accionamiento / Operang kits
❼Tubo de enrolle / Rolling tube
❽Casquillo punta / Roller end bearing
❾Casquillo máquina / Gear end bearing
En el caso de no ulizar el soporte jación a techo en este pos de instalaciones, dejar un hueco entre el soporte y la pared trasera de la medida de la
llave Allen necesaria / If no ceiling mounng brackets (3) are used for ceiling installaons, leave a gap between the bracket and the rear wall large enough
to allow you to use the Allen key
4
5 –Secciones acotadas / Section dimensions
STORBOX 300
6 - Tablas de selección motor / Motor selection table
Salida / Projecon (m)
1,50 1,75 2,0 2,25 2,50 2,75 3,0 3,25 3,50
T. de enrolle / Rolling tube
Ø 70mm
35 Nm 40 Nm
T. de enrolle / Rolling tube
Ø 80mm
40 Nm 50 Nm 55 Nm
Dimensiones (mm) / Dimensions (mm)
* En instalaciones a techo aconsejable siempre instalar soportes jación techo / Ceiling mount brackets
should always be used for ceiling installaons
5
8 –Información de maniobras y clase / Information about operation and classification
Los brazos llevan una banda protectora de colores para su idencación:
VERDE: Visto desde fuera, lado derecho
ROJA: Visto desde fuera, lado izquierdo
STORBOX 300
7 –Clasificación según norma Europea / Classification according to European standard: EN 13.561:215
Salida brazo / Arm projecon (m) Línea / Width (m) Clase / Class
3,50 5,00 C.0
3,00 6,00 C.1
The arms are secured with color-coded safety bands:
GREEN: Right-hand side viewed from outside
RED: Le-hand side viewed from outside
NUNCA EXTRAER LAS BANDAS DE SEGURIDAD PARA LA TENSIÓN HASTA HABER SUJETADO EL BRAZO AL
PERFIL DE CARGA.
NEVER REMOVE THE SAFETY BANDS UNTIL THE ARM HAS BEEN ATTACHED TO THE FRONT PROFILE.
6
STORBOX 300
Línea total máquina interior o motor / Total width for interior gearbox or motor (L)
10.- Línea / Width
9.- Herramientas y accesorios recomendados para la instalación /
Recommended tools and accessories for installation procedure
La Distancia entre la parte exterior de las placas será L - 105 mm., siendo L= línea total
The distance between the outside of the wall plates should be: L - 105 mm, when L= total width
11.1.- Instrucciones de instalación —Installation instructions
7
STORBOX 300
Fijación del conjunto sobre los soportes pared / Aach the system to the wall brackets
Para la realización de un cambio de inclinación en el conjunto / To change the cassee slope, proceed
as indicated in the image
Al nalizar la regulación apretar de nuevo los tres tornillos de jación /
Reghten the three screws aer adjusng
11.2.- Instrucciones de instalación —Installation instructions
8
STORBOX 300
Para la realización de un cambio de paralelismo en el conjunto / To change the alignment of the arms, pro-
ceed as shown in the image
Regulación paralelismo / Adjusng
the alignment of the arms
Fijación paralelismo / Secur-
ing the adjusted arms
Para la realización de un cambio de jación del terminal / To change the aachment to the front bar, proceed
as shown in the image
IMPORTANTE: El tornillo del terminal siempre hacia la posición de exterior /
IMPORTANT: The screw to the front bar should always face outwards
11.3.- Instrucciones de instalación —Installation instructions
9
STORBOX 300
Para la colocación de las regletas y
tapas laterales /
Aach the covers and the side caps
Cortar y limar la entalla prevista para la salida del gancho maquina / Cut and le the slot for the gearbox hook
11.4.- Instrucciones de instalación —Installation instructions
Fijación de la tapa lateral al conjunto soporte / Mount the side cap to the support structure
10
STORBOX 300
GENERAL NOTES ON ASSEMBLY AND INSTALLATION:
 Assembly and installaon should be done by trained personnel.
 IMPORTANT SAFETY CONSIDERATIONS: For proper installaon of the awning, the instrucons for assem-
bly and installaon must be carefully followed step by step. Keep plasc bags or any assembly pieces out
of the reach of children.
 Do not alter the design or the conguraon of the system, nor change the installaon method without
consulng the manufacturer or an authorised representave.
 If the awning is motorised and there is a switch, the switch should be placed so that the user does not in-
terfere with the movement of the awning, and at a height of less than 1.3 metres when possible.
 If the awning is manually operated, it should be accessible at a height of 1.8 metres.
 If the awning is to be installed in windy areas where there are frequent blackouts, manual operaon or
the use of a back-up generator is recommended.
 When motorised units are inspected or repaired, always disconnect them from the power supply.
BASIC PRECAUTIONS FOR SAFE HANDLING OF THE AWNING:
 The awning must be rolled away:
 In the event of ice, if operaon is parcularly dicult, and in the absence of safety measures, refrain
from using the system unl more favourable condions prevail.
 Before opening or closing, clear away all obstacles which might get in the way. NEVER FORCE THE AWN-
ING! If the awning does not move at all when you try to operate it, call a professional installer.
 With motorised awnings, remember that the motor features a thermal safety device to avoid overheang
and malfuncons. This device is acvated when the operang switches are pressed insistently.
 Do not subject the system to addional loads or stresses that it is not intended to bear as per the man-
ufacturer’s instrucons.
 Do not interfere with the system’s mounng components.
 Examine the installaon if it has been subjected to adverse weather condions, and do not use the
system unl any necessary repairs are completed. In such cases, a professional installer should be called.
 Keep the installaon clean and in good condion. A yearly maintenance check by an authorised
professional installer is recommended.
IMPORTANT SAFETY INSTRUCTIONS. The system has powerful springs inside it. In the event of in-
correct installaon, these may cause the awning to open suddenly and forcefully. If any irregulari-
es are observed during opening and/or closing, call a professional installer. To avoid possible dam-
age, do not allow children to play with the awning.
11
STORBOX 300
PRECAUCIONES BÁSICAS PARA UN MANEJO SEGURO DEL TOLDO:
 Se debe recoger el toldo ante situaciones meteorológicas adversas como:
 En caso de hielo, si la maniobra es particularmente difícil, y en ausencia de dispositivos de seguridad, detener la ma-
niobra hasta que se restablezcan unas condiciones más favorables.
 Durante las maniobras de apertura o cierre, vericar que no exista ningún obstáculo que cause algún im-
pedimento. ¡NO FORZAR NUNCA EL TOLDO!. Si al intentar maniobrar el toldo, éste no efectúa movimiento
alguno, será necesario avisar a un profesional instalador
 En caso de que el toldo esté motorizado, debe tenerse en cuenta que el motor incorpora un dispo-
sivo de seguridad térmica para evitar sobrecalentamientos y averías. Este disposivo se pone en marcha
cuando se pulsan insistentemente los inversores de accionamiento.
 No someter la instalación a esfuerzos o cargas adicionales e independientes a la conguración dada por
el fabricante. No actuar sobre los elementos de jación del sistema.
 Examinar la instalación si ha sido someda a condiciones climácas adversas, y no ulizarla si es nece-
saria alguna reparación. En tal caso, será necesario avisar a un profesional instalador.
 Mantener la instalación limpia y en buenas condiciones, y se recomienda una revisión de man-
tenimiento anual realizada por un instalador profesional autorizado.
INSTRUCCIONES IMPORTANTES PARA LA SEGURIDAD. El sistema dispone de potentes resortes en el
interior que en caso de una instalación en malas condiciones, pueden causar una apertura brusca del
toldo. Si se observa alguna anomalía durante las maniobras de apertura y/o cierre, avisar a un profe-
sional instalador. No permir a los niños jugar con el toldo para evitarles posibles daños.
CONSIDERACIONES BÁSICAS PARA EL MONTAJE Y LA INSTALACIÓN:
 El montaje y la instalación de este producto debe realizarlo personal cualicado.
 INSTRUCCIONES IMPORTANTES PARA LA SEGURIDAD. Atender a las advertencias de seguridad indica-
das junto al producto o en las instrucciones de montaje. Las bolsas de plásco y otros elementos de
montaje no son ningún juguete y deben quedar fuera del alcance de niños o personal ajeno al mon-
taje.
 No modicar el diseño ni la conguración del sistema ni las indicaciones dadas para la jación del toldo
sin consultar al fabricante o su representante autorizado.
 En caso de toldo motorizado + interruptor, éste debe situarse a una altura del suelo inferior a 1,30m. .
Emplazar evitando la interferencia accidental del usuario.
 En caso de accionamiento manual del toldo, éste debe ser accesible desde una altura inferior a 1,80 m.
 En caso de instalaciones en zonas de viento y con frecuentes fallos del suministro eléctrico, se reco-
mienda que el accionamiento del toldo sea manual o con una generador eléctrico alternavo.
 Durante las inspecciones de mantenimiento o reparaciones en una instalación motorizada, el sistema
debe estar desconectado del sistema eléctrico.
12
LLAZA WORLD, S.A.
Tramuntana, 1. Pol. Ind. Roques Roges
43460 ALCOVER
Tel. +34 977 990 600 / Fax +34 977 990 610
e-mail: [email protected] / e[email protected]
Versión PDF— impreso en papel reciclado / PDF version - printed on recycled paper.

Other manuals for STORBOX 300

1

Other llaza Accessories manuals

llaza MONOBOX-400 User manual

llaza

llaza MONOBOX-400 User manual

llaza SPLENBOX 400 User manual

llaza

llaza SPLENBOX 400 User manual

llaza COMPLET-PRO 350 User manual

llaza

llaza COMPLET-PRO 350 User manual

llaza SPLENBOX 300 User manual

llaza

llaza SPLENBOX 300 User manual

llaza STORBOX 300 User manual

llaza

llaza STORBOX 300 User manual

llaza SPLENBOX 300 User manual

llaza

llaza SPLENBOX 300 User manual

llaza STORBOX 250 User manual

llaza

llaza STORBOX 250 User manual

llaza SPLENBOX 400 User manual

llaza

llaza SPLENBOX 400 User manual

llaza MOONBOX 400 User manual

llaza

llaza MOONBOX 400 User manual

Popular Accessories manuals by other brands

Fluke 3563 quick guide

Fluke

Fluke 3563 quick guide

Bosisto's AMBIENCE user manual

Bosisto's

Bosisto's AMBIENCE user manual

Spartan Easy Stinger 2804 user manual

Spartan

Spartan Easy Stinger 2804 user manual

Nice Moonbus Instructions and warnings for the fitter

Nice

Nice Moonbus Instructions and warnings for the fitter

Pyle Nutrichef PKTCEC4BL user manual

Pyle

Pyle Nutrichef PKTCEC4BL user manual

Trilux LiveLink quick start guide

Trilux

Trilux LiveLink quick start guide

Valetta PALMA Assembly instruction

Valetta

Valetta PALMA Assembly instruction

Piezus APZ 2030 Operation manual

Piezus

Piezus APZ 2030 Operation manual

MDT Technologies SCN-LSEN1.01 operating instructions

MDT Technologies

MDT Technologies SCN-LSEN1.01 operating instructions

Audiovox PRO 9233 owner's manual

Audiovox

Audiovox PRO 9233 owner's manual

Gotting HG G-19370ZA manual

Gotting

Gotting HG G-19370ZA manual

NEWHOUSE HARDWARE PGCM120 manual

NEWHOUSE HARDWARE

NEWHOUSE HARDWARE PGCM120 manual

Rain Bird WRFT Installation and operating instructions

Rain Bird

Rain Bird WRFT Installation and operating instructions

anko VM9015B-SA user manual

anko

anko VM9015B-SA user manual

MRMC MRMC-2168-00 quick start guide

MRMC

MRMC MRMC-2168-00 quick start guide

ECOWITT WS80 owner's manual

ECOWITT

ECOWITT WS80 owner's manual

Cloogy POWER PLUGS quick start guide

Cloogy

Cloogy POWER PLUGS quick start guide

Pillar UniFoiler 3000 Operator's manual

Pillar

Pillar UniFoiler 3000 Operator's manual

manuals.online logo
manuals.online logoBrands
  • About & Mission
  • Contact us
  • Privacy Policy
  • Terms and Conditions

Copyright 2025 Manuals.Online. All Rights Reserved.