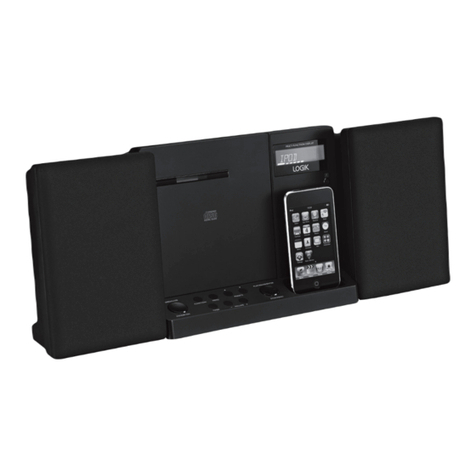
Logik LHFMP310 User manual

Hi-Fi with CD Player
Instruction Manual
LHFMP310
Logik LHFMP310_IB_100721_Zell.indd 1 21/07/2010 10:22 AM

Logik LHFMP310_IB_100721_Zell.indd 2 21/07/2010 10:22 AM

Contents
Unpacking.............................................................................................................................4
Product Overview.................................................................................................................5
Front and Side View.....................................................................................................................................5
Top View ..........................................................................................................................................................6
Rear View.........................................................................................................................................................6
Remote Control.............................................................................................................................................7
LCD Display Window...................................................................................................................................7
Battery Installation for the Remote Control........................................................................................8
Remote Control Operation Range..........................................................................................................9
Connections ........................................................................................................................10
Speaker Connections............................................................................................................................... 10
Connecting to the Mains Socket ........................................................................................................ 10
For Personal Listening ............................................................................................................................. 10
Compatible Disc Types .......................................................................................................11
Basic Operation ..................................................................................................................11
Powering ON/OFF ..................................................................................................................................... 11
STANDBY/ON .............................................................................................................................................. 11
Selecting Modes........................................................................................................................................ 11
Adjusting the Volume ............................................................................................................................. 11
Clock Setting............................................................................................................................................... 12
Alarm Clock Setting ................................................................................................................................. 12
Snooze Function........................................................................................................................................ 12
Sleep Timer Setting .................................................................................................................................. 13
Preset EQ ...................................................................................................................................................... 13
CD / MP3 / WMA Operation................................................................................................13
Playback........................................................................................................................................................ 13
Playing The Entire CD/MP3/WMA........................................................................................................ 14
Play Mode Function.................................................................................................................................. 14
Programme Function............................................................................................................................... 15
Radio Operation .................................................................................................................17
AM Mode...................................................................................................................................................... 17
FM Mode....................................................................................................................................................... 17
Selecting Mono / Stereo ......................................................................................................................... 17
Maintenance .......................................................................................................................18
Hints and Tips .....................................................................................................................19
Specications......................................................................................................................20
Safety Warnings..................................................................................................................21
Contents updated
Logik LHFMP310_IB_100721_Zell.indd 3 21/07/2010 10:22 AM
GB-4
Safety WarningsProduct Overview Connections MaintenanceOperation Hints and Tips
and Specification
The Main Unit Speakers x 2
Instruction Manual
(P.N.: 227-0601DN-013)
Quick Start Guide
(P.N.: 227-0601DN-113)
Remote Control
(P.N.: 070-M673DN-01C0)
If items are missing or damaged, please contact Partmaster (UK only).
Tel: 0844 800 3456 for assistance.
Unpacking
Remove all packaging from the unit. Retain the packaging. If you dispose of it please do so
according to local regulations.
The following items are included:
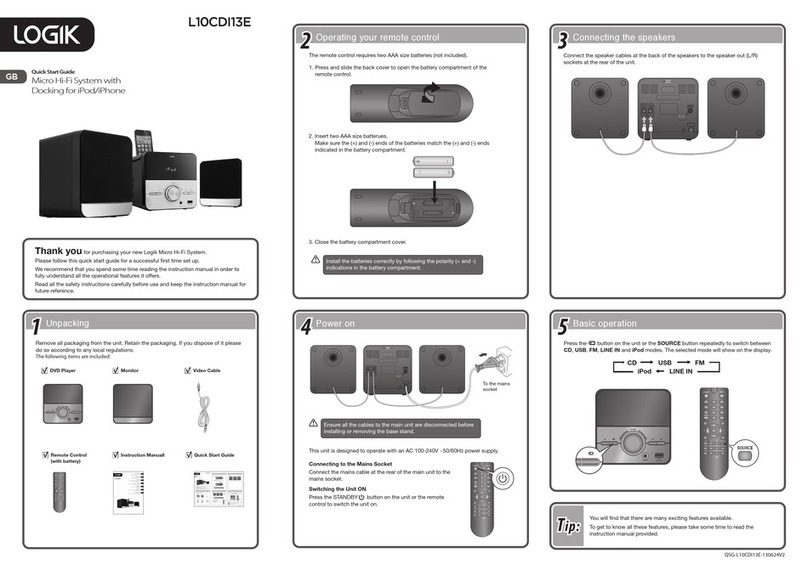
Congratulations on the purchase of your new Logik Hi-Fi with CD
Player.
We recommend that you spend some time reading this instruction manual in
order that you fully understand all the operational features it oers. You will
also nd some hints and tips to help you resolve any issues.
Read all the safety instructions carefully before use and keep this instruction
manual for future reference.
STANDBY/ON
FUNCTION
PROG/
SKIP/
SEARCH
PLAY/
PAUSE/BAND
VOLUME
STEREO
PLAYMODE
SLEEP
STOP/
FMMO/ST.
CLOCK-ADJ.
SNOOZE
TUNING
1 2
STANDBY/ON
FUNCTION
PLAY/
PAUSE/
BAND
STOP/
FMMONO/ST.
PLAYMODE SKIP/SEARCH
FOLDER
AL.SET
/OFF
SLEEP
EQ
MUTE VOLUME
Logik LHFMP310_IB_100721_Zell.indd 4 21/07/2010 10:22 AM

GB-5
Safety Warnings Product Overview
Connections
Maintenance Operation
Hints and Tips
and Specification
STANDBY/ON
FUNCTION
PROG/
SKIP/
SEARCH
PLAY/
PAUSE/BAND
VOLUME
STEREO
PLAY MODE
SLEEP
STOP/
FM MO/ST.
CLOCK-ADJ.
SNOOZE
TUNING
Product Overview
Front View
1. STEREO LED Indicator
2. STANDBY/ON Button
3. STANDBY/ON LED Indicator
4. FUNCTION Button
5. SKIP/SEARCH Button
6. PROG/CLOCK-ADJ. Button
7. SKIP/SEARCH Button
8. SNOOZE Button
9. Earphones Socket
10
11
13
14
15
17
18
16
12
3
6
7
4
5
2
1
8
9
10. IR Sensor
11. LCD Display Window
12. PLAY/PAUSE/BAND Button
13. VOLUME + Button
14. TUNING +/– Control
15. VOLUME – Button
16. STOP/FM MO/ST. Button
17. PLAY MODE Button
18. SLEEP Button
Logik LHFMP310_IB_100721_Zell.indd 5 21/07/2010 10:22 AM

GB-6
Safety WarningsProduct Overview Connections MaintenanceOperation Hints and Tips
and Specification
Top View
Rear View
OPEN/
CLOSE 20
22
23
19
21
19. CD Door
20. OPEN/CLOSE Button
21. FM Aerial
22. Speakers Socket
23. Mains Cable
Logik LHFMP310_IB_100721_Zell.indd 6 21/07/2010 10:22 AM

GB-7
Safety Warnings Product Overview
Connections
Maintenance Operation
Hints and Tips
and Specification
Remote Control
1. STANDBY/ON Button
2. FUNCTION Button
3. PLAY/PAUSE/BAND Button
4. STOP/FM MONO/ST. Button
5. PLAY MODE Button
6. SKIP/SEARCH Button
7. SKIP/SEARCH Button
8. SLEEP Button
9. FOLDER Button
10. FOLDER Button
11. EQ Button
12. AL. SET/OFF 1Button
13. AL. SET/OFF 2Button
14. MUTE Button
15. VOLUME – Button
16. VOLUME + Button
1 2
STANDBY/ON
FUNCTION
PLAY/
PAUSE/
BAND
STOP/
FM MONO/ST.
PLAY MODE SKIP/SEARCH
FOLDER
AL. SET
/OFF
SLEEP
EQ
MUTE VOLUME
2
5
8
11
14
1
4
7
10
13
16
3
6
9
12
15
LCD Display Window
1. ALARM1 Indicator
2. REPEAT1 / REPEAT ALL / REPEAT
FOLDER Indicator
3. ALARM2 Indicator
4. PLAY Indicator
5. PAUSE Indicator
CD
MP3 WMA TAPE
SNOOZE
KHz
MHz
AM
FM
PM
MW
ALL FOLD RAND PROG SLEEP
4
5
6 7
2 31
6. TRACK / NUMBER / TIME Indicator
7. Mute Indicator
Logik LHFMP310_IB_100721_Zell.indd 7 21/07/2010 10:22 AM

GB-8
Safety WarningsProduct Overview Connections MaintenanceOperation Hints and Tips
and Specification
Handling the Batteries
• Improper or incorrect use of batteries may cause corrosion or battery leakage, which
could cause re, personal injury or damage to property.
• Only use the battery type indicated in this manual.
• When the batteries are exhausted, the remote will not function. Replace both batteries at
the same time with new ones.
• Do not install new batteries with used ones and do not mix dierent types of batteries.
• Do not dispose of used batteries as domestic waste. Dispose of them in accordance with
local regulations.
Handling the Remote Control
• Take care of your ngernails when you press and hold the battery release tab.
• Do not drop or cause impact to the remote control.
• Do not spill water or any liquid on the remote control.
• Do not place the remote control on a wet object.
• Do not place the remote control under direct sunlight or near sources of excessive heat.
• Remove the battery from the remote control when not in use for a long period of time,
as it could cause corrosion or battery leakage and may result in physical injury and/or
property damage including re.
3. Close the battery compartment cover.
2. Place the cover into the compartment, press down
lightly, and push it inside until it snaps on.
• If the remote control is not in use for a long periods, the battery will become weak, and the
remote control will be not functioned, please replace with new one if above happened.
Battery Installation for the Remote Control
1. Press down of the compartment cover, and slide
the cover o open the compartment. Place the one
accessory CR2032 battery in the remote control
according to the polarity markings (“+” and “–”). Inside
the compartment and on the battery.
Logik LHFMP310_IB_100721_Zell.indd 8 21/07/2010 10:22 AM

GB-9
Safety Warnings Product Overview
Connections
Maintenance Operation
Hints and Tips
and Specification
Remote Control Operation Range
Point the remote control at the unit no more than 5 metres from
the remote control sensor and within 60° of the front of the unit.
The operating distance may vary depending on the brightness of
the room.
Within about 5 m
30° 30°
STANDBY/ON
FUNCTION
PROG/
SKIP/
SEARCH
PLAY/
PAUSE/BAND
VOLUME
STEREO
PLAYMODE
SLEEP
STOP/
FMMO/ST.
CLOCK-ADJ.
SNOOZE
TUNING
1 2
STANDBY/ON
FUNCTION
PLAY/
PAUSE/
BAND
STOP/
FMMONO/ST.
PLAYMODE SKIP/SEARCH
FOLDER
AL.SET
/OFF
SLEEP
EQ
MUTE VOLUME
Logik LHFMP310_IB_100721_Zell.indd 9 21/07/2010 10:22 AM

GB-10
Safety WarningsProduct Overview Connections MaintenanceOperation Hints and Tips
and Specification
Connections
Speaker Connections
Connect the speaker cables at the back of the speakers to the speaker sockets (L/R) at the
rear side of the unit.
Connecting to the Mains Socket
Connect the mains cable at the rear of the main unit to the mains socket.
To the Mains Socket
For Personal Listening
Connect earphones (Ø3.5mm stereo mini plug) to the earphones socket. Adjust the volume
control to obtain the desired volume level.
When the earphones are connected, the speakers will automatically mute.
Logik LHFMP310_IB_100721_Zell.indd 10 21/07/2010 10:23 AM

GB-11
Safety Warnings Product Overview
Connections
Maintenance Operation
Hints and Tips
and Specification
Basic Operation
Powering ON/OFF
When you rst connect the unit to the mains socket. The unit will be in STANDBY mode.
• Press the STANDBY/ON button on the unit or on the remote control to switch the unit
on.
• Press the STANDBY/ON button again to switch the unit o.
• Disconnect the mains cable from the mains socket if you want to switch the unit o
completely.
Selecting Modes
Press the FUNCTION button repeatedly to switch between modes (CD/MP3 or RAD).
CD/MP3 RAD
Adjusting the Volume
Press the VOLUME +/– buttons on the main unit or on the remote control to increase/
decrease the volume.
Press the MUTE button on the remote control to switch the
sound o. The icon will illuminate on the LCD display and
the audio output will temporarily terminate. Press the MUTE
button again to resume audio listening.
Compatible Disc Types
Disc Types Disc Logo Recorded Content
CD-R (CD Recordable) AUDIO
CD-RW (CD-Rewritable) AUDIO
AUDIO-CD (Compact Disc Digital Audio) AUDIO
Some recorded les may not be able to be played due to the type and format of disc or
condition of the recording.
CD
Logik LHFMP310_IB_100721_Zell.indd 11 21/07/2010 10:23 AM

GB-12
Safety WarningsProduct Overview Connections MaintenanceOperation Hints and Tips
and Specification
Clock Setting
Setting the clock can only be done in STANDBY mode.
When the unit is in STANDBY mode, the STANDBY/ON LED indicator illuminates.
1. In STANDBY mode, press and hold the PROG/CLOCK-ADJ. button on the unit until
the 24-hour indicator is ashing, then press the SKIP button to select the 12-hour or
24-hour time format on the display. Press the PROG/CLOCK-ADJ. button on the unit to
conrm, then the hour digits will ash.
2. Press the SKIP/SEARCH buttons to adjust the hour digits while ashing, then
press the PROG/CLOCK-ADJ. button on the unit to conrm, then the minute digits will
ash.
3. Press the SKIP/SEARCH buttons to adjust the minute digits while ashing.
4. Press the PROG/CLOCK-ADJ. on the unit button to conrm the time.
5. Each enable state will be cleared if any buttons are not pressed within 10 seconds.
Alarm Clock Setting
Setting the alarm clock in STANDBY mode.
1. Press and hold the AL. SET/OFF 1or 2button on the remote control. The or
indicator will illuminate, and then the hour indicator will ash. Adjust to the correct
hour by pressing the SKIP/SEARCH buttons.
2. Press the AL. SET/OFF 1or 2button again. The minute indicator will ash. Adjust to
the correct minute by pressing the SKIP/SEARCH buttons.
3. RAD will appear and ash on the display. Adjust RAD/CD/BU by pressing the SKIP/
SEARCH buttons.
4. Press the AL. SET/OFF 1or 2button again, the timer V-13 (only for RAD and CD)
indicator appears on the display and ashes, adjust the alarm volume by pressing the
SKIP/SEARCH buttons.
5. Press the AL. SET/OFF 1or 2button to conrm, or appears on the display.
6. Each enable state will be cleared if any buttons are not pressed within 10 seconds.
Snooze Function
1. Press the SNOOZE button after the RADIO, CD or BUZZER alarm sounds. The snooze
indicator will show on the LCD display. The alarm will go o and will come on again in
approximately 9 minutes.
2. The alarm will keep sounding every 9 minutes for around 1 hour. If no button is
pressed, the snooze function will automatically turn o after around 1 hour.
• When the alarm is ringing, you can press the STANDBY/ON button once or press the
AL. SET/OFF 1or 2button once on the remote control to stop the AL. SET/OFF 1or the
AL. SET/OFF 2function. The or indicator will still illuminate on the LCD display. (It
may keep the AL. SET/OFF 1or the AL. SET/OFF 2function the next day)
• When the alarm is not ringing, if you want to stop the AL. SET/OFF 1or the
AL. SET/OFF 2function fully, press the AL. SET/OFF 1or 2button once on the remote
control only. The or indicator will disappear from the display. The function of the
AL. SET/OFF 1or the AL. SET/OFF 2will cancel at once.
Logik LHFMP310_IB_100721_Zell.indd 12 21/07/2010 10:23 AM

GB-13
Safety Warnings Product Overview
Connections
Maintenance Operation
Hints and Tips
and Specification
Sleep Timer Setting
The sleep timer automatically turns the unit o after a certain time.
1. While the unit is on, press the SLEEP button to adjust the Radio or CD Player’s sleep
mode.
2. Press the SLEEP button repeatedly to select the desired sleep time as below:
90 80 70 60 50
NORMAL
40 30 20 10
Preset EQ
This system supports a variety of equalizers and sound eects.
During playback, press the EQ button on the remote control to select a desired music
mode. Each time the EQ button is pressed, the music mode will change to the next one as
follows:
PASS CLAS ROC JA
CD / MP3 / WMA Operation
Press the FUNCTION button repeatedly until you reach the CD mode.
Playback
1. Press the CD DOOR and it will open automatically.
CD
2. Place the CD or MP3 disc into the CD compartment, and
then close the CD door.
3. Press the FUNCTION button to CD mode. The total
number of tracks will display on the LCD display, then
press the PLAY/PAUSE/BAND button, the unit will
play the CD/MP3 disc.
• This unit can play CD, CD-R, CD-RW, MP3, WMA disc,
8cm and Multi Section of MP3 DISC.
• It can “Playback Transfer Rate in 8-320 kbps”, Max
Readable Folders 99 and 999 tracks
• If no disc or can’t read TOC will be displayed.
CD
Logik LHFMP310_IB_100721_Zell.indd 13 21/07/2010 10:23 AM

GB-14
Safety WarningsProduct Overview Connections MaintenanceOperation Hints and Tips
and Specification
2. To interrupt playback , press the PLAY/PAUSE/BAND
button once again. The track number indicator will ash.
Press the PLAY/PAUSE/BAND button once more
again to resume playback.
3. To stop playback, press the STOP/FM MO/ST. button
once on the unit or on the remote control.
For MP3 / WMA Mode
1. Place the MP3/WMA disc into the CD compartment.
The total number of les will display on the LCD display,
then press the PLAY/PAUSE/BAND button, the unit
will play the rst le of the MP3/WMA disc.
2. Press the FOLDER buttons on the remote control
to select the desired folder, and press the SKIP/SEARCH
buttons to go to favourite le number.
3. To interrupt playback, press the PLAY/PAUSE/BAND
button once again. The le number indicator will ash.
Playing The Entire CD/MP3/WMA
For CD Mode
1. Insert the CD disc into the CD compartment. The total
number of tracks will display on the LCD display, then
press the PLAY/PAUSE/BAND button, the unit will
play the rst track of the CD disc.
CD
CD
MP3
CD
MP3
CD
• After playing the last track in a folder, the unit will automatically
play the rst track of the next folder.
4. To resume playback, press the PLAY/PAUSE/BAND
button once more again.
5. To stop playback, press the STOP/FM MO/ST. button
once on the unit or on the remote control.
Play Mode Function
For CD Mode
1. Press the PLAY MODE button once on the unit or
remote control,“ ” is displayed. CD will play the current
track repeatedly.
2. Press the PLAY MODE button twice, “
ALL
“ is displayed.
CD will play all tracks repeatedly.
CD
CD ALL
Logik LHFMP310_IB_100721_Zell.indd 14 21/07/2010 10:23 AM

GB-15
Safety Warnings Product Overview
Connections
Maintenance Operation
Hints and Tips
and Specification
CD RAND
3. Press the PLAY MODE button three times, “
RAND
“ is
displayed. CD will play all tracks randomly.
4. Press the PLAY MODE button once more again, the
PLAY MODE function will be o.
For MP3 / WMA Mode
1. Press the PLAY MODE button once on the unit (or
remote control), then “ ” is displayed. It will play the
current le repeatedly.
2. Press the PLAY MODE button twice, “
FOLD
” is
displayed. It will play all les in the current folder
repeatedly.
3. Press the PLAY MODE button three times, “
ALL
“ is
displayed. It will play all les repeatedly.
4. Press the PLAY MODE button four times, then “
RAND
“ is
displayed. It will play all les in the disc of current album
randomly.
5. Press the PLAY MODE button once more again, the
PLAY MODE function will be o.
CD
MP3
CD
MP3
FOLD
CD
MP3
ALL
CD
MP3
RAND
2. Press the SKIP/SEARCH buttons to select the
track that you want to preset.
3. Press the PROG/CLOCK-ADJ. button to conrm the track
number.
4. Repeat steps 2 and 3 to enter additional tracks into the
program memory up to 32 programs. When the memory
is full, “ ” will ash on the display.
For MP3 / WMA Mode
1. Press the PROG/CLOCK-ADJ. button on the unit, shift to
PROG mode. The album number is ashing. “ “ and
“
PRO G
” indicator will be displayed.
Programme Function
User can program up to 32 tracks in CD mode or 64 tracks in MP3/WMA mode in any
desired order. PROG mode is activated while in STOP mode.
How to set the Programme
For CD Mode
1. Press the PROG/CLOCK-ADJ. button on the unit, shift to
PROG mode. “ “ and “
PRO G
” indicator will be displayed.
CD PROG
CD PROG
Logik LHFMP310_IB_100721_Zell.indd 15 21/07/2010 10:23 AM

GB-16
Safety WarningsProduct Overview Connections MaintenanceOperation Hints and Tips
and Specification
2. Press the SKIP/SEARCH buttons, the album
number will change and ash.
3. Press the PROG/CLOCK-ADJ. button, the rst track
number will be displayed and ash.
4. Press the SKIP/SEARCH buttons to select the le
number that you want to preset.
5. Press the PROG/CLOCK-ADJ. button to conrm the
favourite track number. “ “ will be displayed.
6. Repeat steps 2 – 5 to enter additional tracks into the
program memory up to 64 programs. When the memory
is full, “ ” will ash on the display.
PROGRAMME PLAY
Press the PLAY/PAUSE/BAND button on the unit or on the remote control. The unit will
play the rst track of the program. When all tracks have been played, the unit display will
show the number of tracks of the CD/MP3/WMA songs.
CANCEL PROGRAMME
Press the STOP/FM MO/ST. button once, or open the CD tray door and close it again to
erase the memory.
CD PROG
• Press the PLAY MODE button once, the “ ” indicator will illuminate on the display. The unit will repeat
the current track.
• Press the PLAY MODE button twice, the“
ALL
“ will illuminate on the display. The unit will repeat the
total number of tracks.
• Press the PLAY MODE button once more again. The unit will return to play the programme.
Logik LHFMP310_IB_100721_Zell.indd 16 21/07/2010 10:23 AM

GB-17
Safety Warnings Product Overview
Connections
Maintenance Operation
Hints and Tips
and Specification
Radio Operation
Press the FUNCTION button repeatedly to the RAD mode to select the AM/FM station.
AM Mode
• Press the PLAY/PAUSE/BAND button to select AM mode. Turn the TUNING +/–
control to select the desired station.
• The unit has a built-in ferrite aerial which is directional. Reorient the unit to get a better
AM recepiton.
FM Mode
• Press the PLAY/PAUSE/BAND button to select FM mode. STEREO LED will illuminate
if a stereo broadcast is being received.
• Turn the TUNING +/– control to select the desired station. Fully extend the FM aerial and
adjust its direction to get the best FM reception.
Selecting Mono / Stereo
This function works on FM mode only.
• Press the STOP/FM MO/ST. button in FM mode. The S-OF indicator will show on the
display for 2 seconds, and the stereo LED indicator on the unit will turn o.
• The unit will return to FM MONO station.
• Press the STOP/FM MO/ST. button again. The S-ON indicator will show on the display
for 2 seconds, the unit will return to FM STEREO and the stereo LED indicator will
illuminate.
Logik LHFMP310_IB_100721_Zell.indd 17 21/07/2010 10:23 AM

GB-18
Safety WarningsProduct Overview Connections MaintenanceOperation Hints and Tips
and Specification
Maintenance
Handling Discs
• Do not touch the playback side of the disc.
• Do not attach paper or tape to the disc.
Cleaning Discs
• Fingerprints and dust on the disc cause picture and sound deterioration. Wipe the disc
from the centre outwards with a soft cloth. Always keep the disc clean.
• If you cannot wipe o the dust with a soft cloth, wipe the disc lightly with a slightly
moistened soft cloth and nish with a dry cloth.
• Do not use any type of solvent such as thinner, benzine, commercially available cleaners
or antistatic spray. They may damage the disc.
Storing Discs
• Do not store discs in places subjected to direct sunlight or near heat sources.
• Do not store discs in places subjected to moisture and dust such as a bathroom or near a
humidier.
• Storing discs vertically in a case, stacking discs or placing objects on discs outside of their
cases may cause warping.
Playback side
Logik LHFMP310_IB_100721_Zell.indd 18 21/07/2010 10:23 AM

GB-19
Safety Warnings Product Overview
Connections
Maintenance Operation
Hints and Tips
and Specification
Hints and Tips
If a problem does occur, it may often be due to something very minor. The following table
contains various tips.
Problem Cause / Solution
CD
Micro HiFi system does not power on • Make sure the mains plug is secure in the
mains socket, and the outlet has power.
• Make sure you’ve selected CD mode.
Disc in place but the unit won’t play • Make sure the disc label is facing up.
• Make sure the disc is clean.
• PAUSE mode may be activated,
deactivate it.
• Disc may be damaged or dirty; check
and clean the disc.
Disc skips • Make sure the unit is on a secure spot.
Vibrations or jarring can cause the disc
to skip.
RADIO
Poor FM reception • Make sure the FM aerial wire is fully
extended.
• Electrical interference in your home can
cause poor reception. Move the unit
away from them (especially those with
motors and transformers).
Logik LHFMP310_IB_100721_Zell.indd 19 21/07/2010 10:23 AM

GB-20
Safety WarningsProduct Overview Connections MaintenanceOperation Hints and Tips
and Specification
Specications
Model LHFMP310
Power Supply 230V ~50Hz
Output Power 2Watts x 2
Unit Dimension 154 (W) x 203 (D) x 221 (H) mm
Speaker Box Dimension 139 (W) x 114 (D) x 221 (H) mm
N.W.: 3.3 kg
Radio Section
Frequency Range FM 88 – 108 MHz
AM 540 – 1600 KHz
Compact Disc Section
Optical Pickup 3 - Beam Laser
Frequency Response 100Hz – 16KHz
Features and specications are subject to change without notice.
Logik LHFMP310_IB_100721_Zell.indd 20 21/07/2010 10:23 AM
Table of contents
Other Logik Stereo System manuals

Logik
Logik LCDBM12 User manual

Logik
Logik LSB3213WE User manual

Logik
Logik LHFiP2010E User manual

Logik
Logik LCDBOOM14 User manual

Logik
Logik LHFM14 User manual

Logik
Logik LCDHF512 User manual

Logik
Logik LHFIP2010 User manual

Logik
Logik LCDBB13E User manual

Logik
Logik LIAA4614E User manual

Logik
Logik LHFM14 User manual