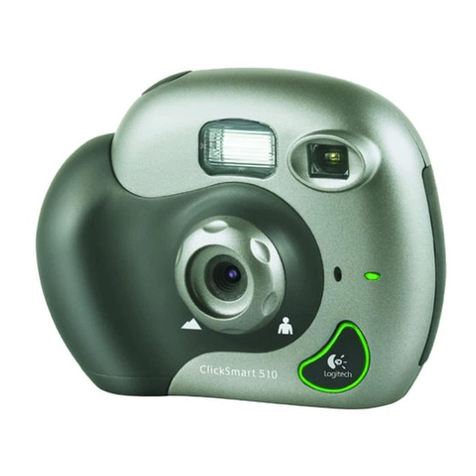
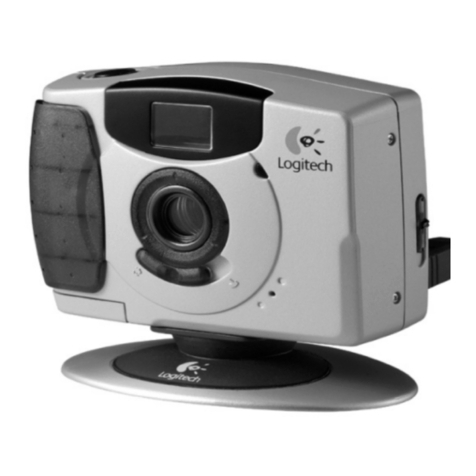
Logitech ClickSmart 510 Manual

ClickSmart™510
Setup
ClickSmart™510
Setup

2
© 2001 Logitech. All Rights Reserved. Logitech, the Logitech logo, and other Logitech
marks are owned by Logitech and my be registered. All other trademarks are the property
of their respective owners. Logitech assumes no responsibility for any errors that may
appear in this manual. Information contained herein is subject to change without notice.
Part Number:
622898-0403
Logitech® ClickSmart™ products are intended to be used in a lawful manner. Certain uses
of digital PC camera products may be prohibited by local laws in some countries or states,
such as the surreptitious recording of audio and/or video communications for certain
purposes. If you have any question about whether a proposed use of your product is lawful,
you should consult a local legal authority before proceeding.
Limited Warranty.
Logitech warrants that any hardware product accompanying this
documentation shall be free from significant defects in material and workmanship for
a period of two (2) years from the date of purchase. Logitech's limited warranty
is nontransferable and is limited to the original purchaser. This warranty gives you
specific legal rights, and you may also have other rights which vary under local laws.
Remedies.
Logitech’s entire liability and your exclusive remedy for any breach of warranty
shall be, at Logitech’s option, to: (a) repair or replace the hardware, provided that the
hardware is returned to the point of purchase or such other place as Logitech may direct,
with a copy of the sales receipt, or (b) refund the price paid. Any replacement hardware
will be warranted for the remainder of the original warranty period or thirty (30) days,
whichever is longer. These remedies are void if failure of the hardware has resulted from
accident, abuse, or misapplication.
DISCLAIMER OF WARRANTY.
THE WARRANTIES
EXPRESSLY SET FORTH IN THIS AGREEMENT REPLACE ALL OTHER WARRANTIES.
LOGITECH AND ITS SUPPLIERS EXPRESSLY DISCLAIM ALL OTHER WARRANTIES, INCLUDING,
BUT NOT LIMITED TO, THE IMPLIED WARRANTIES OF MERCHANTABILITY AND FITNESS FOR
A PARTICULAR PURPOSE AND NONINFRINGEMENT OF THIRD-PARTY RIGHTS WITH RESPECT
TO THE HARDWARE. NO LOGITECH DEALER, AGENT, OR EMPLOYEE IS AUTHORIZED TO MAKE
ANY MODIFICATION, EXTENSION, OR ADDITION TO THIS WARRANTY. Some jurisdictions
do not allow limitations on how long an implied warranty lasts, so the above limitation
may not apply to you.
LIMITATION OF LIABILITY.
IN NO EVENT WILL LOGITECH OR ITS SUPPLIERS BE LIABLE FOR
ANY COSTS OF PROCUREMENT OF SUBSTITUTE PRODUCTS OR SERVICES, LOST PROFITS,
LOSS OF INFORMATION OR DATA, OR ANY OTHER SPECIAL, INDIRECT, CONSEQUENTIAL,
OR INCIDENTAL DAMAGES ARISING IN ANY WAY OUT OF THE SALE OF, USE OF, OR INABILITY
TO USE ANY LOGITECH PRODUCT OR SERVICE, EVEN IF LOGITECH HAS BEEN ADVISED OF
THE POSSIBILITY OF SUCH DAMAGES. IN NO CASE SHALL LOGITECH'S AND ITS SUPPLIERS’
TOTAL LIABILITY EXCEED THE ACTUAL MONEY PAID FOR THE LOGITECH PRODUCT
OR SERVICE GIVING RISE TO THE LIABILITY. Some jurisdictions do not allow the exclusion
or limitation of incidental or consequential damages, so the above limitation or exclusion
may not apply to you. The above limitations will not apply in case of personal injury where
and to the extent that applicable law requires such liability.
FCC Compliance and Advisory Statement.
This hardware device complies
with Part 15 of the FCC Rules. Operation is subject to the following two conditions:
1) this device may not cause harmful interference, and 2) this device must accept any
interference received, including interference that may cause undesired operation.
This equipment has been tested and found to comply with the limits for a Class B digital
device, pursuant to Part 15 of the FCC Rules. These limits are designed to provide
reasonable protection against harmful interference in a residential installation.
This equipment generates, uses, and can radiate radio frequency energy and, if not
installed or used in accordance with the instructions, may cause harmful interference
to radio communications. However, there is no guarantee that interference will not occur
in a particular installation. If this equipment does cause harmful interference to radio
or television reception, which can be determined by turning the equipment off and on,
the user is encouraged to try to correct the interference by one or more of the following
measures: 1) reorient or relocate the receiving antenna; 2) increase the separation
between the equipment and the receiver; 3) connect the equipment to an outlet on
a circuit different from that to which the receiver is connected; 4) consult the dealer or an
experienced radio/TV technician for help. Any changes or modifications not expressly
approved by the party responsible for compliance could void the user's authority
to operate the equipment. Where shielded interface cables have been provided with
the product or specified additional components or accessories elsewhere defined to be
used with the installation of the product, they must be used in order to ensure compliance
with FCC regulations.
Canadian DOC Statement.
This digital device does not exceed the Class B limits
for radio noise emissions from digital apparatus specified in the interference-
causing equipment standard entitled “Digital Apparatus,” ICES-003 of the Department
of Communications.
Cet appareil numérique respecte les limites bruits radioélectriques applicables
aux appareils numériques de Classe B prescrites dans la norme sur le matériel brouilleur:
“Appareils Numériques,” NMB-003 édictée par le Ministère des Communications.
This device complies with RSS-210 of Industry and Science Canada. Operation is subject to
the following two conditions: 1) this device may not cause interference, and 2) this device
must accept any interference, including interference that may cause undesired operation
of the device.
Register Your Camera!
Please take a moment to register your camera on our web site
at www.logitech.com. Registration entitles you to free Customer Support. Furthermore,
as a registered customer you may chose to be included in special product offers and
interesting information abut new Logitech products.

3
© 2001 Logitech. Tous droits réservés. Logitech, le logo Logitech et les autres marques
Logitech sont la propriété exclusive de Logitech et sont susceptibles d’être des marques
déposées. Toutes les autres marques sont la propriété exclusive de leurs détenteurs
respectifs. Logitech décline toute responsabilité en cas d'erreurs dans ce manuel.
Les informations énoncées dans le présent document peuvent faire l’objet
de modifications sans avis préalable.
Les produits QuickCam de Logitech doivent faire l’objet d’une utilisation légale.
Certaines utilisations de caméras numériques pour PC peuvent être interdites par
les lois locales dans certains pays ou états, telles que l’enregistrement clandestin de
communications audio et/ou vidéo pour des usages particuliers. Pour toute question
concernant la légalité de l’utilisation proposée de votre produit, veuillez consulter
une autorité légale locale au préalable.
Garantie limitée.
Logitech certifie que les produits matériels accompagnant cette
documentation sont exempts de tout défaut de fabrication et sont garantis pendant une
période de deux (2) ans à compter de la date d'achat. La garantie de Logitech est limitée
à l'acheteur initial et ne peut faire l'objet d'un transfert. La présente garantie vous confère
certains droits légaux spécifiques. Vous pouvez détenir d'autres droits variant selon
les lois locales.
Recours.
En cas de rupture de garantie l’intégralité de la responsabilité
de Logitech et votre recours exclusif consisteront, au choix de Logitech, à: (a) réparer ou
remplacer le matériel, sous réserve que le matériel soit renvoyé au point de vente ou à
tout autre lieu indiqué par Logitech, accompagné d’une copie du justificatif d’achat, ou
(b) rembourser le prix d’achat. Tout matériel remplacé sera garanti jusqu'à échéance de la
garantie d'origine ou pour une durée de trente (30) jours, en fonction de la période la plus
longue. Ces recours sont nuls si la défaillance du matériel est due à un accident, à un
mauvais traitement ou à une utilisation inappropriée.
Renonciation de garantie.
LES
GARANTIES PREVUES DANS CET ACCORD REMPLACENT TOUTES LES AUTRES GARANTIES.
LOGITECH ET SES FOURNISSEURS EXCLUENT EXPRESSEMENT TOUTES AUTRES GARANTIES, Y
COMPRIS SANS QUE CETTE ENUMERATION SOIT LIMITATIVE, TOUTES GARANTIES IMPLICITES
DU CARACTERE ADEQUAT POUR LA COMMERCIALISATION OU UN USAGE PARTICULIER, AINSI
QUE LES GARANTIES DE RESPECT DE DROITS DE TIERS CONCERNANT LE MATERIEL.
AUCUN DISTRIBUTEUR, AGENT OU EMPLOYE DE LOGITECH N'EST AUTORISE A EFFECTUER
DES MODIFICATIONS, DES EXTENSIONS OU DES AJOUTS DANS CETTE GARANTIE.
Certaines juridictions ne reconnaissent pas les limitations de durée des garanties
implicites; il est donc possible que la limitation susmentionnée ne s’applique pas
à votre cas.
Limites de responsabilité.
LOGITECH OU SES FOURNISSEURS NE SAURAIENT ETRE TENUS
RESPONSABLES DES COÛTS D'APPROVISIONNEMENT EN PRODUITS OU SERVICES DE
REMPLACEMENT, DU MANQUE A GAGNER, DE LA PERTE D'INFORMATIONS OU DE DONNEES,
OU DE TOUT AUTRE DOMMAGE PARTICULIER, INDIRECT, CONSECUTIF OU ACCESSOIRE
DECOULANT DE LA VENTE, DE L'UTILISATION OU DE L'IMPOSSIBILITE D'UTILISER UN PRODUIT
OU UN SERVICE LOGITECH, MEME SI LOGITECH A ETE INFORMEE DE L'EVENTUALITE DE TELS
DOMMAGES. LA RESPONSABILITE DE LOGITECH ET DE SES FOURNISSEURS NE SAURAIT
EN AUCUN CAS DEPASSER LE MONTANT DEBOURSE POUR L’ACQUISITION DU PRODUIT
OU DU SERVICE LOGITECH LUI DONNANT LIEU. Certaines juridictions n’autorisent pas
l’exclusion ou la limitation des dommages accessoires ou consécutifs; il est donc
possible que la limitation ou l’exclusion susmentionnée ne s’applique pas à votre cas.
Les limites susmentionnées ne s'appliqueront pas en cas de préjudice corporel lorsque
et dans la mesure où la loi en vigueur prévoit l'existence de cette responsabilité.
Déclaration FCC.
Cet équipement a été testé et déclaré conforme à la section 15
du règlement de la FCC. Son fonctionnement est soumis aux conditions suivantes:
1) l'équipement concerné ne doit pas causer d'interférences dangereuses, et 2) il doit
accepter toute interférence reçue, y compris les interférences risquant d'engendrer
un fonctionnement indésirable. Cet équipement a été testé et déclaré conforme
aux limitations prévues dans le cadre de la catégorie B des appareils numériques défini par
la section 15 du règlement de la FCC. Ces limitations sont stipulées aux fins de garantir
une protection raisonnable contre les interférences gênantes en installation résidentielle.
Cet équipement génère, utilise et diffuse des ondes radio, et s'il n'est pas installé ni utilisé
en conformité avec les instructions dont il fait l'objet, peut causer des interférences
gênantes avec les communications radio. Cependant, nous ne pouvons vous garantir
qu'une interférence ne se produira pas dans une installation particulière. Si cet
équipement produit des interférences graves lors de réceptions radio ou télévisées qui
peuvent être détectées en allumant et en éteignant l'équipement, vous êtes invités
à les supprimer de plusieurs manières: 1) Réorienter ou déplacer l'antenne de réception;
2) Augmenter la distance séparant l'équipement et le récepteur; 3) Connecter l'équipe-
ment à un circuit différent de celui auquel le récepteur est connecté; 4) Contacter votre
revendeur ou un technicien radio/TV qualifié. Toutes modifications ou tous changements
effectués sans l'accord exprès de la partie responsable de la conformité aux normes
pourraient contraindre l'utilisateur à ne plus utiliser son équipement. Afin d'assurer la
conformité avec les règlements FCC, les câbles d'interface blindés fournis avec le produit
doivent être utilisés, ainsi que tout autres composants ou accessoires également spécifiés,
lors de l'installation du produit.
Déclaration du Ministère des Communications Canadien.
Cet appareil numérique
est conforme aux limitations concernant l'émission d'interférences radio par des appareils
numériques de catégorie B, telles que stipulées dans le cadre de la norme Appareils
numériques ICES-003 édictée par le Ministère canadien de l’Industrie.
Cet équipement a été déclaré conforme à la norme RSS-210 édictée par le Ministère
canadien des Sciences et de l'Industrie. Son fonctionnement est soumis aux conditions
suivantes: 1) l'équipement concerné ne doit pas causer d'interférences, et 2) il doit
accepter toute interférence reçue, y compris les interférences risquant d'engendrer
un fonctionnement indésirable.
Contents
English . . . . . . . . . . . . . . . . . . . . . . . . . . . . . . . . . . . . . . . . . . . . . . . . . . . . . . . . . . . . . . . . . . . . . . . . . . . . . . . . 1
Español. . . . . . . . . . . . . . . . . . . . . . . . . . . . . . . . . . . . . . . . . . . . . . . . . . . . . . . . . . . . . . . . . . . . . . . . . . . . . . . . 7
Français . . . . . . . . . . . . . . . . . . . . . . . . . . . . . . . . . . . . . . . . . . . . . . . . . . . . . . . . . . . . . . . . . . . . . . . . . . . . . . . 13
Português . . . . . . . . . . . . . . . . . . . . . . . . . . . . . . . . . . . . . . . . . . . . . . . . . . . . . . . . . . . . . . . . . . . . . . . . . . . . . 19

1
Welcome!
It’s easy with your Logitech
®
ClickSmart
™
510 digital camera!
Take spontaneous digital
pictures, or make fun videos
with sound. Share your creations
quickly with family and friends
over e-mail, or the Web.
For digital pictures and videos,
turn on the camera,
then point and shoot.
Your pictures and videos are
stored on a Smart Media
™
card.
Later, download via QuickSync
™
.
For live Web video, connect
the camera to your computer,
then launch the Logitech
®
camera software that’s included
with your camera.
Low light/
Flash charging indicator
Viewfinder
Battery compartment
Stand
Focusing ring
Flash
Shutter button
Video-on LED
Microphone
QuickSync
™
button
Lens
Viewfinder
On/off button
Select button
Mode button
Status display
Speaker
Smart Media memory
card slot (behind cover)
USB connection
(behind cover)
Tripod socket

2
Getting Ready
1.
Insert the four AAA alkaline camera batteries.
2.
Insert the Smart Media
™
memory card into the memory
card slot. Push the card all the way in and close the door.
(To remove the memory card, open the door and press
on the card to eject it.)
3.
Install the Logitech
®
camera software using
your computer’s CD-ROM drive. Follow the on-screen
instructions.
Taking Pictures and Videos
1.
Press and hold the On/off button for one second
to turn on the camera. The camera is ready to take
a digital picture.
2.
To change any of the camera’s options (e.g., camera
mode, resolution, timer, etc.), cycle through the options
on the status display by pressing the Mode button.
The icon of the active option will flash. Change it by
pressing the Select button.
3.
When not in use, the camera turns itself off after
60 seconds to conserve battery power.
4.
To switch the camera off, press and hold the On/
off button for one second.
Slide cover to open

3
The Status Display
1. Camera Mode
*
Photo
Video. Press and hold Shutter button to record
video with sound; release button to stop.
Multisnap. Pressing the Shutter button
once takes a series of five photos
at one second intervals.
2. Resolution
High: 1.3 megapixels (1280 x 960 pixels),
enhanced in software (photos only)
Medium: 640 x 480 pixels (photos only)
and 320 x 240 pixels (videos only)
Low: 320 x 240 pixels (photos only)
and 160 x 120 pixels (videos only)
3. Flash
Automatic flash with each shot.
Fill-in flash in low light.
No flash.
4. Timer
Press Shutter button; photo is taken after 10 seconds.
5. Camera Sound Indicator - On/Off
6. Delete
Press the QuickSync button for one second to delete
the last picture. Hold QuickSync button to delete
a series of images.
Status Indicators
7. Counter - Up/Down
Up arrow: pictures taken; Down arrow: pictures
remaining.
8. Number of Pictures or Frames of Video
9. Battery Status
*Use Mode button to cycle through modes; use Select button to choose option.
1
2
3
45
6
7
8
9

4
Getting Your Pictures and Videos into the Computer
1.
Turn on your computer, then place
the camera on its stand.
2.
Open the cover protecting the USB
connector on the camera.
Plug the USB cable into the camera,
then plug the other end into a USB port
on your computer.
3.
Press the QuickSync button on
the camera to display the QuickSync
window on your computer screen.
From here you can:
•
Transfer all your images to the Gallery
in your computer. After the transfer,
the pictures in the camera are deleted
automatically.
•
Delete all the pictures in your camera
without transferring them.
•
Cancel and neither download
nor delete your in-camera pictures.
USB connector
USB port
Cover

5
Sharing Your Pictures and Videos
1.
Download your pictures to the computer
(see “Getting Your Pictures and Videos into
the Computer”).
2.
If the Logitech
®
camera software is not launched,
click the Logitech
®
camera software icon located
on the Windows
®
Quick Launch Bar to launch
the software.
3.
To e-mail a photo or video, use the “Attach to
an E-mail” button in the Gallery section.
For more information, refer to the Online
User’s Guide.
It’s also easy to share your photos on SpotLife.com
using the “Create a Web Album” activity.
(A FREE SpotLife.com trial membership is included
with your camera.) For more information,
refer to the Online User’s Guide.
Using the Camera as a Web Camera
With your camera and software, do video calling,
video e-mail, or live video broadcasting on the Internet
right from your PC.
Simply connect the camera to your PC , and place
the camera on your computer monitor or your desktop.
Launch the Logitech
®
camera software. For additional
information, refer to the Online User’s Guide.
Warnings!
•
Don’t expose the camera to extremes of cold or heat.
Operating temperature is between 32° to 104° F
(0° to 40° C).
•
Don’t immerse the camera in water.
•
Avoid touching the LCM window.
•
Use the lens cap to protect the lens when you are
not taking pictures.
•
When inserting the Smart Media
™
memory card
into the camera, don’t touch the metal contacts on
the card.
•
Use only Smart Media
™
memory cards.
•
Discard used batteries according to
the manufacturer’s instructions.
•
Remember that when the camera is set to auto-flash
or fill-in flash, the camera batteries are drained
more quickly.

6
Tips for Taking Great Pictures and Videos
•
Fill the viewfinder with your subject and hold the camera steady for extra time
to prevent blurry images.
•
Make sure your subject fits within the crop marks in the viewfinder.
•
There are two focusing ranges. For near subjects less than three feet (90 cm)
away, set the focusing ring to the “man” icon. For distant subjects,
set the focusing ring to the “mountain” icon.
•
Avoid subjects of extreme contrast that have both deep shadows and harsh
highlights (e.g., when the sun is directly behind your subject).
•
Avoid taking videos in very dim light; your video will be too dark.
•
For bright, overhead lighting use the fill-in flash feature (e.g., taking a portrait
when the sun is directly over your subject).
•
In dim light, the low light indicator underneath the viewfinder will turn on.
Consider using the flash feature.
•
When you turn on the flash, the low light indicator becomes the flash
charging indicator. It will blink to let you know that the flash is charging.
Wait until the indicator has turned a solid red before taking a picture.
•
Obtain free software updates. Your Logitech
®
camera software automatically
checks the Logitech
®
web site and downloads the newest version of
the software.
•
Get more Information — Important! Access the Online User’s Guide:
1.
From within the Logitech
®
camera software, click the Help button. A drop-
down list box displays.
2.
Select “View the How to Guide.” The User’s Guide displays automatically.
To view a topic, click one of the topics listed on the left side of the title page.

7
Bienvenido
¡La cámara digital Logitech
®
ClickSmart
™
510 hace las cosas
realmente fáciles! Tome fotografías
digitales espontáneas o grabe
divertidos vídeos con sonido.
Comparta rápidamente sus
creaciones con familiares
y amistades a través de correo
electrónico o de Internet.
Para capturar vídeos y fotografías
digitales, encienda la cámara,
encuadre y dispare. Las imágenes
se guardan en una tarjeta Smart
Media
™
. Luego pueden descargarse
con QuickSync
™
.
Para grabar vídeo Web en directo,
conecte la cámara al ordenador
e inicie el software incluido
con la cámara de Logitech
®
.
Indicador de luz escasa/
carga de flash
Visor
Compartimento de las pilas
Soporte
Control de enfoque
Flash
Botón del obturador
Indicador LED
de vídeo
Micrófono
Botón
QuickSync
™
Objetivo
Visor
Botón de encendido
Botón de selección
Botón de modo
Pantalla de estado
Altavoz
Ranura de tarjeta
de memoria Smart Media
(bajo tapa)
Conexión USB
(bajo tapa)
Zócalo para trípode

8
Operaciones preliminares
1.
Coloque las cuatro pilas alcalinas AAA.
2.
Introduzca la tarjeta de memoria Smart Media
™
en la ranura correspondiente. Asegúrese de que la tarjeta
encaja correctamente y cierre la tapa. Para sacar la tarjeta,
presione sobre ella.
3.
Instale el software de la cámara de Logitech
®
desde la unidad de CD-ROM del ordenador.
Siga las instrucciones que se muestran en pantalla.
Capturar fotografías y vídeos
1.
Mantenga pulsado el botón de encendido durante
un segundo para encender la cámara. La cámara está lista
para tomar una fotografía digital.
2.
Si desea cambiar alguna de las opciones de la cámara
(por ejemplo, modo de cámara, resolución, disparador
automático, etc.), pulse el botón de modo para recorrer
las opciones que aparecen en la pantalla de estado.
El icono de la opción activa parpadeará. Pulse el botón
de selección para cambiar de opción.
3.
Si no se utiliza, la cámara se apaga automáticamente
tras 60 segundos de inactividad para conservar la energía
de las pilas.
4.
Para apagar la cámara, mantenga pulsado el botón
de encendido durante un segundo.
Deslice la tapa para abrir

9
Pantalla de estado
1. Modo de cámara*
Fotografía
Vídeo. Mantenga pulsado el botón
del obturador para vídeo grabar con sonido;
suéltelo para detener la grabación.
Multinstantánea. Si pulsa el botón
del obturador una vez, se toma una serie de
cinco fotografías a intervalos de un segundo.
2. Resolución
Alta: 1,3 megapíxeles (1.280 x 960),
mejora por software (sólo fotografías)
Media: 640 x 480 píxeles (sólo fotografías)
y 320 x 240 píxeles (sólo vídeo)
Baja: 320 x 240 píxeles (sólo fotografías)
y 160 x 120 píxeles (sólo vídeo)
3. Flash
Flash automático con cada disparo.
Flash de relleno con luz escasa.
Sin flash.
4. Disparador automático
Pulse el botón del obturador; la fotografía se toma
transcurridos diez segundos.
5. Indicador de sonido de la cámara
6. Eliminar
Pulse el botón QuickSync durante un segundo
para eliminar la última fotografía. Mantenga pulsado
el botón QuickSync para eliminar una serie
de imágenes.
Indicadores de estado
7. Contador: arriba/abajo
Flecha arriba: fotografías tomadas; Flecha abajo:
fotografías restantes.
8. Número de fotografías o cuadros de vídeo
9. Estado de las pilas
*Use el botón de modo para acceder a las opciones y el botón de selección para elegir
una de ellas.
1
2
3
45
6
7
8
9

10
Transferir fotografías y vídeos al ordenador
1.
Encienda el ordenador y, a continuación,
coloque la cámara sobre el soporte.
2.
Abra la tapa que protege el conector USB
de la cámara. Conecte el cable USB
a la cámara y el otro extremo al puerto USB
del ordenador.
3.
Pulse el botón QuickSync en la cámara
para abrir la ventana QuickSync en
la pantalla del ordenador. Desde aquí
puede:
•
Transferir todas las imágenes
a la Galería. Después de
la transferencia,lasfotografías se borran
automáticamente de la cámara.
•
Eliminar todas las fotografías de
la cámara sin transferirlas.
•
Cancelar y no descargar ni eliminar
las fotografías guardadas en la cámara.
Conector USB
Puerto USB
Tapa

11
Compartir fotografías y vídeos
1.
Descargue las fotografías al ordenador
(véase Transferir fotografías y vídeos al ordenador).
2.
Si el software de la cámara de Logitech
®
no se inicia,
actívelo haciendo clic en el icono del software de
la cámara de Logitech
®
, situado en la barra de inicio
rápido de Windows
®
.
3.
Para enviar por correo electrónico una fotografía
o un vídeo, use el botón “Adjuntar a mensaje
de correo electrónico”, en la Galería. Para obtener
más información, consulte el Manual del usuario
en pantalla.
Por medio de la actividad Crear un álbum Web podrá
compartir fácilmente sus fotografías en SpotLife.com.
La cámara incluye una suscripción de prueba GRATIS
a SpotLife.com. Para obtener más información,
consulte el Manual del usuario en pantalla.
Usar la cámara como cámara Web
Con la cámara y el software de la cámara, puede realizar
videoconferencias, enviar vídeo por correo electrónico
o difundir vídeo en directo a través de Internet desde
el PC.
Basta con que conecte la cámara al PC y la coloque sobre
el monitor del ordenador o la superficie de trabajo.
Inicie el software de la cámara de Logitech
®
.
Para obtener más información, consulte el Manual
del usuario en pantalla.
Advertencias
•
No exponga la cámara a condiciones extremas
de frío o calor. La temperatura de funcionamiento
debería estar entre 0° y 40° C.
•
No sumerja la cámara en agua.
•
No toque la ventana LCM.
•
Use la tapa del objetivo para protegerlo cuando
no esté usando la cámara.
•
Al colocar la tarjeta de memoria Smart Media
™
en la cámara, no toque los contactos metálicos
de la tarjeta.
•
Use únicamente tarjetas de memoria Smart Media
™
.
•
Deseche las pilas usadas de acuerdo con
las instrucciones del fabricante.
•
Recuerde que al dejar el flash encendido las pilas
de la cámara se agotan más rápidamente.

12
Consejos para obtener fotografías y vídeos de gran calidad
•
Procure que el sujeto aparezca entero en el visor y mantenga firme la cámara durante más tiempo,
para evitar obtener imágenes desenfocadas.
•
Asegúrese de que el sujeto queda encuadrado dentro de las marcas de corte del visor.
•
Hay dos rangos de enfoque: para sujetos situados a menos de 90 cm, coloque el control de enfoque en la posición
del icono de la figura; para sujetos alejados, coloque el control de enfoque en la posición del icono de la montaña.
•
Evite sujetos con contrastes excesivos que contengan a la vez sombras muy oscuras y claros demasiado intensos
(como ocurre cuando el sol está situado directamente detrás del sujeto).
•
Procure no grabar vídeos con poca luz; las imágenes serán demasiado oscuras.
•
En condiciones de luminosidad intensa, use el flash de relleno (por ejemplo, para tomar fotografías cuando
el sol está directamente encima del sujeto).
•
Con luz muy tenue, se encenderá el indicador de luz escasa, situado debajo del visor. Puede ser conveniente el uso
del flash.
•
Al activar el flash, el indicador de luz escasa cumple la función de indicador de carga de flash. La luz parpadeará
para indicar que se está cargando. Espere hasta que el indicador muestre la luz roja permanente antes de tomar
la fotografía.
•
Obtenga las actualizaciones de software gratuitas. El software de la cámara de Logitech
®
busca automáticamente
en la página Web de Logitech
®
y descarga la versión más reciente del software.
•
Información adicional — Importante: Acceso al Manual del usuario en pantalla:
1.
Desde el software de la cámara de Logitech
®
, haga clic en el botón Ayuda. Aparece una lista desplegable.
2.
Seleccione “Ver el manual del usuario”. El Manual del usuario se muestra de forma automática. Para consultar
un tema, haga clic en uno de los temas que aparecen a la izquierda de la portada.

13
Bienvenue!
C’est facile avec votre appareil
photo numérique ClickSmart
™
510 de Logitech
®
! Prenez des
photos numériques spontanées,
ou réalisez des vidéos
amusantes avec du son.
Partagez rapidement
vos créations avec votre famille
et vos amis par courrier
électronique ou sur le Web.
Pour prendre des photos
numériques et réaliser
des vidéos, allumez l’appareil,
puis visez et capturez.
Vos photos et vidéos sont
stockées sur une carte Smart
Media
™
. Ensuite, vous pouvez
les télécharger via QuickSync
™
.
Pour filmer une vidéo Web
en direct, branchez l’appareil
photo numérique sur
votre ordinateur, puis lancez
le logiciel Logitech
®
fourni.
Voyant de chargement
du flash/d’éclairage faible
Viseur
Logement des piles
Socle
Bague de mise au point
Flash
Bouton du déclencheur
Voyant de vidéo
Microphone
Bouton
QuickSync
™
Objectif
Viseur
Bouton Marche/Arrêt
Bouton de sélection
Bouton Mode
Affichage
de l’état
Haut-parleur
Emplacement de la carte
mémoire Smart Media
(protégée par son clapet)
Connexion USB
(protégée par son clapet)
Ecrou du pied

14
Préparation
1.
Insérez quatre piles alcalines de type AAA.
2.
Insérez la carte mémoire Smart Media
™
dans la fente
prévue à cet effet. Poussez la carte entièrement
et refermez le clapet. (Pour retirer la carte mémoire,
ouvrez le clapet et appuyez sur la carte pour l’éjecter.)
3.
Installez le logiciel de l’appareil photo numérique Logitech
®
en utilisant le lecteur de CD-ROM de votre ordinateur.
Suivez les instructions qui s'affichent à l'écran.
Prise de photos et de vidéos
1.
Appuyez sur le bouton Marche/Arrêt et maintenez-le
enfoncé pendant une seconde pour allumer l’appareil.
Vous êtes prêt à prendre une photo numérique.
2.
Pour modifier une des options de l’appareil (mode,
résolution, minuteur, etc.), parcourez les options
d’affichage de l’état en appuyant sur le bouton Mode.
L’icône de l’option activée clignote. Modifiez-la
en appuyant sur le bouton de sélection.
3.
Lorsque l’appareil photo numérique n’est pas utilisé,
il s’éteint après 60 secondes pour économiser les piles.
4.
Pour l’éteindre, appuyez sur le bouton Marche/Arrêt
et maintenez-le enfoncé pendant une seconde.
Ouvrez le couvercle
en le faisant coulisser

15
Affichage de l’état
1. Modes disponibles*
Photo
Vidéo. Appuyez sur le bouton du déclencheur
et maintenez-le enfoncé pour enregistrer de
la vidéo avec du son, relâchez-le pour arrêter
l’enregistrement.
Capture multiple. Si vous appuyez une fois
sur le bouton du déclencheur, une série de cinq
photos est prise à une seconde d’intervalle.
2. Résolution
Elevée: 1,3 mégapixels (1280 x 960 pixels),
améliorée par logiciel (photos uniquement)
Moyenne: 640 x 480 pixels (photos uniquement)
et 320 x 240 pixels (vidéos uniquement)
Faible: 320 x 240 pixels (photos uniquement)
et 160 x 120 pixels (vidéos uniquement)
3. Flash
Flash automatique à chaque prise.
Flash de contre-éclairage en lumière faible.
Pas de flash.
4. Minuteur
Appuyez sur le bouton du déclencheur; la photo
est prise après 10 secondes.
5. Voyant de son - Marche/Arrêt
6. Supprimer
Appuyez sur le bouton QuickSync pendant
une seconde pour effacer la dernière photo.
Maintenez ce bouton enfoncé pour supprimer
une série d’images.
Voyants d’état
7. Compteur - ascendant/descendant
Flèche ascendante: photos prises; Flèche
descendante: photos restantes.
8. Nombre de photos ou d’images vidéo
9. Niveau des piles
*Utilisez le bouton Mode pour parcourir les modes; utilisez le bouton de sélection
pour choisir une option.
1
2
3
45
6
7
8
9

16
Transfert des photos et vidéos sur l’ordinateur
1.
Allumez votre ordinateur, puis placez
l’appareil photo numérique sur son socle.
2.
Ouvrez le couvercle qui protège
le connecteur USB de l’appareil photo.
Insérez une extrémité du câble USB
dans l’appareil et l'autre dans le port USB
de l'ordinateur.
3.
Appuyez sur le bouton QuickSync
pour afficher la fenêtre correspondante
sur l'écran de votre ordinateur.
Depuis cette fenêtre, vous pouvez:
•
Transférer toutes vos images
dans la Galerie de l’ordinateur.
Après le transfert, les photos
de l’appareil sont supprimées
automatiquement.
•
Effacer toutes les photos de l’appareil
sans les transférer.
•
Annuler et ne pas télécharger,
ni supprimer les photos
de votre appareil.
Connecteur USB
Port USB
Couvercle
Other manuals for ClickSmart 510
2
Table of contents
Languages:
Other Logitech Digital Camera manuals

Logitech
Logitech ClickSmart 310 Manual

Logitech
Logitech RALLY CAMERA User manual

Logitech
Logitech BEMO User manual

Logitech
Logitech 961247-0215 - ClickSmart 420 Digital Camera User manual

Logitech
Logitech RALLY CAMERA User manual

Logitech
Logitech TV Camera for Skype User manual

Logitech
Logitech Mevo Start User manual

Logitech
Logitech QuickCam Sphere MP User manual

Logitech
Logitech ClickSmart 510 User manual

Logitech
Logitech RALLY CAMERA User manual