manuals.online logo
Brands
  1. Home
  2. •
  3. Brands
  4. •
  5. Lorex
  6. •
  7. Security System
  8. •
  9. Lorex L23WD SERIES User manual

Lorex L23WD SERIES User manual

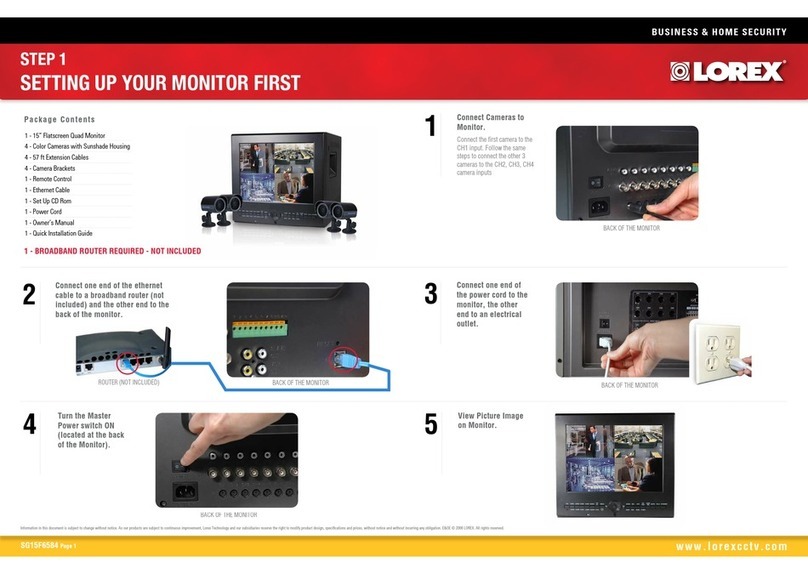
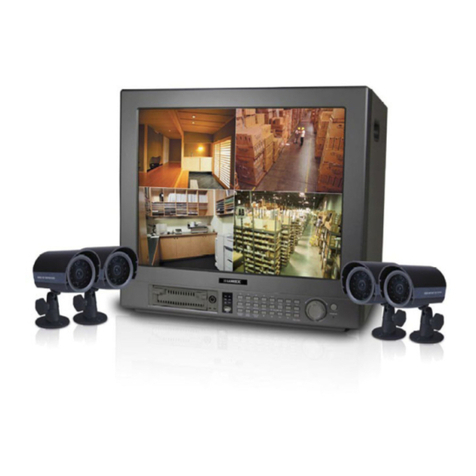
PACKAGE CONTENTS:
Skill Level
Intermediate
easy advanced
Time
under 30 minutesunder 15 minutes under 60 minutes
Hand Tools Hardware
Router
Hi Speed
over 60 minutes
Skill Level
Intermediate
easy advanced
Time
under 30 minutesunder 15 minutes under 60 minutes
Hand Tools Hardware
Router
Hi Speed
over 60 minutes
Time: 20 Minutes Hand Tools Skills - Easy
BASIC INSTALLATION GUIDE
BASIC SYSTEM SETUP
STEP 1
NAVIGATION AND CONTROLS
STEP 2
Skill Level
Intermediate
easy advanced
Time
under 30 minutesunder 15 minutes under 60 minutes
Hand Tools Hardware
Router
Hi Speed
over 60 minutes
Time: 20 Minutes Skills - Easy
BASIC INSTALLATION GUIDE
Skill Level
Intermediate
easy advanced
Time
under 30 minutesunder 15 minutes under 60 minutes
Hand Tools Hardware
Router
Hi Speed
over 60 minutes
Skill Level
Intermediate
easy advanced
Time
under 30 minutesunder 15 minutes under 60 minutes
Hand Tools Hardware
Router
Hi Speed
over 60 minutes
Time: 20 Minutes Hand Tools Skills - Easy
BASIC INSTALLATION GUIDE
BASIC SYSTEM SETUP
STEP 1
CONTINUED
L23WD Series
Quick Setup Guide
1Mouse
Left-Button: While navigating menus, click to select
a menu option. While in a split-screen display mode,
double-click an individual channel to view it in full-screen;
double-click again to return to the split-screen display
mode. Right-Button: Right-click anywhere on the screen
to open the Quick Menu.
12
L23WD Series Quick Setup Guide - English - R1
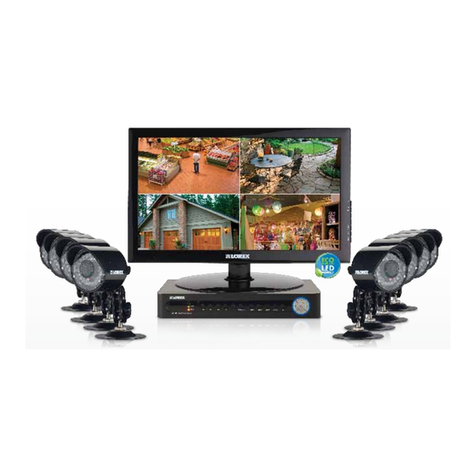
• 23” Widescreen LCD DVR
• HDD Pre-Installed*
• Mouse
• Remote Control
• Power Supply
It’s all on the Web
For detailed setup information, please
refer to your included User’s Manual.
For additional information, please
visit our website
www.lorextechnology.com
Infor mation in this docume nt is subjec t to change without notice. As our products are subject to
continuous improvem ent, Lorex Technology INC. and our subsidiarie s reser ve the right to modify
product des ign, specific ations and prices, without notice and without incur ring an y obligation. E&OE ©
2010 LOREX . All rights r eser ved.
* For setup of Instant Mobile Viewing
and MAC Compatibility refer to your
User Manual.
ATTENTION:
• * Number of Channels/ Screen Size/ Cameras/ Accessories/ Port configuration
and HDD (hard disk drive) capacity may vary by model. Check your package for
specific content information.
• Cameras & stands*
• Camera extension cables*
• Ethernet cable
• Software application CD
• Quick Start Guide
• Owner’s Manual
View the System
Demo on the System
with a press of a
button (10+)
1
Connect the first camera to the CH1 input.
Follow the same steps to connect the
additional cameras.
Connect DIN Cameras to the System:
TIP: Test the cameras prior to selecting a permanent mounting location by
temporarily connecting the Cameras and Cables to your System.
* Connect cameras to extension
cables by aligning the arrows.
NOTE: You cannot connect BNC and DIN
cameras to the same channel
simultaneously.
NOTE: The arrow mark on top of
the flat side of the camera and
cable connectors should face
outwards when connecting to the
system. This aligns cable pins from
being bent. If the pins are bent, the
camera will not function.
Connect BNC Cameras to the System:
ATTENTION: The ends of the extension cable are NOT the same - one end has
a Male power connector, and the other has a Female power connector. Before
permanently running the Camera Extension Cable, make sure that the cable
has been oriented between the Camera and the system correctly.
Male Power Connector - The male
power connector end of the Extension
cable connects to the Camera.
If you are using BNC cameras:
1. Connect the extension cable to the camera.
a. Connect the Male Power connector to the
camera.
b. Connect the BNC connector to the
camera.
2. Connect the extension cable to the system.
a. Connect the BNC connector to an
available BNC port on the system.
b. Connect the Female Barrel Power
connector to a power adaptor.
3. Connect the Power Adaptor to a wall outlet.
Female Power Connector - The
female power connector (barrel) end
of the Extension cable connects to the
Power Adaptor.
1a
TIP: Tilt the System UP to locate the connection ports.
The DIN inputs are located in the center.
2
Connect one end of the Ethernet cable to an
available port of your router (not included)
and the other end to the System’s Network
Port.
Connect the Ethernet Cable:
Connect one end of the power adaptor to the
System and the other end to an electrical
outlet. The power connector faces outward
and only goes in one way. Do not force.
Connect the Power Cable:
4
Connect a USB mouse to the USB port
on the front panel of the system.
Connect the Mouse:
3
Main Menu
1. Click in the Status Bar.
• The SETUP window opens.
2. Click SYSTEM SETUP.
3
The Status Bar (is always ON by default) gives you access to different
modes and functions of the system.
Status Bar
2
Quick Menu
4
Right-click on any channel (in viewing mode
only) to open the Quick Menu. The Quick Menu
allows for quick access to key functions, including
quick playback, PIP, volume, and keylock. Click
anywhere outside the Quick Menu to exit.
Exclusive Octaplex Operation
1
2
3
4
5
6
7
8
View
Record
Playback
Backup
Remote Configuration
PC Monitor
Entertainment
Display
Public View
Monitor
TIP: Under NETWORK TIME SERVER SETUP, click SYNC to synchronize
the system to the network time server (the system must be properly
connected to your network in order to use this function).
The system automatically opens the virtual keyboard
when you double-click a blank field, or when you
need to enter system information.
The Virtual Keyboard
TIP: It is recommended to change the default password after the initial
setup is complete.
To use the Virtual Keyboard:
1. Click any desired letter, number, or character.
NOTE: Click “A” to shift between upper and lowercase letters.
1. Click in the status bar.
• The SETUP window opens.
2. Click SYSTEM SETUP. The MAIN window opens.
3. Click SYSTEM.The SYSTEM window opens.
4. Under DATE TIME, manually select the date and
time (yyyy/mm/dd; hh/mm/ss) and adjust using
the buttons.
NOTE: If desired, change the Date Format and the
Time Format.
6
NOTE: It is highly recommended
to set the time on the system
prior to doing any recording.
Setting the Date & Time
5. Click APPLY and then click CLOSE to save your changes.
LOREX EASY CONNECT INTERNET
REMOTE VIEWING - BASIC
STEP 3A
REMOTE VIEWING INSTALLATION GUIDE
Skill Level
Intermediate
easy advanced
Time
under 30 minutesunder 15 minutes under 60 minutes
Hand Tools Hardware
Router
Hi Speed
over 60 minutes
Time: 20 Minutes Skills - Easy
Hardware
- PC
Skill Level
Intermediate
easy advanced
Time
under 30 minutesunder 15 minutes under 60 minutes
Hand Tools Hardware
Router
Hi Speed
over 60 minutes
Easy Connect Setup
Router port forwarding is not required
Detailed instructions
available in the User Manual.
For more advanced remote
monitoring refer to Step 3B.
1
Using your Internet Explorer web browser from
your computer (Windows operating system only)
Go to http://lorex.yoics.com and
create an account.
NOTE: There is no “www” in front of the address. The system must be
connected to your local network router for Yoics to automatically detect
the system.
A pop-up window opens and
informs you that your device
has been detected. Click
CONTINUE in the registration
screen to enable Yoics Easy
Connect.
2
You can rename your system
(e.g. myoffice). Click REGISTER
NOW. After the registration,
your system will be detected
automatically.
3
Enter the System User Name
(ADMIN) and Password
(1234) and click OK to login
to the system.
6
Congratulations! Now that you have a Yoics account set up you can log in to
http://lorex.yoics.com to remotely view your cameras from anywhere in the world
using Internet Explorer web browser (Windows operating system only).

Click on the name of your device
under “My Stuff” on the left side
bar. Install ActiveX when Internet
Explorer prompts you.
5
Connect to your DVR
Your system now appears on
the left side bar under “My
Stuff”
4
NOTE: This service is provided
free of charge. You do not have
to click the Upgrade Now
button to use the Remote
Viewer service.
DVR Viewer
DVR Viewer
Congratulations! You have completed STEP 1 & 2 successfully. Your system is now
ready to use. Refer to the owner’s manual to learn how to record, search, playback,
and use other advanced features and all other features available with this system.
1. Press the RETURN button once on the
remote control or on the front panel of your
system. Under the SYSTEM INFORMATION
screen you will find your system’s IP
address.
2. From your local computer, open Internet
Explorer and type in the local IP address
and Port number (e.g. http://192.168.1.100).
A login window appears.
http://your local IP address
3. Enter in your System’s user ID and
password. The Web Remote Viewer
window opens.
4. Click the Active X menu bar near the top of
the browser. Click Install ActiveX Control.
Logging into Web Remote Viewer (LOCALLY):
LOCAL LIVE SITE
5. Click Install when the security
window opens.
6. Click the ActiveX toolbar when
the main Web Remote Viewer
window opens. Click Install
ActiveX Control.
7. Click Install when the security
window opens. The Web
Remote Viewer automatically
detects and connects to your
system after the ActiveX
plug-in installs.
By default, the system does not require a password to login to the system.
User Name & Password
5
To Log in
USER: ADMIN
PASSWORD: 1234
OPTIONAL
NOTE: Please wait until the system completes
loading. This may take up to 15 seconds.
PRESS THE MONITOR POWER
BUTTON ON - LOCATED AT THE FRONT OF THE MONITOR.
ON YOUR PC
EXAMPLE
L23WD Series Quick Setup Guide - English - R1
LOREX EASY CONNECT INTERNET REMOTE
MONITORING ADVANCED
Skill Level
Intermediate
easy advanced
Time
under 30 minutesunder 15 minutes under 60 minutes
Hand Tools Hardware
Router
Hi Speed
over 60 minutes
Skill Level
Intermediate
easy advanced
Time
under 30 minutesunder 15 minutes under 60 minutes
Hand Tools Hardware
Router
Hi Speed
over 60 minutes
REMOTE VIEWING INSTALLATION GUIDE
Time: 60 Minutes Skills - Advanced
Hardware
PC/Router
Skill Level
Intermediate
easy advanced
Time
under 30 minutesunder 15 minutes under 60 minutes
Hand Tools Hardware
Router
Hi Speed
over 60 minutes
Record the IP and MAC Addresses in the section below:
IP ADDRESS : . . .
MAC ADDRESS : : : : : :
(Required for DDNS registration)
Retrieve the System Information
1. Press the RETURN button once
on the remote control or on the
front panel of your system.
2. Under the SYSTEM
INFORMATION screen you will
find your system’s IP and MAC
addresses.
1
Auto Port Forward (via System with UPNP enabled
Router):
2
554
tomsmith
This step offers more advanced internet remote
monitoring features. If you are only interested in
instant remote viewing (Step 3A) you can skip Step 3B.
To enable auto port forwarding:
1. Click in the status bar.
2. Click on SYSTEM SETUP.
3. Click on NETWORK.
4. On RTSP SERVER PORT, click on AUTOPORT. Wait for a SUCCESS
message.
5. On WEB SERVER PORT, click on AUTOPORT. Wait for a SUCCESS
message.
6. Press APPLY to save your changes.
7. Under ALIAS make sure the DDNS link appears
(e.g. http://tomsmith.lorexddns.net)
http://tomsmith.lorexddns.net
NOTE: The Auto Port feature works with UPNP (Universal Plug
& Play) routers only. If you do not get a SUCCESS message, your
router may not be compatible with this feature. Use the Auto Port
Forwarding Wizard to automatically configure your router.
STEP 3B
CONTINUED
Auto Port Forward Wizard
3
The Lorex Auto Port Forwarding Wizard is a software that automates
router port forwarding.
1. Insert the system’s software CD, select the Lorex Easy Connect
Internet Setup Wizard and follow the instructions to register,
download and launch the Wizard.
Installation
LOREX EASY CONNECT INTERNET REMOTE
MONITORING ADVANCED
(AUTO PORT FORWARD WIZARD)
You must have the following before you configure the
software:
1. Your router’s model and version numbers
2. Your router’s user name and password
3. Your Lorex device’s IP address
4. Your Lorex device’s port numbers that require port forwarding
Step 1: Populate the Router Database
5
The Auto Port Forwarding Wizard
automatically populates a list of current
routers, and detects the number of
connected routers.
1. Click the Next button after the
software detects your router
configuration.
Step 2: Enter your Router Settings
1. Under the Router drop-down list,
select the model of your router OR
click the Search button to enter the
name of your router model.
2. Under Router IP, click the Detect Router IP button. The router’s
IP populates in the blank field.
3. Under Username and Password, enter the router’s username
and password.
4. Under IP, enter the IP address of your Lorex device as recorded
in Step 3B-1.
5. Under Port, enter the port number(s) that require forwarding
(80, 554).
6. Click Next to continue.
Step 3: Update the Router Settings
1. Click the Update Router button. The
program begins updating the router
settings. This may take 20 - 30
seconds.
2. Close the update window when the
update finishes.
Step 4: Test your Connection
1. Click the Test Your Connection button.
Your system’s default browser opens
and connects to your Lorex device.
NOTE: Ensure that Internet Explorer is
your system’s default internet browser.
80
554

4
To Log in
USER: ADMIN
PASSWORD: 1234
FAIL/NO DEVICE
Go To Step 3B3
SUCCESS
Go To Step 3B7
NOTICE WARNING
CONTINUED
Congratulations! You have completed 3B successfully. You can now view, playback
images on your Remote Computer via WAN (wide area network) and Remotely control
the system on your Remote computer over the Internet (Wide Area Network).
CONTINUED
8
Open your web browser (Internet Explorer by default) and enter
http://www.lorexddns.net in the address bar.
Create Account:
1. For PRODUCT LICENSE select the L23WD Series option from the
drop down menu.
2. For PRODUCT CODE enter the Monitor’s MAC address (recorded in
step 3B-1).
3. For URL REQUEST enter a unique URL name (e.g. tomsmith).
NOTE: URL name should not be more than 15 characters.
Complete New Account Information:
12
3
9
Create Account
NOTE: Remote viewing is only compatible with Internet Explorer &
Safari (Safari supports Viewing only and does not support Search
or PTZ controls ). Other browsers are not supported.
An automated REGISTRATION CONFIRMATION EMAIL will be
sent to your email. Print and Save this confirmation. You will
need this information to access your System remotely.
Registration Email:
Service Provider: dns1.lorexddns.net
Domain Name: tomsmith.lorexddns.net
User ID: tomsmith
Password: (your password)
CONTINUED
1. On your computer, open Internet Explorer, and type in the
DDNS address you registered with the L23WD.
http://tomsmith.lorexddns.net
2. A login window appears.
3. Enter in your System’s user ID and password. USER: ADMIN,
PASSWORD: 1234. The Web Remote Viewer window opens.
4. Click the Active X menu bar near the top of the browser. Click
Install ActiveX Control.
5. Click Install when the security window opens.
6. Click the ActiveX toolbar when the main Web Remote Viewer
window opens. Click Install ActiveX Control.
7. Click Install when the security window opens. The Web
Remote Viewer automatically detects and connects to your
system after the ActiveX plug-in installs.
Logging into Web Remote Viewer (REMOTELY):
Enter DDNS Set-up on your System
1. Click in the status bar.
• The SETUP window opens.
2. Click SYSTEM SETUP.
3. Click NETWORK.
• The Network window opens.
4. Click the DDNS tab on the left.
• The DDNS window opens.
5. Under USER ID, enter your DDNS user name.
6. Under DOMAIN NAME, enter only the first portion of your
DDNS domain from the confirmation email. For example, if
your domain name is tomsmith.lorexddns.net, you only need
to enter tomsmith in the text field.
7. Under PASSWORD, enter your DDNS password.
8. Click APPLY to save your settings or click CANCEL to restore
defaults.
9. Click STATUS to ensure the DDNS has been set up correctly. If
the DDNS is set up correctly, a message will read “Success”. If
the DDNS is not set up correctly, a message will read “Fail”.
10. Click CLOSE to exit.
STEP 3B STEP 3B STEP 3B
Manual Port Forward (optional):
6
If you were unable to port-forward your router
automatically using the wizard, you will need to do so
manually.
All routers are different. To port forward your router, please refer to
your router’s user manual.
An example of a port forwarding screen is shown for illustration
purposes.
Ports: 80 (Web Port), 554 (TCP/IP port).
7
Open your web browser (Internet Explorer by default) and enter
http://www.lorexddns.net in the address bar.
DDNS (Dynamic Domain Name System) Set-up:
http://www.lorexddns.net
80
554
12
12
554
System
System 80
11
12
LOREX EASY CONNECT INTERNET REMOTE
MONITORING ADVANCED
LOREX EASY CONNECT INTERNET REMOTE
MONITORING ADVANCED
LOREX EASY CONNECT INTERNET REMOTE
MONITORING ADVANCED
REMOTE LIVE SITE*
*If you are unable to connect remotely over the
internet make sure to perfrom steps 3B3 to 3B5
Auto Port Forwarding Wizard.

OPTIONAL DDNS DDNS DDNS
EXAMPLE
EXAMPLE
NOTE: Click the Auto Detect button if you
have a Linksys or Netgear router (works
with most models).
10
tomsmith.lorexddns.net
tomsmith
********
ON YOUR PC ON YOUR PC ON YOUR PC & SYSTEM ON YOUR PC
STEP 3B
ON YOUR SYSTEM

Other manuals for L23WD SERIES

1

Other Lorex Security System manuals

Lorex DVM2050 User manual

Lorex

Lorex DVM2050 User manual

Lorex SG19LD804-161 Installation guide

Lorex

Lorex SG19LD804-161 Installation guide

Lorex SG21FD3044-161 Mounting instructions

Lorex

Lorex SG21FD3044-161 Mounting instructions

Lorex U222AA-Z Instruction Manual

Lorex

Lorex U222AA-Z Instruction Manual

Lorex LW2002B Series User manual

Lorex

Lorex LW2002B Series User manual

Lorex mCAM DMC2030 User manual

Lorex

Lorex mCAM DMC2030 User manual

Lorex SG19LD804-161 Installation guide

Lorex

Lorex SG19LD804-161 Installation guide

Lorex SG7864R User manual

Lorex

Lorex SG7864R User manual

Lorex mCAM DMC2030 User manual

Lorex

Lorex mCAM DMC2030 User manual

Lorex SY14S1044C-A User manual

Lorex

Lorex SY14S1044C-A User manual

Lorex LHB926 Series User manual

Lorex

Lorex LHB926 Series User manual

Lorex D861 Series User manual

Lorex

Lorex D861 Series User manual

Lorex LW1000P Series User manual

Lorex

Lorex LW1000P Series User manual

Lorex SG19LD804-161 Installation guide

Lorex

Lorex SG19LD804-161 Installation guide

Lorex SG5550 User manual

Lorex

Lorex SG5550 User manual

Lorex SGQ4160 User manual

Lorex

Lorex SGQ4160 User manual

Lorex L20WD800 Series User manual

Lorex

Lorex L20WD800 Series User manual

Lorex L222A8D Series User manual

Lorex

Lorex L222A8D Series User manual

Lorex L14Q684 Installation guide

Lorex

Lorex L14Q684 Installation guide

Lorex LH041 Series User manual

Lorex

Lorex LH041 Series User manual

Lorex L14Q684C User manual

Lorex

Lorex L14Q684C User manual

Lorex SG17LD800 User manual

Lorex

Lorex SG17LD800 User manual

Lorex H32A Series User manual

Lorex

Lorex H32A Series User manual

Lorex Vantage Edge+ CVC6996 User manual

Lorex

Lorex Vantage Edge+ CVC6996 User manual

Popular Security System manuals by other brands

Arexx TL-ALU9 user manual

Arexx

Arexx TL-ALU9 user manual

Safewatch Pro 3000EN quick guide

Safewatch

Safewatch Pro 3000EN quick guide

KE2 EvapOEM troubleshooting guide

KE2

KE2 EvapOEM troubleshooting guide

Federal Signal Corporation 2-240 Installation, operation & service manual

Federal Signal Corporation

Federal Signal Corporation 2-240 Installation, operation & service manual

Selax Electronics SEL-003 manual

Selax Electronics

Selax Electronics SEL-003 manual

Transmitter Solutions iGAZERSR66HD Photo Eyes Operating and installation instructions

Transmitter Solutions

Transmitter Solutions iGAZERSR66HD Photo Eyes Operating and installation instructions

Schwaiger hg2000 instruction manual

Schwaiger

Schwaiger hg2000 instruction manual

Thitronik G.A.S.-pro manual

Thitronik

Thitronik G.A.S.-pro manual

Clas Ohlson SH238 instruction manual

Clas Ohlson

Clas Ohlson SH238 instruction manual

Hills ChallengerPlus Training Kit Starter Guide

Hills

Hills ChallengerPlus Training Kit Starter Guide

olympia electronics BS-471 manual

olympia electronics

olympia electronics BS-471 manual

Mighty Module MM1420 manual

Mighty Module

Mighty Module MM1420 manual

Alderon Industries VersAlarm I/O VLIO-0002 quick start guide

Alderon Industries

Alderon Industries VersAlarm I/O VLIO-0002 quick start guide

Siemens HFPO-11 installation instructions

Siemens

Siemens HFPO-11 installation instructions

Teka BKSSL BPM Safety and installation instructions

Teka

Teka BKSSL BPM Safety and installation instructions

Stanley Easikey 250 User and installation guide

Stanley

Stanley Easikey 250 User and installation guide

ITI 60-252 installation instructions

ITI

ITI 60-252 installation instructions

Pima Electronic Systems HUNTER-PRO Manual supplement

Pima Electronic Systems

Pima Electronic Systems HUNTER-PRO Manual supplement

manuals.online logo
manuals.online logoBrands
  • About & Mission
  • Contact us
  • Privacy Policy
  • Terms and Conditions

Copyright 2025 Manuals.Online. All Rights Reserved.