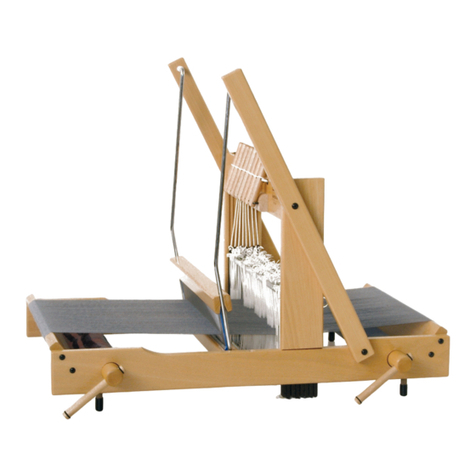
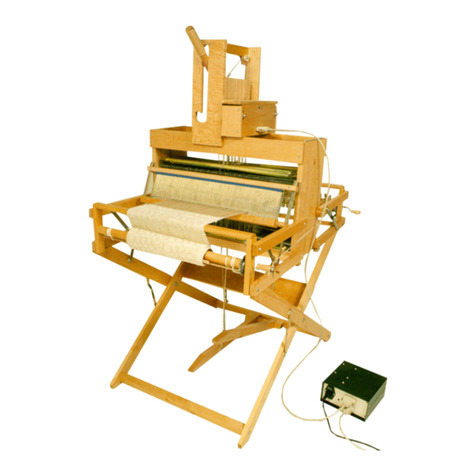
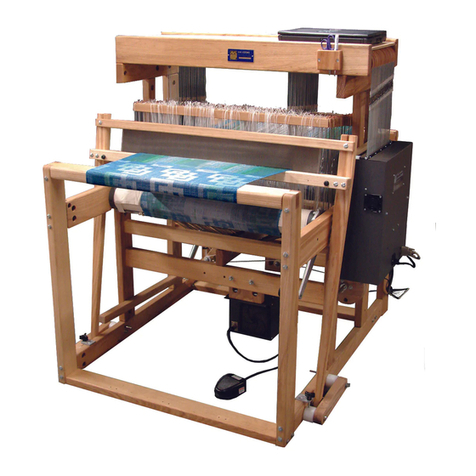
Louet Megado Computer Dobby 2.0 User manual

Dobby 2.0
Web Interface Manual
Version 2.2

1
Louet Dobby 2.0 Web Interface- Software Version 2.2.................................. 2
General Information ................................................................................... 2
Register your Dobby 2.0 ............................................................................ 3
How to Use this Manual ............................................................................. 3
Overview of Features of the Dobby web Interface Version 2.2 .................. 4
First Weaving Session ............................................................................... 6
Starting Dobby Web Interface (all sessions after the first session) ............ 7
Lift Plan ......................................................................................................... 8
Open Lift Plan................................................................................................ 9
Open a New Weaving Pattern (open new lift plan) .................................... 9
Open Lift Plan from USB Stick or Dobby 2.0 Internal Storage ................. 10
Edit Lift Plan ................................................................................................ 11
Edit Display Overview .............................................................................. 11
Edit New or Existing Weaving Patterns.................................................... 11
Save Weaving Pattern- Save File ............................................................ 13
Weft Color................................................................................................ 13
Weaving with the Dobby.............................................................................. 14
Enable weaving mode.............................................................................. 16
Navigate................................................................................................... 16
Plain Weave............................................................................................. 17
Sound Signal/Chimes During Weaving .................................................... 19
Unweave.................................................................................................. 19
File Manager in Local Folder or on USB .................................................. 20
Move a File from USB Local Folder..................................................... 20
Settings ....................................................................................................... 21
Settings Overview .................................................................................... 21
Customize Color Palette .......................................................................... 22
Software Update Process............................................................................ 22
Dobby Dictionary ......................................................................................... 23
Troubleshooting........................................................................................... 25
Version: I-ME-dobby2.2-V2.2 April 2020
2
Louet Dobby 2.0 Web Interface- Software Version 2.2
General Information
The unique Louët dobby 2.0 allows you to use the electronic Dobby without
commercial weaving software.
The Dobby 2.0 contains a computer that includes the software for the web interface
and also storage space for weaving patterns. In order to use this software, you do not
need to install any software on the computer. This software allows you to use a web
browser (such as Internet Explorer, Safari, Firefox or Google Chrome) to easily
display the Dobby software via a wireless connection (WiFi).
This guide contains a variety of technical terms you may be encountering for the first
time. We’ve included a Dobby Dictionary in the back of this guide that explains the
terms used.
Difference between Dobby Web Interface and Commercial Weaving Software
The main function of the built-in Dobby web interface software is to control the Dobby
during weaving, which is to indicate which shaft combination should be selected for
each pick of the weaving pattern. These instructions are indicated by the English
term 'lift plan'.
The web interface software allows you to enter and modify a lift plan, but you can
also import a lift plan that you have created using weaving software.
One of the great advantages of the web interface software is that it is independent of
the computer or operating system. If new software versions are available from the
Louët Dobby, you can update them directly via the Internet or through the USB stick
update feature. The first version of the Dobby web Interface Software (2018) was still
quite primitive. This major update in 2020 to version 2.2 has many new and improved
features. In the future, the functions may be expanded further or improved.
View Lift Plan Dobby 2.0
Weaving software also shows the threading
and weave
Independent commercial weaving design software programs (Fiberworks PCW,
ProWeave, PixeLoom, Weavemaker, WeaveIt, Winweaving, etc.) allow you to design
a weaving pattern by combining threading, and treadling sequences. With an
additional driver (available for purchase separately) you can also use the
independent software program to drive the Louët Dobby. For this, you will need the

3
USB cable that connects the Dobby to the computer. When the Dobby is connected
to the computer via USB cable connection, the web interface software is temporarily
deactivated. Once you unplug the USB cable from the Dobby, you can use the web
interface software again.
The instructions for creating the connection can be found in the Dobby 2.0
Installation Guide and in the manual of the independent weaving software program.
Although you do not need commercial weaving software to control the Dobby, this
software is certainly useful for creating patterns. The advantage of the Dobby 2.0
web interface software is that you do not have to put your computer on or next to the
loom and you can use the wireless (WiFi) connection.
Register your Dobby 2.0 at louetdobby.nl or louetdobby.com
After registering your dobby on louetdobby.nl or
louetdobby.com you will get access to the Dobby 2.0
user page. Here you can find tips, free Dobby patterns,
information about software updates and ask questions.
When registering, you will need the serial number of the
Dobby. This is on the label under the solenoid. NOTE:
Write down your serial number as you will need it in any
software upgrade process and its not visible when the
dobby is mounted on the loom.
How to Use this Manual
Step-by-Step Learning
In this manual, you will learn how to operate the Dobby web interface software step-
by-step by continuing to follow the reference to the 'next step' at the end of the
paragraph.
Search by Table of Contents
If you are looking to reference a specific topic, please consult the table of contents on
page 1.
Writing conventions in this manual
In this manual, the following designations are used in the
instructions:
Select can be done in one of two ways:
•Touch screen: point to the object you want to
select and tap
•Computer: point to and click with the left mouse
button
Fill in: Type the text in
Slide can be done in one of two ways:
•Touchscreen: Put your finger on the dot in the
slider and slide to the right or left.
on
off

4
•Mouse: Click on the unselected part of the slider
or drag with the left mouse button down the circle
in the button to the desired position.
Numbered lists indicate a series of actions you need to
take
1. …
2. …
Bullet lists give extra information a topic
•…
•…
Overview of Features
of the Dobby Web
Interface Version 2.2
Weave:
•Dobby 2.0 reads the lift
plan of the weaving
pattern
•Change the direction of
the active pattern
•Go to a specific pick
•A solenoid power
activation on/off slide
•Unweave history file
•A sound signal at a
specific interval and/or
at the end of a pattern
repetition, and/or at a
color change.
•Toggle between
pattern and plain
weave weaving
•The computer
automatically saves the
last woven pick

5
Edit: weave pattern on
the fly
•Slide the Edit tab to
activate edit mode
•Create and adjust
weaving patterns
•Add colors to the weft
from the color palette
Manage files:
•Open weave files from
internal storage or from
USB stick
•Store weaving files on
internal storage or on
USB stick
•Copy, rename and
delete files from
internal storage
Settings:
•Find available WiFi
network
•Connect to WiFi
Network
•Change Dobby 2.0
Password
•Set the number of
shafts in use
•Plain weave setting
•Set color palette
•Setting sound signals
•Software update from a
USB stick

6
How to Connect your Tablet/Computer via WiFi
Below you can find brief instructions for how to activate the web interface software.
For detailed instructions, refer to the 'Louët Dobby 2.0 – Installation Manual '. The
latest version of this manual can be downloaded at www.louetdobby.com – Dobby
2.0 Users page. The instructions for connecting your tablet or computer to the web
interface software can be found in the chapter “Make the connection to LouëtWifi”.
You can connect to the Dobby computer simultaneously with multiple devices.
First Weaving session
Turn on the dobby computer: Switch to 1 (=ON)
On the Dobby display, the Dobby 2.0 will show the IP address of your Dobby.
Dobby display
first version (2018)
Dobby display after update software version 2.2
New LouetWifi
Wirelessly connected to iPhone 'hotspot' (or
any other local wifi)
Make the connection to LouëtWifi
At first usage, the IP address 10.42.0.1 will be displayed on the Dobby display.
1. Go to your tablet or computer's wireless Network Settings
2. Select from the list of available networks Louetwifi
3. Enter the Dobby password
4. Select Connect
Detailed instructions for creating connections with and without internet support are
provided in the Dobby 2.0 Installation Guide.
Open the Dobby web interface software
1. On the tablet or computer that you just
connected to the Dobby, open an Internet
Web browser (Safari, Internet Explorer,
etc.)
2. Type the IP address of the Dobby in the
address line of the browser: 10.42.0.1
3. The main screen of the Dobby Web
interface software appears in the window.
Next step: Open lift plan (page 9)

7
Starting Dobby Web Interface (all sessions after the first session)
1. Turn on the dobby computer: Switch to 1 (=ON)
If you use the Louët WiFi connection without an Internet connection (IP address
10.42.0.1 on the dobby display):
1. Use the network settings for your device’s WiFi to connect to Louëtwifi (See
the instructions for the 'first session').
2. You can set the network settings on your device to automatically restore the
connection if both devices are turned on.
If you have set up the connection to the Internet (IP address 192. xx. xx. xx or 172.
xx. xx. xx), the Dobby will automatically contact the network. If the network is not
available, the text "No Connection" will appear on the Dobby display. In that case,
check that the router or mobile hotspot is online. Turn off the Dobby computer and
then turn it on again.
1. Open the Internet browser on the device.
2. If the web interface screen is still open
from the previous session, refresh the
screen.
3. Enter the IP address on the address line of
the browser. (The IP address is on the
display of the Dobby.)
or
If the device has not previously been connected
via WiFi, the Dobby password will be asked for.
This password is displayed on the Dobby display.
If the network connection is dropped, the text "No connection" will be displayed.
Once the network is available again, the connection will be automatically restored.
You may need to refresh the weaving screen by tapping the address line again.
Next, you will need to reopen the weave file. The last woven pick is always
remembered by the Dobby.
If the Dobby fails to reconnect, turn off the Dobby and turn it back on again after
about a minute. If there is no connection to the home network, check whether other
devices in your home also have a network problem.
In exceptional cases, it may be necessary to do a factory reset on the Dobby (refer
to the Dobby 2.0 Installation Manual) to rebuild the network connection.
Next step: Lift Plan (page 8)

8
Lift Plan
The 'lift plan' is shown on the main screen of the Dobby web interface. Each line
displays the shafts selected for that pick. The shaded boxes indicate which shafts go
up. The line showing shaft’s selected for the first pick has a dark frame around it.
Each subsequent pick is shown on the lines above it.
The box pattern is not the image of the fabric! The appearance of the woven cloth is
partially determined by the threading pattern.
The lift plan will look a little bit different depending on the edit mode or the weave.
Both screens show a Settings button, Folder button, active file name window, WiFi
connection symbol and the Louët logo with version number.
Lift plan in weave mode
function: weaving (see page 13/14)
1. Button Edit (grey)
2. Choose active pick (black)
3. Other picks (light grey)
4. Buttons: Plain and Direction
5. Power (slide) green = on – solenoids
active
6. Previous and Next buttons
7. Unweave slide
Lift plan in edit-mode
function: editing weaving pattern
1. Button Edit (green)
2. All programmed picks (boxes are
black for shafts that rise)
With the web interface software, you can import weaving patterns (lift plans) from a
pre-made pattern file, without commercial weaving software. There are also
websites where you can download weaving patterns. You can import and edit the
pattern if necessary.
In edit mode, you can edit the weave pattern. You can select a box (shaft to be
lifted) either by clicking in the box (left mouse button) or tapping (touch screen).
Click or tap the same box again and the selected box changes back to white.
Creating and customizing a new weaving pattern is easier with a mouse than with a
touch screen, so consider using your computer's internet browser to communicate
with the Dobby computer (following the instructions on 6. You can have multiple
devices connected to the Dobby at the same time.)
Next step: Open lift plan (page 9)

9
Open Lift Plan
After starting the Dobby, a blank main
screen will be displayed in the 'edit
mode'. This is the 'New lift plan' screen.
(waiting for confirmation of edit layout –
ihow to delete a line)
Open a New Weaving Pattern (open new
lift plan)
1. Select button File (1)
2. Select New (2)
3. If there are any changes made to the open
weaving file that have not yet been saved, you
will receive the notification “Current file not
saved”.
a) Select New if you want to ignore the changes
An empty lift plan will open
b) If you want to save the changes to the open
file, select Save The main screen will be
active again.
4. Follow the instructions on page 13
Empty lift plan
There are three ways to open a file:
•Open a New Weaving Pattern (open new lift plan)
•Storage – page 10
•Edit Lift Plan – page 11

10
Open Lift Plan from USB Stick or Dobby 2.0 Internal Storage
Each weave pattern file in various weave pattern formats can be stored in a WIF-file.
This is a computer file type that can be made and read by all weaving software. The
weft pattern in the WIF-file must be stored in the lift plan format. Please refer to the
manual of the weaving software how to convert a pattern into a ‘lift plan' and save as
a WIF-file.
Display in weaving software
pattern with threading and
treadle mode
Display in weaving software
pattern converted to 'lift
plan'
In this setting, the file as
WIF-file should be stored on
a USB stick to be able to
open later in the Dobby web
interface
Display in Dobby web
interface
There are up to 20
picks shown at a time
in the display, but the
length of the pattern
has, in principle, no
restrictions
You can store WIF-files for the Dobby from a USB stick onto the Dobby computer’s
internal storage, or you can open the file directly from the USB stick. The advantage
of using a USB stick for the weaving files is that you can better organize your files
with folders. The internal storage in the Dobby computer is labeled "Local".It is not
possible to create your own folders to organize the files.
We do not recommend using the supplied USB stick for the storage of weaving
pattern files. This USB stick contains USB-serial drivers you may need to connect
your computer with your weaving design software.
1. If the weaving file is on a USB stick, insert
the USB stick into one of the USB ports
on the Dobby
2. Select File
3. Select Open
4. Select USB or Local button
5. Select sub folder (if necessary)
6. Select specific file
If no lift plan is opened in the main screen, check the WIF-file using your weaving
design software to make sure your pattern file has been converted into lift plan
format.
Next step, choose either:
•Edit Lift Plan (page 11)
•Weaving with the Dobby (page 16)

11
Edit Lift Plan
Edit Display Overview
The main screen with the lift plan (see description on page 8) has two functions:
Edit the lift plan (edit) and weave. You can switch between these two functions with
the Edit slider. In this chapter, we discuss the edit functions.
Main screen in edit mode : Overview of the screen parts
a. Slide button: either edit or
weave
b. Pattern file – New/Open/Save
c. File name of current opened
pattern file
d. Open settings (see page 20)
e. Shaft numbers
f. Pick numbers
g. New pick – if adding lines
h. Selected and not selected shafts
in the pattern – black is selected
(will be raised)
i. Active pick
j. Change active pick up or down
k. Insert new line before the active
line
l. Delete active line
m. Color bar indicator - weft color
Editing a pattern is easier on a computer with a mouse than on a touchscreen tablet.
You can simultaneously connect your computer's web browser and your tablet to the
Dobby. Follow the instructions on page 7 to add an additional device.
Edit New or Existing Weaving Patterns
1. Open a new or existing weaving pattern (See page 8)
2. If necessary, put the Edit button in the on position
•When starting a new weaving pattern, edit mode is
activated by default.
•When you open an existing weaving pattern, the
weaving mode, to edit you need to slide the Edit
button.
On = edit mode
Off =
weaving mode

12
New weaving pattern in the edit mode
Existing weaving pattern in edit mode
New pattern – Select number of shafts
If you do not use all shafts, you can change the
number of shafts that are displayed. This is only to
make the image uncluttered, when weaving it makes
no difference what number is selected.
1. Select open settings
2. Select the number of shafts (8, 16, 24 or 32)
3. Select close settings to activate the Edit
screen
1. open settings
2.
3. close settings
Edit Weave Rule
By clicking in the boxes, you can turn the boxes corresponding to a lifted shaft on
or off. This is a pattern editing rule.
The shaft numbers are displayed at the top of the screen.
A black box marks a shaft to be lifted. In this example, pick 10 is displayed, shafts
that will be lifted are: 3,5,7,8,11,15,19,23,27,31
Navigation
There are always only 20 lines of pattern on the screen.
You can navigate through the pattern in different ways:
•Select button Up or Down
•Select the box with the active line number. An input
screen appears. Type the line number you want, then
select . You may need to put your cursor behind
the last digit of the line number and select the “Bksp”
button.
Note that the navigation in edit mode does not affect the
active pick in the weaving mode. In weaving mode, you
can navigate the same way to move to a specific pick.

13
Inserting and removing a pick
New line at the top:
On the line with the plus you can enter the shafts you wish
to raise immediately.
Insert pick between two existing picks
1. Move the active line box to the pick before you wish
to insert a new pick
2. Select the Insert button as many times as needed
3. Edit the inserted pick lines
Remove a pick
1. Move the active line box to the pick you wish to delete
2. Select Delete button
Save Weaving Pattern- Save File
The file name box displays the file name (= filename) of the open weave pattern.
As soon as you make changes in the weaving pattern, the box changes to red.
.
If you just started with a new weave pattern, the text is 'unnamed File'.
1. Select
2. Select Save
3. Select Internal or USB (for USB, you need to put a USB stick in one of the
USB ports)
4. Optionally, select the folder where you want to save the pattern (only
applicable when using a USB stick).
5. Type the file name
6. Select the Save button
Weft Color
You can change the color of the weft in the weaving pattern. These are shown in the
color bar to the right of the weave pattern area. During weaving, you can be warned
with a sound chime if the weft color changes (See page 14). Several basic colors are
available when opening a new file. When opening an existing weaving pattern, the
color palette displays only the colors used in the pattern.

14
Choose Weft Color
1. Select the square next to the lift plan area in the color bar (1) A window will
appear with the available colors
2. Select the desired color (2)
If you add a new pick line at the end of the lift plan (+) or between two existing
picks (Insert), the new one automatically gets the color of the previous pick.
Edit Color Selection Scheme
You can add existing colors and colors to the
color scheme.
These added colors will also be available in
future new weaving patterns.
1. Select open settings
2. Select one of the colors or a white box
in the 'Color-preset'
3. Select a color in the color window (a)
4. In the color bar, select the color (b)
5. In the field, select the light value of the
color (c). The black dot is the current
color setting.
6. Select choose
7. Select close settings
1. open settings
2.
3.
4. close settings
Weaving with the Dobby
The main function of the Dobby web interface is to weave a pattern with the Dobby.
This section explains all the features.
1. The weaving process is in an endless repetition of the weave pattern. It is
possible to get a sound signal at the end of every repeat.
2. You can change the active pick by:
•Jumping to a specific pick
•Navigating with Previous – Next buttons
•Changing direction - Reverse
•With the Unweave function you can unweave back 1000 picks. The history
is followed exactly.
3. You can switch between a pattern and plain weave
4. You can adjust the definition of the shaft combination for plain weave
During weaving, the fans in the Dobby-box may be active, which produces a soft
sound. Sound is controlled by your devices operating system. Sounds may not work
as expected with Apple products due to Apple’s control of sound features.

15
a. Switch between Edit – Weaving
mode
b. Navigate to a specific pick up and
down
c. C1 - Number of active picks
C2 – picks that have been woven
weaving history of this session
(software will remember the last
1000 woven picks)
d. Change the direction - reverse
e. Switch to Plain or Pattern mode
f. Access to File Management
(Open/Save)
g. File name of open weave pattern
h. Open Settings screen- plain
weave definition-set sound
signals, number of shafts

16
Enable weaving mode
1. Open a lift plan weaving pattern (See page 9)
•The weaving mode is automatically switched on
•The active weaving memory has remembered the last
pick of the previous weaving session.
•The weft is displayed in the active weaving pattern
•If you have made any adjustments in edit mode, turn
off the Edit button. As a result, the Dobby enters the
weaving mode.
2. Activate the solenoids by sliding the power slide on or
by pressing the treadle and letting it come up again.
This moves the switch block past the bottom sensor,
sending a deactivate signal and then up to the top
sensor activating the solenoids.
3. You will hear that the solenoids of the active weaving
pick are activated
4. Press the treadle and the shed opens
5. Weave – throw your shuttle, beat, release the treadle
6. The next pick is automatically activated
•Repeat from the 4th step (‘treadle‘)
Off =
weaving mode
On = edit mode
On = solenoids
activated
Time-out
If the Dobby has not been active for a minute, it goes into idle mode, where the
solenoids go into the off position. This is to protect the Dobby from overheating.
Either slide the power button or depress the treadle again, the active pick (which is
next pick after the last woven pick) becomes active again.
Navigate
Next and Previous
These buttons are used to navigate to a specific pick. You can
use it to go back to a pick, but if you want to go back multiple
picks, the Unweave function is more efficient.
You can skip picks or reactivate a previous pick using the Next
or Previous buttons. Repeat until the desired pick is in the
active weaving line.
After weaving this pick, the pick above the weaving line will be
displayed as active
Go to a specific pick
If you want to jump to a certain pick, use the input box to the
right of the active weave area
1. Select the box with the active pattern entry number
2. Click/Tap the pick number to highlight it or move your
cursor to the last digit. Delete the number and type the
pick number you wish to jump to.
•Bksp: correction button on wrong input
X– Cancel the “Go-To specific pick” action

17
•If you enter a non-existing pick number, nothing will
happen.
3. Select the green to accept and activate the change of
active pick position
4. The next pick depends on the set weaving direction (in
the image: forward - 9 is the next pick after 8
5. In the History (under the active weaving area), you see
this jump back once you have woven this pick
Change direction of weaving
By default, the weaving direction is forward:
from the first (bottom line): Weft 1 2 3,
etc.).
With the Direction button, you can change
the order of the picks 3 2 1. You can
use this if you want to weave sharp
variations in your weaving (i.e. reverse a
twill on a point draw).
The last woven pick is not repeated.
After selecting the Direction button, the pick for the last woven pick will be
activated.
1. Supposing: You have in forward direction woven picks 1 2 3 4
•The last woven pick is 4,
•On the active line, pick number 5 is ready
2. Select the Direction button
•The direction changes from forward to backward
•You can see the order of the picks above the active line if you are
weaving in forward or backward direction
The active weaving line will now display pick number 3.
Contrast this operation with the Unweave function, where the last pick is repeated,
and the history is woven back in reverse order.
Plain Weave
In addition to the weaving pattern laid out in the lift plan, you can always switch to a
plain weave. This is useful when weaving a starting piece and at intersections in the
weaving project. The shaft combination for weaving a plain weave is set. You can
save definitions of the plain weave on the Dobby drive, so you can use them more
often.
If you have a pattern with pattern picks always alternating with a plain weave pick,
you can define it better in the pattern part.
Switch between plain weave and
pattern picks

18
1. Select the button Plain (this button
is only visible in the weaving
position)
•In the weft part of the screen,
alternating weft picks A and B of
plain weave are visible
•The label on the "Plain" button
changes to "Pattern"
2. Select Pattern button
Plain weave as tabby
Plain weave in a tabby weaving (like summer & winter,
overshot) has to be defined in your pattern.
Pattern definition of a summer & winter including tabby
The (white) tabby wefts are included in the pattern (see section
editing page 11)
Select and edit plain weave definition
1. Select open settings
2. Edit the plain weave definition by selecting the boxes in
the two pick lines
3. Select close settings
1. open
settings
2. Edit
3. close
settings
Save a plain weave definition
1. Start with a new lift plan (see page
9). Enter the two plain weave pick
definitions in Summer and Winter.
Save this pattern.
•Tip: Give a name starting with
plain for example, "Plain 16s
summer-winter"
Plain weave definition
Saved
“Plain 16s summer-winter”
Open a plain weave definition
1. Open a weaving pattern
2. Select open settings
3. Select Plain button
4. Choose the plain weave pattern
you saved
5. Close Settings
Check by switching between Plain and
Pattern mode in the Weave mode. You
can save several plain weave patterns
and load the active pattern you wish.

19
Sound Signal/Chimes During Weaving
You can enable sound chime at certain times during weaving, for example, to change
color. It is advisable to only enable one of the signal groups.
The sound is produced by the device on which the web interface is operating. So,
make sure the speakers are turned on. On all Apple products, it is unfortunately not
possible to produce sound signals (Apple has disabled this functionality).
Set Sound signal
The following settings can be switched on
or off:
•
Sound signal when the last pick of
the weaving pattern is reached
•
Sound signal always after 16 picks
•
Sound signal of choice for each
color change in the color bar of the
pattern or a color change to a
specific color.
1. open settings
1. Select one or more of the signal
options
1. Click the options you
want to switch to
2. close settings
Unweave
When starting a new weaving session (when opening an existing or new weaving
file), the weaving history is still empty. As soon as you weave, the lines under the
active weaving area are filled with the history. The last 1000 woven picks are
retained. Once the Dobby is turned off or another pattern is loaded, the history is
emptied again.
When you switch to the Unweave function, the history is rewoven with every treadle
movement. In the example below, first tabby B, then pattern 5, then tabby A, then
pattern 4. After disabling the Unweave function, the same pick as the last extracted
entry will be active. Set the last pick to pick 4, then after turning it off again the active
pick that follows (in the forward weaving direction) is pick 5.
Other manuals for Megado Computer Dobby 2.0
1
Table of contents
Other Louet Weaving manuals

Louet
Louet Delta User manual

Louet
Louet Jane Assembly instructions

Louet
Louet Spring User manual

Louet
Louet Erica User manual

Louet
Louet Erica User manual

Louet
Louet Kombo 40 4+4 User manual

Louet
Louet Spring Assembly instructions

Louet
Louet David-III Assembly instructions

Louet
Louet Kombo 70 4+4 User manual