LSG GRC-10 User manual

Product may vary slightly from the item pictured due to model upgrades.
Read all instructions carefully before using this product.
Retain this owner’s manual for future reference.
NOTE:
This manual may be subject to updates or changes. Up to date manuals are available through our
website at www.lsgfitness.com.au
GRC-10
Adjustable Roman Chair
USER MANUAL

2
TABLE OF
CONTENTS
| TABLE OF CONTENTS
I. Important Safety Instructions . . . . . . . . . . . . . . . . . . . . . . . . . . . . . . . 03
II. Technical Details . . . . . . . . . . . . . . . . . . . . . . . . . . . . . . . . . . . . . . . . . . . . . . 04
III. Assembly Instructions . . . . . . . . . . . . . . . . . . . . . . . . . . . . . . . . . . . . . . . 05
IV. Training Instructions . . . . . . . . . . . . . . . . . . . . . . . . . . . . . . . . . . . . . . . . 07
V. Care and Maintenance . . . . . . . . . . . . . . . . . . . . . . . . . . . . . . . . . . . . . . . 12
VI. Space-Saving Storage . . . . . . . . . . . . . . . . . . . . . . . . . . . . . . . . . . . . . . . . 12
VII. Exercise Guide . . . . . . . . . . . . . . . . . . . . . . . . . . . . . . . . . . . . . . . . . . . . . . . . 13
VIII. Warranty . . . . . . . . . . . . . . . . . . . . . . . . . . . . . . . . . . . . . . . . . . . . . . . . . . . . . . 15

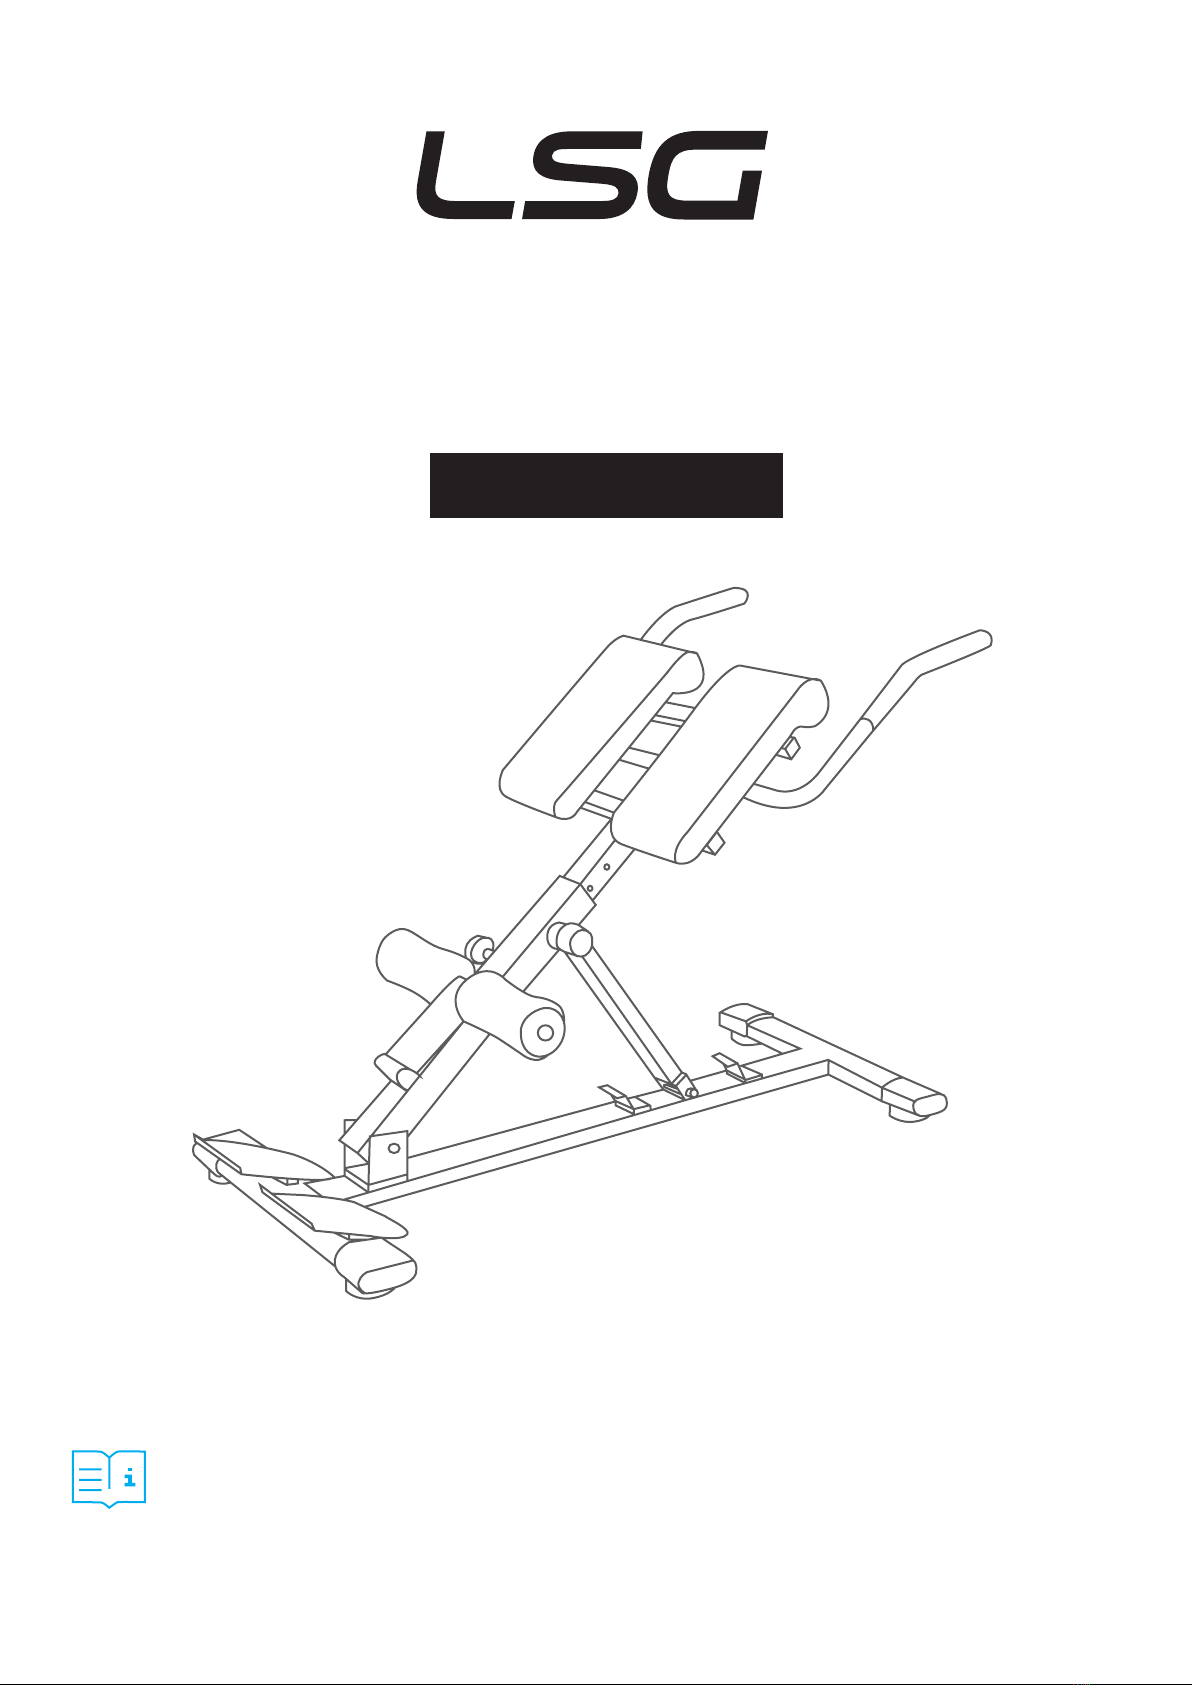
3IMPORTANT SAFETY INSTRUCTIONS |
I. IMPORTANT SAFETY
INSTRUCTIONS
For your safety and health, please use this product correctly.
Before beginning any exercise program, consult your physician. This is especially important for
individuals over the age of 35 or persons with pre-existing health problems.
Read all instructions before using any fitness equipment. We assume no responsibility for personal
injury or property damage sustained by or through the use of this product.
Save these instructions.
•Keep children and pets away from the machine at all times. DO NOT leave children unattended in
the same room with the machine.
•Only one person at a time should use the machine.
•If the user experiences dizziness, nausea, chest pain, or any other abnormal symp- toms,
STOP the workout at once. CONSULT A PHYSICIAN IMMEDIATELY.
•Position the machine on a clear, leveled surface. DO NOT use the machine near water or outdoors.
•The free area must be at least 0.6m greater than the training area. This is a space where you can
safely dismount, without obstruction, in case of an emergency. Where two pieces of equipment
are positioned adjacent to each other the free area may be shared.
•Keep hands away from all moving parts.
•Always wear appropriate workout clothing when exercising. DO NOT wear robes or other clothing
that could become caught in the machine. Running or aerobic shoes are also required when using
the machine.
•Use the machine only for its intended use as described in this manual. DO NOT use attachments
not recommended by the manufacturer.
•Do not place any sharp object around the machine.
•Disabled person should not use the machine without a qualified person or physician
in attendance.
•Before using the machine to exercise, always do stretching exercises to properly warm up.
•Never operate the machine if the machine is not functioning properly.
•Max user weight: 130kg (dip station max. user weight: 100kg)

4| TECHNICAL DETAILS
II. TECHNICAL DETAILS
Net weight: 17.2kg
Dimensions (L x W x H): 108cm x 62cm x 93cm
Dimensions folded (L x W x H): 119cm x 63cm x 27cm
Max. User weight: 130kg (dip station max. user weight: 100kg) Locking system: 3-stage
Height Adjustability: 6-stage

5ASSEMBLY INSTRUCTION |
III. ASSEMBLY INSTRUCTIONS
STEP 1
Screw the left and right handlebar (#3, #4) to the adjustable tubular frame (#5). Use the bolt screw
#24 (M10x60mm), the washer #27 (ø10) and the nut 26# (M10)
#24 M10 x 60mm
Bolt screw (2x),
#27 Washer (2x),
#26 Nut (2x)

6| ASSEMBLY INSTRUCTIONS
STEP 2
Join the two racks together. Fasten it with the plum blossom knob (#13) and the reset pull pin (#19). The
device is then ready for use.

7TRAINING INSTRUCTIONS |
IV. TRAINING INSTRUCTIONS
To prevent injuries you should start with warm-up and
stretching exercises before each workout.
No matter how you do sports, please do stretches first. This reduces the risk of a spasm, or muscle
injury, during exercise. To warm up yourself we suggest the following stretch exercise as shown in the
graphic: Do not overstretch or pull your muscles.
IF IT HURTS, STOP IT!
Side Bends
Pass the arm over your head and bend the upper body in the
same direction. Hold this position for 10 to 15 seconds and
slowly straighten up yourself. Repeat this 3 times for each
side.
Toe Touch
Slowly bend forward from your waist, letting your back and
shoulders relax as you stretch toward your toes, Reach down
as far as you can and hold for 15 counts, then relax and repeat
3 times.
Calf-Achilles Stretch
Lean against a wall with your left leg in front of the right and your
arms forward. Keep your right leg straight and the left foot on the
floor, then bend the left leg and lean forward by moving your hips
toward the wall. Hold, then repeat on the other side for 15 counts.
Then relax and repeat 3 times for each leg.
Quadriceps Stretch
With one hand against a wall for balance, reach behind you
and pull your right foot up. Bring your heel close to your
buttocks. Hold for 10-15 counts, then relax. Repeat three times
for each foot.
Inner Thigh Stretch
Sit with the soles of your feet together with your knees
pointing outward. Pull your feet as close into your groin as
possible. Gently push your knees towards the floor. Hold for 15
counts. Then relax and repeat 3 times.

8
HYPEREXTENSIONS (BACK STRETCH)
TRAINING EFFECT
Hyperextensions are an optimal training method to strengthen the musculature of the
lower lumbar spine area.
Start position:
During the exercise hook your feet under the foot support bracket. The seat pad supports your pelvic
area. Cross your arms behind your head and keep elbows pointing outwards. Start bending forward
slowly as far as possible ensuring your thigh and torso are forming almost a right angle.
Back to the starting position:
Slowly raise your torso back to the starting position where your back and your legs are forming a
straight line.
During the exercise avoid arching your back past the body line (torso-backside-legs).
Moreover, to avoid painful strain on your back do not swing the torso at any time. Do
the exercise always in a fluid and slow manner.
| TRAINING INSTRUCTIONS

9TRAINING INSTRUCTIONS |
SIDE BENDS ON A HYPEREXTENSION BENCH
TRAINING EFFECT
This exercise is an optimal training method to strengthen your lateral abdominal muscles.
These muscles support the sideways movement of the thorax toward the pelvis.
Start position:
Lie sideways on the bench and hook your feet under the foot support bracket. Your pelvic area is lying
on the seat pad and your arms are crossed over the chest. Lower the torso towards the floor. Stop the
movement when the torso is at least parallel to the floor.
Back to the starting position:
Lift your torso slowly and return to your starting position. Repeat this exercise 10-20 times, depending
on the training intensity, and continue the action with the opposite side.
Make sure, that your legs and torso stay completely stable. Move your trunk only
laterally to prevent stressing your lower back.

10
PUSH UP
TRAINING EFFECT
The push-up is a self-weight exercise that is especially used to strengthen the
muscles of the shoulders, arms and chest.
Start position:
For this exercise, move the machine to the flattest position and use the grips as push-up grips. The
head must be in line with the body when doing a push-up, the view is directed to the floor. Now move
your body towards the floor. In order to train the chest muscles completely, the exercise must be
performed with the greatest possible range of motion.
Back to the starting position:
Now move your body upwards from the ground in a controlled manner so that it slowly returns to its
starting position.
To achieve a higher training intensity, avoid gaining momentum with your upper body.
Also, additional weights can increase the intensity.
| TRAINING INSTRUCTIONS

11TRAINING INSTRUCTIONS |
DIPS
TRAINING EFFECT
Dips are multi-joint exercises in strength training because the shoulder joint and
elbows are involved. They are especially used to strengthen the triceps, chest and
shoulders.
Start position:
For this exercise, you will start with the bar support position by resting on the grips. Angle your legs
and bend your arms towards the floor. Keep your head facing slightly downwards. This keeps the
cervical spine in a neutral position.
Back to the starting position:
Now move your body upwards from the ground in a controlled manner so that it slowly returns to its
starting position. The elbows are pressed through at the end of the movement. This briefly removes
the tension from the chest and triceps.
To achieve a higher training intensity, additional weights can increase the intensity.
The max. user weight must not exceed 100kg.

12
V. CARE AND MAINTENANCE
VI. SPACE-SAVING STORAGE
1. Warning! The safety level of the equipment can only be maintained if it is examined
regularly for damage and wear.
2. Replace defective components immediately and/or keep the equipment out of use until repair.
Pay special attention to components most susceptible to wear.
3. Lubricate moving parts with light oil periodically to prevent premature wear.
4. The equipment can be cleaned using a damp cloth and mild non-abrasive detergent.
Do not use solvents.
5. Do not attempt to repair this equipment yourself. Should you have any difficulty with assembly,
operation or use of your exercise product or if you think that you may have parts missing,
contact the manufacturer or their approved service agent’
A. To fold the unit, loosen the locking screw (#19) under the seat cushion attachment
and pull it out.
B. Push the front support tube in the direction of the seat cushion attachment and the securing
pin into the hole of the inner adjustable tube.
C. In this configuration you can compact store the device. For example under the bed or next to
a cabinet.
| CARE AND MAINTENANCE

13
VII. EXERCISE GUIDE
PLEASE NOTE:
Before beginning any exercise program, consult your physician. This is important especially if you are
over the age of 45 or individuals with pre-existing health problems.
The pulse sensors are not medical devices. Various factors, including the user’s movement, may
affect the accuracy of heart rate readings. The pulse sensors are intended only as an exercise aid in
determining heart rate trends in general.
Exercising is great way to control your weight, improve your fitness and reduce the effect of aging and
stress. The key to success is to make exercise a regular and enjoyable part of your everyday life.
The condition of your heart and lungs and how efficient they are in delivering oxygen via your blood to
your muscles is an important factor to your fitness. Your muscles use this oxygen to provide enough
energy for daily activity. This is called aerobic activity. When you are fit, your heart will not have to work
so hard. It will pump a lot fewer times per minute, reducing the wear and tear of your heart.
So as you can see, the fitter you are, the healthier and greater you will feel.
WARM UP
Start each workout with 5 to 10 minutes of stretching and some light exercises. A proper warm-up
increases your body temperature, heart rate and circulation in preparation for exercise. Ease into your
exercise.
After warming up, increase the intensity to your desired exercise program. Be sure to maintain your
intensity for maximum performance. Breathe regularly and deeply as you exercise.
EXERCISE GUIDE |

14 | EXERCISE GUIDE
COOL DOWN
Finish each workout with a light jog or walk for at least 1 minute. Then complete 5 to 10 minutes of
stretching to cool down. This will increase the flexibility of your muscles and will help prevent post-
exercise problems.
WORKOUT GUIDELINES
This is how your pulse should behave during general fitness exercise. Remember to warm up and
cool down for a few minutes.
TARGET ZONE
MAXIMUM
85%
70%
COOL DOWN
AGE
HEART RATE
200
180
160
140
120
100
80
20 25 30 35 40 45 50 55 60 65 70 75
The most important factor here is the amount of effort you put in. The harder and longer you work, the
more calories you will burn.

15WARRANTY |
VIII. WARRANTY
AUSTRALIAN CONSUMER LAW
Many of our products come with a guarantee or warranty from the manufacturer. In addition,
they come with guarantees that cannot be excluded under the Australian Consumer Law. You are
entitled to a replacement or refund for a major failure and compensation for any other reasonably
foreseeable loss or damage.
You are entitled to have the goods repaired or replaced if the goods fail to be of acceptable quality and
the failure does not amount to a major failure. Full details of your consumer rights may be found at
www.consumerlaw.gov.au.
Please visit our website to view our full warranty terms and conditions:
https://www.lsgfitness.com.au/pages/warranty
WARRANTY AND SUPPORT
For all warranty or support related enquiries, please lodge a support ticket first by sending us an email.

WWW.LSGFITNESS.COM.AU
Table of contents
Other LSG Fitness Equipment manuals
Popular Fitness Equipment manuals by other brands

GymPark
GymPark GP117B1 installation manual

ISE
ISE POWER TOWER user manual

Cortex
Cortex CSST-DBAJ032-2 user manual

BH FITNESS
BH FITNESS G588BM Instructions for assembly and use

Gold's Gym
Gold's Gym GB 2000 user manual

PRx Performance
PRx Performance Profile Squat Rack with Pull-Up Bar 90" Install instructions

BH FITNESS
BH FITNESS H8715M Instructions for assembly and use

Happylegs
Happylegs HL2020 user guide

FitterFirst
FitterFirst BALANCE BOARD user manual

Fitness Equipment
Fitness Equipment MLD-M6 product manual

BH FITNESS
BH FITNESS H650 Instructions for assembly and use

Precor
Precor move beyond S3.15 Assembly and maintenance guide