manuals.online logo
Brands
  1. Home
  2. •
  3. Brands
  4. •
  5. Ltech
  6. •
  7. Media Converter
  8. •
  9. Ltech LT-830-8A User manual

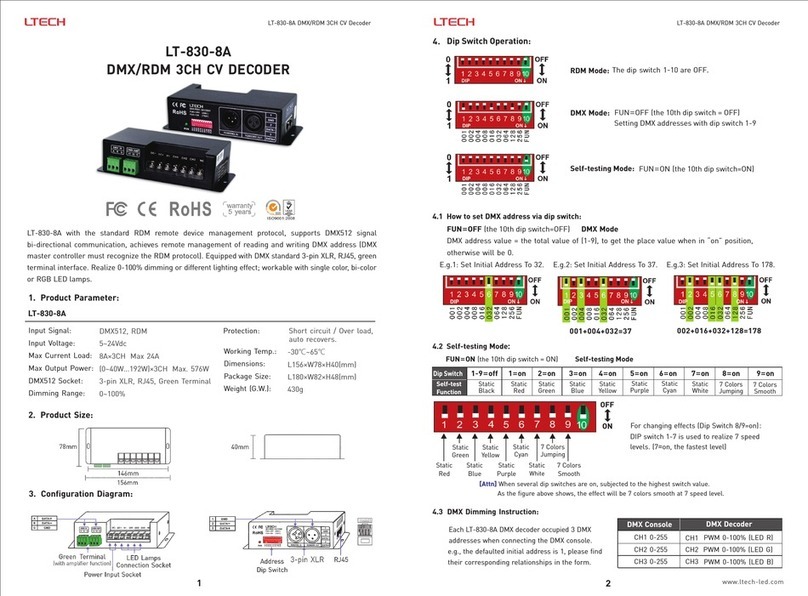
Ltech LT-830-8A User manual

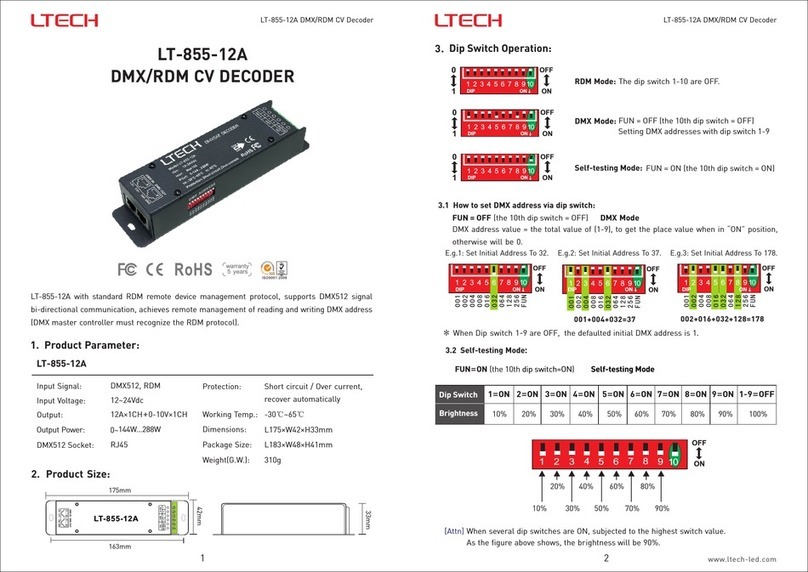
1. Product Parameter:
Input Signal:
Input Voltage:
Max Current Load:
Max Output Power:
DMX512 Socket:
Dimming Range:
DMX512, RDM
5~24Vdc
8A×3CH Max 24A
(0~40W...192W)×3CH Max. 576W
3-pin XLR, RJ45, Green Terminal
0~100%
1
LT-830-8A
2. Product Size:
DC+
DC- CH1 CH2 CH3 NC
V+
LT-830-8A
DMX/RDM 3CH CV DECODER
LT-830 8A DMX/RDM 3CH CV Decoder-
LT-830-8A w
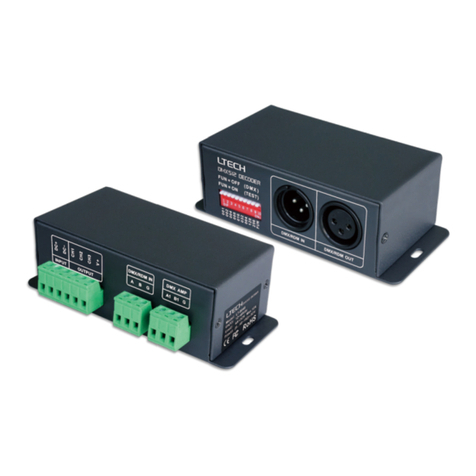
bi-directional communication, achieves remote management of reading and writing DMX address (DMX
master controller must recognize the RDM protocol). Equipped with DMX standard 3-pin XLR, RJ45, green
terminal interface. Realize 0-100% dimming or different lighting effect; workable with single color, bi-color
or RGB LED lamps.
ith the standard RDM remote device management protocol, supports DMX512 signal
Power Input Socket
Address
Dip Switch
Green Terminal
(with amplifier function) 3-pin XLR RJ45
A B N N N N G G
LED Lamps
Connection Socket
3. Configuration Diagram:
2
LT-830 8A DMX/RDM 3CH CV Decoder-
4.3 DMX Dimming Instruction:
CH1 0-255
CH2 0-255
CH3 0-255
Each LT-830 8A DMX decoder occupied 3 DMX
addresses when connecting the DMX console.
-
PWM 0-100% (LED R)
PWM LED G)0-100% (
PWM LED B)0-100% (
CH1
CH2
CH3
DMX Console DMX Decoder
Dip Switch Operation:
4.
RDM Mode: The dip switch 1-10 are OFF.
FUN=ON (the 10th dip switch=ON)
Self-testing Mode:
FUN=OFF (the 10th dip switch = OFF)
DMX Mode:
Setting DMX addresses with dip switch 1-9
FUN=OFF (the 10th dip switch ) Mode=OFF DMX
4.1 How to set DMX address via dip switch:
E.g.1: Set Initial Address To 32. E.g.2: Set Initial Address To 37. E.g.3: Set Initial Address To 178.
001+004+032=37 002+016+032+128=178
4
4
4
1
1
1
111
2
2
2
222
3
3
3
333
4
4
4
444
5
5
5
555
6
6
6
666
7
7
7
777
8
8
8
888
9
9
9
999
ON
ON
ON
DIP
DIP
DIP
0
1
0
1
0
1
OFF
ON
OFF
ON
OFF
ON
OFF
ON
OFF
ON
OFF
ON
10
10
10
10 10 10
ONDIP ON ON
DIP DIP
FUN=ON (the 10th dip switch = ON) Self-testing Mode
4.2 Self-testing Mode:
1=on 4=on 7=on 8=on 9=on2=on 5=on
3=on 6=on
Self-test
Function
1-9=off
Dip Switch
Static
Black Static
Red
Static
Red
Static
Green
Static
Green
Static
Blue
Static
Blue
Static
Yellow
Static
Yellow
Static
Purple
Static
Purple
Static
Cyan
Static
Cyan
Static
White
Static
White
7 Colors
Jumping
7 Colors
Jumping
7 Colors
Smooth
7 Colors
Smooth
[Attn] When several dip switches are on, subjected to the highest switch value.
As the figure above shows, the effect will be 7 colors smooth at 7 speed level.
For changing effects (Dip Switch 8 9=on): /
DIP switch 1-7 is used to realize 7 speed
levels. (7=on, the fastest level)
DMX address value = the total value of (1-9), to get the place value when in “on” position,
otherwise will be 0.
OFF
ON
12345678910
e.g., the defaulted initial address is 1, please find
their corresponding relationships in the form.
www.ltech-led.com
warranty
5 years
Working Temp.:
Dimensions:
Package Size:
Weight (G.W.):
-30℃~65℃
L156×W78×H40(mm)
L180×W82×H48(mm)
430g
Short circuit / Over current
auto recovers.
Protection:
12345678910
ON
DIP
40mm
78mm
156mm
146mm
3
5. Wiring Diagram:
LT-830 8A DMX/RDM 3CH CV Decoder-
5.1 Decoder can be connected to a variety of standard DMX512 devices:
*
at the end of each line.
If the recoil effect occurs because of longer signal line or bad line quality, please try to connect 0.25W 90-120Ω terminal resistor
*
An amplifier is needed when more than 32 decoders are connected, signal amplification should not be more than 5 times
continuously.
5.2 The connection diagram of three DMX terminals:
5.3 The connection diagram of :AMP signal amplifier terminal
3-pin XLR Connected in Parallel
Green Terminal Connected in Parallel
RJ45 Connected in Parallel
These 3 terminals can be connected
in a mixed way.
Terminal resistor
Terminal resistor
Terminal
resistor
Terminal
resistor
Terminal
resistor
DMX signal input
*
signal amplification
should be no more than 5 times continuously.
Amplified the signal by AMP interface which connecting too many decoder and in overlong signal line,
LT-830 8A DMX/RDM 3CH CV Decoder-
4
6. Attention:
7. Warranty Agreement:
6.1 The product shall be installed and serviced by the qualified person.
6.2 This product is non-waterproof. Please avoid the sun and rain. When installed outdoors please ensure
it is mounted in a water proof enclosure.
6.3 Good heat dissipation will prolong the working life of the controller. Please ensure good ventilation.
6.4 Please check if the output voltage of the LED power supply used comply with the working voltage of
the product.
6.5 Please ensure that adequate sized cable is used from the controller to the LED lights to carry the current.
Please also ensure that the cable is secured tightly in the connector.
6.6 Ensure all wire connections and polarities are correct before applying power to avoid any damages to
the LED lights.
6.7 If a fault occurs, please return the product to your supplier. Do not attempt to fix this product by yourself.
7.1 We provide lifelong technical assistance with this product:
A 5-year warranty is given from the date of purchase. The warranty is for free repair or replacement
if cover manufacturing faults only.
For faults beyond the 5-year warranty, we reserve the right to charge for time and parts.
7.2 Warranty exclusions below:
Any man-made damages caused from improper operation, or connecting to excess voltage and
overloading.
The product appears to have excessive physical damage.
Damage due to natural disasters and force majeure.
Warranty label, fragile label and unique barcode label have been damaged.
The product has been replaced by a brand new product.
7.3
7.4 Any amendment or adjustment to this warranty must be approved in writing by our company only.
★ This manual only applies to this model. reserve the right to make changes without
We prior notice.
Repair or replacement as provided under this warranty is the exclusive remedy to the customer.
We shall not be liable for any incidental or consequential damages for breach of any stipulation
in this warranty.
Update Time: 2018.07.06_A5
www.ltech-led.com
LT-830-8A is equipped with 3 types DMX terminals for users’ selection.
The diagram takes 3-pin XLR terminal as a example, same connecting
method for the rest two: green terminal (with amplifier function) & RJ45
terminal.
5-24Vdc5-24Vdc5-24Vdc
Input PowerInput PowerInput Power
DMX/RDM Signal
DMX/RDM Signal
DMX/RDM signal
1
3
2
PUSH
1
3
2
PUSH
DMX Console
DC +
DC
-
RGB
R
3
R
2
R
1
DC +
DC
-
RGB
R
3
R
2
R
1
DC +
DC
-
RGB
R
3
R
2
R
1
12345678910
ON
12345678910
ON
12345678910
ON
12345678910
ON
12345678910
ON
12345678910
ON
12345678910
ON
12345678910
ON
12345678910
ON
AM P
12345678910
ON
12345678910
ON
12345678910
ON
12345678910
ON
12345678910
ON
12345678910
ON
12345678910
ON
12345678910
ON
12345678910
ON
LT- 830-8A
RDM/DMX恒压解码器
LT-830-8A
一、 产品参数::
二、 产品尺寸
LT- 830-8A RDM/DMX 恒压解码器 LT- 830-8A RDM/DMX 恒压解码器
40mm
78mm
156mm
146mm
三、结构图:
DMX512起始地址码 = 编码开关1-9位的位值总和, 将编码开关拨向下(ON置“1”), 可获得该位
的位值; 编码开关拨向上(置“0”),则该位的位值为0。
四、拔码开关的操作说明:
RDM模式:
自测模式:
DMX模式:
FUN=OFF (第10位拔码开关 ) 模式= OFF DMX
4.1 用拔码开关设置首地址:
4.3 DMX 调光示意:
例1: 设置首地址为32。 例2: 设置首地址为37。 例3: 设置首地址为178。
001+004+032=37 002+016+032+128=178
111
222
333
444
555
666
777
888
999
OFF
ON
OFF
ON
OFF
ON
10 10 10
4
1 2 3 4 5 6 7 8 9
ONDIP
0
1
OFF
ON
10
4
1 2 3 4 5 6 7 8 9
ONDIP
0
1
OFF
ON
10
4
1 2 3 4 5 6 7 8 9
ONDIP
0
1
OFF
ON
10
ONDIP ON ON
DIP DIP
CH1 0-255
CH2 0-255
CH3 0-255
PWM 0-100% (LED R)
PWM LED G)0-100% (
PWM LED B)0-100% (
CH1
CH2
CH3
DMX控台通道 DMX解码器输出通道
DMX控台连接DMX解码器调光, 每台
解码器占用3个DMX地址。
LT-830
FUN=ON (第10位拔码开关 ) =ON 自测模式
1=on 4=on 7=on 8=on 9=on2=on 5=on
3=on 6=on
自测模式
1-9=off
拔码开关
静态黑色 静态红色
静态红色
静态绿色
静态
绿色
静态蓝色
静态蓝色
静态黄色
静态
黄色
静态紫色
静态紫色
静态青色
静态
青色
静态白色
静态白色
7彩跳变
7彩
跳变
7彩渐变
7彩渐变
OFF
ON
12345678910
拔码开关8 9=on时,为 :/动态效果
拔码开关 可用于调节速度1-7 (7=on, 为最快速度)。
[注] 当多位拔码开关为on时, 以高位为准(如上图所示,表现为7级速度的7彩渐变)。
4.2 自测功能:
例如: DMX解码器默认首地址为1, 控台与解码器
调光对应关系如表格。
此时可通过1-9拨码开关设置DMX地址
输入信号 :
DMX512插口 :
输入电压 :
负载电流 :
负载功率 :
DMX512, RDM
5~24Vdc
×
(0~40 ×
XLR, RJ45, 绿色端子
8A 3路 Max. 24A
W...192W) 3路 Max. 576W
3针
拔码开关1-10全部拨向上
FUN=OFF (第10位拔码开关拨向上时)
FUN=ON (第10位拔码开关拨向下时)
1 2 www.ltech.cn
调光范围 :
保护:
工作温度 :
产品尺寸 :
包装尺寸 :
重量(毛重):
0~100%
短路、过流保护, 可自恢复
-30℃~65℃
L156×W78×H40(mm)
L180×W82×H48(mm)
430g
LT-830-8A加入标准的RDM远程设备管理协议, 支持DMX512信号双向通讯, 可以实现远程读取/
写入DMX地址等管理功能( DMX主控需支持RDM协议)。提供XLR-3, RJ45, 绿色端子三种DMX信号
接口选择,实现0-100%调光或各种变化效果; 可控制单色、双色、RGB的LED灯具。
质保5年
拨码开关
绿色端子
(具有信号放大功能)
3针XLR RJ45
A B N N N N G G
电源输入/LED输出
12345678910
ON
DIP
DC+
DC- CH1 CH2 CH3 NC
V+
12345678910
ON
12345678910
ON
12345678910
ON
12345678910
ON
12345678910
ON
12345678910
ON
12345678910
ON
12345678910
ON
12345678910
ON
5.1 解码器可以连接各种标准DMX512设备。
5.2 三种DMX端口的连接示意图
5.3 AMP信号放大端子连接图
六、 注意事项:
6.1 本产品请由具有专业资格的人员进行调试安装。
6.2 本产品不能防水,需避免日晒雨淋,如安装在户外,请用防水箱。
6.3 良好的散热条件会延长LED控制器的使用寿命,请把产品安装在通风良好的环境。
6.4 请检查使用的LED电源输出电压是否符合产品电压范围要求。
6.5 使用的电线直径大小必须能足够负载连接的LED灯具,并确保接线牢固。
6.6 通电调试前,应确保所有接线正确,以避免因接线错误而导致灯具损坏。
6.7 如果发生故障,请勿私自维修;如果有疑问,请联系供应商。
7.1 购买雷特LED控制器产品享受终身技术支持和保修服务:
● 免费保修:自购买之日起五年内出现产品质量问题雷特将给予免费修理或更换服务。
● 有偿保修:超过免费保修期的产品收取适当的维修材料成本费用。
7.2 以下情况不在免费保修或更换服务范围之内:
● 过高电压、超负载、操作不当等人为造成的损坏;
● 产品外形严重损坏或变形;
● 自然灾害以及人力不可抗拒原因造成的损坏;
● 产品保修标签和产品唯一条形码损坏。
● 产品已经更新换代。
7.3. 修理或更换是雷特对客户的唯一补救措施。雷特不承担任何附带引起的损害赔偿责任。
7.4. 只有雷特享有修正或调整本保修条款的权利,并以书面形式发布认定为准。
★ 本说明书仅适用于本型号产品,如有更新恕不另行通知。
七、 保修协议:
更新日期:2018.07.06_A5
五、连接示意图:
www.ltech.cn 4
3
*
超过32台DMX解码器连接需加信号放大器,信号放大不能连续超过5次。
*
DMX解码器过多, 或信号线过长, 可用AMP接口放大信号, 连续放大次数请勿超过5次 当
*
当信号线较长或者线材质量等原因造成信号反冲效应影响使用, 可以尝试在每路信号线末端连接0.25W
终端电阻去解决。
90-120Ω
LT- 830-8A RDM/DMX 恒压解码器 LT- 830-8A RDM/DMX 恒压解码器
DMX主控
RDM/DMX信号 RDM/DMX信号
RDM/DMX信号
本DMX解码器提供三种DMX端子供用户选择,
以连接3针XLR端子为例, 也可根据实际情况选择RJ45端子
或者绿色端子(内有信号放大功能)。
本连接图
终端电阻
DMX信号输入
AM P
终端电阻
以上三种方式可以任意混合连接
绿色端子并联连接
RJ45并联连接
3针XLR并联连接 终端电阻
12345678910
ON
12345678910
ON
12345678910
ON
终端
电阻
5 dc-24V 5 dc-24V 5 dc-24V
电源输入 电源输入 电源输入
DC +
DC +
DC +
DC
-
DC
-
DC
-
RRR
GGG
BBB
R
3R
3R
3
R
2R
2R
2
R
1R
1R
1
LT-830-8A LT-830-8A LT-830-8A
12345678910
ON
12345678910
ON
12345678910
ON
12345678910
ON
12345678910
ON
12345678910
ON
Other Ltech Media Converter manuals

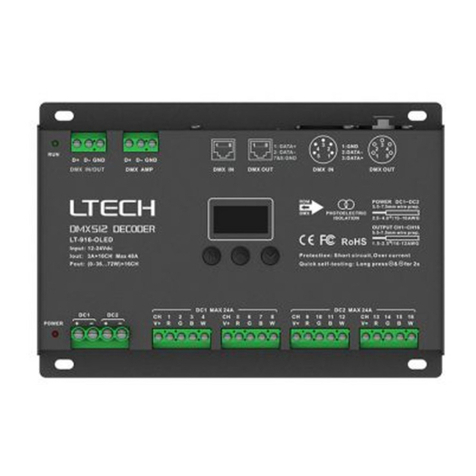
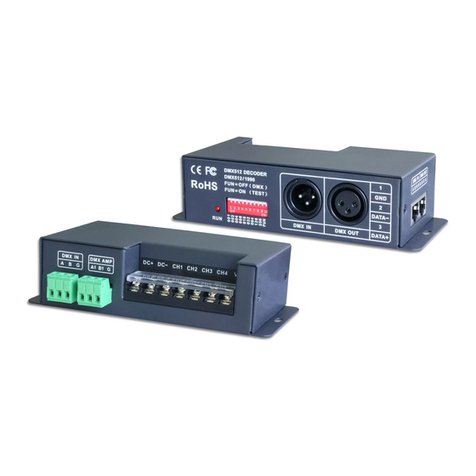
Ltech LT-916 User manual

Ltech

Ltech LT-916 User manual

Ltech LT-874S-5A Operator's manual

Ltech

Ltech LT-874S-5A Operator's manual

Ltech LT-858-5A User manual

Ltech

Ltech LT-858-5A User manual

Ltech LT-905-OLED User manual

Ltech

Ltech LT-905-OLED User manual

Ltech LT-851-6A User manual

Ltech

Ltech LT-851-6A User manual

Ltech LT-830 User manual

Ltech

Ltech LT-830 User manual

Ltech SE 20 250-1000-W2B2 User manual

Ltech

Ltech SE 20 250-1000-W2B2 User manual

Ltech LT-8030 User manual

Ltech

Ltech LT-8030 User manual

Ltech LT-830-8A User manual

Ltech

Ltech LT-830-8A User manual

Ltech LT-858-CC User manual

Ltech

Ltech LT-858-CC User manual

Ltech M4-E User manual

Ltech

Ltech M4-E User manual

Ltech LT-904 User manual

Ltech

Ltech LT-904 User manual

Ltech LT-DMX-3001 User manual

Ltech

Ltech LT-DMX-3001 User manual

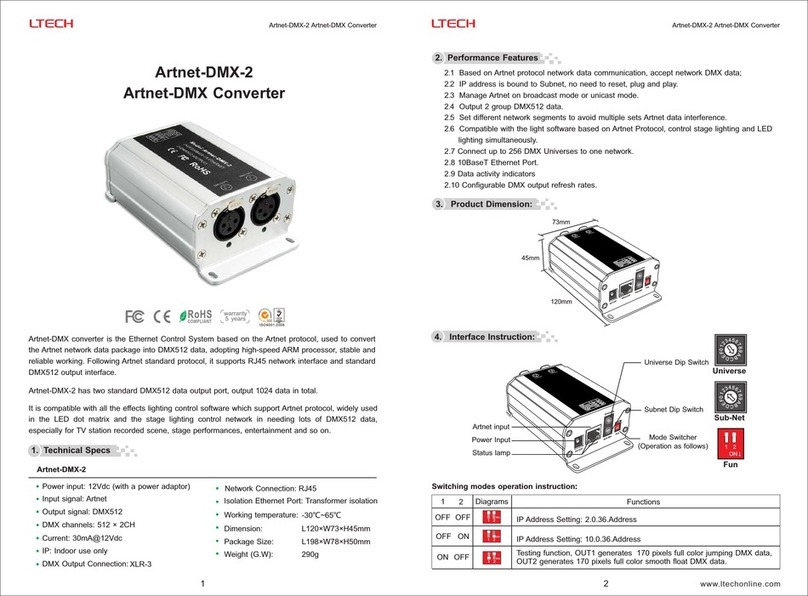
Ltech Artnet-DMX-2 User manual

Ltech

Ltech Artnet-DMX-2 User manual

Ltech LT-840-6A User manual

Ltech

Ltech LT-840-6A User manual

Ltech DIN-DMX-5A User manual

Ltech

Ltech DIN-DMX-5A User manual

Ltech Artnet-DMX-8 Operator's manual

Ltech

Ltech Artnet-DMX-8 Operator's manual

Ltech Artnet-DMX-1 User manual

Ltech

Ltech Artnet-DMX-1 User manual

Ltech LT-DMX-1809 User manual

Ltech

Ltech LT-DMX-1809 User manual

Ltech DIN-DMX-350 User manual

Ltech

Ltech DIN-DMX-350 User manual

Ltech LT-932-OLED User manual

Ltech

Ltech LT-932-OLED User manual

Ltech LT-924-OLED User manual

Ltech

Ltech LT-924-OLED User manual

Ltech LT-855-12A User manual

Ltech

Ltech LT-855-12A User manual

Ltech LT-995-OLED User manual

Ltech

Ltech LT-995-OLED User manual

Popular Media Converter manuals by other brands

qutools quTAG MC manual

qutools

qutools quTAG MC manual

Matrox Monarch HD Dev tools reference guide

Matrox

Matrox Monarch HD Dev tools reference guide

General Dynamics LT-3600 SERIES Operation & maintenance manual

General Dynamics

General Dynamics LT-3600 SERIES Operation & maintenance manual

Audioconnext MIDIBOX MB-44 USB 4i4o user guide

Audioconnext

Audioconnext MIDIBOX MB-44 USB 4i4o user guide

Intellinet 510486 user manual

Intellinet

Intellinet 510486 user manual

Fibersystem 21-216 Technical manual

Fibersystem

Fibersystem 21-216 Technical manual

Texas Instruments TLC4541EVM user guide

Texas Instruments

Texas Instruments TLC4541EVM user guide

Visual Tools AX-TV user manual

Visual Tools

Visual Tools AX-TV user manual

Panduit Atlona OmniStream 121 installation guide

Panduit

Panduit Atlona OmniStream 121 installation guide

CYP CSC-6011 Operation manual

CYP

CYP CSC-6011 Operation manual

Hall Research Technologies SC-HD2SDI user manual

Hall Research Technologies

Hall Research Technologies SC-HD2SDI user manual

Comnet CWFE1005POEMHO-M Installation and operation manual

Comnet

Comnet CWFE1005POEMHO-M Installation and operation manual

Relay AnDi1 user manual

Relay

Relay AnDi1 user manual

Elko 7180 instruction manual

Elko

Elko 7180 instruction manual

Datalogic DB0431 Integration guide

Datalogic

Datalogic DB0431 Integration guide

DoorKing 1830-185 instructions

DoorKing

DoorKing 1830-185 instructions

Digitrax DH166PS manual

Digitrax

Digitrax DH166PS manual

Atlona AT-HD500 user manual

Atlona

Atlona AT-HD500 user manual

manuals.online logo
manuals.online logoBrands
  • About & Mission
  • Contact us
  • Privacy Policy
  • Terms and Conditions

Copyright 2025 Manuals.Online. All Rights Reserved.