manuals.online logo
Brands
  1. Home
  2. •
  3. Brands
  4. •
  5. Ltech
  6. •
  7. Media Converter
  8. •
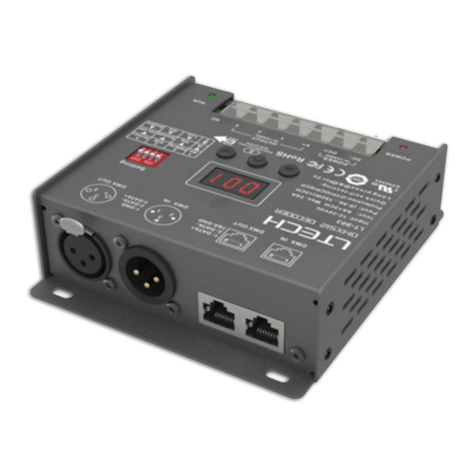
  9. Ltech LT-995-OLED User manual

Ltech LT-995-OLED User manual

2
39
169
157
80
59
www.ltech-led.com
warranty
5 years
Technical Specs
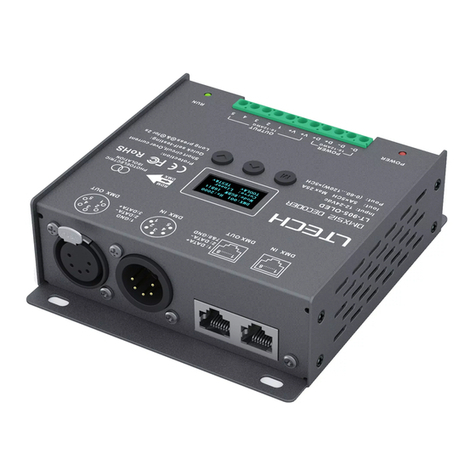
LT-995-OLED
DMX512/RDM
12 24Vdc~
6A 5CH Max. 30A ×
(0~72W...144W) × 5CH Max. 720W
3-pin XLR, RJ45, green terminal
Dimming/CT/RGB/RGBW/RGBWY
0.1~9.9
8bit (256 levels) / 16bit (65536 levels)
Yes
Short circuit / Over current / Over-heat protection,
recover automatically
-30°C~65°C
L169×W80×H39mm
L182×W91×H41mm
550g
Model:
Input Signal:
Input Voltage:
Current Load :
Output Power:
DMX Interface:
Control Mode:
Dimming Curve:
Grey Level:
Photoelectric Isolation:
Protection:
Working Temperature:
Dimensions:
Package Size:
Weight (G.W.):
Unit: mm
E500 58 5
1
RJ45 RDM
www.ltech-led.com
Product Introduction
Gamma Value
DMX Value
Output
Brightness
0
100%
2.5 3.5
6.5
1.0
0.8
0.9
<1
>1
1.5
255
3-pin XLR Photoelectric
isolation
Short circuit
Protection
Display
Over current
protection
Over-heat
protection
8. With power-on state management and fast self-testing function.
4. Support 3 kinds of DMX ports with signal isolation function: 3-pin XLR,
RJ45 and green terminal (with signal amplifier function).
10. Optional for standard, linear, LOG or custom 0.1-9.9 dimming curve.
6. With firmware upgrade function.
5. With the operations can be completed
via the RDM master console, such as parameters browsing & setting, DMX
address setting, equipment recognition, etc.
RDM remote management protocol,
2. Easy operation with OLED screen and the touch buttons.
1. Designed with 5 channels output, and Max. 6A current per channel, up to
720W output power.
3. 5 kinds of mode optional: single color, CT, RGB, RGBW, RGBWY.
7.
function when fault.
With short circuit, over current and over-heat protection, as well as warning
9. 16bit (65536 levels) / 8bit (256 levels) grey level optional.
www.ltech-led.com
LT-995-OLED
Dimming curve: 0.1~9.9
Short circuit / Over current / Over-heat protection
3 kinds of DMX interfaces Photoelectric
isolation
CHANNELS
OLED display
8 bit / 16 bit
3
www.ltech-led.com
Main Component Descripition
3-pin XLR
DMX/RDM
input & output
Green terminal
DMX/RDM
input & output OLED screen
OLED Screen Interface
Press "M" key, switch entries.
Long press “M” key, back to main page.
Press "∧" or “∨" key, parameter adjustment.
Exit: back to previous page.
M
<
<
RJ45
DMX/RDM
input & output
12-24Vdc
Power input
Green terminals
LED lamps connection
4
DMX: Hz: High
Mode: RGB 8bit
Curve: Standard
Dim: Smo TOOL&v
001
DMX: 001 Hz:
Mode: RGB 8bit
Curve: Standard
Dim: Smo TOOL&v
High
DMX: 001 Hz: High
Mode: 8bit
Curve: Standard
Dim: Smo TOOL&v
RGB
DMX: 001 Hz: High
Mode: RGB
Curve: Standard
Dim: Smo TOOL&v
8bit
DMX: 001 Hz: High
Mode: RGB 8bit
Curve:
Dim: Smo TOOL&v
Standard
www.ltech-led.com
1. DMX Address
Setting
Press “∧" or “∨" key to set DMX address.
Range: 001~512
Main page
2. PWM
Frequency
3. Mode
Smooth and delicate,
human eye is comfortable.
4. Grey Level
5. Dimming
Curve
No flicker in
video camera.
Press “∧" or “∨" key to choose.
Std (standard)
High
Mid (middle)
Low
Optional :
It is recommended
to use standard.
Press “∧" or “∨" key to choose.
Optional : Dim / CT
RGB / RGBW / RGBWY
Press “∧" or “∨" key to choose.
Optional : 8bit
16bit (choose it if the master
controller support this
function)
Press “∧" or “∨" key to choose.
Optional :
Linear
LOG
0.1~9.9
Standard
It is recommended to use standard,
0.1-9.9 is for special requirements.
DMX: 001 Hz: High
Mode: RGB 8bit
Curve: Standard
TOOL&VDim: Smo
5
Screen: ON+Addr
Contrast: 40%
Beep: ON
EXIT&V
TEST&V
Screen: ON+Addr
Screen: ON+black
Screen: OFF
001
DMX: 001 Hz: High
Mode: RGBW 8bit
Curve: Standard
Dim: Smo TOOL&v
DMX: 001 Hz: High
Mode: RGBW 8bit
Curve: Standard
Dim: Smo TOOL&V
www.ltech-led.com
6. Enhance
Dimming
7. Tool
*
Fast self-testing function: press “ or " keys
simultaneously for 2-3 seconds under any page,
decoder will enter self-testing function.
∧"∨"
Screensaver open and display
address if undo for 2 minutes.
Screensaver open and
black if undo for 2 minutes.
Screensaver not enable.
CH1: 255 CH2: 255
CH3: 255 CH4: 255
CH5: 255 ALL: 255
EXIT &V
Press “∧" or “∨" key to choose.
Optional :
Smo (smooth)
Std (standard)
Smo: This option with smooth processing,
realize the dimming flicker-free and
dynamic effects more downy.
It is recommended to
use standard.
Press “∧" or “∨"
key to enter submenu.
Press “∧" or “∨"
key to enter
submenu of test.
Brightness setting
(range: 0~255)
Press"∨" to exit
AMP
*
LT-995-OLED
LT-995-OLED LT-995-OLED
1
3
2
PUSH
1
3
2
PUSH
GND
DATA+
DATA-
12-24Vdc 12-24Vdc 12-24Vdc
LT-995-OLED LT-995-OLED LT-995-OLED
LT-995-OLED
LT-995-OLED
LT-995-OLED
LT-995-OLED
LT-995-OLED
LT-995-OLED
LT-995-OLED
LT-995-OLED
LT-995-OLED
www.ltech-led.com www.ltech-led.com www.ltech-led.com
RGB LEDs RGBW LEDs
RGBWY LEDs
Color temperature LEDs
Dimming mode CT mode
RGB mode RGBW mode
RGBWY mode
1 Connecting LED lights:
DMX/RDM signal DMX/RDM signalDMX/RDM signal DMX/RDM signal
LEDs LEDs
LED
power
supply
LED
power
supply
LED
power
supply
Single color LEDs
Wiring Diagram 2. DMX console onnectionc :
LT-995-OLED is equipped with 3 types DMX
terminals for users’ selection. The following
diagram takes 3-pin XLR as an example, same
connecting method for the rest two: RJ45 &
green terminal (with amplifier function).
DMX
console
DMX signal
DMX signal DMX signal
Resistor
terminal
3. The connection diagram of 3 kinds of DMX/RDM terminals:
Terminal
resistor
Terminal
resistor
Terminal
resistor
Terminal resistor
3-pin XLR
connected
in parallel
Rj45
connected
in parallel
Green terminal
connected
in parallel
These 3 terminals can be connected in a mixed way.
4. The connection diagram of :AMP signal amplifier terminal
If the recoil effect occurs because of longer signal line or bad line quality,
please try to connect 0.25W 90-120Ω terminal resistor at the end of each line.
*
*
Connecting with green terminal or an extra amplifier will be needed when more
than 32 decoders are connected or use overlong signal wire(as shown below).
Signal amplifier should not be more than 5 times continuously.
76 8
LT-995-OLED
LT-995-OLED
12-24Vdc 12-24Vdc
V+ V +
V+ V +
V+
V+ V +
V+ V +
V+
11
11
1
22
22
2
33
33
3
44
44
4
55
55
5
An amplifier is needed if more than 32 decoders are connected
, signal amplification should not be more than 5 times continuously.
or use overlong
signal line
www.ltech-led.com
Address setting table
Mode
Mode
Resolution
Resolution
Address Quantity
Address Quantity
Channel
Channel
DIM
DIM
1
2
8bit
16bit
1
1
2
2
3
3
4
4
5
5
001
001
002
001
002
001
002
001
002
001
002
001
001
001
001
9
CT
CT
RGB
RGB
RGBW
RGBW
RGBWY
RGBWY
2
4
3
6
4
8
5
10
8bit
16bit
8bit
16bit
8bit
16bit
8bit
16bit
001
002 001
002 001
002 001
002
001
002
003
004 003
004 003
004 003
004
005
006 005
006 005
006
007
008 007
008
009
010
007
008
005
006
005
006
003
004
003
004
001 001 001 001
002 002 002 002
001 003 003 003
002 003 004 004
002 003 004 005
www.ltech-led.com
10
LT-995-OLED LT-995-OLED
WIFI-RDM01
Work with RDM Editor
LT-995-OLED can work with LTECH RDM editor (Model: WiFi-RDM01) to realize
changing the parameters by long-range setting, wiring diagram as below:
5-24Vdc
Power
input
LT-995-OLED
www.ltech-led.com
11
RDM Editor APP Interface Instruction
Download the APP, setting the LT-995-OLED parameters (frequency, bit, curve,
modes, dimming range, screensaver, etc.) after well connecting the RDM editor,
more details, please check the manual of WiFi-RDM01.
Well installation of products first, then working with WiFi-RDM01 to realize setting
parameters and firmware upgrade by APP.
a: click”Add”, edited the address in corresponding box.
b: Click”ID”, get more product details.
c: Click” ”, enter edited interface
d: Click”No.”, issue the recognizing command.
ac
b
d
No further notice if any changes in the manual.
Product function depends on the goods.
Please feel free to contact your supplier if any question.
WiFi-RDM01
upgrade
DMX device
upgrade
Supporting WiFi-RDM01
upgrade and DMX driver
upgrade.
Update Time: 2019.06.14_A4

Other Ltech Media Converter manuals

Ltech LT-DMX-8806 User manual

Ltech

Ltech LT-DMX-8806 User manual

Ltech LT-830-350 User manual

Ltech

Ltech LT-830-350 User manual

Ltech LT-830-8A User manual

Ltech

Ltech LT-830-8A User manual

Ltech 2272700 User manual

Ltech

Ltech 2272700 User manual

Ltech LT-995 User manual

Ltech

Ltech LT-995 User manual

Ltech LT-932-OLED User manual

Ltech

Ltech LT-932-OLED User manual

Ltech LT-830-8A User manual

Ltech

Ltech LT-830-8A User manual

Ltech LT-924-OLED User manual

Ltech

Ltech LT-924-OLED User manual

Ltech LT-851-5A User manual

Ltech

Ltech LT-851-5A User manual

Ltech DMX512 Instruction manual

Ltech

Ltech DMX512 Instruction manual

Ltech Artnet-SPI-8 User manual

Ltech

Ltech Artnet-SPI-8 User manual

Ltech Artnet-DMX-8 Operator's manual

Ltech

Ltech Artnet-DMX-8 Operator's manual

Ltech LT-DMX-6803 User manual

Ltech

Ltech LT-DMX-6803 User manual

Ltech LT-DMX-6803 User manual

Ltech

Ltech LT-DMX-6803 User manual

Ltech LT-904-DIP User manual

Ltech

Ltech LT-904-DIP User manual

Ltech LT-905 Operator's manual

Ltech

Ltech LT-905 Operator's manual

Ltech Artnet-DMX-1 User manual

Ltech

Ltech Artnet-DMX-1 User manual

Ltech LT-855-12A User manual

Ltech

Ltech LT-855-12A User manual

Ltech LT-830-350 User manual

Ltech

Ltech LT-830-350 User manual

Ltech M4-E User manual

Ltech

Ltech M4-E User manual

Ltech LT-912-OLED User manual

Ltech

Ltech LT-912-OLED User manual

Ltech LT-DMX-3001 User manual

Ltech

Ltech LT-DMX-3001 User manual

Ltech Artnet-DMX-2 User manual

Ltech

Ltech Artnet-DMX-2 User manual

Ltech LT-DMX-1809 User manual

Ltech

Ltech LT-DMX-1809 User manual

Popular Media Converter manuals by other brands

Euphonix MADI MI715 installation manual

Euphonix

Euphonix MADI MI715 installation manual

Bose SoundDock AM316536 owner's guide

Bose

Bose SoundDock AM316536 owner's guide

Digikeijs DR4018 DIGISWITCH instruction manual

Digikeijs

Digikeijs DR4018 DIGISWITCH instruction manual

Sharp AN-LS1 Operation manual

Sharp

Sharp AN-LS1 Operation manual

Gold Note DS-10 PLUS owner's manual

Gold Note

Gold Note DS-10 PLUS owner's manual

Velleman VASMON2N user manual

Velleman

Velleman VASMON2N user manual

Technica 100BASE-T1 SPY Mini user manual

Technica

Technica 100BASE-T1 SPY Mini user manual

Tekvox SCU11-KVM user manual

Tekvox

Tekvox SCU11-KVM user manual

Roline 13/21/1067 Quick installation guide

Roline

Roline 13/21/1067 Quick installation guide

CTC Union IFC-1200 user guide

CTC Union

CTC Union IFC-1200 user guide

NTI VGACMP-HD Operation manual

NTI

NTI VGACMP-HD Operation manual

Magnimage LED-580F Series user manual

Magnimage

Magnimage LED-580F Series user manual

Gefen EXT-HOMETS user manual

Gefen

Gefen EXT-HOMETS user manual

Kiloview DC220 user manual

Kiloview

Kiloview DC220 user manual

Seneca S117P1 installation manual

Seneca

Seneca S117P1 installation manual

MG 17VS instruction manual

MG

MG 17VS instruction manual

KTI Networks KC-300D Series installation guide

KTI Networks

KTI Networks KC-300D Series installation guide

CYP AU-D3 Operation manual

CYP

CYP AU-D3 Operation manual

manuals.online logo
manuals.online logoBrands
  • About & Mission
  • Contact us
  • Privacy Policy
  • Terms and Conditions

Copyright 2025 Manuals.Online. All Rights Reserved.