Lube1 ATF602 User manual

® Copyright, Lube1, 2019, all rights reserved. / Misprints and technical changes reserved / Date: 2019-04
1
MANUAL
ATF602
www.lube1.swiss

® Copyright, Lube1, 2019, all rights reserved. / Misprints and technical changes reserved / Date: 2019-04
2
Content
General information.....................................................................................................................................3
Description of the machine..........................................................................................................................4
Description of the control panel...................................................................................................................4
Technical Data ............................................................................................................................................5
Dimension drawing......................................................................................................................................5
INSTALLATION...............................................................................................................................................6
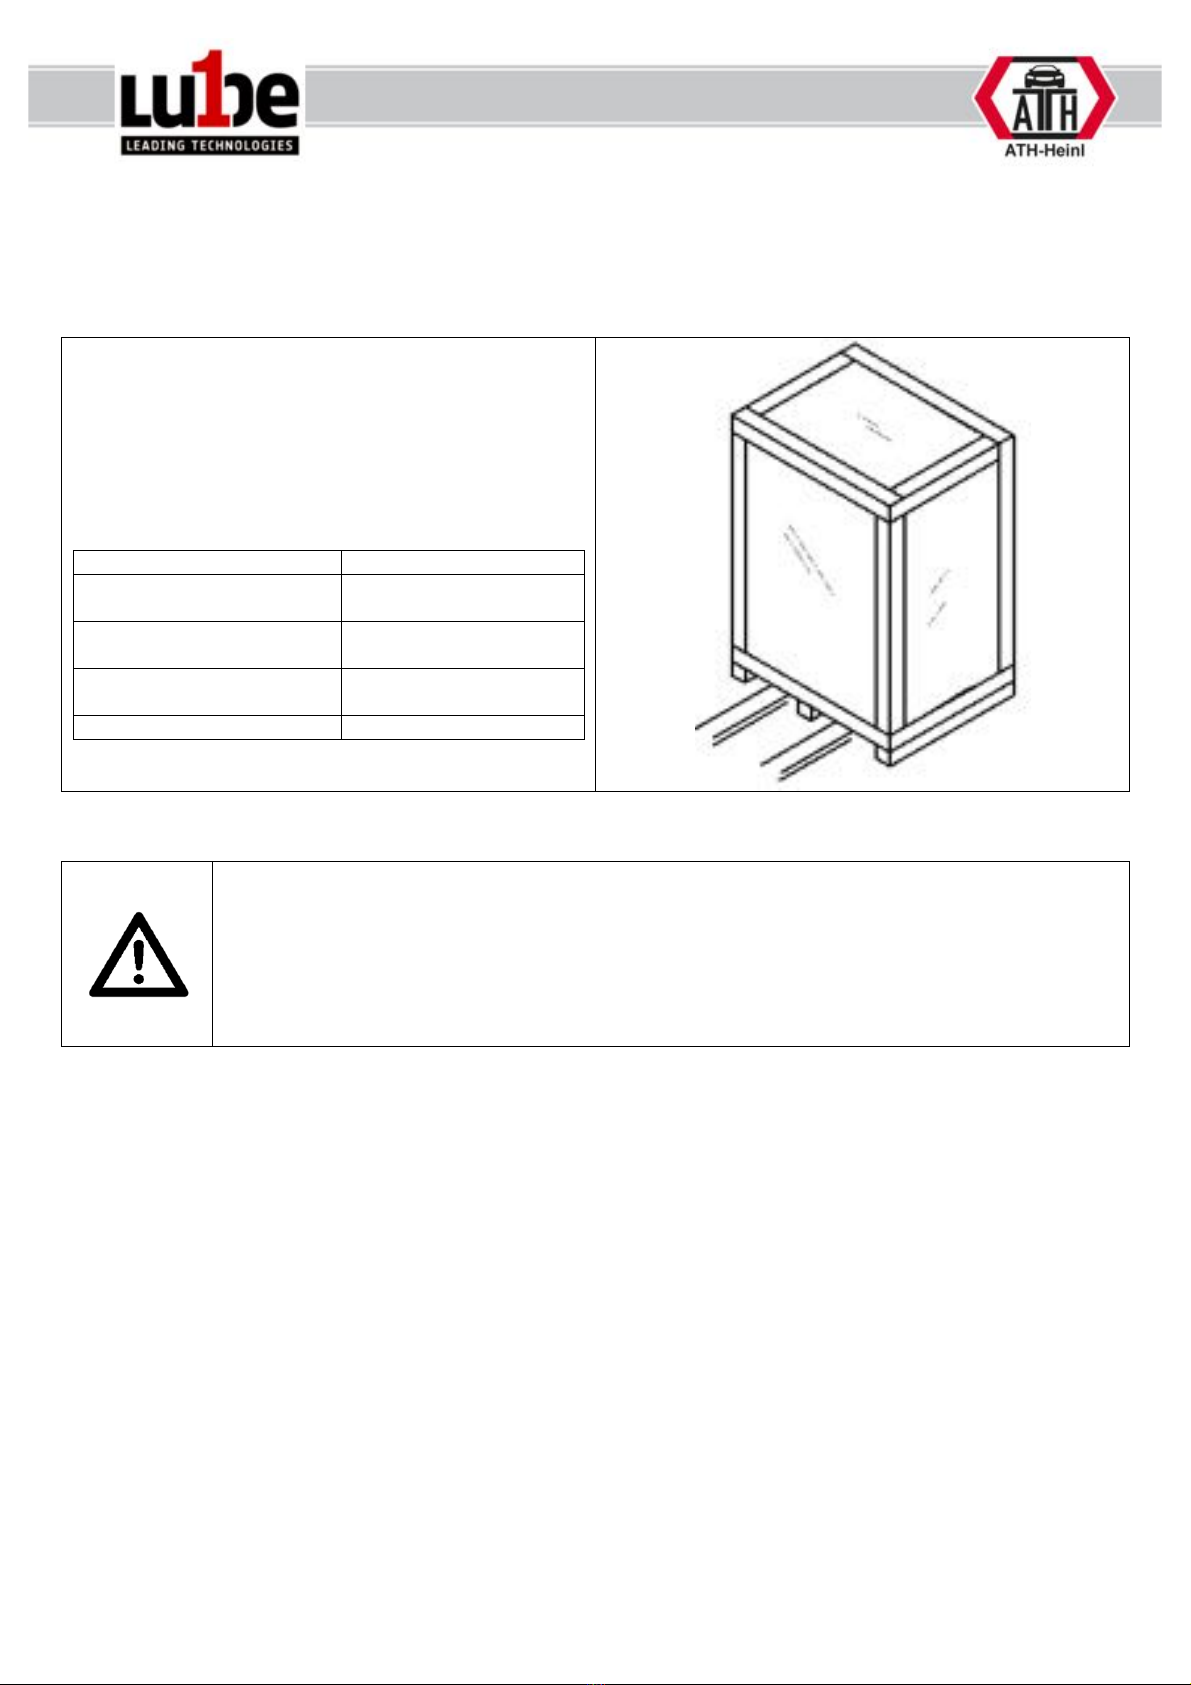
Transport & Storage Conditions..................................................................................................................6
Location.......................................................................................................................................................7
OPERATION OF THE MACHINE ...................................................................................................................8
Manual.........................................................................................................................................................8
Basic informations.......................................................................................................................................9
General information about automatic oil change.......................................................................................10
EXECUTION of an automatic transmission oil change .................................................................................11
Preparation and implementation ...............................................................................................................11
Change oil types, change oil in device......................................................................................................11
TIPPS and Lube1 Recommendations for older vehicles / transmissions......................................................12
1st tip Vehicles with high mileage .............................................................................................................12
2nd tip Gear unit with heavy wear / dirt.....................................................................................................12
PROCEDURE Filter change on the machine................................................................................................12
CONNECTION scheme machine to automatic transmission ........................................................................13
Flush before oil change.............................................................................................................................13
Correct filling level (drain oil).....................................................................................................................16
Correct filling level (add oil) after gearbox filter change ............................................................................17
Completion of the oil change.....................................................................................................................19
Emptying (recommendation after each service)........................................................................................19
System settings / Calibration.....................................................................................................................20
MAINTENANCE ............................................................................................................................................23
Safety regulations for oil............................................................................................................................23
Care instructions .......................................................................................................................................24
Troubleshooting.........................................................................................................................................24
Disposal.....................................................................................................................................................24
DECLARATION OF CONFORMITY / KONFORMITÄTSERKLÄRUNG .......................................................26
ORDER LIST.................................................................................................................................................27
Machine Parts ...........................................................................................................................................29
Standard-Adapter......................................................................................................................................29
Special-Adapter.........................................................................................................................................30
Lube1 - Oils / Automatic-Gear Boxes........................................................................................................31
Lube1 – Oils / Power Steering...................................................................................................................31
Lube1 - Oils / Engines...............................................................................................................................31
Lube1 - Oil-Analysis ..................................................................................................................................32
Lube1 – Special Cleaner...........................................................................................................................32
Lube1 - Accessories / Various...................................................................................................................32
Lubegard - Products/Additives ..................................................................................................................33
ANNEX..........................................................................................................................................................34
Circuit diagram ..........................................................................................................................................34
Electric-Plan ..............................................................................................................................................35
NOTES..........................................................................................................................................................38

® Copyright, Lube1, 2019, all rights reserved. / Misprints and technical changes reserved / Date: 2019-04
3
INTRODUCTION
General information
THIS MANUAL IS AN INTEGRAL PART OF THE MACHINE.
IT MUST BE READ AND UNDERSTOOD BY THE USER.
NO LIABILITY IS ACCEPTED FOR DAMAGE CAUSED BY NON-COMPLIANCE WITH THESE
INSTRUCTIONS OR THE APPLICABLE SAFETY REGULATIONS.
CAUTION: Follow the instructions to prevent injury or damage.
TIP: Provides more information on how to use the device and tips on how to use it efficiently.
Appropriate protective clothing must be worn for all work on the system described.
Type plate:
Enter all information about the machine in the following fields.
It is forbidden to remove the nameplate from the machine.

® Copyright, Lube1, 2019, all rights reserved. / Misprints and technical changes reserved / Date: 2019-04
4
Description of the machine
01
Electrical connection
07
Drip tray
02
Main switch
08
Filler neck for NEW oil (rear)
03
Bottle for gear cleaner
09
Handholds
04
Filter
10
Service cover (rear)
05
Level indicator NEW oil tank (NEW)
11
Two connection hoses
06
Level indicator USED-Oil Tank (USED)
12
Emptying hose
Description of the control panel
01
Manometer filling side
02
Sight glass filling side
03
Sight glass return side
04
Manometer return side
05
Keyboard
06
Display
07
Printer
01
02
03
04
05
06
07
08
09
10
11
12
01
02
03
04
05
06
07

® Copyright, Lube1, 2019, all rights reserved. / Misprints and technical changes reserved / Date: 2019-04
5
Technical Data
Automatic flow direction detection
Dimension
635 x 585 x 1.075 mm
Power supply
AC220V 50Hz / 110V 60Hz
Power
200W
Length of maintenance hoses
3.000 mm
Length of emptying hose
1.000 mm
Capacity new and waste oil tank
20 L
Measuring range of the scales
40 kg
Changeover accuracy
±100 ml
Capacity detergent bottle
500 ml
TFT / LCD colour display
105,5 x 67,2 mm; 480 x 272 Dots; RGB
Pressure measuring range
0~150psi (1-10Bar)
Dimension drawing
1075 mm
635 mm
585 mm

® Copyright, Lube1, 2019, all rights reserved. / Misprints and technical changes reserved / Date: 2019-04
6
INSTALLATION
The machine should only be installed by authorised personnel in accordance with the instructions.
Transport & Storage Conditions
For transport and positioning of the machine, always use
suitable stop, lifting or floor conveyor equipment and pay
attention to the centre of gravity of the machine.
The machine should only be transported in its original
packaging.
Data:
Width
mm
630
Length
mm
700
Hight
mm
1230
Storage temperature
-25 bis +55 °C
Unpacking the machine
Remove the top cover of the carton and ensure that no damage has been caused during transport.
Remove the locking bolt to remove the machine from the pallet.
To lift the m a ch i n e o ff t h e pa l l e t , u se a s u i t a ble l i f t ing device (possibly with a rope).
The packaging material used for the machine should be kept in a safe place.
Keep the packaging material out of the reach of children as it can be a source of danger.

® Copyright, Lube1, 2019, all rights reserved. / Misprints and technical changes reserved / Date: 2019-04
7
Location
The machine should be kept away from flammable and explosive materials, sunlight and intense light. The machine
should also be installed in a well ventilated place.
The machine should be operated on any concreted or similarly hard floor.
When selecting the place of installation, the guidelines and instructions of the accident prevention regulations and the
workplace ordinance must be observed in addition to the floor condition.
The machine may only be used inside enclosed spaces. It has no corresponding safety equipment (e.g. IP protection,
galvanised version, etc.).
Te m p e r at u r
4-40 °C
Humidity
50% at 40°C – 90% at 20 °C

® Copyright, Lube1, 2019, all rights reserved. / Misprints and technical changes reserved / Date: 2019-04
8
OPERATION OF THE MACHINE
Manual
ATF602
Risks for people and the environment
Read all service procedures and precautions, installation and operating instructions thoroughly.
Failure to observe these precautions or improper use of the equipment may result in property
damage, injury or death. Never allow untrained personnel to perform these procedures or operate the
equipment.
Protective measures and rules of conduct
•Before using the ATF602, read and understand the instruction manual.
•Do not smoke in the vicinity of the unit while it is in operation.
•Never use the unit near sources of heat or fire.
•Do not expose to direct sunlight or rain and use only in well-ventilated areas.
•Always switch off the unit after use.
•Keep the hoses away from rotating and hot elements such as fans, radiators, etc. during
use.
•Car exhaust gases contain various toxic and harmful gases (e.g. carbon monoxide,
hydrocarbons, nitrogen oxides, etc.). While the device is in operation, it is essential to wear
protective goggles, protective mask and protective clothing.
•To avoid injury, keep away from hot elements such as the exhaust pipe and radiator.
•When disconnecting the pipe connection of the oil line system, wrap a suitable cloth around
the connection to prevent the transmission fluid from splashing out.
•Children should stay away from the unit while it is in operation.
•To prevent damage due to improper operation, the operator should be very familiar with the
automatic transmission gear shifting system.
•The device must always be in the normal and intended standing position.
•An oil change should always be carried out by appropriately trained personnel. The quality
of the automatic transmission oil used must comply with the manufacturer's specifications.
ATH-Heinl GmbH & Co.KG or Lube1 accepts no responsibility for direct or indirect damage
caused by incorrect operation.
Behaviour in the event of faults
•Any defects found must be reported immediately to the responsible person.
First Aid
Notruf:
•In the event of an accident, remember not only to rescue the injured person and provide
first aid, but also to secure the scene of the accident.
•Report any accident immediately to the person responsible.
Maintenance, disposal
§Repairs may only be carried out by the manufacturer's customer service department or by
trained personell.

® Copyright, Lube1, 2019, all rights reserved. / Misprints and technical changes reserved / Date: 2019-04
9
Basic informations
THE MACHINE MAY ONLY BE OPERATED BY PERSONS OVER 18 YEARS OF AGE WHO HAVE UNDERGONE
SPECIALIST TRAINING AND INSTRUCTION.
THE MACHINE MAY ONLY BE USED FOR ITS INTENDED PURPOSE.
IN ORDER TO MAINTAIN THE GEAR UNIT PROPERLY, APPROPRIATE ACCESSORIES (E.G. SPECIAL
ADAPTER) MUST BE USED IF NECESSARY.
ALWAYS USE THE PRESCRIBED MATERIAL, E.G. SUITABLE OILS OR CORRECT RINSING AGENT.
BEFORE ASSEMBLY OR DISASSEMBLY, CHECK ALL COMPONENTS; THEY MUST NOT SHOW ANY SIGNS OF
DAMAGE.
DURING OPERATION YOU SHOULD ALWAYS PAY ATTENTION TO DANGERS. AS SOON AS DANGERS
OCCUR, SWITCH OFF THE MACHINE IMMEDIATELY AND REMOVE THE MAINS PLUG.
THEN CONTACT YOUR DEALER.
OPERATING THE ATF602 AND SERVICING THE AUTOMATIC TRANSMISSION OF THE
VEHICLE REQUIRES A HIGH LEVEL OF ATTENTION.
INCORRECT OPERATION OR EXPERT IGNORANCE CAN LEAD TO DAMAGE TO VEHICLES OR
INJURY TO THE OPERATOR.
ALL WARNING SIGNS MUST ALWAYS BE LEGIBLE. IN THE EVENT OF DAMAGE, THEY MUST BE REPLACED
IMMEDIATELY.

® Copyright, Lube1, 2019, all rights reserved. / Misprints and technical changes reserved / Date: 2019-04
10
General information about automatic oil change
The transmission oil within an automatic transmission should be completely replaced at regular intervals, as otherwise
a perfect functioning of the transmission can no longer be guaranteed (recommendation every 80'000 -120'000 km). In
the previous oil change procedure, only the oil in the oil pan of the automatic transmission was changed. This was
usually 3 litres to a maximum of 5 litres and this does not correspond to the complete change of the entire oil filling
quantity of the transmission. Due to the design or the omission of the drain plug from the converter including the oil
cooler, a considerable amount of old ATF oil remained in the transmission system, which led to mixing of the new ATF
oil with the dirty and used old ATF oil, as well as deposits and abrasion particles in the system. The ATF602 can flush
the gearbox, torque converter and radiator and perform a complete oil change within a short time. The oil exchange
rate is almost 100%.
WITH THE ATF602, THE OIL LEVEL OF THE AUTOMATIC TRANSMISSION CANNOT BE
CHECKED. THE VEHICLE MANUFACTURER'S INSTRUCTIONS AND INSTRUCTIONS MUST BE
OBSERVED.
Function table
Main functions
Flush
Flush/clean the AT gear system.
Flushing can only be carried out when the AT gear unit is switched on.
(Motor must run for this process)
Change
Replaces the waste oil from the AT gearbox with new oil.
Level correction
Add or drain oil from the AT gearbox
Emptying
Emptying the old and new oil tanks
Settings
Calibration
Calibration of scales for old and new oil tanks
Language
Language selection
Indication of weight
Input of the empty weight of the new and waste oil tanks
Unit
Selection of metric (kg) or British units (lb)
Diagnosis
Direct control of the solenoid valves and the internal oil pump to test
the system

® Copyright, Lube1, 2019, all rights reserved. / Misprints and technical changes reserved / Date: 2019-04
11
EXECUTION of an automatic transmission oil change
Preparation and implementation
1. Enter vehicle in Oilfinder WWW.LUBE1.SWISS to determine oil quantity and exact oil type
2. Check the temperature and OEM method of oil level control in the diagnostic device (riser pipe,
level control screw or dipstick)
3. Make a warm-up and cleaning run
4. Connect the machine to the gearbox or oil cooling lines using appropriate adapters
5. Fill the fresh oil tank with oil (oil quantity according to Oilfinder plus 3-5 litres)
6. Type in oil change quantity in the unit (dry filling quantity + at least 1.5 litres for lines and cooler
and 2-4 litres for old or heavily loaded gearboxes)
7. Start car engine and check connections for leaks
8. Check used oil in the sight glass and if it is very dark adjust and increase the change quantity
again
9. Start the ATF602 machine, the exchange procedure starts now
10. Check the oil level at the correct oil temperature after completion of the change procedure and
correct it if necessary via the ADJUST menu. Add or remove oil until the level is correct
11. Remove the adapters and restore the original condition of the oil lines
12. Pump out the waste oil tank of the ATF602 into the waste oil barrel via the DRAIN menu
13. Test drive and hold each gear manually for 2-3 seconds
Change oil types, change oil in device
1. Empty fresh oil tank via the DRAIN menu, Drain Fresh Oil Tank
2. Add a new type of oil to the fresh oil tank
3. Hold the front service hose in the waste oil barrel with an open adapter (e.g. no. 59)
4. Correct via ADJUST menu, add 0.5 L, Enter
5. Hold rear service hose with open adapter (e.g. no. 59) in waste oil barrel
6. Correct via ADJUST menu, add 0.3 L, Enter
All pipes, pump and hoses are now oiled to the new oil grade.

® Copyright, Lube1, 2019, all rights reserved. / Misprints and technical changes reserved / Date: 2019-04
12
TIPPS and Lube1 Recommendations for older vehicles / transmissions
1st tip Vehicles with high mileage
For vehicles with a mileage of 150,000 km or more and if the lighting lamp in the waste oil sight
glass on the device is no longer visible there is a lot of abrasion in the used oil. In this case it is
worth emptying the entire oil pan before the oil change procedure and refilling it with fresh oil (via
the device). Then this amount of oil is already 100% exchanged.
Proceed as follows:
Switch off the engine!
Place bucket with litre marking under oil sump. Open the drain plug of the oil pan and let the used
oil run into the provided bucket. (Again possibility for a visual check of the oil).
Read off the quantity of oil that has been omitted and add the same quantity of fresh oil +0.5 L via
the ADJUST menu (the 0.5L also ensures that there is never any underfilling).
When the process is completed, the actual oil change can be started. The quantity already
exchanged via the oil pan needs to be subtracted from the total quantity initially intended for the oil
exchange.
2nd tip Gear unit with heavy wear / dirt
For best results, increase the exchange amount of oil in heavily contaminated oils by 2-4 litres
right from the start.
Example: Total oil quantity incl. line and cooler 12 litres. Adding 2-4 litres results in a total change
quantity of 14-16 litres.
WITH THESE TWO RECOMMENDATIONS YOU GET THE BEST POSSIBLE RESULTS WITH
THE SMALLEST POSSIBLE AMOUNT OF FRESH OIL.
PROCEDURE Filter change on the machine
RECOMMENDATION: Change the internal oil filter of the machine after approx. 10 oil changes. This
ensures that the used oil cannot cause any damage to the machine. Dirty oil can damage the solenoid
valve 1 and the pump of the ATF602.

® Copyright, Lube1, 2019, all rights reserved. / Misprints and technical changes reserved / Date: 2019-04
13
CONNECTION scheme machine to automatic transmission
Pic.3
1
ATF602
3
Automatic Gear Box Cooler
2
Hoses to gear box
4
Automatic Gear Box
X
Special adapters may be required. (See adapter list on www.lube1.swiss)
PLEASE NOTE IF NECESSARY THE NECESSARY OIL TEMPERATURE DURING THE CHANGE
Flush before oil change
FOR THIS, FILL THE RINSING/CLEANING AGENT INTO THE GEARBOX USING THE DEVICE OR
THE SYRINGE AND THEN GO ON A CLEANING TRIP OF APPROX. 15 MIN. DURING THIS
DRIVE MANUALLY SHIFT ALL GEARS SEVERAL TIMES ALSO REVERSE GEAR.
THE INSTRUCTIONS OF THE VEHICLE MANUFACTURER AND THOSE OF THE
RINSING/CLEANING AGENT OF THE MANUFACTURER MUST BE STRICTLY OBSERVED!
WHEN CHANGING THE AT-GEAR OIL CORRECTLY, THE AUTOMATIC OIL QUANTITY
ACCORDING TO OILFINDER MUST BE ADDED WITH APPROX. 2 TO 3 LITRES OF ADDITIONAL
OIL FOR PIPES AND COOLERS.
X

® Copyright, Lube1, 2019, all rights reserved. / Misprints and technical changes reserved / Date: 2019-04
14
SHIFT THE GEARBOX SEVERAL TIMES
DURING RINSING.

® Copyright, Lube1, 2019, all rights reserved. / Misprints and technical changes reserved / Date: 2019-04
15

® Copyright, Lube1, 2019, all rights reserved. / Misprints and technical changes reserved / Date: 2019-04
16
Correct filling level (drain oil)
DURING THE PROCESS, THE CAR'S ENGINE MUST BE RUNNING.
THE OPERATOR MUST BE IN THE CAR.
MAKE ABSOLUTELY SURE THAT IF THE VEHICLE GIVES AN ERROR MESSAGE DURING THIS
PROCESS, SWITCH OFF THE ENGINE IMMEDIATELY.
Warning: Take care not to underfill the
transmission
Take out max 0.5 Liter and check Level again!
SWITCH OFF THE ENGINE IMMEDIATELY
AFTER THE OPERATION.

® Copyright, Lube1, 2019, all rights reserved. / Misprints and technical changes reserved / Date: 2019-04
17
AFTER THE PROCESS IT IS RECOMMENDED TO CHANGE THE GEAR OIL FILTER.
WHEN CHANGING THE FILTER, AN ADDITIONAL QUANTITY OF OIL MAY BE REMOVED FROM
THE GEARBOX.
THIS QUANTITY MUST BE TAKEN INTO ACCOUNT WHEN REFILLING.
Correct filling level (add oil) after gearbox filter change
ENTER TOTAL OIL QUANTITY (OIL DRAINED + QUANTITY FROM OIL PAN if necessary)
(E.G. 4 LITRES COULD BE DRAINED, 1 LITRE WAS STILL IN THE OIL SUMP, 5 LITRES HAVE
TO BE ADDED AGAIN) AT THE END OF THE TEST IT IS MANDATORY TO CHECK THE OIL
LEVEL AND CORRECT IT USING THE DEVICE IF NECESSARY.
Fill level control is mostly while the engine is running and at the temperature specified by the manufacturer. (Can be
seen in the car manual or in the diagnostic unit).
Either via riser pipe, measuring rod or level control screw.
Via the menu level correction add oil as long as necessary or if necessary also suck off oil until the level is correct.

® Copyright, Lube1, 2019, all rights reserved. / Misprints and technical changes reserved / Date: 2019-04
18

® Copyright, Lube1, 2019, all rights reserved. / Misprints and technical changes reserved / Date: 2019-04
19
Completion of the oil change
•Switch off engine
•Disconnect the device from the adaption, remove the adapter and restore the original connection on the gear
unit.
•Start engine and check for leaks.
•Go on test drive
Emptying (recommendation after each service)

® Copyright, Lube1, 2019, all rights reserved. / Misprints and technical changes reserved / Date: 2019-04
20
System settings / Calibration
Calibration of the weigh for new and
used oil tanks.
Enter and confirm the appropriate
weight using the keypad.
First a weight between 5 and 10 kg,
then a weight between 11 and 15 kg.
Table of contents
Other Lube1 Service Equipment manuals