manuals.online logo
Brands
  1. Home
  2. •
  3. Brands
  4. •
  5. Lumens
  6. •
  7. Document Camera
  8. •
  9. Lumens DC-A11 User manual

Lumens DC-A11 User manual

D
DC
C-
-A
A1
11
1
Q
Qu
ui
ic
ck
k
S
St
ta
ar
rt
t
G
Gu
ui
id
de
e
2.1 System requirements
2.2 Install Ladibug™
1. Insert the software CD into your
computer.
2. The software installation program will
automatically launch. Please select
[Install Ladibug] to begin installation.
3. Please follow the instructions, then press
[Next].
4. Press [Yes] to create a Ladibug™
shortcut on your desktop.
5. Click [NO], then press [Finish] to cancel
the restart. (Refer to Fig. 1)
[NOTE: Please restart the computer only
when the installation of Wireless LAN
Utility is completed.]
2.3 Installing Wireless LAN Utility
1. Please select [Wireless LAN Utility] to
begin installation.
2. Select Language.
3. Please follow the instructions, then press
[Next].
4. Please click the [Finish] button to restart
your computer. (Refer to Fig. 2)
TFig. 1
TFig. 2
Continued on the next pageT
Important
Please activate your warranty at www.lumens.com.tw/reg.
To download the latest version of Quick Start Guide, multilingual user
manual, software, or driver, etc., please visit Lumens™
http://www.lumens.com.tw/goto.htm
1. Package Contents
Î
Windows XP/Vista/7 User
5100117-51
A
PR, 2011
DC-A11 Quick Start
Guide
To download this
manual in other
languages, visit
Lumens website.
Software CD Wireless USB
Dongle for PC
USB connection
cable
AC Adapter Power Cord
The package contents are subject to change without notice.
2. Software Installation Guide
Windows XP Windows Vista/Windows 7
yMin CPU: P4 2.8 GHz
yMin Memory: 512 MB
ySupporting Direct X 9
yMin Resolution: 1024 x 768
yMin Hard Drive Space: 100 MB
yWindows XP SP2 or above
yMin CPU: P4 2.8 GHz
yMin Memory: 1 GB (32-bits)/2 GB
(64-bits)
ySupporting Direct X 9
yMin Resolution: 1024 x 768
yMin Hard Drive Space: 100 MB
3. Installation
USB
connection
cable
Important Information
To ensure successful installation, please be sure to follow each of the following steps.
The MAC operation system is supported for a USB cable connection directly to a DC120 and not
yet supported for a wireless connection.
The content of CD may be changed. If you cannot find the desired files in the CD, please contact
the distributor or download from Lumens™ website.
SContinued from the previous page
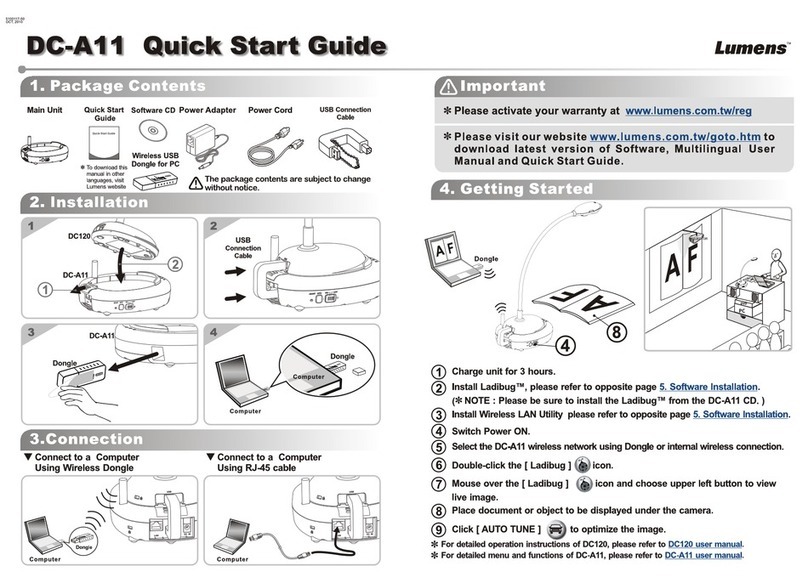
Charge the unit for 3 hours before the first use.
Switch power to [ON]. (Note: When the unit is fully charged, indicator lights blue.)
To start connection, please follow the steps of Section 5.1 Auto connection.
Modify SSID before the first use. Please follow the steps of 5.2 Change the SSID for
modification.
Double click on [Ladibug] icon to activate Ladibug™ Software.
Move the mouse to [Ladibug] icon, and the main function menu will be displayed.
Place an object to be displayed under the camera.
Press [Preview] to display the setting screen of POWER Frequency, and
follow the screen instructions. A live image is displayed when the setting is
finished.
(This setting is required for the first use only.)
Press [AUTO TUNE] button to optimize the image.
For more information on the operation of DC120, please refer to DC120 User Manual.
For more information on the setting of DC-A11, please refer to DC-A11 User Manual.
5.1 Auto connection
1. Press the WPS button of DC-A11, as shown in Fig. 1.
2. Within 30 seconds, press and hold the WPS button of Dongle for about 5 seconds, as
shown in Fig. 2.
[Note] The WPS indicator of DC-A11 will now flash red, and then light blue after the
connection is made. (Refer to Fig. 3)
SFig. 1 SFig. 2 SFig. 3
3. The connection is started when the screen like Fig. 4 displays. The connection will
complete when the window closes.
4. Double click the icon of Wireless LAN Utility. (A screen indicating successful
connection is as shown in Fig. 5)
XFig. 4
XFig. 5
5.2 Change the SSID
1. Open the Internet Explorer webpage browser, and enter [192.168.2.1] (default) in the
address bar.
2. Enter the Login Name [Admin].
3. Enter the default password [Admin] and click [Login].
4. Enter the [Basic] page (Please refer to Fig. 6).
5. Enter new [SSID], and click [Apply] to apply the changes.
6. Please make a connection again according to the steps of 5.1 Auto connection.
XFig. 6
3. Installation
Computer
Computer
5. Start Wireless Network Connection
WPS indicator on the
DC-A11
4. Start Using
Computer
Projector
2. Software Installation Guide

Other manuals for DC-A11

3

Other Lumens Document Camera manuals

Lumens DC133 User manual

Lumens

Lumens DC133 User manual

Lumens DC136 User manual

Lumens

Lumens DC136 User manual

Lumens 3D101 User manual

Lumens

Lumens 3D101 User manual

Lumens PS650 User manual

Lumens

Lumens PS650 User manual

Lumens DC260 User manual

Lumens

Lumens DC260 User manual

Lumens DC-A11 User manual

Lumens

Lumens DC-A11 User manual

Lumens DC145 Quick start guide

Lumens

Lumens DC145 Quick start guide

Lumens CL510 User manual

Lumens

Lumens CL510 User manual

Lumens PC170 User manual

Lumens

Lumens PC170 User manual

Lumens PS400 User manual

Lumens

Lumens PS400 User manual

Lumens DC120 User manual

Lumens

Lumens DC120 User manual

Lumens DC192 User manual

Lumens

Lumens DC192 User manual

Lumens DC166 User manual

Lumens

Lumens DC166 User manual

Lumens DC172 User manual

Lumens

Lumens DC172 User manual

Lumens DC145 User manual

Lumens

Lumens DC145 User manual

Lumens PS753 User manual

Lumens

Lumens PS753 User manual

Lumens DC166 User manual

Lumens

Lumens DC166 User manual

Lumens DC-F20 User manual

Lumens

Lumens DC-F20 User manual

Lumens PS660 User manual

Lumens

Lumens PS660 User manual

Lumens PS750 User manual

Lumens

Lumens PS750 User manual

Lumens DC170 User manual

Lumens

Lumens DC170 User manual

Lumens DC211 User manual

Lumens

Lumens DC211 User manual

Lumens DC-W80 User manual

Lumens

Lumens DC-W80 User manual

Lumens CL510 User manual

Lumens

Lumens CL510 User manual

Popular Document Camera manuals by other brands

RM RM Eye user manual

RM

RM RM Eye user manual

Orcam OrCam manual

Orcam

Orcam OrCam manual

Rehan Journey user manual

Rehan

Rehan Journey user manual

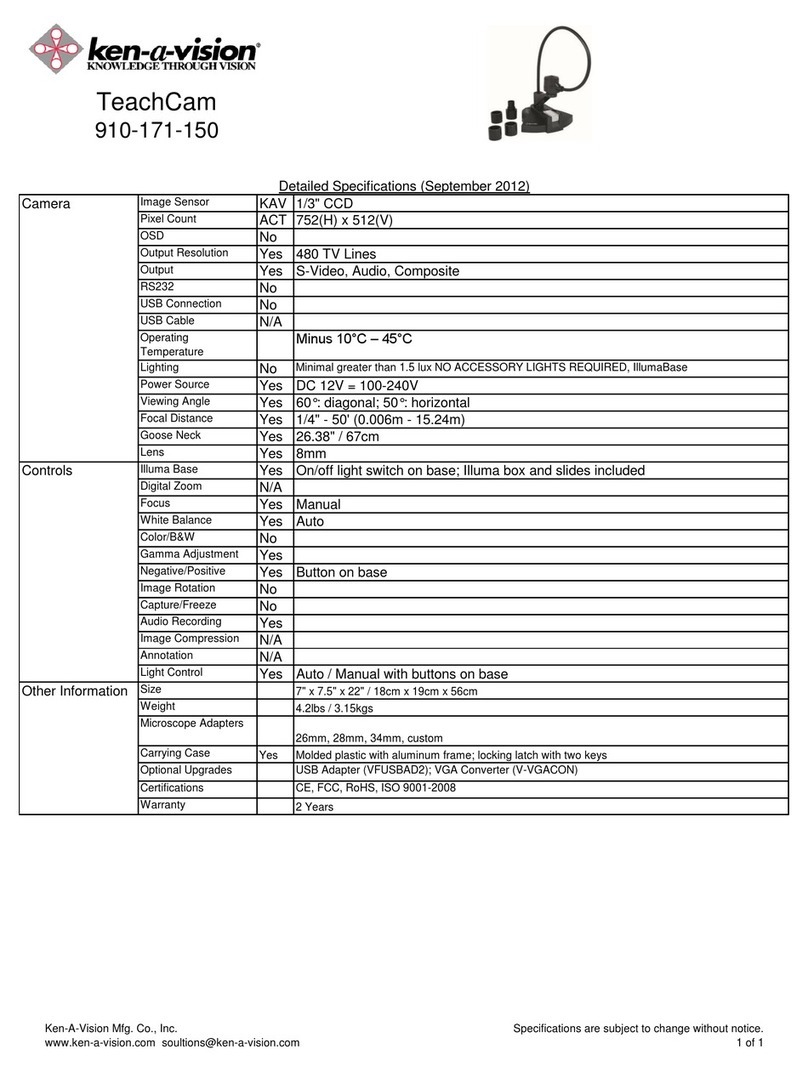
Ken A Vision Video Flex 7610 specification
Ken A Vision

Ken A Vision Video Flex 7610 specification

Edirol DV-7PR owner's manual

Edirol

Edirol DV-7PR owner's manual

Avermedia AVerVision SPB370 user manual

Avermedia

Avermedia AVerVision SPB370 user manual

AVer M5 quick start guide

AVer

AVer M5 quick start guide

Epson ELPDC06 Document Camera For serial numbers beginning with LQZF - DC-06 Document... quick start guide

Epson

Epson ELPDC06 Document Camera For serial numbers beginning with LQZF - DC-06 Document... quick start guide

SMART SMART 330 user guide

SMART

SMART SMART 330 user guide

Qomo QPC100W manual

Qomo

Qomo QPC100W manual

Avermedia AVerVision CP155 Quick reference guide

Avermedia

Avermedia AVerVision CP155 Quick reference guide

Dukane DVP510 user manual

Dukane

Dukane DVP510 user manual

Avermedia AVerVision530 user manual

Avermedia

Avermedia AVerVision530 user manual

SMART Document Camera 280 Installation and user guide

SMART

SMART Document Camera 280 Installation and user guide

Huawei RP100 installation guide

Huawei

Huawei RP100 installation guide

Ken A Vision FlexCam 2 910-171-200 specification

Ken A Vision

Ken A Vision FlexCam 2 910-171-200 specification

Avermedia AVerVision CP355 user manual

Avermedia

Avermedia AVerVision CP355 user manual

Elmo EV-368 Operation manual

Elmo

Elmo EV-368 Operation manual

manuals.online logo
manuals.online logoBrands
  • About & Mission
  • Contact us
  • Privacy Policy
  • Terms and Conditions

Copyright 2025 Manuals.Online. All Rights Reserved.