LuminAir Products CL-17 User manual

Full-time Intelligent Charger (Model No CL-17)
User Manual
Please read the entire manual before using this product.
I.Features
1. Charge all Lithium batteries (3.6V/3.7V & 7.2V/7.4V) for Cameras, Cell phones, Camcorders, PDAs,
iPods (by 5V USB) and AA/AAA Ni-MH rechargeable batteries.
2. Intelligent Polarity Detection.
3. Fast/trickle charge and maintain in full charge.
4. Transfer power from Lithium and AA/AAA batteries via USB output port to any USB rechargeable
devices.
5. Manual rejuvenating function for over-discharged Lithium and AA/AAA Ni-MH batteries, or batteries
that have not been used for long time.
6. Five (5) user-friendly, easy-to-read LED charging indicators.
7. Charge up to 3 different hand-held devices simultaneously.
8. Built-in safety protections, Over Voltage, Short Circuit and over-time.
II.Contents
zCharger main unit
zAC Adapter
z12V Car Cigarette Adapter
zPlastic tube for AAA type battery (2)
III.ImportantSafetyTips
1.SAVE THIS INSTRUCTION for future operating and safety purposes.
2. Try to void use of extension cord unless absolutely necessary.
3. To reduce the risk of electric shock, unplug charger from outlet before attempting any
maintenance or cleaning.
4. Do not use charger in damp/wet locations or directly under the sun.
IV.Parts
1

V. Lithium-ion Battery Charging Mode
DO NOT connect the charger with the adapter before (Lithium) battery polarities are detected
and Ready LED (13) is lit.
1. Remove the Lithium battery from its device, place it in the tray (18) of the charger.
2. Check polarity by adjusting the spring contactors with battery charging connections until the LED
indicator (13) turns on.
zFor Batteries with charging connections on the side panel:
Adjust the spring contactors pointing horizontally by pressing both sides of “Angle stop
releasing knob” (4), make contact with the battery charging connections until the Blue LED
indicator (13) turns on; then affix the battery with the Rear Plate Fixing Bar (8) or upper cover
( 10). (Fig. 2.1)
Blue LED (13)
2
●For Batteries with charging connections on the flat panel:
Fig. 2.1
Adjust the spring contactors pointing up (vertically) by pressing both sides of “Angle stop
releasing knob” (4), make contact with the battery charging connections until the Blue LED
indicator (13) turns on; then affix the battery by using upper cover (10). (Fig. 2.2)
3. Connect AC adapter to the charger, plug into the AC power outlet to start charging. The green
Power LED indicator (12) and Li-ion battery charging indicator (15) are lit. (Fig. 3.1)
Blue LED (13) Fig. 2.2
AC power outlet
Fig. 3.1
•If use in the vehicle, now you can plug in 12V Cigarette adapter to start charging.

4. When the charger is powered by AC or 12V vehicle as power source, it can charge one (1)
lithium-ion battery (or 2 AA /AAA Ni-MH batteries) in tray and two (2) hand-held devices via USB
output port simultaneously.
5. When the Charger is charging devices via USB port, the Blue LED (16) will be lit. When the
charging is completed, the Blue LED will be off.
6. Some lithium batteries (Sony, JVC, Panasonic, etc…) come with “security charging terminal”
marked with letter “C”, DO NOT contact these terminals with spring contactors during charging to
avoid irrevocable damage. (Fig. 8.1)
Fig. 8.1
Note: To void damaging batteries with “security charging terminal”, DO NOT connect the
charger with the adapter before (Lithium) battery polarities are detected and Ready
LED (13) is lit.
VI.ChargingIndication
3
1. When lithium-ion battery polarities are detected and secured, the Blue LED (13) will be lit; push
(8) forward and press the Cover Holder (10) to affix the battery.
(13)
2. When connect AC/DC power adapter to power input socket (9), the Green LED (12) will be lit;
the Charger is powered and ready to charge. When the Red LED (14) or (15) is lit, the installed
battery is charging.
(12) (13) (14) (15)
(9)
3. When the Red LED (14) or (15) turns into Green, the battery is about 95% charged; it will then
start trickle-charging for additional 30 minutes to reach maximum charged.
VII. Ni-MH Battery Charging Mode
Insert 2 AA or AAANi-MH batteries into battery tray (19), the Red LED (14) will be lit. When the Red
LED (14) becomes green, the batteries are fully charged. If the red LED (14) is flashing when battery
is installed, it indicates that the batteries are non-rechargeable alkaline batteries or aging Ni-MH
rechargeable batteries.
Note:
¾This charger will not charge with single Ni-MH battery, has to charge by pair.
¾Insert AAA batteries into the plastic cartridge in order to charge.

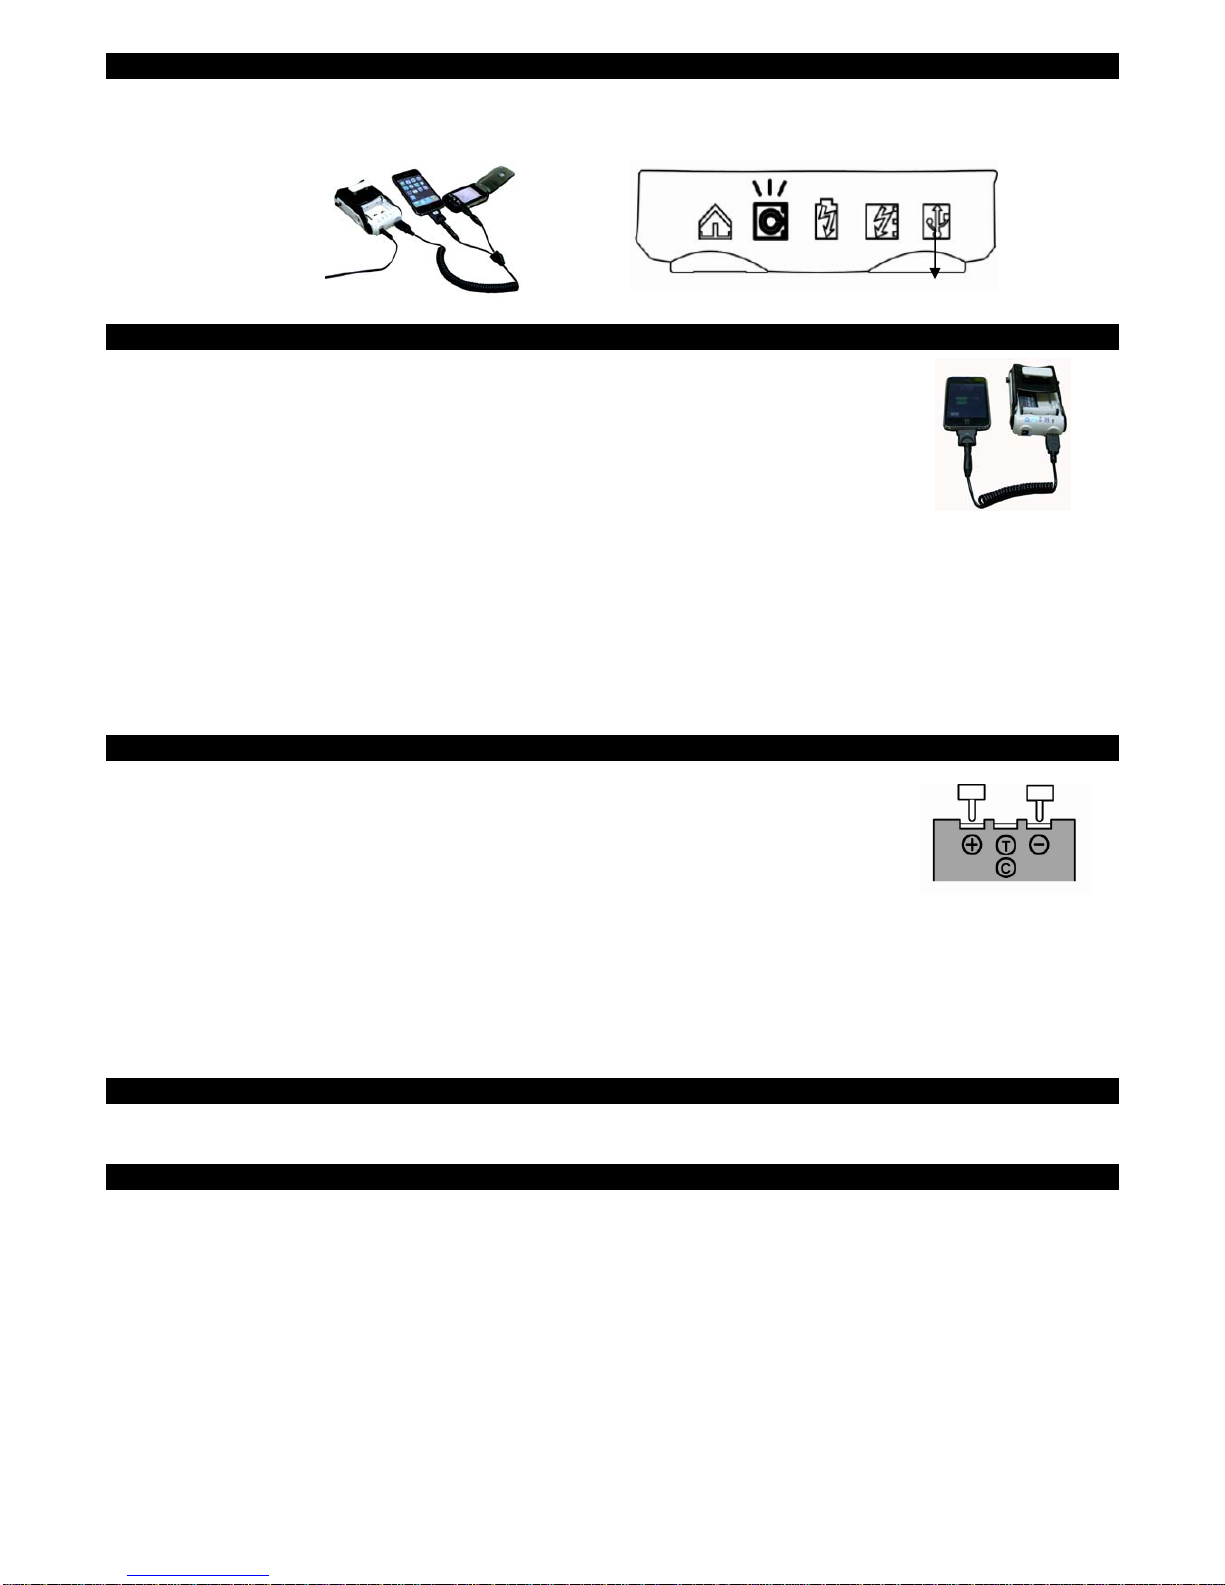
VIIII. USB Port Charging
All hand-held devices with tip connectors via USB DC 5V can be charged by this Charger. Connect the
device to USB output port (17); the Blue LED (16) will be lit. When the charging is completed, the Blue
LED will be off.
(16)
IX.PowerTransferChargingMode
1. Insert a fully charged spare battery into battery tray and secure
connections, the Blue LED (13) will be lit; then plug in any USB
rechargeable hand-held devices into the USB power output port (17),
the Blue LED (16) will be lit. The Charger starts transferring the spare
battery as power source via 5V USB to charge any USB devices. When
charging is completed, the Blue LED will be off.
2. To avoid over discharge, remove the spare battery as soon as the Blue LED (13) is off. Replace
fresh battery to continue charging if necessary.
Note:
¾When 2 AA / AAA batteries are used as power source in Power transfer mode, no LED will be
lit.
¾The Blue LED (13) will turn off when power transfer via USB is completed (unless the batteries
to be charged might be over-discharged).
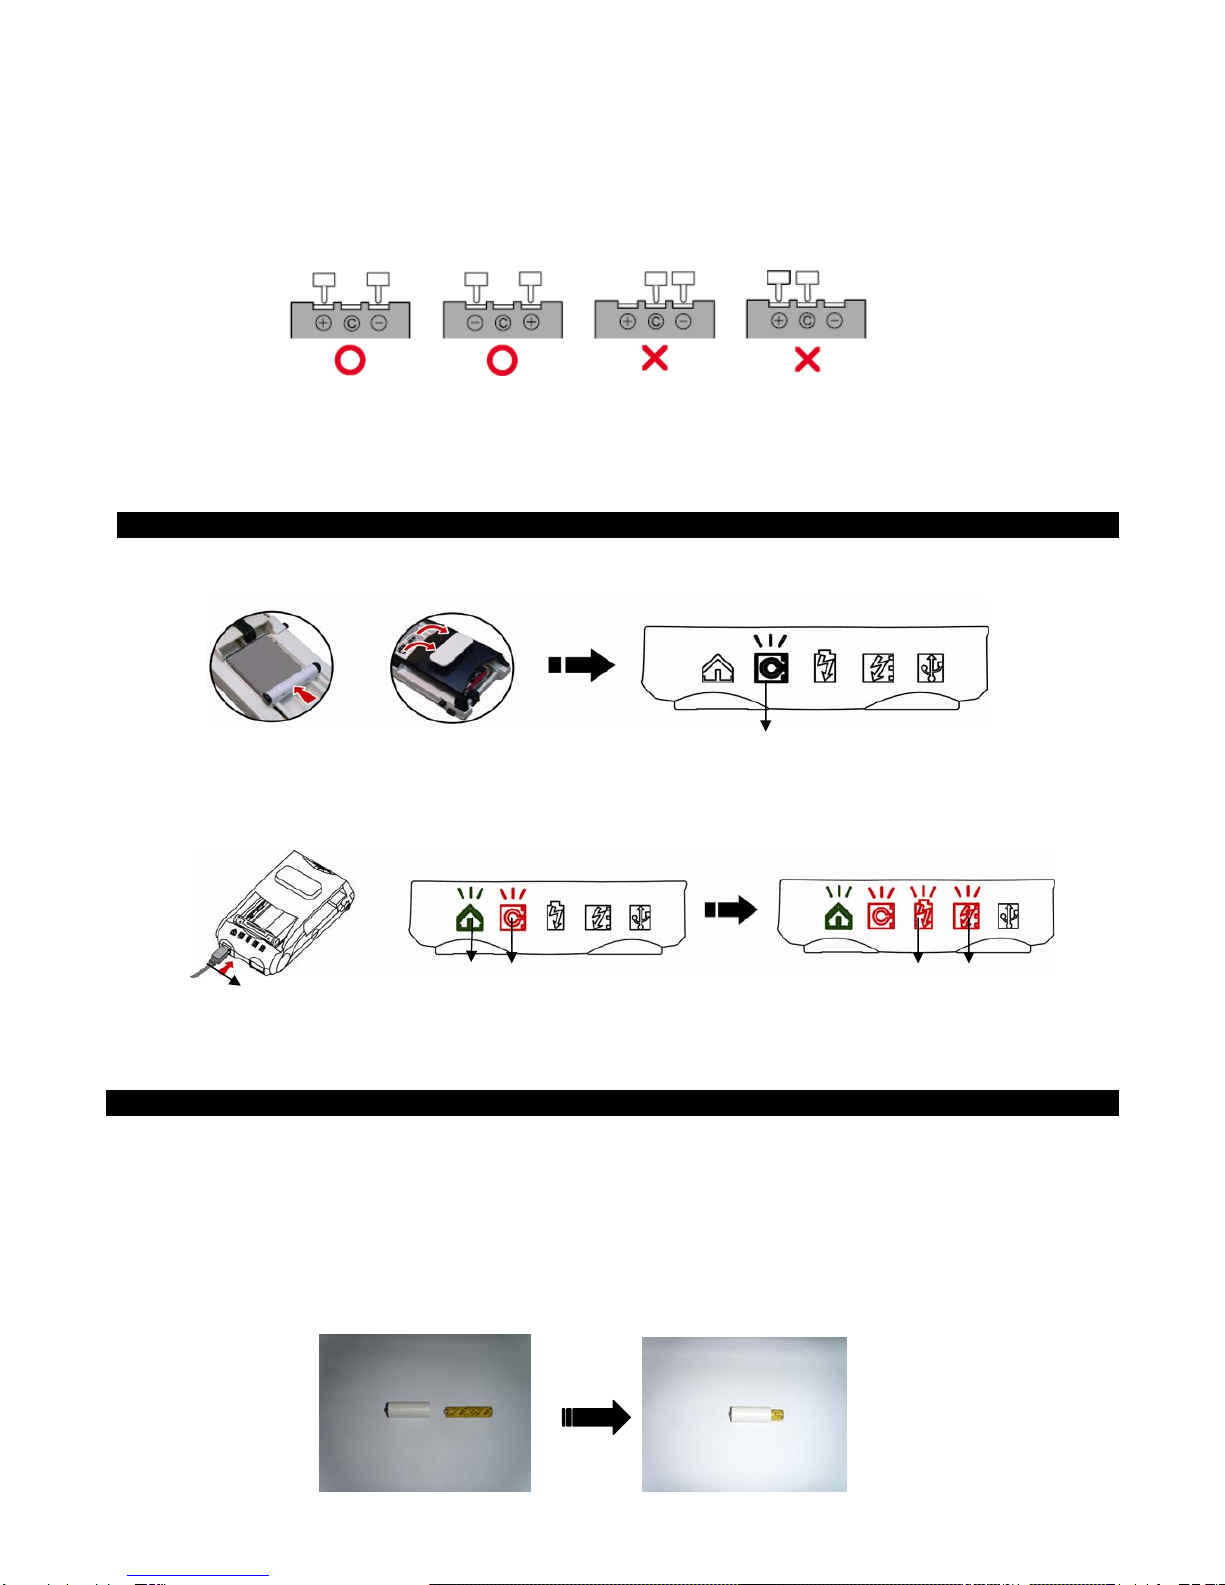
X. Manual Rejuvenating Function
If the battery has not been used for a long time or over-discharged
(exhausted), the Blue LED (13) will not turn on even if battery is correctly
connected. Place the two spring contactors in contact with the positive (+)
and negative (-) of the battery (Fig. B), then plug AC adapter into the
power input socket (9), the Green (12), Blue (13) and Red (15) LEDs will
be lit and start charging. (Fig. B)
If the Red LED (14) does not turn on after theAA/AAA Ni-MH batteries are installed, it indicates that
the batteries are over-discharged. Plug AC/DC adapter into the power input socket (9), press and
hold the “Revive” button (11) on the Charger for two (2) seconds until the Red LED (14) turns on, then
release the button (11) to start charging.
XI.CAUTION
zThis charger is only applicable to 3.6 / 3.7V or 7.2 / 7.4 V lithium-ion battery, AA/ AAANi-MH
rechargeable battery.
XII. Specifications
Input Voltage: AC100~240V / DC 12V
Output Voltage: 4.25 or 8.5V and USB DC 5V.
Battery Types: 3.6 / 3.7V and 7.2 / 7.4 V (Lithium-ion), AA / AAA Ni-MH rechargeable batteries,
AA / AAA alkaline batteries (Power transfer charging only).
Charge time: 1.5~3 hrs (depending on battery capacity)
Materials: Plastic ( ABS、PC、POM)
Max charging current: 0.7 A / 1A (Lithium-ion/Ni-MH)
Dimensions: 12.3 x 7.5 x 4.5 (Lx W x H) Cm
Weight: 130 g
4

5
Table of contents
Other LuminAir Products Batteries Charger manuals