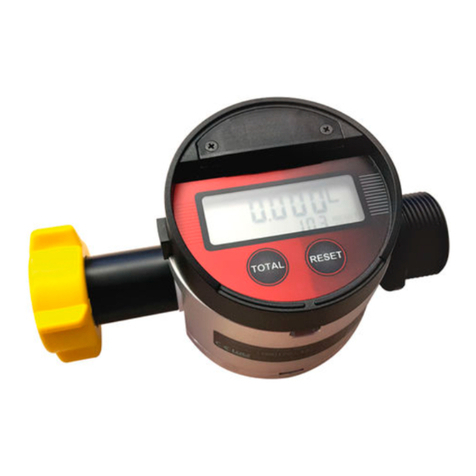
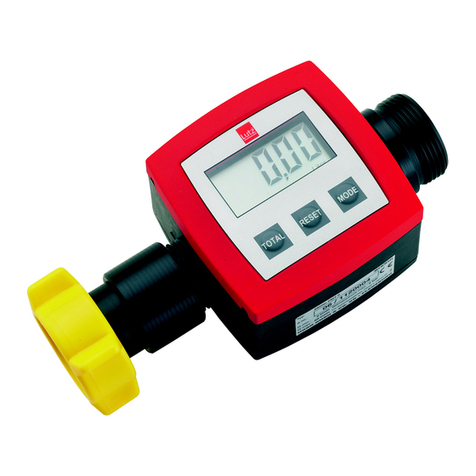
Lutz TR3-PP User manual

Translation of the original instructions
FLOW METER
Type
TR3-PP
TR3-PVDF
Read this operating instructions before start up!
To be retained for future reference.
en

2
0697-001 TR3 - 10/19
en
Table of Contents
1. Concerning this manual.................................................................................................................... 4
1.1 Terms........................................................................................................................................... 4
1.2 Target groups ............................................................................................................................. 4
1.3 Associated applicable documents .............................................................................................. 4
1.4 Warnings and symbols ............................................................................................................... 5
1.5 Latest state ................................................................................................................................. 5
1.6 Copyright .................................................................................................................................. 5
2. Safety ............................................................................................................................................ 6
2.1 General safety information......................................................................................................... 6
2.2 Proper use .................................................................................................................................. 8
2.2.1 Technical data .................................................................................................................... 9
2.2.2 Liability .............................................................................................................................. 9
2.2.3 Prevention of obvious misapplication (examples)........................................................... 10
3. Conguration.................................................................................................................................. 10
3.1 Identication ............................................................................................................................ 10
3.2 Display...................................................................................................................................... 11
3.3 Keypad...................................................................................................................................... 11
3.4 Battery...................................................................................................................................... 11
4. Transport and storage..................................................................................................................... 11
4.1 Transport .................................................................................................................................. 11
4.2 Storage ..................................................................................................................................... 11
5. Assembly ......................................................................................................................................... 12
5.1 General..................................................................................................................................... 12
5.2 Assembly with drum pump connection G1 .............................................................................. 12
5.3 Assembly with drum pump connection G1 1/4 ........................................................................ 13
5.4 Assembly at nozzle PP/PVDF with standard hose connector and hose connector twistable ... 14
5.5 Rotating the display.................................................................................................................. 15
6. Operation........................................................................................................................................ 15
6.1 Description of display............................................................................................................... 16
6.2 Dispensation mode................................................................................................................... 16
6.2.1 Dispensation active.......................................................................................................... 16
6.2.2 No active dispensation .................................................................................................... 17

3
0697-001 TR3 - 10/19
en
7. Programming the meter ................................................................................................................. 18
7.1 Change over into programming mode..................................................................................... 18
7.2 Setting the unit of measurement ............................................................................................. 18
7.3 Setting the meter type.............................................................................................................. 19
7.4 Setting the calibration factor.................................................................................................... 19
7.4.1 Calibration ....................................................................................................................... 19
7.4.2 Calibration with measuring vessel................................................................................... 20
8. Maintenance ................................................................................................................................... 21
8.1 Cleaningtheowmeter ........................................................................................................... 21
8.2 Changing the batteries............................................................................................................. 21
9. Error messages – What do I do when...?......................................................................................... 22
10.Waste disposal ................................................................................................................................ 22
10.1 Return of batteries .................................................................................................................. 22
Spare part list .................................................................................................................................. 24-26
Declaration of conformity..................................................................................................................... 27

4
0697-001 TR3 - 10/19
en
1. Concerning this manual
This manual
• is part of this product
• is valid for all mentioned series
• describes the safe and proper use in all operating stages
1.1 Terms
User: Single person or organisation who is using the products e.g. customer, user, assistant
Children: Young persons up to and including the age of 14 years.
1.2 Target groups
Target group Task
User ►Retain these operating instructions at the product’s place of use for
future reference.
►Demandthestatoreadandobservetheseinstructionsandthe
additional valid documents, in particular the safety information and
warnings.
►Observe additional regulations and instructions concerning the
plant.
Qualiedpersonnel,installer ►Read, observe and follow these instructions and the additional valid
documents, in particular the safety information and warnings.
Tab. 1: Target groups and their tasks
1.3 Associated applicable documents
None

5
0697-001 TR3 - 10/19
en
1.4 Warnings and symbols
Warning Level of risk Consequences in case of
non-compliance
DANGER direct danger death or serious injury
WARNING possible direct danger death or serious injury
CAUTION possible dangerous situation light injury
NOTICE possible dangerous situation damage of property
Tab. 2: Warnings and consequences in case of non-compliance
Symbol Meaning
Safety information
►Comply with all measures that are marked with a safety sign to prevent injuries or
death.
iInformation / Recommendation
►What to do
→Cross reference
3Requirement
Tab. 3: Symbols and meaning
1.5 Latest state
Pleasendthelateststateofthisoperatinginstructionunderwww.lutz-pumpen.de.
1.6 Copyright
The content of this operating instruction and the images contained in them are subject to the copyright
protection of Lutz Pumpen GmbH.

6
0697-001 TR3 - 10/19
en
2. Safety
The manufacturer will not be held responsible for any damages resulting from non-compliance of
the overall documentation, in particular for damages in case of non-compliance of the operating
instructions.
2.1 General safety information
Observe following regulations before accomplishing all activities.
Product safety
Theowmeterisconstructedinconformitywiththestateoftheartandapprovedsafety-related
standards. Danger however can occur during use for life and health of the user or third parties or
damageoftheowmeterandothermaterialassets.Therefore:
• Operatetheowmeteronlyinatechnicallysoundstate,foritsproperuse,andconsciousofsafety
and hazards taking into account these instructions.
• Ensure that these instructions and all associated applicable documents are complete, legible, and
stored in a place that personnel can access at all times.
• Refrain from any manner of working that endangers personnel or uninvolved third parties.
• Inthecaseofasafety-relevantmalfunction,stoptheowmeterimmediatelyandenlistaresponsible
person to rectify the malfunction.
• In addition to the overall documentation, observe the statutory or other safety and accident
prevention regulations, as well as the valid standards and guidelines of the respective operating
country.
Modications
Unless the manufacturer has provided its consent in writing, the manufacturer is not liable for
interventionsperformedbytheuser(modications)ontheproduct,suchasconversion,alteration,new
design,etc.Modicationsnotagreedwiththemanufacturermayhavethefollowingeects,among
others:
• Functional impairments on the appliance or plant
• Damage to the appliance and other property damage
• Environmental damage
• Personal injuries right through to death

7
0697-001 TR3 - 10/19
en
Duties of the operator
Safety-conscious working
• Operatetheowmeteronlyinatechnicallysoundstate,foritsproperuse,andconsciousofsafety
and hazards taking into account these instructions.
• Ensure observance and monitoring of:
- Proper use
- Statutory or other safety and accident prevention regulations
- Safety provisions in handling hazardous substances
- Valid standards and guidelines in the respective country of operation
• Provide protective equipment.
Personnel qualication
• Ensurethatpersonneltaskedwithworkontheowmeterhavereadandunderstoodthese
instructions and all associated applicable documents, particularly safety, maintenance and servicing
information, before they start work.
• Clarify responsibilities, competencies and monitoring of the personnel.
• Ensurethatallworkiscarriedoutbytechnicalqualiedpersonnelonly:
- Assembly, servicing, maintenance work
- Work on the electrics
• Personneltobetrainedmustonlyworkontheowmeterunderthesupervisionoftechnical
personnel.
Statutory warranty
• Duringtheguaranteeperiod,obtainthemanufacturer'spermissionformodications,maintenance
work or alterations.
• Use only original parts.
Duties of the personnel
• Observethenoticesontheowmeterandmaintaintheminalegiblestate.
• Use protective equipment where necessary.
• Onlyperformworkontheowmeterduringdowntime.
• Forallassemblyandmaintenanceworkontheowmeter,removethebatteries.
• Aftercompletingalltheworkontheowmeter,remountthesafetydevicesinaccordancewith
specications.

8
0697-001 TR3 - 10/19
en
2.2 Proper use
• TheowmeterTR3isaowmeterforowingliquidsbasedonthemeasuringprincipleofaturbine
wheelmeterwheregaugingmeteringisnotrequired.Theowmeterissuitableforstationaryuseas
wellasformobilellingprocess.
TheowmeterTR3turbinemeterconsistsofameasuringchamberwithaturbineandanelectronic
housing which contains the evaluation electronics, display, and keypad. The turbine is equipped with a
magnet which transfers the measurement pulses to a reed switch on the evaluation electronics when a
mediumowsthroughit.
TheowmeterTR3hasanon-resettabletotalvolumememoryand8resettablepartialvolumememory
slots.
!DANGER
The metering of non-compatible liquids damages the ow meter.
Splashing liquid can cause injury.
Check by means of the materials indicated in the technical data and a resistance table (e. g. Lutz
resistancetable)whethertheowmeterissuitableforthedeliveredliquid.
!DANGER
Fire and explosion hazard due to delivered liquid!
Combustion hazard. Blast wave: Flying parts can kill.
Theowmeterisnotexplosionproof.Itisnotallowedtoputtheowmeterintooperationinsideof
hazardouslocationandwithexplosionhazard,oxidizing,highlyoreasilyammableliquids.
!DANGER
Exceeding the temperature range and the operating pressure causes damage to the ow meter.
Splashing liquid or ying parts can cause injury.
The ranges indicated in the technical data for temperature of liquid and operating pressure have to be
observed.

9
0697-001 TR3 - 10/19
en
2.2.1 Technical data
TR3-PP TR3-PVDF
Material Cover PC
Keypad PES
Impact protection NBR
Material (in contact with
the medium)
Measuring chamber PP PVDF
Rotor PP PVDF
Shaft Hastelloy C-22
Bearing ball PTFE
Sealing PTFE
Volumeowrange 5 – 120 l/min
Range of viscosity 0.8 – 40 mPas
Operating pressure (max.) 10 bar
Burst pressure (min.) 20 bar
Measuring accuracy (uncalibrated) * ± 2%
Measuring accuracy (calibrated) * ± 1%
Repeating accuracy ± 0.5 %
Connection thread G 1 G 1 1/4 G 1 G 1 1/4
Type of protection IP 65
Battery Two 1.5 V batteries (AAA) replaceable
Temperature range Operation: -10 °C - +50 °C
Storage: -20°C - +70°C
Dimensions approx.: 85 x 123 x 52 mm
Weight approx.: 0.22 kg 0.24 kg
* Testassembly:Medium:water/diesel,owinthepreferreddirection,settlingsectionof0.2mbefore
and after meter
2.2.2 Liability
If the product and supplied accessories are used for other purposes than the intended purpose, it is the
responsibilityoftheusertocheckthesuitabilityandadmissibility.Productusenotconrmedinwriting
by the manufacturer absolves the manufacturer of any liability.
The manufacturer is not liable for consequences of incorrect treatment, use, maintenance, servicing
and operation of the appliance, as well as normal wear and tear. The same applies if faults arise from
interventionorcongurationsonthepartoftheusernotconrmedbythemanufacturer.

10
0697-001 TR3 - 10/19
en
2.2.3 Prevention of obvious misapplication (examples)
!WARNING
Equipment misuse can cause the meter to rupture or malfunction and cause serious injury.
• Donotuseforpumpingammableliquids.
• Donotoperatetheowmeterinexplosionhazardarea.
• Do not leave the equipment unattendedly while dispensing.
• Check equipment daily. Repair or replace worn or damaged parts immediately.
• Useonlyuidsandsolventsthatarecompatiblewiththeequipment.Readalluidandsolvent
manufacturer's warnings.
• Sealalluidconnectionsbeforeoperatingthisequipment
• Donotstopordeectleakswithhands,body,glovesorrags.
• Do not dispense liquid towards any person or any part of the body.
3. Conguration
3.1 Identication
Rating plate
Fig. 1: Rating plate
1Type
2Serial number
3Year of construction (last two digits of the serial number e.g. -18 for 2018)
4 CE-Identication

11
0697-001 TR3 - 10/19
en
3.2 Display
LCD display with
- Four-digit volume display with digits measuring 17 mm in height for current dispensation
- Seven-digit display with digits measuring 6 mm in height for totalizers
- Displayinliterunits(optional:GAL,PTS,QTS)andowrate(l/min)
- Low battery alert on display.
Minimum digital step of the measured value is 0.01 litres, minimum digital step of non-resettable
totalizer is 1 litre.
3.3 Keypad
Front membrane with three keys: "Reset", "Mode" and "Light".
3.4 Battery
Two1.5Vbatteries(AAA)withaminimumservicelifeofapprox.5yearsforaowquantityof1,000,000
liters during this period without use of the illumination. If the illumination is used, the service life
decreases with frequency of use.
The battery can be replaced after opening the housing (→chapter 8.2). Volume and calibration values
arenotaectedbybatteryreplacement.
4. Transport and storage
4.1 Transport
Unpacking and checking condition of delivery
►Unpacktheowmeteronreceiptandcheckfortransportdamages.
►Report transport damages to the manufacturer immediately.
►Check that the consignment is complete as ordered.
4.2 Storage
NOTICE
Damage of property as a result of incorrect storage!
►Completeemptyingofowmeter.
►StoreowmeterprotectedagainstweathereectsandUV-rays.

12
0697-001 TR3 - 10/19
en
5. Assembly
5.1 General
Before assembly all parts have to be checked for particles of packing material.
TheowmeterTR3possessesG1externalthreadsonbothsideswhichallowittobeinstalledinany
pipe. When doing so, please ensure that the meter is not under mechanical stress due to tension/
pressure or bending. To avoid this, an elastic equalizing element is to be used, and the lines are to be
supported in a suitable manner. In order to prevent damage, the tightening torque at the G1 external
threads are not to exceed 30 Nm.
Theowdirectioncanbechosenfreely.
Werecommendtheuseoffront-sideatsealsorO-ringsattheendsofthescrewthreadsforsealing
purposes.
After being screwed into the pipe, the electronic housing can be rotated freely around the measuring
chamber. This allows the display to be brought into a position that is comfortable for the user.
The pressure surges that occur in the pipe are not to exceed the nominal pressure.
5.2 Assembly with drum pump connection G1
1.ScrewthedrumpumpconnectorG1(1)attheinletoftheowmeter(→Fig. 2).
NowcommerciallyavailablehoseconnectorsG1canbeconnectedattheoutletoftheowmeter.
Fig. 2

13
0697-001 TR3 - 10/19
en
5.3 Assembly with drum pump connection G1 1/4
Before assembly all parts have to be checked for particles of packing material.
1. Push the wing nut (1) onto the threaded nipple (2) (→Fig. 3)
2. Screw the threaded nipple (2) into the threaded sleeve (3)
3. Insert the seal (4) in the threaded sleeve (3)
4.Screwthethreadedsleeve(3)ontotheowmeter
5. Insert the seal (5) in the reducing connector (6)
6.Screwthereducingconnector(6)ontotheowmeter
7. Insert the seal (7) into the wing nut (1)
8.Screwtheowmetertogetherwiththemountedpartsontothedrumpump
Now commercially available hose connectors G 1 1/4 can be connected at the reducing connector (6).
Fig. 3

14
0697-001 TR3 - 10/19
en
5.4 Assembly at nozzle PP/PVDF with standard hose connector and hose
connector twistable
Before assembly all parts have to be checked for particles of packing material.
1. Push the wing nut (1) onto the threaded nipple (2) (→Fig. 4)
2. Screw the threaded nipple (2) into the threaded sleeve (3)
3. Insert the seal (4) in the threaded sleeve (3)
4.Screwthethreadedsleeve(3)ontotheowmeter
5. Insert the seal (5) into the wing nut (1)
6.Screwtheowmeterwithwingnut(1)ontothenozzle
7. Insert the seal (6) into the connection sleeve (7)
8.Screwtheconnectionsleeve(7)ontotheowmeter
9.Screwtheowmetertogetherwiththemountedpartsontothehoseconnectortwistable
Fig. 4
Now commercially available hose connectors G 1 1/4 or hose connector twistable can be connected at
theowmeter.
If our hose connector twistable is used, sliding surfaces and seal ring must be wetted with a suitable
lubricant.Compatibilitywiththeowmediummustbeobserved!

15
0697-001 TR3 - 10/19
en
5.5 Rotating the display
ThedisplayoftheowmeterTR3(1)canbe
mounted both vertically as well as horizontally
inordertoallowthemetertobereado
comfortably (→Fig. 5).
To turn the display, the four screws (2) on the
top side are loosened and the display is pulled
upwards. The display can now be replaced in any
desired orientation.
The rubber shock protector (3) is not to be rotated
along with the display.
The battery housing (4) may need to be placed on
the other side (5) of the meter housing to prevent
the battery housing and battery connector (6)
from colliding.
The battery cable needs to be laid such that it
is not pinched between the reed switch and the
housing.
Fig. 5
6. Operation
3 Allconnectionsandttingsareproperly
tightened.
TheowmeterTR3isoperatedusingthreekeys
(→Fig. 6): "Reset" (2), "Mode" (3) and "Light" (1).
Information is shown on the LCD display (4) with a
permanently visible display.
Theowmeterissetbythemanufacturerwith
unit of measurement “Litres” and calibration
factor “1.000”. The accuracy of the display
can be increased through calibration, and the
unit of measurement can also be changed (→
chapter7).Afterinstallation,themeterisreadyto
measure dispensations without requiring further
conguration.
Fig. 6

16
0697-001 TR3 - 10/19
en
6.1 Description of display
The display is divided into various areas (→Fig. 7)
1. Four-digitpartialvolumedisplaywithoating
point, values range from 0.00 to 9999
2. Battery symbol
3. Indicates partial volume totalizer (TOTAL 1 –
TOTAL 8) or total volume totalizer (TOTAL)
4. Seven-digit totalizer display,
values range from 0 to 9999999
5. Volumeowdisplay
6. Volume unit display
Fig. 7
6.2 Dispensation mode
Fordailyuse,theowmeterTR3issettodispensation mode.
6.2.1 Dispensation active
During a dispensation, both the partial volume display as well as
the selected totalizer will be continually updated. The total volume
totalizer will always be updated in the background even if it is not
shown on the display.
The following key combinations are possible during dispensation:
"Light" key: The display illumination is turned on for 15 seconds.
"Mode"key: Thecurrentowrateisshowninthepartialvolume
display for as long as the "Mode" key is held down.

17
0697-001 TR3 - 10/19
en
6.2.2 No active dispensation
The partial volume for the last dispensation as well as the current value for the selected totalizer are
shown on the display. The following key combinations are possible:
"Light" key: The display illumination is turned on for 15 seconds.
"Reset" key: Pressing this key for a short time resets the partial
volume display.
Holding it down for a longer time resets the active partial volume
totalizer. The total volume totalizer cannot be reset.
"Mode" key: Pressing this key for a short time toggles between
partial volume totalizers (TOTAL 1 – TOTAL 8) and
the total volume totalizer (TOTAL) shown.
Holding down the "Mode" key for a longer time until the program version is shown (e.g. "P1.33")
switches the device to programming mode (→chapter7).

18
0697-001 TR3 - 10/19
en
7. Programming the meter
The device allows the unit of measurement (liters, US gallons, US quarts, US pints, imperial gallons,
imperial quarts, imperial pints) to be selected, the basic selection of the medium characteristic curve
(watery media, thin mineral oils) to be performed, as well as a calibration to be performed to optimize
measurement accuracy.
7.1 Change over into programming mode
Hold down the "Mode" key until the program version is shown (e.g.
"P1.33") to switch to programming mode.
Once the key is released, a display test is carried out. Subsequently, multiple settings can be
conguredinsuccession,beginningwiththeselection of the unit of measurement for volume. In
programming mode, the display will blink. If no key is pressed for more than 60 seconds, the device will
cancel programming mode and return to dispensation mode.
7.2 Setting the unit of measurement
Theconguredunitofmeasurementisshownandcanbechanged
if necessary. If the unit is changed, the partial volume shown as well
as all totalizers will automatically be converted.
"Reset" key: Toggles between the units liters (L), US gallons
(US GAL), US quarts (US QTS), US pints (US PTS),
imperial gallons (IMP GAL), imperial quarts (IMP
QTS) and imperial pints (IMP PTS).
"Mode"key: Conrmsthevolumeunitshownandswitchestometer type selection.

19
0697-001 TR3 - 10/19
en
7.3 Setting the meter type
TheowmeterTR3meterisconguredwithtwooptimized
characteristic curves for the measuring chamber made of PP and
measuring chamber PVDF. One of these two characteristic curves
can be chosen.
"Reset" key: Switches between the characteristic curves for the
measuring chamber PP and measuring chamber
PVDF.
"Mode"key: Conrmsthecharacteristiccurvesshownandswitchestocalibration.
7.4 Setting the calibration factor
7.4.1 Calibration
TheselectedcharacteristiccurveoftheowmeterTR3canbesubjectedtoanadditionalcalibrationto
compensateforspecialoperatingconditions,suchasunusualmediatemperaturesorborderlineow
values.
Shown on the partial volume display are the measured quantity for
the last dispensation, as well as the calibration factor in the lower
line(factorydefault1000,congurablevalues500–1500).
"Reset" key: Increases calibration factor by 1, increases the
displayed output quantity per revolution of the
turbine wheel by 1/1000. Hold the key to increase
the setting speed.
"Light" key: Decreases calibration factor by 1, decreases the
displayed output quantity per revolution of the
turbine wheel by 1/1000. Hold the key to increase
the setting speed.
"Mode"key: Conrmsthecalibrationfactorshownandswitches
back to dispensation mode.

20
0697-001 TR3 - 10/19
en
7.4.2 Calibration with measuring vessel
Oneeasywaytoperformacalibrationisbyperformingacomparisonusingasucientlylargeand
precise measuring vessel. Proceed as follows:
1. Meter is in dispensation mode, partial volume counter has been
deleted.
2. Thedispensationiscarriedoutataowspeedthatisasconstant
aspossibleuntilthemeasuringvesselislledtothedened
volume.
3. Switch to programming mode, sub-menu "Calibration" (skip
volumeunitanduidmenuswiththe"Mode"key).
4. Adjust the calibration factor until the quantity displayed
corresponds to the quantity dispensed into the measuring
vessel.
5. Save the new calibration factor and return to dispensation
mode.
This manual suits for next models
1
Table of contents
Other Lutz Measuring Instrument manuals