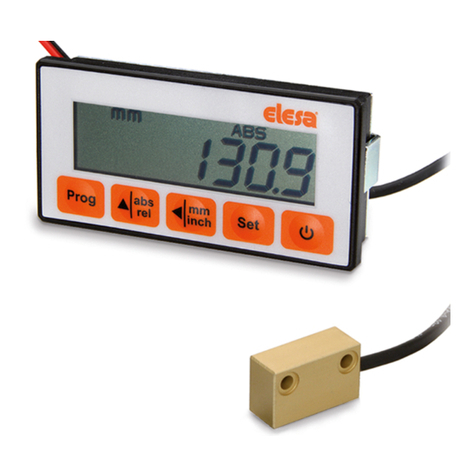
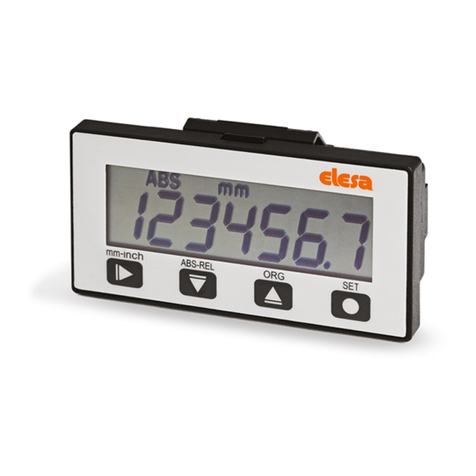
Elesa MPI-R10 User manual

Magnetic measuring system
OPERATING INSTRUCTIONS
MPI-R10
MPI-R10-RF

Models all rights reserved in accordance with the law. Always mention the source when reproducing our drawings.
2
EN
MPI-R10 MPI-R10-RF Magnetic measuring system
Contents
1. Safety Instructions 3
2. Description 3
2.1 Version - MPI-R10-RF 4
3. Installation 4
3.1 Display installation 4
3.2 Sensor installation 4
3.3 Magnetic band installation 5
4. Display 5
5. Key functions 5
6. System Switching on/off 6
6.1 Switching on the system 6
6.2 Switching off the system 6
7. Operating mode 6
7.1 Absolute/incremental measuring
mode selection 6
7.2 Unit of measure selection 6
7.3 Origin setting 6
7.4 Absolute reference setting 6
7.5
Direct programming of the absolute
reference value and compensation value 7
7.6 Targets 7
7.6.1Reaching the target position 7
7.6.2 Target display mode 7
7.6.3 Target tolerance 8
7.7 Angular Measurement 8
7.8 Version - MPI-R10-RF 8
7.8.1
Programming of the network parameter (nEt id) and the
channel parameter (nEt ch)
8
7.8.2 Targets 8
8. Programming mode 8
8.1 Programming of parameters with numeric values 8
8.2 Device parameters (in alphabetical order) 8
8.3 Main menu tree 9
8.4 Target menu tree 9
8.5 Additional features 10
8.5.1 Reset 10
8.5.2 Calibration 10
8.5.3 LCD test 10
8.5.4 Correction coefficients 10
8.5.5 Revision 10
9. Battery replacement 10
10. Display messages and troubleshooting 10

Models all rights reserved in accordance with the law. Always mention the source when reproducing our drawings.
MPI-R10 MPI-R10-RF Magnetic measuring system
3
EN
1. Safety Instructions
The product has been designed and manufactured in ac-
cordance with the current regulations. The product leaves
the factory ready for use and complies with the safety stand-
ards. To maintain the product in this state, it is necessary that
it is assembled and used properly, in the closest compliance
with this instructions manual and with the following specific
safety precautions.
Before installing and using the MPI-R10, read carefully this
manual, which is intended as an indispensable supplement
to the existing documentation (catalogues, data sheets).
Morever, all the rules of law must be observed, in regard to
accident prevention and environmental protection.
The use, without complying with the descriptions /
specific parameters, (in combination with systems
/ machines / processes to be controlled), can lead
to a malfunction of the product, causing:
- health hazards,
- environmental hazards,
- damage to the product and to its proper functionality.
The device must not be used:
- in explosion hazard areas;
- in medical/life support areas and equipment.
Do not open the equipment and do not tamper with it! Any
tampering might have a negative impact on reliability of the
device and might be dangerous. Do not attempt any repair.
Return any defective equipment to the manufacturer! Any
violation of the integrity of the device as delivered will cause
the warranty loss.
Changes or modifications, not expressly approved by the
party responsible for compliance, could void the user’s
authority to operate the equipment.
Setup/Commissioning
In case of any malfunction (even in case of change in
operating conditions), the device must be switched off
immediately. Switch off power supply during any installation
work on the equipment. Installation and commissioning are
allowed by trained and authorised staff only. After correct
setup and commissioning, the device is ready for operation.
Maintenance/repair
Switch off the power supply of the equipment before any
action. Maintenance should be performed by trained and
authorised staff only.
NOTE: This equipment has been tested and found to comply
with the limits for a Class A digital device, pursuant to part
15 of the FCC Rules. These limits are designed to provide
reasonable protection against harmful interference when the
equipment is operating in a commercial environment. This
equipment generates, uses, and can radiate radio frequency
energy: if not installed and used in accordance with the
instructions manual, it may cause harmful interference to
radio communications. Operation of this equipment in a
residential area is likely to cause
harmful interference in which case the user will be required to
correct the interference at his own expense.
2. Description
Connected to the dedicated sensor FC-MPI, and combined
with the magnetic band M-BAND-10, the MPI-R10 is a
complete system for the measurement of linear and angular
displacement. Characterised by extremely easy assembly, it
allows precise alignment and positioning, reducing time and
machining procedures to a minimum.
MPI-R10 main features are:
- Multifunction LCD with 4 function keys.
- Absolute/ incremental mode.
- Programmable offset and targets function.
- Lithium battery powered.
- Protection against accidental polarity inversion.
The sensor cable FC-MPI is made of a metallic enclosure
containing the electronic sensor, a multipolar flexible cable
and a connector to be plugged into the MPI-R10.
The sensor cable is available in different lengths.
The magnetic band M-BAND-10 is made of two separate
parts: the magnetic band and the cover strip. The magnetic
band is made of a magnetic tape, a carrier strip and an
adhesive tape (Fig. 2).
The cover strip is made of a protection strip and an adhesive
tape (Fig. 1).
Proper assembly

Models all rights reserved in accordance with the law. Always mention the source when reproducing our drawings.
4
EN
MPI-R10 MPI-R10-RF Magnetic measuring system
Mechanical and electrical characteristics
Power supply Lithium battery 1/2AA 3.6 V
Battery life 3 years (2 years for
MPI-R10-RF)
Display 7-digit LCD of 12 mm height and
special characters
Reading scale -199999; 999999
Number of decimal digits programmable
Programmable measuring unit mm, inches, degrees (angle)
Max operating speed (1) 1 ÷ 5 m/s programmable
Resolution (2) 0.01 mm - 0.001 in - 0.01°
Precision (3) ±0.03mm
Repeatability (4) 0.0002xL mm (L is the measure
in mm)
Self-diagnostic battery check, sensor check,
magnetic tape check
Protection class IP54 or IP67
Operating temperature 0°C ÷ +50°C
Storage temperature -20°C ÷ +60°C
Relative humidity max. 95% at 25°C without
condensation
Operating environment Internal use
Altitude up to 2000 m
(1) The reading speed influences the battery life.
(2) Resolution: the smallest change in length that the system is capable of
displaying.
(3) Precision: the maximum deviation of the value measured by the
system from the actual one.
(4) Repeat accuracy: the degree of closeness among a series of meas-
ures of the same sample, when each single measurement is carried
out with the conditions unchanged.
mm-inch
ABS-REL
ORG SET
10
15
11
26
4
17
4
9.5
Ø3.5
20.5 16.5
12
A
AB
B
72
37
28
7
21
17.5
MPI-R10 FC-MPI
mm-inch
ABS-REL
ORG SET
10
15
11
26
4
17
4
9.5
Ø3.5
20.5 16.5
12
A
AB
B
72
37
28
7
21
17.5
MPI-R10 FC-MPI
M-BAND-10 Technical data
Accuracy class ± 40 µm
Material
magnetic tape: nitrilic rubber
carrier strip: stainless steel
cover strip: stainless steel
acrylic adhesive tape
Width magnetic band: 10 mm ± 0.20 mm
cover strip: 10 mm ± 0.20 mm
Thickness magnetic band: 1.43 ± 0.15 mm
cover strip: 0.23 mm
Magnetic pole pitch 5 mm
Operating and storage
temperature min -40°C max +100°C
Linear thermic
expansion factor 17 x 10-6 / K-1
2.1. Version – MPI-R10-RF
The MPI-R10-RF is compatible with Elesa wireless network
that allows magnetic measuring system and indicators to
communicate via radio with a PLC.
Elesa wireless network is made by the following components:
- One control unit UC-RF
- Max 36 electronic position indicators or magnetic measuring
system, such as DD51-E-RF, DD52R-E-RF or MPI-R10-RF.
The control unit UC-RF is provided with a standard interface
for the most common industrial busses to be connected
to the PLC and allows the transmission of the information
between the PLC and the MPI-R10-RF magnetic measuring
system. The UC-RF exchanges information with the MPI-R10-
RF via radio frequency and allows the setting of the target
position and the control of the current position of each
indicator, directly from the PLC.
mm-inch
ABS-REL
ORG SET
mm-inch
ABS-REL
ORG SET
mm-inch
ABS-REL
ORG SET
Target positionsUC-RF
Current positions
PLC
3. Installation
3.1. Display installation
1. Drill the panel according to the template dimensions
reported.
2. Remove all drilling burrs before fitting the MPI-R10.
3. Fit the lower part of the case into the housing.
4. Press onto the upper part until the case is completely
snapped in.
R
max
1
0.7÷2 67
+0.2
34
-0.5
3.2. Sensor installation
Fix the magnetic sensor by using M3 screws (not included in
the supply). During the installation, use a spacer (max 1 mm
is suggested) to grant the parallelism between the sensor
and the magnetic band.

Models all rights reserved in accordance with the law. Always mention the source when reproducing our drawings.
MPI-R10 MPI-R10-RF Magnetic measuring system
5
EN
4. Display
1. Absolute or relative mode indicator
2. Low battery level indicator
3. mm, INCH or degree unit of measure
4. Target position indication
5. RF connection indicator
5. Key functions
The function of the key changes depending on the mode of
the device.
12354
The maximum distance between the sensor and the magnetic
band, to ensure a correct reading of the displacement, is 1mm.
3.3. Magnetic band installation
To mount the magnetic band follow the instructions below:
- Clean the mounting surface carefully.
- Remove the protective film from the adhesive tape of the
magnetic band.
- Stick the magnetic band on the mounting surface.
- Clean the surface of the magnetic band carefully.
- Remove the protective film from the adhesive tape of the
cover strip.
- Stick the cover strip on the magnetic band. The cover
strip must be put on the magnetic band to protect it from
possible mechanical damages.
- In case of absence of a seat for the housing of M-BAND-10,
secure the ends of the cover strip to prevent unintentional
peeling.
The mounting surface must be flat. Buckles or bumps will
lead to measuring inaccuracies. To guarantee an optimal
adhesion of the adhesive tapes, the mounting surfaces must
be perfectly cleaned, dry and smooth. The following surface
roughness is recommended: Ra <= 3,2 N8 (Rz <= 25). To
maximize the adhesion install the strip applying pressure.
Gluing should preferably be carried out at temperatures
between 20 °C to 30 °C and in dry atmosphere.
WARNING
Once the installation is completed, the calibration procedure
must be carried out as shown in cap. 8.5.2.
Key Or Key
Combination Operating Mode Programming Mode
SET
Keep pressed for 3 sec to enter the
programming mode.
Parameter
selection/Confirm
of parameter
change
ORG
Keep the button pressed for
3 sec to set the origin of the
measurement.
Programmable with one of
the following options (see the
____0__
voice of the menu
– cap. 8.3):
d_tArG
: when a target is
loaded, the display shows the
actual absolute position. Pressing
the key, the target absolute position
to reach appears on the display.
d_toG0
[DEFAULT]: when a
target is loaded the display shows
the distance to reach the target
position. Pressing the key, the actual
absolute position appears on the
display.
OFF
: the key is not assigned to
any function in the operating mode.
Digit increase /
Scroll for parameters
bottom-top on the
menu tree
ABS-REL
Select the:
ABS
: absolute measuring mode
REL
: incremental measuring mode
It is possible to choose one of
the following options (see the
__0____
voice of the menu
– cap. 8.3):
ArCLr
[DEFAULT]: switching
from
ABS
to
REL
the counter is
set to zero.
Ar
: switching from
ABS
to
REL
the counter is not set to zero.
OFF
: the key is not assigned to
any function in the operating mode.
Digit
decrease /
Scroll for parame-
ters top-bottom on
the menu tree
mm-inch
Press the key to select the unit
of measure needed. The options
available are: millimeters, inches
and degrees.
It is possible to choose one of
the following options (see the
0______
voice of the menu
– cap. 8.3):
ALL
[DEFAULT]: selectable units
of measure: mm, inch, degrees
nodEG
: selectable units of
measure: mm, inch
OFF
: the key does not allow the
unit of measure conversion
Programming mode
exit /
Digit selection
SET
+
mm-inch
Programmable with one of
the following options (see the
0_____0
voice of the menu
– cap. 8.3):
PrOGOrG
[DEFAULT]: show and
set the OriGin parameter
PrOGOFS
: show and set the
OFFS parameters
OFF
: the key combination is not
assigned to any function in the
operating mode.
NA

Models all rights reserved in accordance with the law. Always mention the source when reproducing our drawings.
6
EN
MPI-R10 MPI-R10-RF Magnetic measuring system
Key Or Key
Combination Operating Mode Programming Mode
SET
+
ABS-REL
Programmable with one of
the following options (see the
__0___0
voice of the menu
– cap. 8.3):
LOAdOrG
[DEFAULT]: the key
combination sets the absolute value
to the sum of the parameters Origin
and Offset.
OFF
: the key combination is not
assigned to any function in the
operating mode.
NA
SET
+
ORG
Programmable with one of
the following options (see the
____0_0
voice of the menu
– cap. 8.3):
tArGEtS
: the keys combination
allows to load/program one of the
32 target positions. See 8.4
OFF
[DEFAULT]: the key is not
assigned to any function in the
operating mode
NA
mm-inch
SET
Turn the indicator on hold
mm-inch
then
press the key
SET
. After the start-
up sequence the indicator is ready
to be used (see chap. 4).
NA
SET
ABS-REL
mm-inch
When the
rESEt
parameter is
selected, press the
key
SET
. At this
point, press the
button
ABS-REL
and
then press the key
mm-inch
; the display
will turn off and the
indicator will go into
low power mode
of the battery (see
chap. 4).
7. Operating mode
7.1.
Absolute/incremental measuring mode selection
Press the key
ABS-REL
to select the absolute or incremental
measuring mode.
The measuring mode selected is shown on the display by
the symbols:
-
ABS
: absolute measuring mode.
-
REL
: incremental measuring mode.
It is possible to change the key
ABS-REL
function by the menu
voice
__0____
(see chap.8.3).
The available options are:
-
ArCLr
(default): when relative measurement is selected,
the value is always reset to zero.
-
Ar
: passing from
ABS
to
REL
, the relative measurement
is not reset to zero.
In this case, the counter is set to zero by pressing
SET
+
ABS-REL
-
OFF
: the key
ABS-REL
is disabled and does not allow changing
the selected measuring mode.
To program the parameters listed above, see chap. 8.3.
7.2. Unit of measure selection
Press the key
mm-inch
to select the unit of measure.
The options available are millimeters, inches and degrees.
The measuring mode selected is shown on the display by
the symbols: mm for millimeters, inch for inches and with the
° suffix for degrees.
It is possible to change the key
mm-inch
function by the menu
voice
0______
.
The available options are:
-
ALL
(default): units of measure that can be selected: mm,
inch, degree.
-
nodEG
: units of measure that can be selected: mm, inch.
-
OFF
: the key is disabled and does not allow changing the
selected measuring mode.
To program the parameters listed above, see chap. 8.3
7.3. Setting the origin
Press the key
ORG
for three seconds to set the origin of the
measurement.
Keeping pressed the
ORG
key for three seconds, the display
will show the question Set Org. At this point press the key
SET
to confirm or another key to cancel.
Confirming the setting of the origin, the display will be reset
to zero: this position of the sensor must be considered as the
origin of the following measurements.
7.4. Setting the absolute reference
After having selected the absolute measuring mode and
stopped the sensor in the starting or in the reference position,
press the key combination
SET
+
ABS-REL
to set the absolute value
to the sum of the values of the parameters
Origin
(absolute
value of reference) and the selected
OFFS
(compensation
value).
The value of compensation (
OFFSET
) allows you to adjust the
value shown on the display in such a way that takes into account,
6. System Switching on/off
6.1. Switching on the system
After you have read the section “Safety Instructions”, proceed
by switching on the indicator.
To switch the indicator on:
- hold the key
mm-inch
- press the key
SET
.
The display will light up and the indicator is ready to be used.
6.2. Switching off the system
To switch the system off :
- enter the programming mode,
- select
rESEt
(see chap. 8.3)
- press
SET
- press
ABS-REL
- press
mm-inch
The display will turn off and the indicator will go into low
power mode.

Models all rights reserved in accordance with the law. Always mention the source when reproducing our drawings.
MPI-R10 MPI-R10-RF Magnetic measuring system
7
EN
for example, wear or tool change. The system allows you to store
up to 10 values of compensation.
Pressing the key combination
SET
+
ABS-REL
, the screen will
display the last compensation value used (eg
OFS 0
).
It’s possible to choose the desired compensation value by
pressing the key
ABS-REL
or
ORG
, and then pressing the key
SET
to confirm.
The screen will display the absolute value equal to the sum of
the values of the parameters
Origin
and
OFFSet
.
To program the offset values, see parameter
OFFSet
of cap. 8.3.
It is possible to change the function of the keys
combination
ABS-REL
+
SET
choosing one of the available options
in the menu voice
__0___0
The available options are:
LOAd_OrG
: the key combinations allow to choose an offset
compensation and to set the origin value
OFF
: the keys combination
SET
+
ABS-REL
is not associated to any
function in the operating mode.
For programming the parameters listed above see paragraph 8.3
7.5. Direct programming of the absolute reference value
and compensation values
The keys combination
SET
+
ABS-REL
can be programmed to
allow direct access to the programming of the
OrIGIn
or
OFFSEt
parameters.
It is possible to change the function of the keys combination
choosing one of the available options in the menu voice
0_____0
.
The available options are:
-
PrOGOrG
: direct programming of the absolute reference
value (
OrIGIn
parameter).
-
PrOGOFS
: direct programming of the compensation value
(
OFFSEt
parameter).
-
OFF
: the keys combination is not associated to any function
in the operating mode.
7.6 Targets
MPI-R10 allows to set up to 32 target positions to store
relevant machine configuration setting.
To program the targets:
- select
tArGEtS
in the main menu (see cap 8.3).
- select
PrOG_TG
(see chap. 8.4).
- select the required memory location (
PtrG 01
to
PtrG
32
).
- press the key
SET
to select.
- Follow the instructions in cap. 8.1 to set the required value.
To load a target:
- select
tArGEtS
in the main menu (see cap 8.3).
- select
LOAd_TG
(see chap. 8.4).
- select the required target value (
LtrG 01
to
LtrG 32
)
using the keys
ABS-REL
and
ORG
- press the key
SET
to select.
- The value of the selected target is shown.
- Press
SET
again to confirm or press
mm-inch
to go back to the
target selection list.
The keys combination
SET
+
ORG
allows direct access to the
programming or loading of targets depending on the value
assigned to parameter
___0_0
.
If enabled, the key combination allows to choose between
the two following operations:
-
LOAd_tG
: choose one of the 32 available target
positions, then press
SET
to confirm.
-
PrOG_tG
: choose to program one of the 32 available
target positions, then press
SET
to start programming.
It is possible to change the function of the keys combination
choosing one of the available options in the menu voice
___0_0
.
The available options are:
-
tArGet
: enable the direct load or program targets
functions.
-
OFF
: the keys combination
SET
+
ORG
is not linked to any
function in the operating mode.
7.6.1. Reaching the target position
When a target is selected by the PLC (version MPI-R10-RF),
the device will suggest the direction of movement of the
sensor to reach the target by means of the symbols .
It is possible to set the
FLIP_tG
parameter (see chap. 8.2)
to adapt the target position indication to the actual sensor
configuration.
It is possible to set the tolerance of the target as absolute
difference from the set value by means of the
P_tOLL
parameter (see chap. 8.2).
The target position indicators will work, depending from the
FLIP_tG
and
P_tOLL
parameters, as in the following
table.
FLIP FLIP
M < T - Toll
T - Toll <= M < T
M = T
T < M < = T + Toll
M > T + Toll
T = set target
M = measured value
Toll = tolerance (see
P_toll
)
If a target is selected, it is possible to cancel it by pressing
the keys combination
SET
+
ORG
and to confirm the
StOP_
tG
command by pressing the key
SET
. To keep the target
selection press the key
mm-inch
.
7.6.2. Target display mode
Press the key
ORG
to show the present or the target position
depending on the settings of the device.

Models all rights reserved in accordance with the law. Always mention the source when reproducing our drawings.
8
EN
MPI-R10 MPI-R10-RF Magnetic measuring system
It is possible to change the function of the key and the target
mode choosing one of the available options in the menu
voice
____0__
.
The available options are:
-
d_tArG
(default): when a target is loaded, the display
shows the actual absolute position and the indication to
reach the target as explained before in cap.7.6.1. Pressing
the key
ORG
,
the set target position is shown.
-
d_to_Go
: when a target is loaded, the display shows
the distance to the set target and the indication to reach
the target as explained before in cap.7.6.1. If the target is
not reached, the display blinks. Pressing the key
ORG
the
display shows the actual absolute position.
7.6.3. Target tolerance
Set the value of
P_toll
parameter to define the tollerance
allowed for target (see chap. 8.2 for details).
7.7.Angular measurement
MPI-R10 allows to measure angular displacements. To obtain
the correct measurement, it is needed to set the parameter
“Radius” with the measure of the radius of the arc where the
magnetic band is placed.
7.8. Version - MPI-R10-RF
7.8.1. Programming the network parameter (nEt id) and
the channel parameter (nEt ch)
The system radio network is defined by the following two
parameters:
- nEt id: id 00/99
- nEt ch: ch 01/36
These parameters can be configured in the Radio menu
of the indicator (see chap. 8.3) and must be set according
to the PLC recipe to guarantee a perfect communication
between UC-RF and MPI-R10-RF.
Warning
For MPI-R10-RF with firmware release equal to 5.1 or higher,
channel 1 is equivalent to channel 4 of the previous version.
Consider it when used in old system with UC-RF with
firmware release lower than 5.1.
7.8.2 Targets
Using MPI-R10-RF, target positions can be sent from the PLC
to the indicators through the control unit. When a target is set,
the behaviour is the same as decribed in cap 7.6.
8. Programming mode
Press the key
SET
for 3 seconds to enter the programming
mode. Depending on the setting of
PASS
parameter (see
chap. 8.2), the system may require you to enter a password.
Press the key
ABS-REL
and
ORG
to scroll through the list of
parameters and select the required one by pressing
SET
.
Press the key
mm-inch
to exit the programming mode. The
programming mode is automatically dropped after 30
seconds of inactivity.
8.1. Programming parameters with numeric values
Press the key
mm-inch
to select the digit to change. Then use
ABS-REL
and
ORG
to respectively decrease or increase the
flashing digit.
Press the key
SET
to confirm the value and go back to the list
of parameters.
The numeric values of the parameters must be
inserted taking into account the selected unit
of measure.
When a parameter is changed from its stored value, by
confirming it, the display will show the message
CHAnGEd
.
When exiting from the programming mode, the parameter are
stored in the internal memory. If a parameter was changed,
the display will show the message
StorEd
.
8.2. Device parameters (in alphabetical order)
Parameter Description Available options Default
Deg corr
Angular scale
correction
Programmable value:
0.000001
+/- 9.999999
.
0.00000
cannot be accepted
(the coefficient is automatically set
to 1.00000).
1.000000
Deg res
Resolution of
the angular
measurement
The parameter allows to define the
resolution of
angular
measurement.
The available options are:
1
;
0.1
;
0.01
0.01
Dir
Measurement
direction
Set direction
of the positive
axis
dir-- ( )
--dir ( )
dir--
( )
FLIPp_tG
Arrow to tar-
get indicators
direction
or
The parameter set the direction
of the arrow indicators when the
target is not reached
Lin corr
Linear scale
correction
Programmable value:
0.000001
+/- 9.999999
.
0.00000
cannot be accepted
(the coefficient is automatically set
to 1.00000).
1.000000
Mag. Band
Sensor
R
α

Models all rights reserved in accordance with the law. Always mention the source when reproducing our drawings.
MPI-R10 MPI-R10-RF Magnetic measuring system
9
EN
Parameter Description Available options Default
Offset
Offset Value
Programmable value
Res = 1:-999999 ÷ 999999
Res = 0.1:-99999.9 ÷
99999.9
Res = 0.01:-9999.99 ÷
9999.99
Res =0.001:-999.999 ÷
999.999
The system allows you to store up
to 10 compensation values:
OFS 0
...
OFS 9
0000.00
Origin
Reference
value
Programmable value
Res = 1:-999999 ÷ 999999
Res = 0.1:-99999.9 ÷
99999.9
Res = 0.01:-9999.99 ÷
9999.99
Res =0.001:-999.999 ÷
999.999
0000.00
Pass
Password
ON
: the system requires the
password 22011 to enter the
programming mode.
OFF
[DEFAULT]: the system does
not require a password to enter the
programming mode.
OFF
P toll
Tolerance of
target position
0.01÷9.99
The parameter value depends
on the unit of
measure selected.
0.10
Radius
Radius of the
circumference
where the re-
ading sensor
moves
Programmable value:
0.01-
9999.99
The parameter allows to define the
radius of the arc where the ma-
gnetic band is placed for angular
measurement.
100.00
Res
Resolution
The parameter allows defining the
resolution of the measure.
The available options are:
mm: 1; 0.1; 0.01
inches: 1; 0.1; 0.01;
0.001
mm:
0.01
inches:
0.01
Speed
Reading max
speed
Programmable values
1;2;3;4;5
The parameter sets the maximum
speed of the movement in m/s that
can be correctly read.
3
Targets
Target value
Programmable value
Res = 1:-999999 ÷ 999999
Res = 0.1:-99999.9 ÷
99999.9
Res = 0.01:-9999.99 ÷
9999.99
Res =0.001:-999.999 ÷
999.999
The system allows you to store
up to 32 compensation values:
LtG01
...
LtG32
.
The parameter value depends
on the unit of measure and
resolution set.
0
8.3.Main menu tree
O______aALL (default)
No dEG
OFF
OriGin -999999 ÷ 999999
6
dir dir-- [
7
]
--dir [
7
]
__O___OaLOAdOrG (default)
OFF
PASS OFF (default)
On
rESEt
See chap. 8.5.1
OFFSET
OFS 0
-999999 ÷ 999999
6
OFS 9
SPEEd SPEEd 1 ÷ SPEEd 5
rES
__O____aArClr (default)
OFF
Ar
P_toll
____O__a
____O_OatArGEtS (default)
OFF
0.01 / 1.99
dd_toGo (default)
d_tArGt
OFF
If mm: 1, 0.1,0.01
If inch 1, 0.1, 0.01, 0.001
LinCorr 0.000001÷9.999999
dEGCorr 0.000001÷9.999999
AnGuLAr Radius
dEG_rES
0.01÷9999.99
1, 0.1, 0.01
FLIP_tG FLIP
,
7
O_____OaPrOGOrG (default)
OFF
PrOGOFS
tArGEtS
See chap.8.4
CALibr
See chap. 8.5.2
LcdtESt
See chap. 8.5.3
Rev
See chap. 8.5.5
ABS-REL
Scrolling menu direction
ORG
8.4.Target menu tree
PrOG_tG
PtrG 01
…
PtrG 32
Load_tG
LtrG 01
LtrG 32
…
Scrolling menu
direction
If mm -9999.99÷9999.99
If inch -9999.99÷9999.99
If Deg -99999÷99999
ORG
ABS-REL
6 The parameter value depends on the unit of measure and resolution set.
7 The symbols on the display related to the target feature are used.
8 See chap. 5

Models all rights reserved in accordance with the law. Always mention the source when reproducing our drawings.
10
EN
MPI-R10 MPI-R10-RF Magnetic measuring system
8.5. Additional features
8.5.1. Reset
To reset the device to its factory setup:
- select the voice
RESEt
from the main menu (see chap. 8.3).
- select
YES
pressing the key
ORG
.
- press the key
SET
to confirm.
8.5.2. Calibration
The Calibration voice in the main menu activates the
CALIBRATION MODE and the display shows
GO
.
At this point, the user must slowly move the sensor in one
direction along the magnetic band.
After the
GO
, a progress bar is displayed that will grow as
long the sensor is moved. The procedure is completed when
the measurement position is shown again by the display.
This operation allows the sensor to be accurately bound to
the magnetic tape and has to be done every time after the
installation of the sensor.
8.5.3. Test LCD
The LcdtESt voice in the main menu allows to switch on all
the display segments.
8.5.4. Correction coefficients
To improve the correctness of the measurement, MPI-R10
allows to set two correction factors that take into account
the differencies between ideal and actual installation of the
magnetic band:
-
LinCorr
: is the ratio between the actual measurement
and the value measured by the device in linear
measurement.
-
AngCorr
: is the ratio between the actual measurement
and the value measured by the device in angular
measurement.
To calculate the correction factor, set it to 1 then read the
value measured (M) in a reference point (K). The correction
factor will be equal to K/M.
Verify that the measurement done in the reference point and/
or other known points is correct.
8.5.5. Revision
The release data of the device are shown, starting with the
r letter, as last voice in the main menu. These data can be
scrolled pressing the key
SET
.
Please note these values and communicate them to Elesa in
case of support needed.
9. Battery replacement
The internal lithium 1/2 AA - 3.6 V battery ensures over 3
years battery life (RF version - 2 years).
The symbol is shown on the display when the battery
replacement is required.
The replacement is made by simply removing the cover on
the back.
By replacing the battery in less than 5 seconds, all the
measurements and settings wil not be lost. If more time is
required and the display turns off, the settings of the device
have to be set or verified again.
10. Display messages and troubleshoting
Message on
the display Description Action
SEnSor
The sensor is not connected Connect the sensor or verify the
cable and the connector
no tAPE
The magnetic tape is not
detected
Verify if the sensor is correctly
mounted near the magnetic tape
SPeed X
The sensor is moving too
fast according to the value
of the setting in the Speed
parameter.
X is the present setting of the
Speed parameter.
Press
SET
to go back to the
value reading and re-set the
absolute reference.
Flashing
battery symbol
Low Battery Replace the battery (see chap. 9).


Models all rights reserved in accordance with the law. Always mention the source when reproducing our drawings.
12
EN
MPI-R10 MPI-R10-RF Magnetic measuring system
ELESA S.p.A.
Via Pompei, 29
20900 Monza (MB) Italy
phone +39 039 28111
www.elesa.com
Elesa S.p.A., Monza, May 2021
The texts and examples have been written with great care, nonetheless, mistakes can always happen.
The Company Elesa S.p.A. can neither be held legally responsible nor liable for lacking or incorrect information and the
ensuing consequences.
The Company Elesa S.p.A. reserves the right to alter or improve the magnetic measuring system or parts of them without
prior notice.
© COPYRIGHT ELESA 2021
Art. Nr. ZDOIU-MPIR10-EN-R0
Other manuals for MPI-R10
1
This manual suits for next models
5
Table of contents
Other Elesa Measuring Instrument manuals

Elesa
Elesa DD51-E User manual

Elesa
Elesa DD51-E User manual

Elesa
Elesa DD52R-E User manual

Elesa
Elesa MPI-15 User manual

Elesa
Elesa DD51-E User manual

Elesa
Elesa DD51-E User manual

Elesa
Elesa DD52R-E-RF User manual

Elesa
Elesa DD52R-E-RF User manual

Elesa
Elesa GN 9054 User manual

Elesa
Elesa MPI-R10 User manual