MTI DOOR/DRAWER LOCKS™ PRODUCT MANUAL
5
MTI P/N 063-00244 rev A ©2019 MTI All Rights Reservedwww.mobiletechinc.com | T:800.426.6844
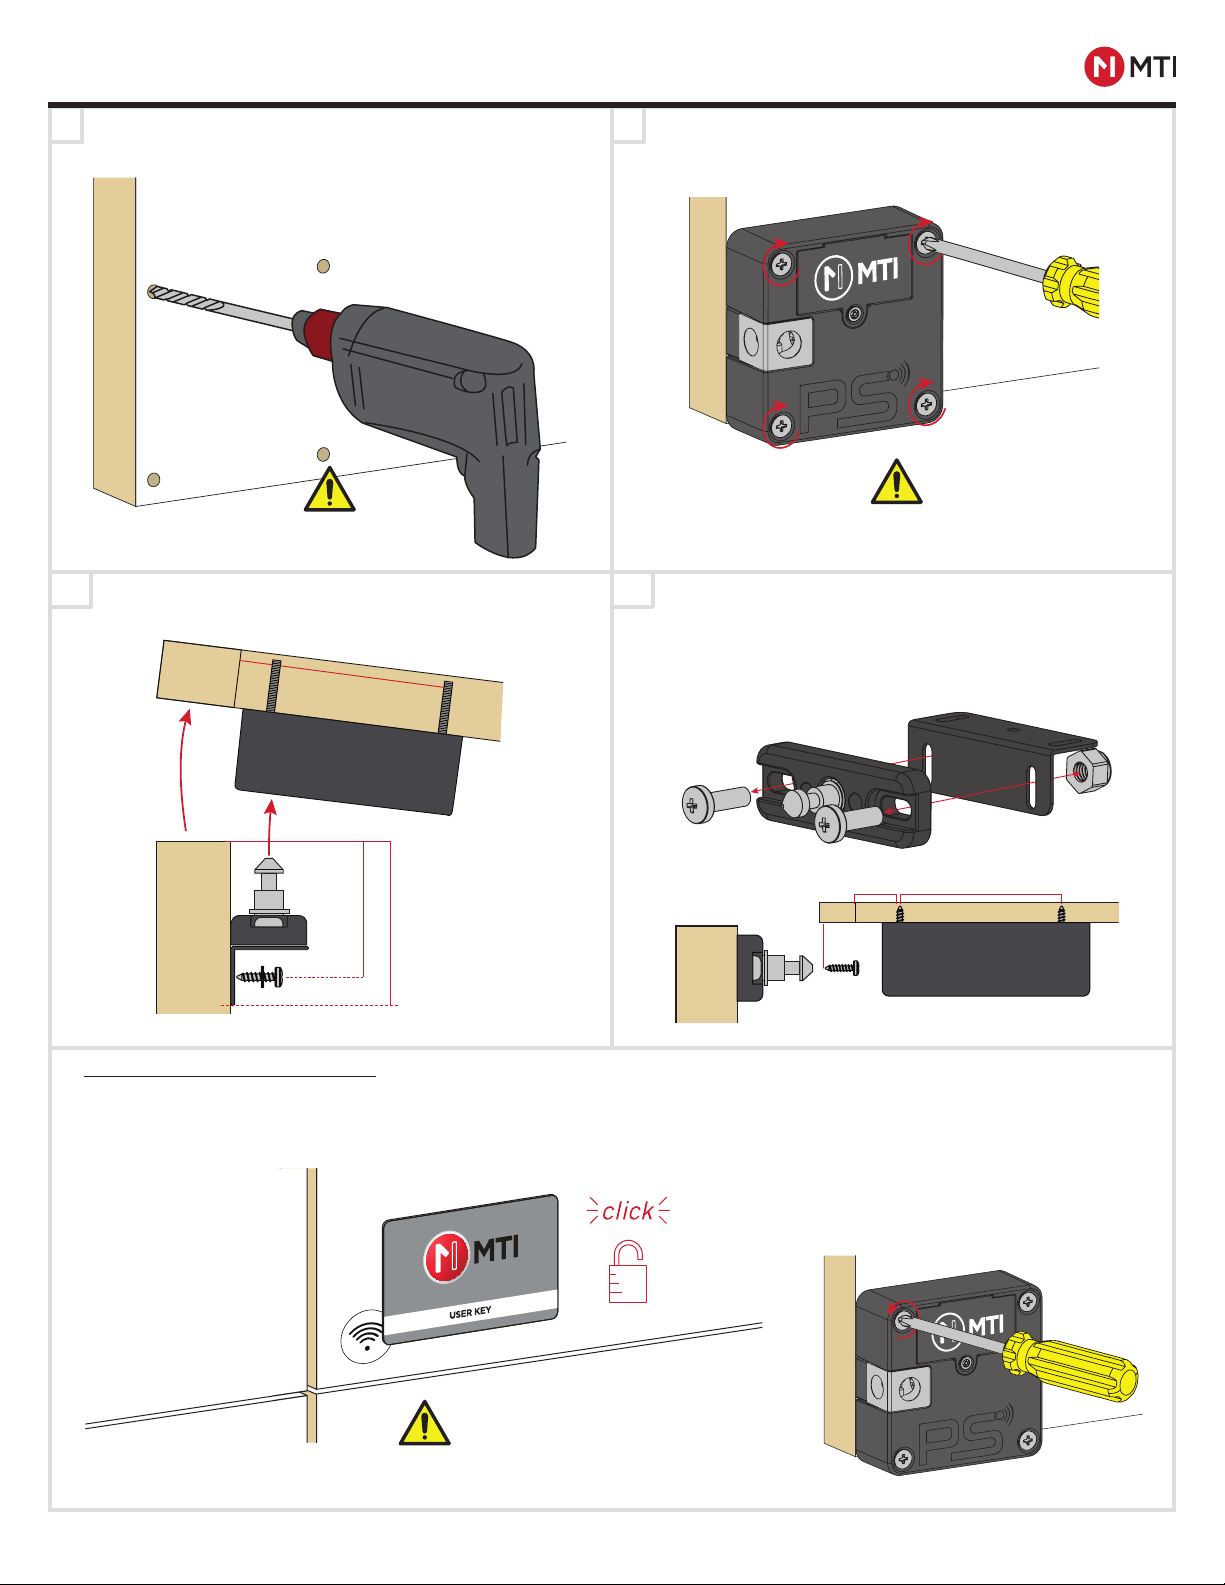
INITIAL SET UP
Note:
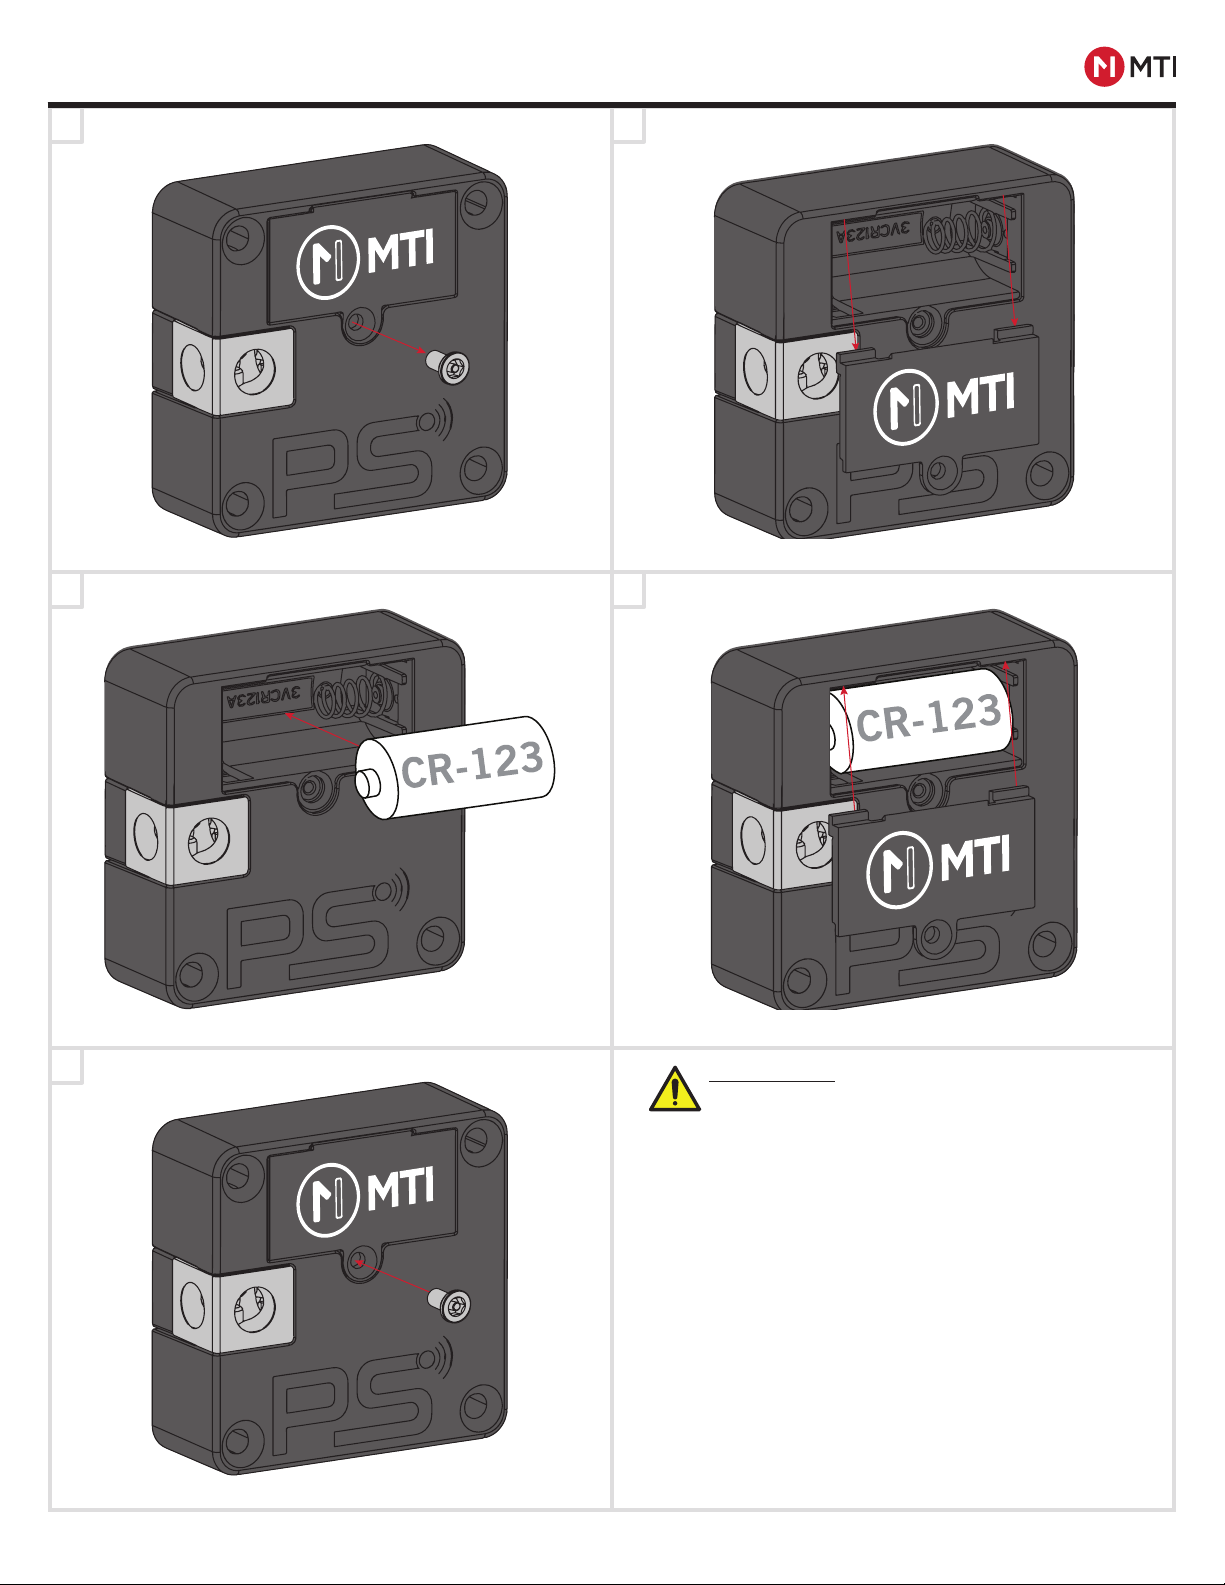
Operating temperature: 41-95° F.
Converting to Connect Lock
To use the MTI Connect Business Intelligence feature of your MTI locks you must have an internet connection, a MTI Connect
Hub to create the mesh network, and the MTI Connect Card, which allows you to convert modes. In Connect mode, the lock will
check in with the Hub every hour, and every time a lock is accessed. During check-in, the Hub will look for new key white list,
report lock status, battery status, and lock ID.
1.Hook up Connect Hub to Ethernet or Wifi Connection.
2.Apply power to Connect Hub, and put into Provisioning mode. This allows the Connect Hub to look for locks trying to enter the
mesh network. Refer to the instructions that came with the Connect Hub for how to enter provisioning mode.
3.Swipe MTI Connect card on lock to enter Connect Provisioning mode. The lock will emit a double beep tone, and then emits
a constant series of slow beeps until it finds the network. When it is connected, it will emit a double beep confirmation tone,
retrieve the white list of keys from the network, and now operate as a Connect lock. If no network is detected in 1 minute 20
seconds, the lock will emit four fast beeps, indicating a time out, and revert back to a non-Connect run mode. When lock
enters Connect mode, it will erase all keys previously programmed to that lock, defaulting to the key whitelist it retrieves from
the Connect Hub.
Reverting Connect Lock to Non-Connect
1.Power down Connect Hub to disable the mesh network. This will ensure the lock is not trying to locate a mesh.
2.Hold Connect card to lock for 10 seconds. Lock will emit a fast double confirmation beep. After 5 seconds it will emit four fast
beeps. Lock has reverted to a non-Connect operating mode.
3.Keys previously whitelisted in Connect mode will still continue to work.
Factory Reset
There are several methods to reset a lock to a factory default.
1.Remove lock from fixture to gain access to reset button on lock. If fixture is stuck closed, proceed to step 3.
2.Press and hold button on back of lock for 3 seconds until it starts emitting a beeping tone. It will emit beeps for 5 seconds.
When it stops beeping, lock will be at a factory reset position with the tumbler in the open position.
3.If lock is not accessible to remove, a factory reset key must be used. With a factory reset key, swipe the lock once, you will hear
consistent four beep bursts.
4.Swipe card again within 5 seconds. Allow the lock to set for several seconds, and it will reset itself to a factory reset, with the
tumbler in the open position. This will remove any key whitelist
5.Follow whitelist process to program new keys.
Features
-Door Open Mode - If a lock has been left open for 5 minutes, the lock will emit a continuous on/off beep tone for 10 minutes or
until the door is closed.
-Stuck Lock - If a lock is jammed or unable to unlock, the lock will emit a slow beep tone to indicate that the lock is stuck.
-Low Battery - If the lock battery is low and needs replacement, the lock will emit a long single beep on every card swipe.
- Lock will beep every hour when it reaches 10% capacity.
- Lock will default to the open position when battery reaches 0%
- Battery health is indicated in Connect App, reported every hour.
Correct Disposal of Product
This marking indicates that this product should not be disposed with other household wastes throughout the EU.
To prevent harm to the environment or human health from uncontrolled waste disposal, recycle it responsibly
to promote the sustainable reuse of material resources. To dispose of used devices contact MTI Global Services
Contact Center at 503-648-6500 or contact local recycling company for proper recycling instructions for
electronic devices.