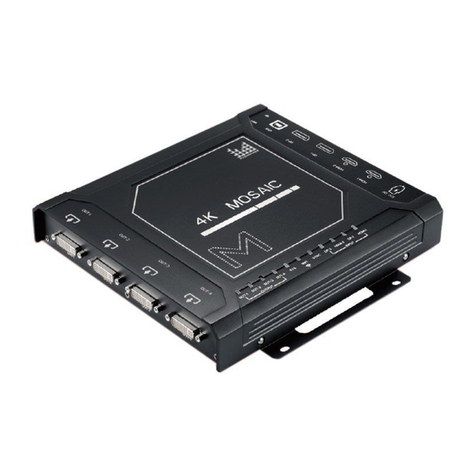
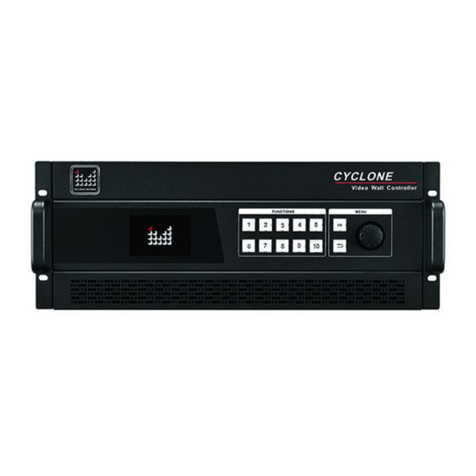
Magnimage LED-F706 User manual

LED-F706/F708/F710
All-in-one Video Controller
User Manuel V1.1
△
!
Document Version:V1.1 Document Release Date:2021/8/10
Before using this LED video processor, please
read this instruction manual carefully and keep it
for future reference.
LED-F706/708/710

Revision History
NO.
Revised Content
Revise Date
Version
1
First release
2022/7/13
V1.1
2
3
4
5
6
7
8
9
10
11
12

Content
Statement ............................................................................................................... 1
Introduction ........................................................................................................... 1
Trademark Credit.............................................................................................................2
About the software.........................................................................................................2
Product Features............................................................................................................. 3
Port Extension.................................................................................................................. 4
Safety Notice.................................................................................................................... 4
Features...................................................................................................................5
Overview............................................................................................................................ 5
Technical Specifications................................................................................................ 9
Menu ..................................................................................................................... 11
How to use the buttons............................................................................................. 11
MENU Area:.........................................................................................................11
LAYER Area:......................................................................................................... 12
INPUT Area:.........................................................................................................12
FUNCTION Area:................................................................................................13
Introduction to Default State................................................................................... 13
Main Menu Introduction............................................................................................15
Main Menu............................................................................................................. 16
Screen configuration submenu.......................................................................17
Layer Setting Submenu ......................................................................................21
Input Setting Submenu......................................................................................23
Function Settings Submenu ............................................................................. 25
Warranty...............................................................................................................28

1
Statement
Without the written permission of the company, no unit or individual may
copy, copy, transcribe or translate part or all of the contents of this manual.
This manual shall not be distributed in any form or by any means (electronic,
mechanical, photocopying, recording or other possible means) for
commercial or commercial purposes.
The product specifications and information mentioned in this manual are
for reference only and may be updated without prior notice. Unless there is a
special agreement, this manual is only used as a guide, and all statements,
information, etc. in this manual do not constitute any form of guarantee.

2
Introduction
Thank you for purchasing our company's LED all-in-one video controller.
Hope you can enjoy the excellent performance of this product. The design of
this LED all-in-one video controller complies with international and industry
standards, but improper operation may still cause personal injury and
property damage. In order to avoid the possible dangers caused by the
equipment, and to benefit from your equipment as much as possible, please
follow the relevant instructions in this manual when installing and operating
the product.
Trademark Credit
VESA is a trademark of the Video Electronics Standards Association.
HDMI, the HDMI logo and High-Definition Multimedia Interface are
trademarks or registered trademarks of HDMI Licensing LLC.字接口)都是
HDMI Licensing LLC.
Even if the company or product trademark is not specifically stated, the
trademark has been fully recognized.
About the software
It is illegal to modify, decompile, disassemble, decrypt or reverse engineer
to the software installed on this product.

3
Product Features
Standard multiple input interfaces:HDMI2.0×1、DP1.1 ×1 or HDMI1.4
×1(select 1 of them, support audio transmission)、DVI×2、Audio×1;
Support HDMI loop out;
Support image scaling freely;
Support quick light screen, no need PC software to configure the screen;
Support seamless switching for multi-layers;
Support single input port 4K*2K/60Hz(HDMI2.0) resolution;
Support window size & position adjustment and image crop;
Support four layers display;
Support scrolling subtitle function;
Support cut switching between single input sources without black
screen;
Support customized output resolution;
Support external independent audio input and output;
Support customized input EDID;
Single network port standard load 650,000 pixels;
Support bandwidth expansion (when receiving card needs to support it ),
a single network port can carry a maximum of 1 million pixels, a single
machine can carry maximum width 8192 and maximum height 3840;
Support template save and load;
Support connection to MIG C-Link series receiving cards;
Support monitoring output function;
Support free cabling function;
Support receiving card serial number calibration, switch on the
intelligent serial number to visually check the position of the box;
Support network port communication, set up multiple control units in
local area network, realize wireless screen adjustment;
Support central control.

4
Port Extension
LED-F706/LED-F708/LED-F710 is basic model number, we can extend
one port of 3G SDI on the basis of basic model. Extension model are as
follows:
Safety Notice
The input voltage range of the power supply of this product is 100~240V,
50/60Hz, please use the correct power supply.
When you want to connect or unplug any signal cable or control cable,
please make sure that all power cables have been unplugged beforehand.
When you want to add hardware devices to this product or remove
hardware devices from this product, please make sure that all signal cables
and power cables have been unplugged in advance.
Before performing any hardware operations, power off the LED video
processor and discharge static electricity from your body by touching a
grounded surface.
Please use it in a clean, dry and ventilated environment, and do not use
this product in a high temperature, humid environment.
This product is an electronic product, please keep it away from fire, water
and flammable and explosive dangerous goods.
There are high-voltage components in this product, please do not open
the case or repair the device by yourself.
If you find any abnormality such as smoke or odor, please turn off the
power switch immediately and contact the dealer.
Available Expansion Modules
Product Model
Input module
Expand 1 external SDI input module
LED-F706S
Expand 1 external SDI input module
LED-F708S
Expand 1 external SDI input module
LED-F710S

5
Features
Overview
The all-in-one video controller is a video controller created by
Magnimage, which integrates video processing, splicing, switching and LED
screen sending card functions. This series integrates various professional
input interfaces, supports up to 4K × 2K/60Hz, F706S single machine can
load 390W pixels, with bandwidth expansion function single machine can load
up to 600W pixels, and support 6 Gigabit Ethernet port output; LED-F708S A
single machine can load 520W pixels, with bandwidth expansion enabled, a
single machine can load up to 800W pixels, and support 8 Gigabit Ethernet
ports for output; F710S has a single-machine load of 650W pixels, with
bandwidth expansion enabled, a single machine can load up to 880W pixels,
and supports 10,000 pixels. Mega network port output, can be used with the
company's support to connect Magnimage C-Link series receiving cards
The load capacity of all-in-one video controller is twice of the ordinary
all-in-one video controller, and supports EDID management and customize
output resolution, single controller output max width can be 8192 pixel, up to
120HZ refresh rate. Greatly improved the utilization of output bandwidth. The
output image can be scaled point by point according to the actual size of the

6
LED display.
Complete video input interface, including: DVI×2, HDMI1.4×1 (support
4K × 1K/60Hz), DP1.1 × 1 (support 4K × 1K/60Hz), HDMI2.0x1 (support 4K ×
2K/60Hz), One HDMI loop-out (only supports HDMI2.0D loop-out), supports
AUDIO (IN and OUT), and can also extend one 3G SDI input source at the
same time. And it supports network, square port USB and RS232 serial port
control, which is convenient for interconnection and control with a variety of
video equipment.

7
Front panel illustration
DVI2
DVI1
LAYER 4
LAYER 3
LAYER 2
LAYER 1
OK
Rotary knob
Button Description
DVI2 input selection /template 2
DVI1 input selection key/template 1
Layer 4
Layer 3
Layer 2
Layer 1
Return key, return to the previous menu
Call out menu and confirmation key.
select menu items and adjust parameters
LOCK
BRIGHT
SIZE
PRESET
SDI
DP
HDMI2
HDMI1
LOCK/template 10
Quick key for brightness adjust/template 9
Quick key for layer size adjust /template 5
Quick button for load preset/template 4
SDI input selection/template8
DP input selection/template7
HDMI input selection/template 6
HDMI input selection/template 3

8
Rear panel illustration
LED-706S
LED-708S
LED-710S

9
Technical Specifications
Video input port
DVI1-DVI2
2 x DVI input ports
DP1.1
1 x DP input port,support 3840x1080/60Hz and customized
HDMI1.4
1 路
1 x HDMI1.4 input port,support 3840x1080/60Hz and customized
HDMI2.0
1 x HDMI2.0 input port,support 3840x2160/60Hz and customized
3GSDI(extend)
1 x SDI input port
Audio(IN)
1 Audio input port
Model
number
Video output port
F706S
Gigabit Ethernet port
6 port, single port load 0.65M pixels,
whole unit load 3.9M pixels.
F708S
Gigabit Ethernet port
8 port, single port load 0.65M pixels,
whole unit load 5.2M pixels.
F710S
Gigabit Ethernet port
10 port,single port load 0.65M pixels,
whole unit load 6.5M pixels.
HDMI loop out
Can loop out HDMI2.0 input source
Audio(out)
1 port Audio output
Input information
Port
Quantity of
port
Resolution specification
DVI
2 port
1024×768/60Hz,1920×1080/60Hz and resolution reach
to VESA standard, and customized
HDMI1.4
1 port
HDMI-1.4, support 3840×1080/60Hz and customized
DP1.1
1 port
Display Port 1.1, 3840×1080/60Hz and customize
HDMI2.0
1 port
HDMI-2.0, 3840×2160/60Hz and customize
3GSDI(extend)
1 port
Support HD-SDI, 3G-SDI(Only layer 4 supports SDI
interlacing)

10
Output information
Model
port
quantity
Resolution specification
LED-F706S
Gigabit
Ethernet
port
6
single port max. load 0.65M pixels, whole unit load
3.9M pixels. Max. Width 7680 pixel, Max. height
3840.
LED-F708S
Gigabit
Ethernet
port
8
single port max. load 0.65M pixels, whole unit load
5.2M pixels. Max. Width 7680 pixel, Max. height
3840.
LED-F710S
Gigabit
Ethernet
port
10
single port max. load 0.65M pixels, whole unit load
6.5M pixels. Max. Width 7680 pixel, Max. height
3840.
HDMI2.0
1
Loop out HDMI2.0 input source, resolution is same
with HDMI2.0 input source.
3.5mm
Audio
(out)
1
HDMI or DP with audio channel to output audio
directly through the machine
3.5mmAudio
(IN)
1 port
Can external audio and output audio signal with
multi-function card
Control port
Ethernet communication
port
Two-way RJ45 control port, used to connect to the host
computer or multi-machine cascade communication
Square port USB
communication port
Used to connect to the host computer
RS232 port
for central control
Machine specification
Input voltage
100-240V AC~50/60Hz 0.6A
Operating temperature
0-45℃
Dimensions
482.6×362.3×44 mm (L × W × H)
Net weight
4.5KG
Power Consumption
55w

11
Menu
Using the product menu system can easily and intuitively set the machine
to meet the user's use requirements
The all-in-one video controller uses a full-color LCD display to display the
entire user menu. When the user does not operate or the operation times out,
the default state will be displayed on the LCD screen. If you use the buttons on
the front panel of the machine to set the machine, the LCD screen will display
the corresponding menu according to the user's operation to prompt the user
to operate better, faster and more intuitively.
The following will combine the button functions and the display of the
LCD screen to introduce the menu system of the all-in-one video controller in
detail.
How to use the buttons
The front panel button of controller divide to 4 areas, MENU, LAYER,
INPUT, FUNCTION
MENU Area:
This area contains 2 buttons and a knob that can be pressed; OK,
button and a knob.
Short press the "knob", its function is the same as the confirmation key
(OK); when press the return key ( ), the menu system will return to the
previous menu in turn, until it returns to the default state.
In the main menu, the enter key can also used for switch between
browsing mode and setting mode, for example:

12
browsing mode
setting mode
↖ confirm button, short press knob, can switch between the two modes.
Under browse mode, Anticlockwise rotate the "knob", the cursor moves
up or left; rotate the "knob" clockwise, the cursor moves down or right. When
moving the cursor to the item to be adjusted, press the "knob" or the confirm
key to enter the setting mode, then turn the "knob" anticlockwise to decrease
the current parameter value; turn the "knob" clockwise, Then the current
parameter value can be increased. To continue setting other items on this
page, please switch back to browse mode. If you want to return to the
previous menu, please use the return button; if the adjustment is completed,
press the return button to return to the previous menu until the default state.
LAYER Area:
This area contains 4 button; LAYER1, LAYER2, LAYER3, LAYER4 ;
Corresponding to the four active screens inside the machine.
Long press the button to turn on or off the corresponding screen. The one
that has been used is green, and the current selection is red.
Short press to select the layer.
INPUT Area:
This area contains 6 buttons; DVI1, DVI2, HDMI1, HDMI2, DP, SDI. SDI
corresponds to one extended input of the processor.
The way of selecting a signal is to first select the LAYER in LAYER area,
then select the corresponding signal.
When there is a signal in the input, the button light is green; the currently
selected one is red.

13
FUNCTION Area:
This area contains 4 buttons:PRESET, SIZE, BRIGHT, LOCK.
Introduction to Default State
After turning on the power of the all-in-one video controller, during the
system boot process, the boot interface will be displayed on the LCD screen of
the front panel. After the startup is completed, the default state of the current
machine will be displayed on the screen, as shown in the figure below.:
LED-F706S:
LED-F708S:
LED-F710S:
BUTTON
Button system default operation
PREST
Quick call out menu of load PRESET/TEMPLATE
SIZE
Call out menu for layer size adjustment
BRIGHT
Quick button to adjust screen brightness
LOCK
LOCK

14
The information in the above figure is explained as follows;
Rotate the button in the default state, you can see the following picture
You can clearly see the selected signal source and resolution of the layer
Continue to rotate the knob, you can see the following picture
You can clearly see the input resolution
Direction
Resolution
Current output resolution
Brightness
Current screen brightness
IP
Machine IP address
The serial number of the network port. If the current network port is
connected to the network cable, the network port will become
highlighted.

15
Main Menu Introduction
In the main menu, the user uses the "OK", " " keys and the knob to select
and adjust each item. The operation mode is as follows:
mark
introduction
Open main menu
In the default state, press the "OK" key or press the rotary knob
Select each item
Rotate the knob to select each item
Adjust parameter
When the right item is a number or option parameter, rotate the knob
Enter next level
menu
When the right item is“►”, press“OK”button
Operate function
Use knob to select the item to be operated, and press the "OK" button
Return to
previous menu
Press “ ” button
Confirm
operation
When resetting and other operations, in order to avoid wrong
operation, you need to confirm the operation with the "OK" button.

16
Main Menu
In the default state, press "OK" button or press the knob, the menu
system will enter the main menu state, and the LCD screen will display as
shown in the figure below
There are 4 menu items in the main menu. Use the knob to select the 4
menu titles listed above. After selecting, press the "OK" button to enter the
selected item, and press the " " key to return to the previous menu.。

17
Screen configuration submenu
This manual suits for next models
2
Table of contents
Other Magnimage Controllers manuals