PWR(POWER)
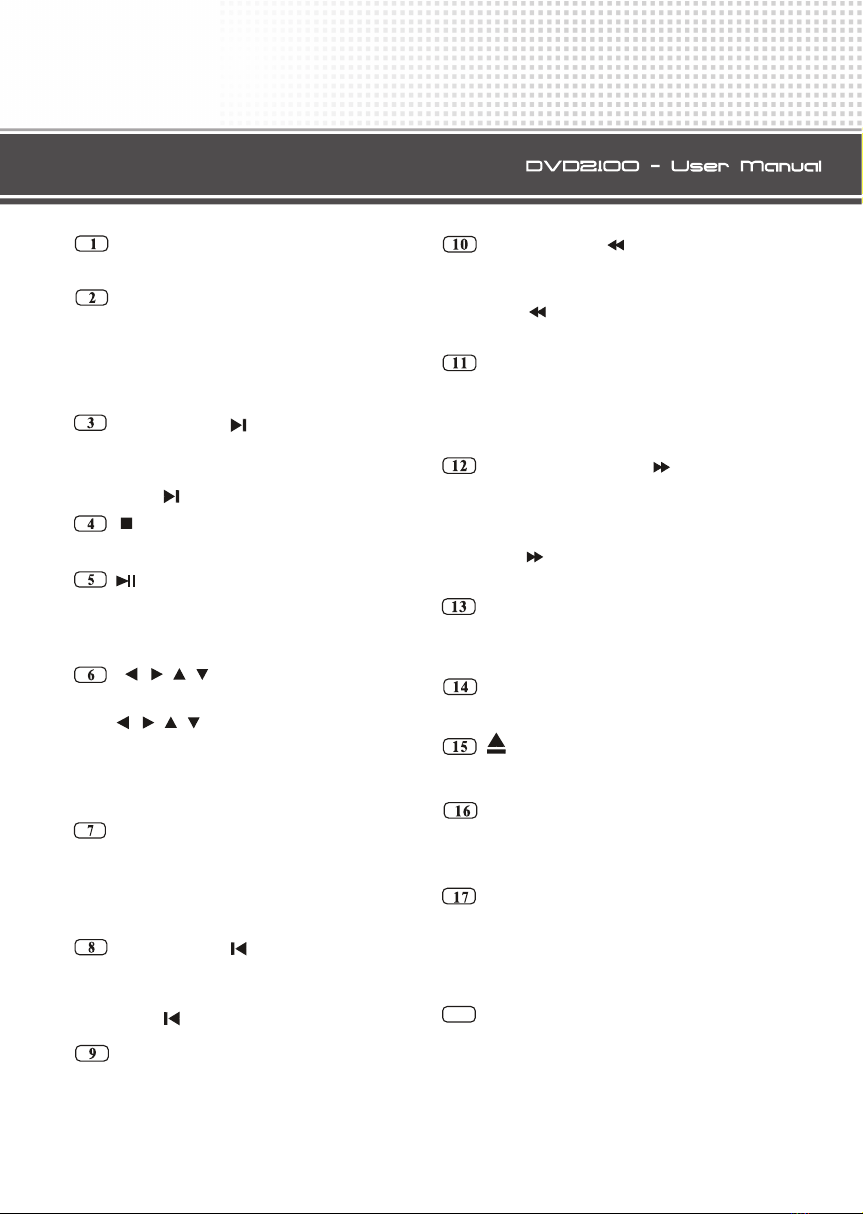
Press to turn on or turn off the unit.
SETUP
During DVD playback mode, press
to display system setting menu, user
could select some relative constant
parameters.
SLOW and
Press to slow forward or reverse
during playback.
STOP
Press to stop the playback
Press to play the next track.
PLAY/PAUSE
Press to switch sequentially between
playback and pause; during stop
mode, press to resume to playback.
In the system setting menu, press
to move cursor upward,
downward,leftward or rightward,and
then press [ENTER]to execute the
entering or the selected item.
[ ][ ][ ][ ][ENTER]
[ ][ ][ ][ ]
SHIFT
When shift function is activated, press
the buttons which have two function
signals on them, the upper function
is valid.
ZOOM and
Press ZOOM to make the picture
increase in size;
Press to play the previous track.
REPEAT
Press REPEAT to repeat playback;
ANGLE and
Press ANGLE to change the viewing
angle during DVDplayback.
Press to perform faster reverse
during playback.
DISPLAY
During DVD,VCD mode, Press
DISPLAY will show the relative
menu.
SUBTITLE and
Press SUBTITLE to change the
subtitle language during DVD play-
back;
Press to perform faster forward
during playback.
VOL+/VOL-
Press to increase or decrease volume
level.
NUMBER BUTTON
Press to select track, or chapter.
Press to eject the disc.
MENU
During DVD mode, press to return
to the main page of menu.
TITLE
During DVD mode, press to return
to the main page of the title menu;
during VCD mode, press to active
PBC (Playback Control) function.
COL
Press this button to adjust the brigh-
tness and contrast and sharpness(sa-
turation).
20
18
2X 4X 8X
Playing a VCD
During VCD mode,press button
to skip reverse to the previous chapter,
press button to skip forward to the
next chapter.
During VCD mode,press or
button to perform fast reverse or forward
separately. Each time the button is pressed,
the speed of fast reverse/forward changes
as follows:
During VCD mode, press DISPLAY
button, the TV shows single elapsed time.
9
3
12
Previous/Next Chapter
Press REPEAT button to perform
replaying function. first press to replay
the current track, press it again to cancel
this function.
9
Notes:
During playback mode, press DISPLAY
button , the TV shows the control menu. Press
to select the time display, then press
ENTER, the TV shows --:--:--. Input your
desired time by using number buttons. For
example: input 01:20:00 , the disc will be
played from the point of eightieth minute.
11
Note:
* This function can only be operated on card
remote control.
the
Note:
* Pressing or on the head unit performs
the same operation separately.
10 11
Note:
*This function can only be operated on
the card remote control.
4. Setting the Audio Channel
During mode, youVCD playback can se-
lect the left channel, right channel or stereo
channel by pressing DISPLA
Yand
or button.
11
5. Setting Playback Time