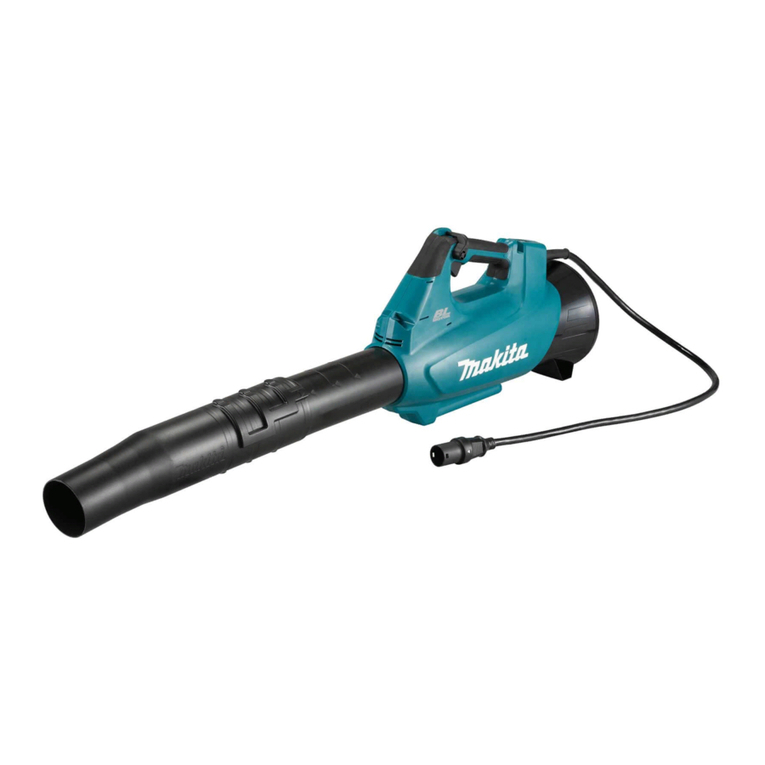
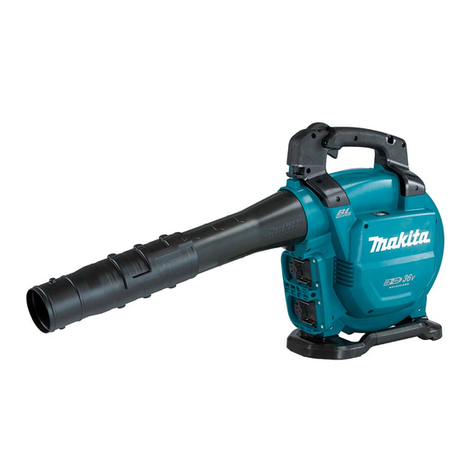
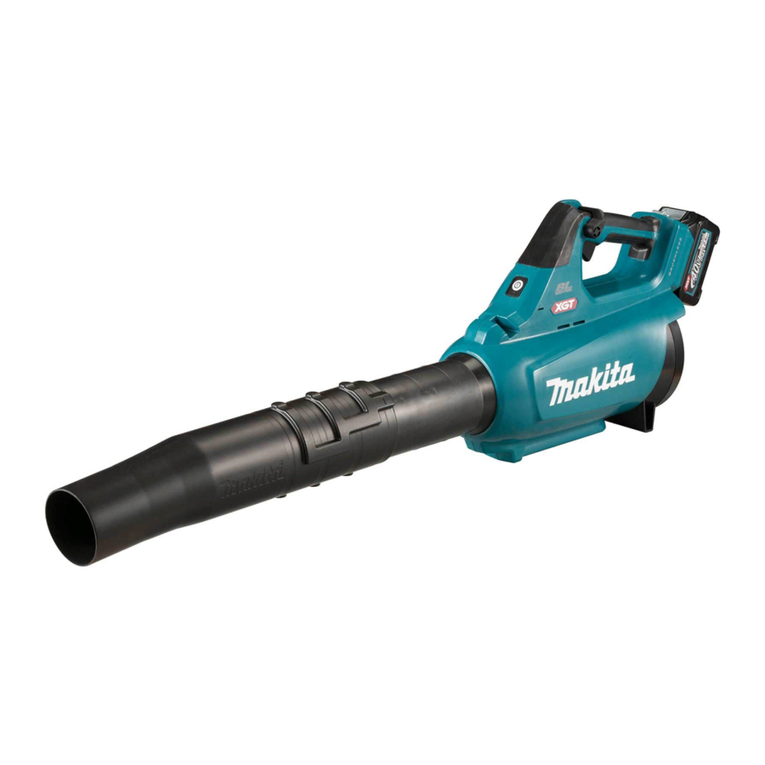
Makita DUB363 User manual

DUB363
EN Cordless Blower INSTRUCTION MANUAL 7
SV Batteridriven lövblås BRUKSANVISNING 15
NO Trådløs blåser BRUKSANVISNING 23
FI Akkukäyttöinen puhallin KÄYTTÖOHJE 31
LV Bezvadu pūtējs LIETOŠANAS INSTRUKCIJA 39
LT Akumuliatorinis pūstuvas NAUDOJIMO INSTRUKCIJA 47
ET Juhtmeta puhur KASUTUSJUHEND 55
RU
Аккумуляторная
воздуходувка
(Аккумуляторная
Воздуходувка/Пылесос)
РУКОВОДСТВО ПО
ЭКСПЛУАТАЦИИ 63

1
2
1
Fig.1
1
2
Fig.2
1 2
Fig.3
1
2
3
Fig.4
2

2
1
3
Fig.5
1
1
Fig.6
1
Fig.7
1 2
33
Fig.8
1
2 3
Fig.9
1
2
3
Fig.10
3

1
2
Fig.11
2
3
1
Fig.12
1
2
1
Fig.13
1
1
Fig.14
1
2
3
Fig.15
4

1
2
Fig.16
21
3
Fig.17
1
Fig.18
1
Fig.19
1
Fig.20
Fig.21
1
4
3
2
Fig.22
5

Fig.23
1
Fig.24
6

7ENGLISH
ENGLISH (Original instructions)
SPECIFICATIONS
Model: DUB363
Capacities Air volume 0 - 13.4 m3/min
Air speed (average) 0 - 54 m/s
Air speed (max.) 0 - 65 m/s
Dimensions (L x W x H) *1 341 mm x 193 mm x 415 mm
Rated voltage D.C. 36 V
Net weight Blower *2 3.8 - 5.2 kg
Vacuum *3 6.0 - 6.6 kg
*1. Without pipes, nozzles, dust bag, shoulder strap, and battery cartridges.
*2. With blower pipe, end nozzle and at nozzle, and without suction pipe, suction nozzle, elbow pipe, dust bag and
shoulder strap.
*3. With suction pipe, suction nozzle, elbow pipe, dust bag and shoulder strap, and without blower pipe, end nozzle
and at nozzle.
• Due to our continuing program of research and development, the specications herein are subject to change
without notice.
• Specications may dier from country to country.
• The weight may dier depending on the attachment(s), including the battery cartridge. The lightest and heavi-
est combination, according to EPTA-Procedure 01/2014, are shown in the table.
Applicable battery cartridge
BL1815N / BL1820 / BL1820B / BL1830 / BL1830B / BL1840 / BL1840B / BL1850 / BL1850B / BL1860B
• Some of the battery cartridges listed above may not be available depending on your region of residence.
WARNING: Only use the battery cartridges listed above. Use of any other battery cartridges may cause
injury and/or re.
Symbols
The followings show the symbols used for the equip-
ment. Be sure that you understand their meaning before
use.
Take particular care and attention.
Read instruction manual.
Keep hands away from rotating parts.
Long hair may cause entanglement
accident.
Keep bystanders away.
Wear eye and ear protection.
Do not expose to moisture.
Ni-MH
Li-ion
Only for EU countries
Do not dispose of electric equipment or
battery pack together with household waste
material!
In observance of the European Directives,
on Waste Electric and Electronic
Equipment and Batteries and Accumulators
and Waste Batteries and Accumulators
and their implementation in accordance
with national laws, electric equipment and
batteries and battery pack(s) that have
reached the end of their life must be col-
lected separately and returned to an envi-
ronmentally compatible recycling facility.
Intended use
The machine is intended for blowing and vacuuming.
Noise
The typical A-weighted noise level determined accord-
ing to EN50636-2-100:
Sound pressure level (LpA) : 84.8 dB(A)
Uncertainty (K) : 1.3 dB(A)
Sound power level (LWA) : 94.9 dB (A)
Uncertainty (K) : 0.3 dB(A)

8ENGLISH
NOTE: The declared noise emission value(s) has
been measured in accordance with a standard test
method and may be used for comparing one tool with
another.
NOTE: The declared noise emission value(s)
may also be used in a preliminary assessment of
exposure.
WARNING: Wear ear protection.
WARNING: The noise emission during actual
use of the power tool can dier from the declared
value(s) depending on the ways in which the
tool is used especially what kind of workpiece is
processed.
WARNING: Be sure to identify safety mea-
sures to protect the operator that are based on an
estimation of exposure in the actual conditions of
use (taking account of all parts of the operating
cycle such as the times when the tool is switched
o and when it is running idle in addition to the
trigger time).
Vibration
The vibration total value (tri-axial vector sum) deter-
mined according to EN50636-2-100:
Work mode: operation without load (blowing)
Vibration emission (ah) : 2.5 m/s2or less
Uncertainty (K) : 1.5 m/s2
Work mode: operation without load (vacuuming)
Vibration emission (ah) : 2.5 m/s2or less
Uncertainty (K) : 1.5 m/s2
NOTE: The declared vibration total value(s) has been
measured in accordance with a standard test method
and may be used for comparing one tool with another.
NOTE: The declared vibration total value(s) may also
be used in a preliminary assessment of exposure.
WARNING: The vibration emission during
actual use of the power tool can dier from the
declared value(s) depending on the ways in which
the tool is used especially what kind of workpiece
is processed.
WARNING: Be sure to identify safety mea-
sures to protect the operator that are based on an
estimation of exposure in the actual conditions of
use (taking account of all parts of the operating
cycle such as the times when the tool is switched
o and when it is running idle in addition to the
trigger time).
EC Declaration of Conformity
For European countries only
The EC declaration of conformity is included as Annex A
to this instruction manual.
SAFETY WARNINGS
Cordless Blower Safety Instructions
WARNING: Read all safety warnings and
all instructions. Failure to follow the warnings and
instructions may result in electric shock, re and/or
serious injury.
Save all warnings and instruc-
tions for future reference.
Training
1. Read the instructions carefully. Be familiar
with the controls and the correct use of the
machine.
2. Never allow children, persons with reduced
physical, sensory or mental capabilities or
lack of experience and knowledge or people
unfamiliar with these instructions to use the
machine. Local regulations may restrict the
age of the operator.
3. Never operate the machine while people, espe-
cially children, or pets are nearby.
4. Keep in mind that the operator or user is
responsible for accidents or hazards occurring
to other people or their property.
Preparation
1. Always wear substantial footwear and long
trousers while operating the machine.
2. Do not wear loose clothing or jewellery that
can be drawn into the air inlet. Keep long hair
away from the air inlets.
3. Always wear protective goggles to protect
your eyes from injury when using power tools.
The goggles must comply with ANSI Z87.1 in
the USA, EN 166 in Europe, or AS/NZS 1336
in Australia/New Zealand. In Australia/New
Zealand, it is legally required to wear a face
shield to protect your face, too.
It is an employer's responsibility to enforce
the use of appropriate safety protective equip-
ments by the tool operators and by other per-
sons in the immediate working area.
4. To prevent dust irritation the wearing of a face
mask is recommended.

9ENGLISH
5. While operating the machine, always wear
non-slip and protective footwear. Non-skid,
closed-toed safety boots and shoes will reduce the
risk of injury.
6. Use personal protective equipment. Always
wear eye protection. Protective equipment such
as a dust mask, non-skid safety shoes, hard hat or
hearing protection used for appropriate conditions
will reduce personal injuries.
Operation
1. Switch o the machine and remove the battery
cartridge and make sure that all moving parts
have come to a complete stop
• whenever you leave the machine.
• before clearing blockages.
• before checking, cleaning or working on
the machine.
• if the machine starts to vibrate
abnormally.
• whenever you convert the machine from
blower to vacuum, and vice versa.
2. Operate the machine only in daylight or in
good articial light.
3. Do not overreach and keep proper balance and
footing at all times.
4. Always be sure of your footing on slopes.
5. Walk, never run.
6. Keep all cooling air inlets clear of debris.
7. Never blow debris in the direction of
bystanders.
8. Operate the machine in a recommended posi-
tion and on a rm surface.
9. Do not operate the machine at high places.
10. Never point the nozzle at anyone in the vicinity
when using the machine.
11. Never block suction inlet and/or blower outlet.
• Be careful not to block suction inlet or
blower outlet with dust or dirt when oper-
ating in dusty area.
• Do not use nozzles other than the nozzles
provided by Makita.
• Do not use the blower to inate balls,
rubber boat or the similar.
12. Do not operate the machine near open window,
etc.
13. Operating the machine only at reasonable
hours is recommended - not early in the
morning or late at night when people might be
disturbed.
14. Using rakes and brooms to loosen debris
before blowing is recommended.
15. If the machine strikes any foreign objects or
should start making any unusual noise or
vibration, immediately switch o the machine
to stop it. Remove the battery cartridge from
the machine and inspect the machine for
damage before restarting and operating the
machine. If the machine is damaged, ask
Makita Authorized Service Centers for repair.
16. Do not insert ngers or other objects into
suction inlet or blower outlet.
17. Prevent unintentional starting. Ensure the
switch is in the o-position before inserting
battery cartridge, picking up or carrying the
machine. Carrying the machine with your n-
ger on the switch or energizing the machine
that has the switch on invites accidents.
18. Never blow or vacuum dangerous materials,
such as nails, fragments of glass, or blades.
19.
Do not operate the machine near ammable materials.
20. Avoid operating the machine for a long time in
low temperature environment.
Maintenance and storage
1. Keep all nuts, bolts and screws tight to be sure
the machine is in safe working condition.
2. If the parts are worn or damaged, replace them
with parts provided by Makita.
3. Store the machine in a dry place out of the
reach of children.
4. When you stop the machine for inspection,
servicing, storage, or changing accessory,
switch o the machine and make sure that
all moving parts come to a complete stop,
and remove the battery cartridge. Cool down
the machine before making any work on the
machine. Maintain the machine with care and
keep it clean.
5. Always cool down the machine before storing.
6. Do not expose the machine to rain. Store the
machine indoors.
7.
When you lift the machine, be sure to bend your
knees and be careful not to hurt your back.
Battery tool use and care
1. Recharge only with the charger specied by
the manufacturer. A charger that is suitable for
one type of battery pack may create a risk of re
when used with another battery pack.
2. Use power tools only with specically desig-
nated battery packs. Use of any other battery
packs may create a risk of injury and re.
3. When battery pack is not in use, keep it away
from other metal objects, like paper clips,
coins, keys, nails, screws or other small metal
objects, that can make a connection from one
terminal to another. Shorting the battery termi-
nals together may cause burns or a re.
4. Under abusive conditions, liquid may be
ejected from the battery; avoid contact. If con-
tact accidentally occurs, ush with water. If
liquid contacts eyes, additionally seek medical
help. Liquid ejected from the battery may cause
irritation or burns.
5. Do not use a battery pack or tool that is dam-
aged or modied. Damaged or modied batteries
may exhibit unpredictable behaviour resulting in
re, explosion or risk of injury.
6. Do not expose a battery pack or tool to re or
excessive temperature. Exposure to re or tem-
perature above 130 °C may cause explosion.
7. Follow all charging instructions and do not
charge the battery pack or tool outside the
temperature range specied in the instruc-
tions. Charging improperly or at temperatures
outside the specied range may damage the
battery and increase the risk of re.

10 ENGLISH
Electrical and battery safety
1. Do not dispose of the battery(ies) in a re.
The cell may explode. Check with local codes for
possible special disposal instructions.
2. Do not open or mutilate the battery(ies).
Released electrolyte is corrosive and may cause
damage to the eyes or skin. It may be toxic if
swallowed.
3. Do not charge battery in rain, or in wet
locations.
4. Do not charge the battery outdoors.
5. Do not handle charger, including charger plug,
and charger terminals with wet hands.
Service
1. Have your power tool serviced by a qualied
repair person using only identical replacement
parts. This will ensure that the safety of the power
tool is maintained.
2. Never service damaged battery packs. Service
of battery packs should only be performed by the
manufacturer or authorized service providers.
SAVE THESE INSTRUCTIONS.
WARNING: DO NOT let comfort or familiarity
with product (gained from repeated use) replace
strict adherence to safety rules for the subject
product.
MISUSE or failure to follow the safety rules stated
in this instruction manual may cause serious
personal injury.
Important safety instructions for
battery cartridge
1. Before using battery cartridge, read all instruc-
tions and cautionary markings on (1) battery
charger, (2) battery, and (3) product using
battery.
2. Do not disassemble battery cartridge.
3. If operating time has become excessively
shorter, stop operating immediately. It may
result in a risk of overheating, possible burns
and even an explosion.
4. If electrolyte gets into your eyes, rinse them
out with clear water and seek medical atten-
tion right away. It may result in loss of your
eyesight.
5. Do not short the battery cartridge:
(1) Do not touch the terminals with any con-
ductive material.
(2) Avoid storing battery cartridge in a con-
tainer with other metal objects such as
nails, coins, etc.
(3) Do not expose battery cartridge to water
or rain.
A battery short can cause a large current
ow, overheating, possible burns and even a
breakdown.
6. Do not store the tool and battery cartridge in
locations where the temperature may reach or
exceed 50 °C (122 °F).
7. Do not incinerate the battery cartridge even if
it is severely damaged or is completely worn
out. The battery cartridge can explode in a re.
8. Be careful not to drop or strike battery.
9. Do not use a damaged battery.
10.
The contained lithium-ion batteries are subject to
the Dangerous Goods Legislation requirements.
For commercial transports e.g. by third parties,
forwarding agents, special requirement on pack-
aging and labeling must be observed.
For preparation of the item being shipped, consult-
ing an expert for hazardous material is required.
Please also observe possibly more detailed
national regulations.
Tape or mask o open contacts and pack up the
battery in such a manner that it cannot move
around in the packaging.
11. When disposing the battery cartridge, remove
it from the tool and dispose of it in a safe
place. Follow your local regulations relating to
disposal of battery.
12. Use the batteries only with the products
specied by Makita. Installing the batteries to
non-compliant products may result in a re, exces-
sive heat, explosion, or leak of electrolyte.
13. If the tool is not used for a long period of time,
the battery must be removed from the tool.
SAVE THESE INSTRUCTIONS.
CAUTION: Only use genuine Makita batteries.
Use of non-genuine Makita batteries, or batteries that
have been altered, may result in the battery bursting
causing res, personal injury and damage. It will
also void the Makita warranty for the Makita tool and
charger.
Tips for maintaining maximum
battery life
1. Charge the battery cartridge before completely
discharged. Always stop tool operation and
charge the battery cartridge when you notice
less tool power.
2. Never recharge a fully charged battery car-
tridge. Overcharging shortens the battery
service life.
3. Charge the battery cartridge with room tem-
perature at 10 °C - 40 °C (50 °F - 104 °F). Let
a hot battery cartridge cool down before
charging it.
4. Charge the battery cartridge if you do not use
it for a long period (more than six months).
ASSEMBLY
CAUTION: Always be sure that the machine is
switched o and the battery cartridge is removed
before carrying out any work on the machine.
NOTICE: Before operating the machine, be sure
to completely assemble the machine. Otherwise,
the machine does not work.

11 ENGLISH
Assembly for blowing
Installing or removing blower pipe
and nozzle
1. Attach the blower pipe to the main unit.
Insert the blower pipe into the main unit with the bolt
facing left as shown in the gure. Turn the blower pipe
as shown in the gure so that the bolt is aligned with the
hole on the main unit, and then tighten the bolt rmly
using the hex wrench.
► Fig.1: 1. Bolt 2. Blower pipe
2. Align the protrusion on the blower pipe with the
groove on the end nozzle, then attach the end nozzle to
the blower pipe, and then turn the end nozzle to lock it
into place.
► Fig.2: 1. End nozzle 2. Blower pipe
To remove the blower pipe and end nozzle, perform the
installation procedure in reverse.
NOTE: The length of the nozzle can be changed by
moving the nozzle as shown in the gure.
► Fig.3: 1. End nozzle 2. Blower pipe
Installing or removing at nozzle or
extension nozzle
Optional accessory
Attach the at nozzle or extension nozzle to the end
nozzle, and then turn it to lock it into place.
► Fig.4: 1. Flat nozzle 2. Extension nozzle 3. End
nozzle
You can also attach the at nozzle or extension nozzle
to the blower pipe.
► Fig.5: 1. Flat nozzle 2. Extension nozzle 3. Blower
pipe
To remove the at nozzle or extension nozzle, perform
the installation procedure in reverse.
Attaching shoulder strap
CAUTION: Be sure to attach the hooks of
the shoulder strap to the machine securely. If the
hooks are attached incompletely, they may come o
and cause an injury.
CAUTION: Be sure to use the shoulder strap
dedicated to this machine. Using other shoulder
strap may cause an injury.
Attach the hooks of the shoulder strap to the machine
as shown in the gure.
► Fig.6: 1. Hook
The shoulder strap features a means of quick release.
Simply squeeze the sides of the buckle to release the
machine from the shoulder strap.
► Fig.7: 1. Buckle
Assembly for vacuuming
Installing or removing suction pipe
and nozzle
Optional accessory
1. Align the triangle mark on the suction nozzle with
that on the suction pipe, and then insert the suction
nozzle into the suction pipe until the latch on the nozzle
snaps into place.
► Fig.8: 1. Suction nozzle 2. Suction pipe 3. Triangle
mark
2. Loosen the bolt on the fan cover using the hex
wrench, and open the fan cover.
► Fig.9: 1. Bolt 2. Fan cover 3. Hex wrench
3. Align the triangle mark on the suction pipe
with mark on the main unit, and then attach the
suction pipe to the main unit.
► Fig.10: 1. Suction pipe 2. Triangle mark 3. mark
4. Turn the suction pipe clockwise so that the bolt
on the pipe is aligned with the hole on the main unit,
and then fasten the bolt rmly using the hex wrench to
secure the pipe to the main unit.
► Fig.11: 1. Suction pipe 2. Bolt
To remove the suction pipe and nozzle, perform the
installation procedure in reverse.
Installing or removing elbow pipe
and dust bag
Optional accessory
1. Insert the elbow pipe into the dust bag and tighten
the belt to x the elbow pipe as shown in the gure.
► Fig.12: 1. Dust bag 2. Elbow pipe 3. Belt
2. Attach the elbow pipe to the main unit.
Insert the elbow pipe into the main unit with the bolt
facing left as shown in the gure. Turn the elbow pipe
as shown in the gure so that the bolt is aligned with the
hole on the main unit, and then tighten the bolt rmly
using the hex wrench.
► Fig.13: 1. Bolt 2. Elbow pipe
3. Attach the hook of the dust bag to the shoulder
strap, and then attach the hooks of the shoulder strap to
the main unit as shown in the gure.
► Fig.14: 1. Hook
To remove the dust bag and elbow pipe, perform the
installation procedure in reverse.

12 ENGLISH
FUNCTIONAL DESCRIPTION
CAUTION:
Always be sure that the machine
is switched o and the battery cartridge is removed
before adjusting or checking function on the machine.
Installing or removing battery cartridge
CAUTION: Always switch o the machine
before installing or removing of the battery
cartridge.
CAUTION: Hold the machine and the battery
cartridge rmly when installing or removing bat-
tery cartridge. Failure to hold the machine and the
battery cartridge rmly may cause them to slip o
your hands and result in damage to the machine and
battery cartridge and a personal injury.
CAUTION: Always install the battery cartridge
fully until the red indicator cannot be seen. If not,
it may accidentally fall out of the machine, causing
injury to you or someone around you.
CAUTION: Do not install the battery cartridge
forcibly. If the cartridge does not slide in easily, it is
not being inserted correctly.
► Fig.15:
1. Red indicator 2. Button 3. Battery cartridge
To remove the battery cartridge, slide it from the machine
while sliding the button on the front of the cartridge.
To install the battery cartridge, align the tongue on the
battery cartridge with the groove in the housing and slip
it into place. Insert it all the way until it locks in place
with a little click. If you can see the red indicator on the
upper side of the button, it is not locked completely.
Indicating the remaining battery capacity
Only for battery cartridges with the indicator
► Fig.16: 1. Indicator lamps 2. Check button
Press the check button on the battery cartridge to indi-
cate the remaining battery capacity. The indicator lamps
light up for a few seconds.
Indicator lamps Remaining
capacity
Lighted O Blinking
75% to 100%
50% to 75%
25% to 50%
0% to 25%
Charge the
battery.
The battery
may have
malfunctioned.
NOTE: Depending on the conditions of use and the
ambient temperature, the indication may dier slightly
from the actual capacity.
Machine/battery protection system
The machine is equipped with a machine/battery
protection system. This system automatically cuts o
power to the motor to extend machine and battery life.
The machine will automatically stop during operation if
the machine or battery is placed under one of the fol-
lowing conditions:
Overload protection
When the machine or battery is operated in a manner
that causes it to draw an abnormally high current, the
machine automatically stops and the lamp for mode
1 blinks in green. In this situation, turn the machine
o and stop the application that caused the machine
to become overloaded. Then turn the machine on to
restart.
Overheat protection
When the machine or battery is overheated, the
machine stops automatically and the lamp for mode 1
lights up in red. In this case, let the machine and battery
cool down before turning the machine on again.
Overdischarge protection
When the battery capacity is not enough, the machine
stops automatically and the lamp for mode 1 blinks in
red. In this case, remove the battery from the machine
and charge the battery.
Main power switch
WARNING: Always turn o the main power
switch when not in use.
To turn on the machine, press the main power switch.
The lamps for mode 1 and mode 2 light up in green. To
turn o, keep pressing the main power switch until the
lamps for mode 1 and mode 2 go o.
► Fig.17: (1) Lamp for mode 1 (2) Lamp for mode 2
(3) Main power switch
You can use the machine in the vacuuming mode. In the
vacuuming mode, the suction volume becomes smaller
than in the normal mode.
When you turn on the machine, the machine starts up in
the normal mode. To use the machine in the vacuuming
mode, press the main power switch when the machine
is turned on. The lamp for mode 2 goes o and only the
lamp for mode 1 lights up in green. When you press the
main power switch again, the machine returns to the
normal mode, and the lamps for mode 1 and mode 2
light up in green.

13 ENGLISH
NOTE: The lamp for mode 1 blinks in green if the
machine is operated under unoperatable conditions.
The lamp blinks in one of the following conditions.
• The switch trigger is pulled, when the bolt on the
fan cover or suction pipe is not tightened rmly,
or the bolt on the blower pipe or elbow pipe is
not tightened rmly.
• The machine is turned on, when the control
lever is not fully returned to the o position, or
while you are pulling the switch trigger.
NOTE: This machine employs the auto power-o
function. To avoid unintentional start up, the main
power switch will automatically shut down when the
switch trigger is not pulled for a certain period after
the main power switch is turned on.
Switch action
WARNING: Before installing the battery car-
tridge into the machine, always check to see that
the switch trigger actuates properly and returns
to the "OFF" position when released.
► Fig.18: 1. Switch trigger
To start the machine, simply pull the switch trigger. The
speed is increased by increasing pressure on the switch
trigger. Release the switch trigger to stop.
Cruise control function
The cruise control function allows the operator to main-
tain a constant speed without pulling the trigger. To
increase the speed, turn the control lever forward. To
decrease the speed, turn the control lever backward.
► Fig.19: 1. Control lever
Hex wrench storage
When not in use, store the hex wrench as illustrated to
keep it from being lost.
► Fig.20: 1. Hex wrench
Accidental re-start preventive
function
If you turn on the machine while pulling the switch trig-
ger or while the control lever is not in the o position,
the machine does not start. To start the machine, rst
release the switch trigger and return the control lever
fully, and then turn on the machine.
Electronic function
The machine is equipped with the electronic function for
easy operation.
• Constant speed control
The speed control function provides the constant
rotation speed regardless of load conditions.
OPERATION
CAUTION: Do not place the machine on the
ground while it is switched on. Sand or dust may
enter from suction inlet and cause a malfunction or
personal injury.
Blower operation
CAUTION: When performing the blower
operation, be sure to remove the suction pipe,
suction nozzle, elbow pipe and dust bag from the
machine, and attach the blower pipe and nozzles
to the machine.
Hold the machine rmly with a hand and perform the
blowing operation by moving it around slowly. When
blowing around building, big stone or vehicle, direct the
nozzle away from them. When performing an operation
in a corner, start from the corner and then move to wide
area.
► Fig.21
Vacuuming operation
CAUTION: When performing the vacuuming
operation, be sure to remove the blower pipe and
nozzles from the machine, and attach the suction
pipe, suction nozzle, elbow pipe, dust bag, and
shoulder strap to the machine.
CAUTION: Check the dust bag frequently for
wear or deterioration.
CAUTION: Be sure to fasten the fastener of
the dust bag before operating the machine.
CAUTION: Always switch o the machine
before opening or fastening the fastener of the
dust bag.
NOTICE: Do not allow wet materials, such as
wet leaves, and foreign materials, such as large
wood chips, metals, glass, pebbles, etc., to be
sucked into the machine. Otherwise, a malfunction
may occur.
NOTICE: Empty the dust bag before it becomes
full. Otherwise, a malfunction may occur.
NOTICE: To prevent the suction of foreign mate-
rials, operating the machine in the vacuuming
mode is recommended.
1. Put the shoulder strap and dust bag on the shoul-
der as shown in the gure. Adjust the length of the
strap.
► Fig.22: 1. Shoulder strap 2. Carry handle 3. Assist
handle 4. Dust bag
2. Hold the carry handle with your right hand and the
assist handle with the other hand.
► Fig.23
3. While operating the machine, adjust the switch
trigger so that the suction force is appropriate for the
work location and conditions.

14 ENGLISH
MAINTENANCE
CAUTION: Always be sure that the machine is
switched o and the battery cartridge is removed
before attempting to perform inspection or
maintenance.
To maintain product SAFETY and RELIABILITY,
repairs, any other maintenance or adjustment should
be performed by Makita Authorized or Factory Service
Centers, always using Makita replacement parts.
Cleaning the machine
Clean the machine by wiping o dust with a dry cloth or
one dipped in soapy water and wrung out.
NOTICE: Never use gasoline, benzine, thinner,
alcohol or the like. Discoloration, deformation or
cracks may result.
Remove dust or dirt from the suction inlets.
► Fig.24: 1. Suction inlet
TROUBLESHOOTING
Before asking for repairs, conduct your own inspection rst. If you nd a problem that is not explained in the man-
ual, do not attempt to dismantle the machine. Instead, ask Makita Authorized Service Centers, always using Makita
replacement parts for repairs.
State of abnormality Probable cause (malfunction) Remedy
Motor does not run. Battery cartridge is not installed. Install the battery cartridge.
Battery problem (under voltage) Recharge the battery. If recharging is not eective,
replace battery.
For blower
The blower pipe is not attached.
The fan cover is not closed.
Attach the blower pipe, and then tighten the bolt.
Close the fan cover, and then tighten the bolt.
For vacuum
The elbow pipe or suction pipe is not
attached.
Attach the elbow pipe or suction pipe, and then
tighten the bolt.
The drive system does not work
correctly.
Ask your local authorized service center for repair.
Motor stops running after a little use. Battery's charge level is low. Recharge the battery. If recharging is not eective,
replace battery.
Overheating. Stop using the machine to allow it to cool down.
The machine does not reach the
maximum speed.
Battery is installed improperly. Install the battery cartridge as described in this
manual.
Battery power is dropping. Recharge the battery. If recharging is not eective,
replace battery.
The drive system does not work
correctly.
Ask your local authorized service center for repair.
Abnormal vibration:
stop the machine immediately!
The drive system does not work
correctly.
Ask your local authorized service center for repair.
Motor cannot stop:
Remove the battery immediately!
Electric or electronic malfunction. Remove the battery and ask your local authorized
service center for repair.
OPTIONAL
ACCESSORIES
CAUTION: These accessories or attachments
are recommended for use with your Makita prod-
uct specied in this manual. The use of any other
accessories or attachments might present a risk of
injury to persons. Only use accessory or attachment
for its stated purpose.
If you need any assistance for more details regard-
ing these accessories, ask your local Makita Service
Center.
• Vacuum kit
• Extension nozzle
• Flat nozzle
• Shoulder strap
• Makita genuine battery and charger
NOTE: Some items in the list may be included in the
product package as standard accessories. They may
dier from country to country.

15 SVENSKA
SVENSKA (Originalinstruktioner)
SPECIFIKATIONER
Modell: DUB363
Kapaciteter Luftvolym 0 - 13,4 m3/min
Lufthastighet (genomsnitt) 0 - 54 m/s
Lufthastighet (max) 0 - 65 m/s
Dimensioner (L x B x H) *1 341 mm x 193 mm x 415 mm
Märkspänning 36 V likström
Nettovikt Blåsmaskin *2 3,8 - 5,2 kg
Dammsugare *3 6,0 - 6,6 kg
*1. Utan rör, munstycken, dammsugarpåse, axelrem och batterikassetter.
*2. Med blåsrör, adapterrör och platt munstycke, samt utan sugrör, sugmunstycke, vinkelrör, dammsugarpåse och
axelrem.
*3. Med sugrör, sugmunstycke, vinkelrör, dammsugarpåse och axelrem, och utan blåsrör, adapterrör och platt
munstycke.
• På grund av vårt pågående program för forskning och utveckling kan dessa specikationer ändras utan föregå-
ende meddelande.
• Specikationer kan variera mellan olika länder.
• Vikten kan variera beroende på tillbehören, inklusive batterikassett. Den lättaste och den tyngsta kombinatio-
nen enligt EPTA-procedur 01/2014 visas i tabellen.
Tillgänglig batterikassett
BL1815N / BL1820 / BL1820B / BL1830 / BL1830B / BL1840 / BL1840B / BL1850 / BL1850B / BL1860B
• Vissa av batterikassetterna på listan ovan kanske inte nns tillgängliga i din region.
VARNING: Använd endast batterikassetter från listan ovan. Användning av andra batterikassetter kan
orsaka personskada och/eller brand.
Symboler
Följande visar symbolerna som används för utrust-
ningen. Se till att du förstår innebörden innan du använ-
der borrmaskinen.
Var extra försiktig och uppmärksam.
Läs igenom bruksanvisningen.
Håll händerna på behörigt avstånd från
roterande delar.
Långt hår kan fastna och orsaka en olycka.
Håll omgivande personer på avstånd.
Bär ögon- och öronskydd.
Utsätt inte för fukt.
Ni-MH
Li-ion
Gäller endast inom EU
Elektrisk utrustning eller batteripaket får
inte kastas i hushållsavfallet!
Enligt EU-direktiven som avser förbrukad
elektrisk och elektronisk utrustning, bat-
terier, ackumulatorer, förbrukade batterier
och ackumulatorer, samt direktivens
tillämpning enligt nationell lagstiftning, ska
uttjänt elektrisk utrustning, batterier och
batteripaket sorteras separat och lämnas
till miljövänlig återvinning.
Avsedd användning
Maskinen är avsedd för dammblåsning och
dammsugning.
Buller
Den normala bullernivån för A-belastning är bestämd
enligt EN50636-2-100:
Ljudtrycksnivå (LpA) : 84,8 dB (A)
Mättolerans (K): 1,3 dB (A)
Ljudeektnivå (LWA) : 94,9 dB (A)
Mättolerans (K): 0,3 dB (A)
OBS: Det deklarerade bullervärdet har uppmätts i
enlighet med standardtestmetoden och kan användas
för jämförandet av en maskin med en annan.
OBS: Det deklarerade bulleremissionsvärdet kan
också användas i en preliminär bedömning av expo-
nering för vibration.

16 SVENSKA
VARNING: Använd hörselskydd.
VARNING: Bulleremissionen under faktisk
användning av maskinen kan skilja sig från det
deklarerade värdet, beroende på hur maskinen
används och särskilt vilken typ av arbetsstycke
som behandlas.
VARNING: Var noga med att identiera säker-
hetsåtgärder för att skydda användaren, vilka är
grundade på en uppskattning av graden av expo-
nering för vibrationer under de faktiska använd-
ningsförhållandena, (ta, förutom avtryckartiden,
med alla delar av användarcykeln i beräkningen,
som till exempel tiden då maskinen är avstängd
och när den går på tomgång).
Vibration
Det totala vibrationsvärdet (treaxlad vektorsumma)
bestämt enligt EN50636-2-100:
Arbetsläge: drift utan last (blåsning)
Vibrationsemission (ah) : 2,5 m/s2eller lägre
Mättolerans (K): 1,5 m/s2
Arbetsläge: drift utan last (dammsugning)
Vibrationsemission (ah) : 2,5 m/s2eller lägre
Mättolerans (K): 1,5 m/s2
OBS: Det deklarerade totala vibrationsvärdet har
uppmätts i enlighet med standardtestmetoden och
kan användas för jämförandet av en maskin med en
annan.
OBS: Det deklarerade totala vibrationsvärdet kan
också användas i en preliminär bedömning av expo-
nering för vibration.
VARNING: Vibrationsemissionen under fak-
tisk användning av maskinen kan skilja sig från
det deklarerade värdet, beroende på hur maski-
nen används och särskilt vilken typ av arbetss-
tycke som behandlas.
VARNING: Var noga med att identiera säker-
hetsåtgärder för att skydda användaren, vilka är
grundade på en uppskattning av graden av expo-
nering för vibrationer under de faktiska använd-
ningsförhållandena, (ta, förutom avtryckartiden,
med alla delar av användarcykeln i beräkningen,
som till exempel tiden då maskinen är avstängd
och när den går på tomgång).
EG-försäkran om överensstämmelse
Gäller endast inom EU
EG-försäkran om överensstämmelse inkluderas som
bilaga A till denna bruksanvisning.
SÄKERHETSVARNINGAR
Säkerhetsinstruktioner för
batteridriven lövblås
VARNING: Läs igenom alla säkerhetsvar-
ningar och anvisningar. Underlåtenhet att följa
varningar och instruktioner kan leda till elstötar, brand
och/eller allvarliga personskador.
Spara alla varningar och instruk-
tioner för framtida referens.
Utbildning
1. Läs anvisningarna noggrant. Sätt in dig i styr-
reglagen och hur maskinen används korrekt.
2. Låt aldrig barn eller personer med nedsatt
fysisk, sensorisk eller mental förmåga, eller
personer som saknar kunskap och erfarenhet
av maskinen eller som ej är förtrogna med
dessa anvisningar, använda maskinen. Lokala
bestämmelser anger eventuellt en åldersgräns
för användaren.
3. Använd aldrig maskinen när personer (speci-
ellt barn) eller djur nns i närheten.
4. Glöm inte att användaren är ansvarig för
olyckor eller eventuell fara gentemot andra
personer och deras egendom.
Förberedelse
1. Bär alltid lämpliga skor och långbyxor vid
arbete med maskinen.
2. Bär inte löst sittande kläder eller smycken som
kan sugas in i luftintaget. Håll långt hår borta
från luftintagen.
3. Bär alltid skyddsglasögon för att skydda dina
ögon från skada när du använder e-verktyg.
Skyddsglasögonen måste uppfylla ANSI
Z87.1 i USA, EN 166 i Europa, eller AS/NZS
1336 i Australien/Nya Zealand. I Australien/
Nya Zeeland måste man enligt lag även bära
ansiktsskydd för att skydda ansiktet.
Det är arbetsgivarens ansvar att se till att
användare och övriga personer i det ome-
delbara arbetsområdet använder lämplig
skyddsutrustning.
4. Det rekommenderas att bära ansiktsmask för
att förhindra dammirritation.

17 SVENSKA
5. Bär alltid halkfria skyddsskor när du använder
maskinen. Halkfria skyddsstövlar och -skor mins-
kar risken för skada.
6. Använd personlig säkerhetsutrustning.
Använd alltid skyddsglasögon. Användning
av skyddsutrustning, som till exempel dammask,
halkfria skor, skyddshjälm och hörselskydd,
under lämpliga förhållanden minskar risken för
personskador.
Användning
1. Stäng av maskinen och ta ut batterikassetten
och se till att alla rörliga delar har slutat rotera
• när du lämnar maskinen.
• innan du tar bort något som fastnat.
• innan maskinen kontrolleras, rengörs
eller något arbete utförs på den.
• om maskinen får ovanliga vibrationer.
• varje gång du ställer om maskinen från
blås till dammsugare och tvärtom.
2. Använd endast maskinen i dagsljus eller i god
belysning.
3. Sträck dig inte för långt och håll alltid god
balans och bra fotfäste.
4. Se alltid till att ha balans på sluttningar.
5. Gå, spring aldrig.
6. Håll alla kylluftinlopp fria från skräp.
7. Blås aldrig skräp i riktning mot kringstående.
8. Använd maskinen i rekommenderad position
och på en stabil yta.
9. Använd inte maskinen på högt belägna ställen.
10. Rikta aldrig munstycket mot någon i omgiv-
ningen när maskinen används.
11. Blockera aldrig lövblåsens insug och/eller
utblås.
• Var noga med att inte blockera insuget
eller utblåset med damm eller smuts vid
användning i dammiga områden.
• Använd inga andra munstycken än de
som levereras av Makita.
• Använd inte lövblåsen för att blåsa upp
bollar, gummibåtar eller liknande.
12. Använd inte maskinen i närheten av öppna
fönster osv.
13. Det rekommenderas att maskinen endast
används vid lämpliga tidpunkter – inte tidigt
på morgonen eller sent på kvällen då folk kan
störas.
14. Det rekommenderas att löv och skräp lossas
genom att man först krattar och sopar innan
lövblåsen används.
15. Om maskinen träar ett föremål, eller börjar
låta eller vibrera konstigt, stäng omedelbart
av den. Ta ur batterikassetten från maskinen
och kontrollera maskinen efter skador innan
du startar om och använder maskinen. Om
maskinen är skadad, kontakta ett auktoriserat
Makita-servicecenter för reparation.
16. För inte in ngrar eller andra föremål i lövblå-
sens insug eller utblås.
17. Förhindra oavsiktlig start. Försäkra dig om
att strömbrytaren står i avstängt läge innan
du sätter i batterikassetten, tar upp eller bär
maskinen. Att bära maskinen med ngrarna på
avtryckaren, eller strömsätta den när avtrycka-
ren är intryckt, inbjuder till olyckor.
18. Blås eller dammsug aldrig farliga material som
spikar, glasskärvor eller sågblad.
19. Använd inte maskinen i närheten av lättan-
tändligt material.
20. Undvik att långvarigt använda maskinen i en
omgivning med låg temperatur.
Underhåll och förvaring
1. Se till att alla muttrar, bultar och skruvar är
åtdragna för att alltid bibehålla maskinen i
säkert arbetsskick.
2. Om delarna blir slitna eller skadade, ska de
ersättas med delar som tillhandahålls av
Makita.
3. Förvara maskinen på en torr plats utom räck-
håll för barn.
4. När du stoppar maskinen för inspektion, ser-
vice, förvaring eller byte av tillbehör, ska du
stänga av maskinen och se till att alla rörliga
delar stannar helt, och ta bort batterikassetten.
Låt maskinen svalna innan något arbete utförs.
Underhåll maskinen med omsorg och håll den
ren.
5. Låt alltid maskinen svalna innan förvaring.
6. Utsätt inte maskinen för regn. Förvara maski-
nen inomhus.
7. När du lyfter maskinen, se då till att böja knäna
och var noga med att inte skada ryggen.
Användning och underhåll av batteri
1. Ladda endast med den batteriladdare som
angetts av tillverkaren. En laddare som passar
en viss typ av batterier kan skapa risk för brand
när den används tillsammans med annat batteri.
2. Använd endast maskiner tillsammans med
tillhörande batterier. Om andra batterier används
kan risken för personskada och brand öka.
3. När batteriet inte används bör det hållas borta
från andra metallföremål som till exempel gem,
mynt, nycklar, spik, skruv eller andra små
metallföremål som kan skapa anslutning från
en terminal till en annan. Kortslutning av batteri-
polerna kan orsaka brännskador eller brand.
4. Under hårda förhållande kan det komma
vätska ur batteriet. Undvik kontakt. Spola med
vatten om kontakt ändå råkar uppstå. Om väts-
kan kommer i kontakt med ögonen bör läkare
uppsökas. Vätska från batteriet kan orsaka irrita-
tion på huden eller ge brännskador.
5. Använd inte ett batteripaket eller maskin som
är skadat eller ändrat. Skadade eller ändrade
batterier kan uppföra sig opålitligt, vilket kan leda
till brand, explosion eller skaderisk.
6. Utsätt inte batteripaket eller maskiner för
brand eller höga temperaturer. Exponering för
brand eller temperaturer över 130 °C kan leda till
explosion.

18 SVENSKA
7. Följ alla laddningsinstruktioner och ladda inte
batteripaketet eller maskinen utanför det tem-
peraturintervall som anges i instruktionerna.
Felaktig laddning, eller vid temperaturer utanför
det angivna intervallet, kan skada batteriet och
öka risken för brand.
El- och batterisäkerhet
1. Släng inte batteriet/batterierna i öppen eld.
Cellen kan explodera. Kontrollera de lokala reg-
lerna för att se eventuell särskild avfallshantering.
2. Öppna inte eller förstör batteriet/batterierna.
Elektrolyt som kommer ut är frätande och kan
ge ögon- eller hudskador. Det kan vara giftigt vid
förtäring.
3. Ladda inte batteriet i regn eller i fuktiga eller
våta utrymmen.
4. Ladda inte batteriet utomhus.
5. Hantera inte laddaren, däribland laddarstick-
proppen, och laddarens kopplingar med våta
händer.
Service
1. Lämna maskinen till en auktoriserad verkstad
för service och underhåll med originalreserv-
delar. Detta garanterar fortsatt säker användning
av maskinen.
2. Utför aldrig service av skadade batteripaket.
Service av skadade batteripaket får endast
utföras av tillverkaren eller auktoriserade
serviceleverantörer.
SPARA DESSA ANVISNINGAR.
VARNING: GLÖM INTE att också fortsätt-
ningsvis strikt följa säkerhetsanvisningarna för
maskinen även efter att du blivit van att använda
den.
Vid FELAKTIG HANTERING av maskinen eller om
inte säkerhetsanvisningarna i denna bruksanvis-
ning följs kan följden bli allvarliga personskador.
Viktiga säkerhetsanvisningar för
batterikassetten
1. Innan batterikassetten används ska alla
instruktioner och varningsmärken på (1) bat-
teriladdaren, (2) batteriet och (3) produkten
läsas.
2. Montera inte isär batterikassetten.
3. Om drifttiden blivit avsevärt kortare ska
användningen avbrytas omedelbart. Det kan
uppstå överhettning, brännskador och t o m en
explosion.
4. Om du får elektrolyt i ögonen ska de sköljas
med rent vatten och läkare uppsökas omedel-
bart. Det nns risk för att synen förloras.
5. Kortslut inte batterikassetten.
(1) Rör inte vid polerna med något strömfö-
rande material.
(2) Undvik att förvara batterikassetten till-
sammans med andra metallobjekt som
t.ex. spikar, mynt o.s.v.
(3) Skydda batteriet mot vatten och regn.
En batterikortslutning kan orsaka ett
stort strömöde, överhettning, brand och
maskinhaveri.
6. Förvara inte maskinen och batterikassetten på
platser där temperaturen kan nå eller överstiga
50 °C.
7. Bränn inte upp batterikassetten även om
den är svårt skadad eller helt utsliten.
Batterikassetten kan explodera i öppen eld.
8. Var försiktig så att du inte råkar tappa batteriet
och utsätt det inte för stötar.
9. Använd inte ett skadat batteri.
10. De medföljande litiumjonbatterierna är föremål
för kraven i gällande lagstiftning för farligt
gods.
För kommersiella transporter (av t.ex. tredje parter
som speditionsrmor) måste de särskilda trans-
portkrav som anges på emballaget och etiketter
iakttas.
För att förbereda den produkt som ska avsändas
krävs att du konsulterar en expert på riskmaterial.
Var också uppmärksam på att det i ditt land kan
nnas ytterligare föreskrifter att följa.
Tejpa över eller maskera blottade kontakter och
packa batteriet på sådant sätt att det inte kan röra
sig fritt i förpackningen.
11. När batterikassetten ska kasseras måste den
tas bort från maskinen och kasseras på ett
säkert sätt. Följ lokala föreskrifter beträande
avfallshantering av batteriet.
12. Använd endast batterierna med de produkter
som specicerats av Makita. Att använda bat-
terierna med ej godkända produkter kan leda till
brand, överdriven värme, explosion eller utläck-
ande elektrolyt.
13. Om maskinen inte används under en lång tid
måste batteriet tas bort från maskinen.
SPARA DESSA ANVISNINGAR.
FÖRSIKTIGT: Använda endast äkta Makita-
batterier. Användning av oäkta Makita-batterier eller
batterier som har manipulerats kan leda till person-
och utrustningsskador eller till att batteriet fattar eld.
Det upphäver också Makitas garanti för verktyget och
laddaren.
Tips för att uppnå batteriets max-
imala livslängd
1. Ladda batterikassetten innan den är helt
urladdad. Stanna alltid maskinen och ladda
batterikassetten när du märker att maskinen
blir svagare.
2. Ladda aldrig en fulladdad batterikassett.
Överladdning förkortar batteriets livslängd.
3. Ladda batterikassetten vid en rumstemperatur
på 10 °C - 40 °C. Låt en varm batterikassett
svalna innan den laddas.
4. Ladda batterikassetten om du inte har använt
den på länge (mer än sex månader).

19 SVENSKA
MONTERING
FÖRSIKTIGT: Se alltid till att maskinen är
avstängd och batterikassetten borttagen innan du
underhåller maskinen.
OBSERVERA: Se till att montera ihop maskinen
helt och hållet innan den används. I annat fall
fungerar inte maskinen.
Montering för blåsning
Installera eller ta bort blåsrör och
munstycke
1. Fäst blåsröret vid huvudenheten.
För in blåsröret i huvudenheten med bulten riktad
åt vänster enligt bilden. Vrid blåsröret så som visas
på bilden så att bulten passar in med hålet på huvu-
denheten, och vrid sedan åt bulten ordentligt med
insexnyckeln.
► Fig.1: 1. Bult 2. Blåsrör
2. Passa in utsprånget på blåsröret med fåran på
adapterröret, sätt sedan fast munstycket på blåsröret,
och vrid på adapterröret så det låses på plats.
► Fig.2: 1. Adapterrör 2. Blåsrör
Ta bort blåsröret och adapterröret genom att utföra
installationsproceduren i omvänd ordning.
OBS: Längden på munstycket kan ändras genom att
ytta munstycket som visas på bilden.
► Fig.3: 1. Adapterrör 2. Blåsrör
Installera eller ta bort det
platta munstycket eller
förlängningsmunstycket
Extra tillbehör
Sätt fast det platta munstycket eller förlängningsmun-
stycket på adapterröret, och vrid det sedan så det låses
på plats.
► Fig.4: 1. Platt munstycke 2. Förlängningsmunstycke
3. Adapterrör
Du kan också fästa det platta munstycket eller förläng-
ningsmunstycket på blåsröret.
► Fig.5: 1. Platt munstycke 2. Förlängningsmunstycke
3. Blåsrör
Ta bort det platta munstycket eller förlängningsmun-
stycket genom att utföra installationsproceduren i
omvänd ordning.
Fastsättning av axelrem
FÖRSIKTIGT: Se till att fästa axelremmens
krokar säkert på maskinen. Om inte krokarna är
ordentligt fastsatta kan de lossa och orsaka skada.
FÖRSIKTIGT: Se till att använda den axelrem
som är avsedd för denna maskin. Att använda
andra axelremmar kan leda till skada.
Fäst axelremmens krokar på maskinen enligt bilden.
► Fig.6: 1. Krok
Det nns en metod för att snabbt lossa axelremmen.
Tryck bara på sidorna av spännet för att lösgöra maski-
nen från axelremmen.
► Fig.7: 1. Spänne
Montering för dammsugning
Installera eller ta bort sugrör och
munstycke
Valfria tillbehör
1. Passa in triangelmärket på sugmunstycket med
det på sugröret, och sätt sedan in sugmunstycket i
sugröret tills haken på munstycket klickar på plats.
► Fig.8: 1. Sugmunstycke 2. Sugrör 3. Triangelmärke
2. Lossa bulten på äkthuset med insexnyckeln och
öppna äkthuset.
► Fig.9: 1. Bult 2. Fläkthus 3. Insexnyckel
3. Passa in triangelmärket på sugröret med marke-
ringen på huvudenheten, och fäst sedan sugröret vid
huvudenheten.
► Fig.10: 1. Sugrör 2. Triangelmärke 3. märke
4. Vrid sugröret medurs så att bulten på röret passar
in med hålet på huvudenheten, och fäst sedan bul-
ten ordentligt med insexnyckeln så att röret fästs vid
huvudenheten.
► Fig.11: 1. Sugrör 2. Bult
Ta bort sugröret och munstycket genom att utföra instal-
lationsproceduren i omvänd ordning.
Installera eller ta bort vinkelröret och
dammsugarpåsen
Valfria tillbehör
1. Sätt in vinkelröret i dammsugarpåsen och spänn
åt remmen för att fästa vinkelröret, enligt bilden.
► Fig.12: 1. Dammsugarpåse 2. Vinkelrör 3. Rem
2. Fäst vinkelröret vid huvudenheten.
För in vinkelröret i huvudenheten med bulten riktad
åt vänster enligt bilden. Vrid vinkelröret så som visas
på bilden så att bulten passar in med hålet på huvu-
denheten, och vrid sedan åt bulten ordentligt med
insexnyckeln.
► Fig.13: 1. Bult 2. Vinkelrör
3. Fäst kroken på dammsugarpåsen vid axelrem-
men, och fäst sedan axelremmens krokar på huvuden-
heten enligt bilden.
► Fig.14: 1. Krok
Ta bort dammsugarpåsen och vinkelröret genom att
utföra installationsproceduren i omvänd ordning.

20 SVENSKA
FUNKTIONSBESKRIVNING
FÖRSIKTIGT: Se alltid till att maskinen är
avstängd och batterikassetten borttagen innan
du justerar maskinen eller kontrollerar dess
funktioner.
Montera eller demontera batterikassetten
FÖRSIKTIGT: Stäng alltid av maskinen innan
du monterar eller tar bort batterikassetten.
FÖRSIKTIGT: Håll stadigt i maskinen och bat-
terikassetten när du installerar eller tar bort batte-
rikassetten. I annat fall kan det leda till att maskinen
och batterikassetten glider ur händerna på dig och blir
skadade och orsakar personskada.
FÖRSIKTIGT: För alltid in batterikassetten
helt tills den röda indikatorn inte längre syns. I
annat fall kan den plötsligt lossna från maskinen och
skada dig eller någon annan.
FÖRSIKTIGT: Montera inte batterikassetten
med våld. Om kassetten inte lätt glider på plats är
den felinsatt.
► Fig.15: 1. Röd indikator 2. Knapp 3. Batterikassett
Ta bort batterikassetten genom att skjuta ner knappen
på kassettens framsida samtidigt som du drar av den
från maskinen.
Sätt i batterikassetten genom att rikta in tungan på
batterikassetten mot spåret i höljet och skjut den på
plats. Tryck in batterikassetten ordentligt tills den låser
fast med ett klick. Om du kan se den röda indikatorn på
knappens ovansida är den inte låst ordentligt.
Indikerar kvarvarande batterikapacitet
Endast för batterikassetter med indikator
► Fig.16: 1. Indikatorlampor 2. Kontrollknapp
Tryck på kontrollknappen på batterikassetten för att se
kvarvarande batterikapacitet. Indikatorlamporna lyser i
ett par sekunder.
Indikatorlampor Kvarvarande
kapacitet
Upplyst Av Blinkar
75% till 100%
50% till 75%
25% till 50%
0% till 25%
Ladda
batteriet.
Batteriet kan
ha skadats.
OBS: Beroende på användningsförhållanden och den
omgivande temperaturen kan indikationen skilja sig
lätt från den faktiska batterikapaciteten.
Skyddssystem för maskinen/
batteriet
Maskinen är utrustad med ett batteriskyddssystem. Detta
system bryter automatiskt strömmen till motorn för att
förlänga maskinens och batteriets livslängd. Maskinen
stannar automatiskt under användningen om maskinen
eller batteriet hamnar i en av följande situationer:
Överbelastningsskydd
När maskinen eller batteriet används på ett sätt som gör
att den drar onormalt mycket ström, stannar maskinen
automatiskt och lampan för läge 1 blinkar grönt. När
detta sker stänger du av maskinen och upphör med
arbetet som gjorde att den överbelastades. Starta där-
efter upp maskinen igen.
Överhettningsskydd
När maskinen eller batteriet överhettas stannar maski-
nen automatiskt och lampan för läge 1 tänds i rött. I
sådant fall ska du låta maskinen och batteriet svalna
innan maskinen sätts på igen.
Överurladdningsskydd
När batterikapaciteten inte är tillräcklig stannar maski-
nen automatiskt och lampan för läge 1 blinkar rött. Ta i
så fall ut batteriet ur maskinen och ladda det.
Strömbrytare
VARNING: Stäng alltid av strömbrytaren när
verktyget inte används.
Tryck på strömbrytaren för att sätta på maskinen.
Lamporna för läge 1 och läge 2 tänds i grönt. Stäng av
genom att hålla strömbrytaren intryckt tills lamporna för
läge 1 och läge 2 släcks.
► Fig.17: (1) Lampa för läge 1 (2) Lampa för läge 2
(3) Strömbrytare
Du kan använda maskinen i dammsugningsläget. I
dammsugningsläget blir sugvolymen mindre än i det
normala läget.
När du sätter på maskinen startar den i normalläge. För
att använda maskinen i dammsugningsläge trycker du på
strömbrytaren när maskinen är påsatt. Lampan för läge 2
släcks och endast lampan för läge 1 tänds i grönt. När du
trycker på strömbrytaren igen återgår maskinen till det nor-
mala läget, och lamporna för läge 1 och läge 2 tänds i grönt.
OBS: Lampan för läge 1 blinkar i grönt om maskinen
används under ohanterliga förhållanden. Lampan
blinkar vid ett av följande tillstånd.
• Avtryckaren trycks när bulten på äkthuset eller
sugröret inte är ordentligt åtdragen eller bulten
på blåsröret eller vinkelröret inte är ordentligt
åtdragen.
• Maskinen sätts på när kontrollspaken inte helt
har återgått till avstängd position eller medan du
trycker på avtryckaren.
Other manuals for DUB363
9
Table of contents
Languages:
Other Makita Blower manuals

Makita
Makita DUB362 User manual

Makita
Makita M4000 User manual

Makita
Makita M4000 User manual

Makita
Makita PM7651H User guide

Makita
Makita DUB361 User manual

Makita
Makita UB1100 User manual

Makita
Makita BUB143 Manual

Makita
Makita UB1102 User manual

Makita
Makita UB402MP Operation instructions

Makita
Makita XSA01 User manual

Makita
Makita BBX7600 User guide

Makita
Makita DUB363 User manual

Makita
Makita DUB362Z User manual

Makita
Makita DUB361 User manual

Makita
Makita BU01 User manual

Makita
Makita DUB362 User manual

Makita
Makita BUB360 User manual

Makita
Makita XBU02 User manual

Makita
Makita XGT 40 V Max User manual

Makita
Makita RBL500 Quick start guide