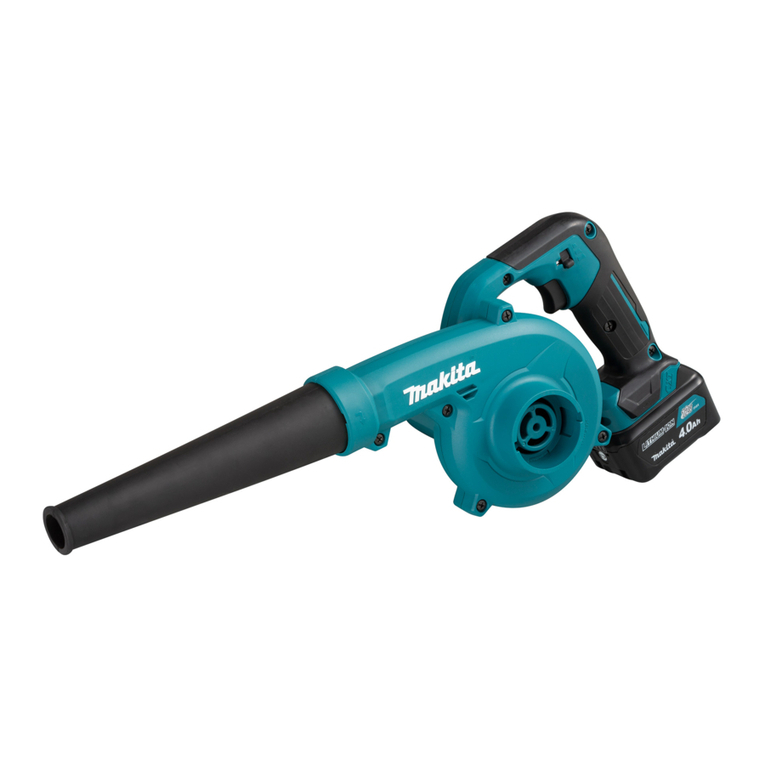
Makita GBU01 User manual

INSTRUCTION MANUAL
MANUAL DE INSTRUCCIONES
Cordless Blower
Sopladora Inalámbrica
GBU01
IMPORTANT: Read Before Using.
IMPORTANTE: Lea antes de usar.

2ENGLISH
ENGLISH (Original instructions)
SPECIFICATIONS
Model: GBU01
Capacities Air volume 0 - 16.0 m3/min (0 - 565 cu.ft./min)
Air speed (average) 0 - 53.5 m/s (0 - 120 MPH)
Air speed (max.) 0 - 64.0 m/s (0 - 143 MPH)
Overall length (with end nozzle) 850 mm (33-1/2″) / 900 mm (35-1/2″) / 950 mm (37-1/2″)
Rated voltage D.C. 36 V - 40 V max
Net weight 3.1 - 3.9 kg (6.8 - 8.6 lbs)
• Due to our continuing program of research and development, the specications herein are subject to change
without notice.
• Specications may dier from country to country.
• The weight may dier depending on the attachment(s), including the battery cartridge. The lightest and heavi-
est combination, according to EPTA-Procedure 01/2014, are shown in the table.
Applicable battery cartridge and charger
Battery cartridge BL4025 / BL4040
Charger DC40RA
• Some of the battery cartridges and chargers listed above may not be available depending on your region of
residence.
WARNING: Only use the battery cartridges and chargers listed above. Use of any other battery cartridges
and chargers may cause injury and/or re.
SAFETY WARNINGS
IMPORTANT SAFETY
INSTRUCTIONS
When using an electrical appliance, basic precautions
should always be followed, including the following:
READ ALL
INSTRUCTIONS BEFORE
USING THIS APPLIANCE.
WARNING - To reduce the
risk of re, electric shock,
or injury:
1. Do not leave appliance when battery tted.
Remove battery from appliance when not in
use and before servicing.
2. Do not expose to rain. Store indoors.
3. Do not allow to be used as a toy. Close
attention is necessary when used by or near
children.
4. Use only as described in this manual. Use only
manufacturer's recommended attachments.
5. Do not use with damaged battery. If appliance
is not working as it should, has been dropped,
damaged, left outdoors, or dropped into water,
return it to a service center.
6. Do not put any object into openings. Do not
use with any opening blocked; keep free of
dust, lint, hair, and anything that may reduce
air ow.
7. Keep hair, loose clothing, ngers, and all parts
of body away from openings and moving parts.
8. Use extra care when cleaning on stairs.
9. Use only the charger supplied by the manufac-
turer to recharge.
SAVE THESE
INSTRUCTIONS.
This appliance is intended for both household use and
commercial use.
Cordless Blower Safety
Instructions
Preparation
1. Always wear substantial footwear and long
trousers while operating the blower.
2. Do not wear loose clothing or jewellery that
can be drawn into the air inlet. Keep long hair
away from the air inlets.

3ENGLISH
3. Always use protective goggles, a cap and
mask when using the blower. Ordinary eye or
sun glasses are NOT safety glasses.
4. To prevent dust irritation the wearing of a face
mask is recommended.
5. While operating the machine, always wear
non-slip and protective footwear. Non-skid,
closed-toed safety boots and shoes will reduce the
risk of injury.
Operation
1. Never operate the blower while people, espe-
cially children, or pets are nearby.
2. Switch o the blower and remove the battery
cartridge and make sure that all moving parts
have come to a complete stop
• whenever you leave the blower.
• before clearing blockages.
• before checking, cleaning or working on
the blower.
• if the blower starts to vibrate abnormally.
3. Operate the blower only in daylight or in good
articial light.
4. Do not overreach and keep proper balance and
footing at all times.
5. Never blow debris in the direction of
bystanders.
6. Operate the blower in a recommended position
and on a rm surface.
7. Do not operate the blower at high places.
8. Never point the nozzle at anyone in the vicinity
when using the blower.
9. Never block suction inlet and/or blower outlet.
• Be careful not to block suction inlet or
blower outlet with dust or dirt when oper-
ating in dusty area.
• Do not use nozzles other than the nozzles
provided by Makita.
• Do not use the blower to inate balls,
rubber boat or the similar.
10.
Do not operate the blower near open window, etc.
11. Operating the blower only at reasonable hours
is recommended - not early in the morning or
late at night when people might be disturbed.
12. Using rakes and brooms to loosen debris
before blowing is recommended.
13. If the blower strikes any foreign objects or
should start making any unusual noise or
vibration, immediately switch o the blower
to stop it. Remove the battery cartridge from
the blower and inspect the blower for damage
before restarting and operating the blower. If
the blower is damaged, ask Makita Authorized
Service Centers for repair.
14. Do not insert ngers or other objects into
suction inlet or blower outlet.
15. Prevent unintentional starting. Ensure the
switch is in the o-position before inserting
battery cartridge, picking up or carrying the
blower. Carrying the blower with your nger
on the switch or energizing the blower that has
the switch on invites accidents.
16. Never blow dangerous materials, such as
nails, fragments of glass, or blades.
17.
Do not operate the blower near ammable materials.
18. Avoid operating the blower for a long time in
low temperature environment.
19. Always be sure of your footing on slopes.
20. Do not use the machine when there is a risk of
lightning.
21. When you use the machine on muddy ground,
wet slope, or slippery place, pay attention to
your footing.
22. Avoid working in poor environment where
increased user fatigue is expected.
23. Do not use the machine in bad weather where
visibility is limited. Failure to do so may cause
fall or incorrect operation due to low visibility.
24. Do not submerge the machine into a puddle.
25. When wet leaves or dirt adhere to the suc-
tion mouth (ventilation window) due to rain,
remove them.
Maintenance and storage
1. Keep all nuts, bolts and screws tight to be sure
the blower is in safe working condition.
2. If the parts are worn or damaged, replace them
with parts provided by Makita.
3. Store the blower in a dry place out of the reach
of children.
4. When you stop the blower for inspection, ser-
vicing, storage, or changing accessory, switch
o the blower and make sure that all moving
parts come to a complete stop, and remove the
battery cartridge. Cool down the blower before
making any work on the blower. Maintain the
blower with care and keep it clean.
5. Always cool down the blower before storing.
6. When you lift the blower, be sure to bend your
knees and be careful not to hurt your back.
7. Do not leave the machine unattended outdoors
in the rain.
8.
Do not wash the machine with high pressure water.
9. When storing the machine, avoid direct sun-
light and rain, and store it in a place where it
does not get hot or humid.
10. Perform inspection or maintenance in a place
where rain can be avoided.
11. After using the machine, remove the adhered
dirt and dry the machine completely before
storing. Depending on the season or the area,
there is a risk of malfunction due to freezing.
Battery tool use and care
1. Prevent unintentional starting. Ensure the
switch is in the o-position before connecting
to battery pack, picking up or carrying the
machine. Carrying the machine with your nger
on the switch or energizing machine that have the
switch on invites accidents.
2. Disconnect the battery pack from the machine
before making any adjustments, changing
accessories, or storing machine. Such preven-
tive safety measures reduce the risk of starting the
machine accidentally.
3. Recharge only with the charger specied by
the manufacturer. A charger that is suitable for
one type of battery pack may create a risk of re
when used with another battery pack.
4ENGLISH
4. Use machines only with specically desig-
nated battery packs. Use of any other battery
packs may create a risk of injury and re.
5. When battery pack is not in use, keep it away
from other metal objects, like paper clips,
coins, keys, nails, screws or other small metal
objects, that can make a connection from one
terminal to another. Shorting the battery termi-
nals together may cause burns or a re.
6. Under abusive conditions, liquid may be
ejected from the battery; avoid contact. If con-
tact accidentally occurs, ush with water. If
liquid contacts eyes, seek medical help. Liquid
ejected from the battery may cause irritation or
burns.
7. Do not use a battery pack or machine that is
damaged or modied. Damaged or modied
batteries may exhibit unpredictable behaviour
resulting in re, explosion or risk of injury.
8. Do not expose a battery pack or machine to
re or excessive temperature. Exposure to re
or temperature above 130°C (265°F) may cause
explosion.
9. Follow all charging instructions and do not
charge the battery pack or machine outside of
the temperature range specied in the instruc-
tions. Charging improperly or at temperatures
outside of the specied range may damage the
battery and increase the risk of re.
10. Have servicing performed by a qualied repair
person using only identical replacement parts.
This will ensure that the safety of the product is
maintained.
11. Do not modify or attempt to repair the machine
or the battery pack except as indicated in the
instructions for use and care.
Electrical and battery safety
1. Do not dispose of the battery(ies) in a re.
The cell may explode. Check with local codes for
possible special disposal instructions.
2. Do not open or mutilate the battery(ies).
Released electrolyte is corrosive and may cause
damage to the eyes or skin. It may be toxic if
swallowed.
3. Do not charge battery in rain, or in wet
locations.
4. Do not charge the battery outdoors.
5. Do not handle charger, including charger plug,
and charger terminals with wet hands.
6. Do not replace the battery in the rain.
7. Do not wet the terminal of battery with liquid
such as water, or submerge the battery. Do not
leave the battery in the rain, nor charge, use,
or store the battery in a damp or wet place. If
the terminal gets wet or liquid enters inside of bat-
tery, the battery may be short circuited and there is
a risk of overheat, re, or explosion.
8. After removing the battery from the machine or
charger, be sure to attach the battery cover to
the battery and store it in a dry place.
9. Do not replace the battery with wet hands.
10. If the battery gets wet, drain the water inside
and then wipe it with a dry cloth. Dry the bat-
tery completely in a dry place before use.
11. Avoid dangerous environment. Don't use the
machine in dump or wet locations or expose it
to rain. Water entering the machine will increase
the risk of electric shock.
Service
1. Have your power tool serviced by a qualied
repair person using only identical replacement
parts. This will ensure that the safety of the power
tool is maintained.
2. Never service damaged battery packs. Service
of battery packs should only be performed by the
manufacturer or authorized service providers.
SAVE THESE
INSTRUCTIONS.
WARNING:
DO NOT let comfort or familiarity
with product (gained from repeated use) replace strict
adherence to safety rules for the subject product.
MISUSE or failure to follow the safety rules stated in this
instruction manual may cause serious personal injury.
WARNING: Use of this product can create
dust containing chemicals which may cause
respiratory or other illnesses. Some examples of
these chemicals are compounds found in pesti-
cides, insecticides, fertilizers and herbicides.
Your risk from these exposures varies, depend-
ing on how often you do this type of work. To
reduce your exposure to these chemicals: work
in a well ventilated area, and work with approved
safety equipment, such as those dust masks that
are specially designed to lter out microscopic
particles.
Symbols
The followings show the symbols used for tool.
volts
direct current
Important safety instructions for
battery cartridge
1. Before using battery cartridge, read all instruc-
tions and cautionary markings on (1) battery
charger, (2) battery, and (3) product using
battery.
2. Do not disassemble or tamper the battery
cartridge. It may result in a re, excessive heat,
or explosion.
3. If operating time has become excessively
shorter, stop operating immediately. It may
result in a risk of overheating, possible burns
and even an explosion.
4. If electrolyte gets into your eyes, rinse them
out with clear water and seek medical atten-
tion right away. It may result in loss of your
eyesight.

5ENGLISH
5. Do not short the battery cartridge:
(1) Do not touch the terminals with any con-
ductive material.
(2) Avoid storing battery cartridge in a con-
tainer with other metal objects such as
nails, coins, etc.
(3) Do not expose battery cartridge to water
or rain.
A battery short can cause a large current
ow, overheating, possible burns and even a
breakdown.
6. Do not store and use the tool and battery car-
tridge in locations where the temperature may
reach or exceed 50 °C (122 °F).
7. Do not incinerate the battery cartridge even if
it is severely damaged or is completely worn
out. The battery cartridge can explode in a re.
8. Do not nail, cut, crush, throw, drop the battery
cartridge, or hit against a hard object to the
battery cartridge. Such conduct may result in a
re, excessive heat, or explosion.
9. Do not use a damaged battery.
10. The contained lithium-ion batteries are subject
to the Dangerous Goods Legislation require-
ments.
For commercial transports e.g. by third parties,
forwarding agents, special requirement on pack-
aging and labeling must be observed.
For preparation of the item being shipped, consult-
ing an expert for hazardous material is required.
Please also observe possibly more detailed
national regulations.
Tape or mask o open contacts and pack up the
battery in such a manner that it cannot move
around in the packaging.
11. When disposing the battery cartridge, remove
it from the tool and dispose of it in a safe
place. Follow your local regulations relating to
disposal of battery.
12. Use the batteries only with the products
specied by Makita. Installing the batteries to
non-compliant products may result in a re, exces-
sive heat, explosion, or leak of electrolyte.
13. If the tool is not used for a long period of time,
the battery must be removed from the tool.
14. During and after use, the battery cartridge may
take on heat which can cause burns or low
temperature burns. Pay attention to the han-
dling of hot battery cartridges.
15. Do not touch the terminal of the tool imme-
diately after use as it may get hot enough to
cause burns.
16. Do not allow chips, dust, or soil stuck into the
terminals, holes, and grooves of the battery
cartridge. It may result in poor performance or
breakdown of the tool or battery cartridge.
17. Unless the tool supports the use near
high-voltage electrical power lines, do not use
the battery cartridge near a high-voltage elec-
trical power lines. It may result in a malfunction
or breakdown of the tool or battery cartridge.
18. Keep the battery away from children.
SAVE THESE INSTRUCTIONS.
CAUTION: Only use genuine Makita batteries.
Use of non-genuine Makita batteries, or batteries that
have been altered, may result in the battery bursting
causing res, personal injury and damage. It will
also void the Makita warranty for the Makita tool and
charger.
Tips for maintaining maximum
battery life
1. Charge the battery cartridge before completely
discharged. Always stop tool operation and
charge the battery cartridge when you notice
less tool power.
2. Never recharge a fully charged battery car-
tridge. Overcharging shortens the battery
service life.
3. Charge the battery cartridge with room tem-
perature at 10 °C - 40 °C (50 °F - 104 °F). Let
a hot battery cartridge cool down before
charging it.
4. When not using the battery cartridge, remove
it from the tool or the charger.
5. Charge the battery cartridge if you do not use
it for a long period (more than six months).
ASSEMBLY
CAUTION: Always be sure that the machine is
switched o and the battery cartridge is removed
before carrying out any work on the machine.
Installing the end nozzle
Align the triangle mark on the end nozzle with the trian-
gle mark on the front pipe, then attach the end nozzle
to the front pipe, and then turn the end nozzle to lock it
into place.
Install the end nozzle so that the tip of the nozzle faces
downward. Depending on the working environment, you
can install the end nozzle so that the tip of the nozzle is
facing up.
2 3
11
► 1. Triangle mark 2. End nozzle 3. Front pipe

6ENGLISH
To remove the end nozzle, perform the installation
procedure in reverse.
NOTE: The length of the nozzle can be changed by
moving the nozzle as shown in the gure.
1 2
► 1. End nozzle 2. Front pipe
Installing the at nozzle or
extension nozzle
Optional accessory
1. Align the groove on the adapter pipe with the pro-
trusion on the front pipe, then attach the adapter pipe to
the front pipe, and then turn it to lock it into place.
2
1
► 1. Adapter pipe 2. Front pipe
2. Align the groove on the at nozzle or extension
nozzle with the protrusion on the adapter pipe, then
attach the at nozzle or extension nozzle to the adapter
pipe, and then turn it to lock it into place.
1
3
2
► 1. Flat nozzle 2. Extension nozzle 3. Adapter pipe
Installing the gutter nozzle set
Optional accessory
1. Align the groove on the adapter pipe with the pro-
trusion on the front pipe, then attach the adapter pipe to
the front pipe, and then turn it to lock it into place.
Insert the adapter pipe as far as it will go so that the
protrusion ts into the deepest groove on the adapter
pipe.
2
3
1
4
► 1. Screw 2. Hose clamp 3. Adapter pipe 4. Front
pipe
2. Loosen the screws on the hose clamps, and pass
the large hose clamp through the adapter pipe, and
then pass the small hose clamp.

7ENGLISH
3. Connect the extension pipe to the adapter pipe.
Align the groove on the extension pipe with the protru-
sion on the adapter pipe, and then slide the extension
pipe along its groove so that the triangle markings face
each other.
2
1
► 1. Extension pipe 2. Adapter pipe
4. Place the hose clamps onto the grooves as illus-
trated and tighten the screws.
1
2
2
► 1. Screw 2. Hose clamp
5. According to the working height, connect the rest
of extension pipes to the extension pipe which has
already been attached.
CAUTION: Do not attach the extension pipe
if the total length including the blower body
exceeds 4 m (14 ft).
6. Turn the outlet of the end nozzle as shown in the
gure.
7. Connect the end nozzle to the extension pipe.
When connecting, align the triangle marking on the end
nozzle and the extension pipe, and then push the end
nozzle until it clicks. After that, rotate the end nozzle to
a suitable position for your work.
1
2
3
► 1. End nozzle 2. Extension pipe 3. Triangle marking
When removing the end nozzle, align the triangle mark-
ings on the end nozzle and extension pipe, and then
pull out the end nozzle from the extension pipe.
1
2
3
► 1. End nozzle 2. Extension pipe 3. Triangle marking

8ENGLISH
Attaching the shoulder strap
CAUTION: Be sure to attach the hooks of
the shoulder strap to the machine securely. If the
hooks are attached incompletely, they may come o
and cause an injury.
CAUTION: Be sure to use the shoulder strap
dedicated to this machine. Using other shoulder
strap may cause an injury.
Attach the hooks of the shoulder strap to the machine
as shown in the gure.
1
1
► 1. Hook
You can also attach the shoulder strap to the machine
as shown in the gure by attaching one end of the
shoulder strap to the buckle of the shoulder strap.
1
► 1. Buckle
FUNCTIONAL
DESCRIPTION
CAUTION: Always be sure that the machine is
switched o and the battery cartridge is removed
before adjusting or checking function on the
machine.
Installing or removing battery cartridge
CAUTION: Always switch o the machine
before installing or removing of the battery
cartridge.
CAUTION: Hold the machine and the battery
cartridge rmly when installing or removing bat-
tery cartridge. Failure to hold the machine and the
battery cartridge rmly may cause them to slip o
your hands and result in damage to the machine and
battery cartridge and a personal injury.
CAUTION: Always install the battery cartridge
fully until the red indicator cannot be seen. If not,
it may accidentally fall out of the machine, causing
injury to you or someone around you.
CAUTION: Do not install the battery cartridge
forcibly. If the cartridge does not slide in easily, it is
not being inserted correctly.
2 3
1
1
► 1. Red indicator 2. Button 3. Battery cartridge
To remove the battery cartridge, slide it from the machine
while sliding the button on the front of the cartridge.
To install the battery cartridge, align the tongue on the
battery cartridge with the groove in the housing and slip
it into place. Insert it all the way until it locks in place
with a little click. If you can see the red indicator as
shown in the gure, it is not locked completely.

9ENGLISH
Indicating the remaining battery
capacity
Press the check button on the battery cartridge to indi-
cate the remaining battery capacity. The indicator lamps
light up for a few seconds.
1
2
► 1. Indicator lamps 2. Check button
Indicator lamps Remaining
capacity
Lighted O Blinking
75% to 100%
50% to 75%
25% to 50%
0% to 25%
Charge the
battery.
The battery
may have
malfunctioned.
NOTE: Depending on the conditions of use and the
ambient temperature, the indication may dier slightly
from the actual capacity.
NOTE: The rst (far left) indicator lamp will blink when
the battery protection system works.
Machine / battery protection system
The machine is equipped with a machine/battery
protection system. This system automatically cuts o
power to the motor to extend machine and battery life.
The machine will automatically stop during operation if
the machine or battery is placed under one of the fol-
lowing conditions:
Overload protection
When the machine or battery is operated in a manner
that causes it to draw an abnormally high current, the
machine automatically stops and the main power lamp
of the machine blinks in green. In this situation, turn the
machine o and stop the application that caused the
machine to become overloaded. Then turn the machine
on to restart.
Overheat protection
When the machine or battery is overheated, the
machine stops automatically. When the machine is
overheated, the main power lamp of the machine
lights up in red. When the battery is overheated, the
main power lamp of the machine blinks in red. Let
the machine and battery cool down before turning the
machine on again.
Overdischarge protection
When the battery capacity is not enough, the machine
stops automatically and the main power lamp of the
machine blinks in red. In this case, remove the battery
from the machine and charge the battery or change the
battery to fully charged one.
Main power switch
WARNING: Always turn o the main power
switch when not in use.
To turn on the machine, press the main power switch.
The main power lamp lights up in green. To turn o,
press the main power switch again.
1
2
► 1. Main power switch 2. Main power lamp
NOTE: This machine employs the auto power-o
function. To avoid unintentional start up, the main
power switch will automatically shut down when the
switch trigger is not pulled for a certain period after
the main power switch is turned on.
NOTE: If you press the main power switch when the
control lever is not fully returned to the o position,
or while you are pulling the switch trigger, the main
power lamp blinks in green. In this case, fully return
the control lever, or release the switch trigger, and
then press the main power switch.

10 ENGLISH
Switch action
WARNING: Before installing the battery car-
tridge into the machine, always check to see that
the switch trigger actuates properly and returns
to the "OFF" position when released.
To start the machine, simply pull the switch trigger. The
speed increases by increasing pressure on the switch
trigger. Release the switch trigger to stop.
1
► 1. Switch trigger
You can use the machine in the Boost mode. In the
Boost mode, the air volume becomes larger than in the
normal mode. To use the machine in the Boost mode,
pull the switch trigger until the switch trigger stops in the
halfway position, and then pull the switch trigger fully.
1
► 1. Switch trigger
NOTE: Depending on the usage conditions or battery
conditions, use of the Boost mode is restricted to
protect the machine. If the main power lamp of the
machine blinks in green when you pull the switch
trigger fully or while you are using the machine in the
Boost mode, the Boost mode is not available.
NOTE: The Boost mode is not available by turning
the control lever.
Cruise control function
The cruise control function allows the operator to main-
tain a constant speed without pulling the trigger. To
increase the speed, turn the control lever forward. To
decrease the speed, turn the control lever backward.
1
► 1. Control lever
Accidental re-start preventive
function
Even if you install the battery cartridge while pulling the
switch trigger, the machine does not start. To start the
machine, rst release the switch trigger and return the
control lever fully, and then pull the switch trigger.

11 ENGLISH
OPERATION
Blower operation
CAUTION: Do not place the machine on the
ground while it is switched on. Sand or dust may
enter from suction inlet and cause a malfunction or
personal injury.
Hold the machine rmly with a hand and perform the
blowing operation by moving it around slowly. When
blowing around building, big stone or vehicle, direct the
nozzle away from them. When performing an operation
in a corner, start from the corner and then move to wide
area.
Using the gutter nozzle set
CAUTION: When using the gutter nozzle set,
do not use the machine in the Boost mode. You
may lose balance and it may cause an accident since
the air volume becomes larger in the Boost mode.
CAUTION: When using the gutter nozzle set,
do not hold the blower with single hand but with
both hands.
CAUTION: Do not use the gutter nozzle set
near electric wires.
CAUTION: Do not use the gutter nozzle set on
windy day.
CAUTION: When using the gutter nozzle set,
keep other people or animal more than 15 m (50 ft)
away from the blower.
15m (50ft)

12 ENGLISH
Hold the blower upright by grabbing the handle of the blower. Place
the outlet of the blower on the gutter and then turn on the blower.
MAINTENANCE
CAUTION:
Always be sure that the machine is
switched o and the battery cartridge is removed before
attempting to perform inspection or maintenance.
To maintain product SAFETY and RELIABILITY,
repairs, any other maintenance or adjustment should
be performed by Makita Authorized or Factory Service
Centers, always using Makita replacement parts.
Cleaning the machine
Clean the machine by wiping o dust with a dry cloth or
one dipped in soapy water and wrung out.
NOTICE: Never use gasoline, benzine, thinner,
alcohol or the like. Discoloration, deformation or
cracks may result.
Remove dust or dirt from the suction inlet at the rear of
the machine.
1
► 1. Suction inlet
Storage
Before storing the machine, remove the battery car-
tridge from the machine, and perform full maintenance.
Store the machine in a place out of the reach of children
and not exposed to moisture, rain, or direct sunlight.
The hook hole on the bottom of the machine is conve-
nient for hanging the machine from a nail or screw on
the wall.
1
► 1. Hole

13 ENGLISH
TROUBLESHOOTING
Before asking for repairs, conduct your own inspection rst. If you nd a problem that is not explained in the man-
ual, do not attempt to dismantle the machine. Instead, ask Makita Authorized Service Centers, always using Makita
replacement parts for repairs.
State of abnormality Probable cause (malfunction) Remedy
Motor does not run. Battery cartridge is not installed. Install the battery cartridge.
Battery problem (under voltage) Recharge the battery. If recharging is not eective,
replace battery.
The drive system does not work
correctly.
Ask your local authorized service center for repair.
Motor stops running after a little use. Battery's charge level is low. Recharge the battery. If recharging is not eective,
replace battery.
Overheating. Stop using the machine to allow it to cool down.
The machine does not reach the
maximum speed.
Battery is installed improperly. Install the battery cartridge as described in this
manual.
Battery power is dropping. Recharge the battery. If recharging is not eective,
replace battery.
The drive system does not work
correctly.
Ask your local authorized service center for repair.
Abnormal vibration:
stop the machine immediately!
The drive system does not work
correctly.
Ask your local authorized service center for repair.
Motor cannot stop:
Remove the battery immediately!
Electric or electronic malfunction. Remove the battery and ask your local authorized
service center for repair.
OPTIONAL
ACCESSORIES
CAUTION: These accessories or attachments
are recommended for use with your Makita prod-
uct specied in this manual. The use of any other
accessories or attachments might present a risk of
injury to persons. Only use accessory or attachment
for its stated purpose.
If you need any assistance for more details regard-
ing these accessories, ask your local Makita Service
Center.
• Adapter pipe
• Extension nozzle
• Flat nozzle
• End nozzle
• Gutter nozzle set
• Shoulder strap
• Makita genuine battery and charger
NOTE: Some items in the list may be included in the
product package as standard accessories. They may
dier from country to country.
MAKITA LIMITED WARRANTY
Please refer to the annexed warranty sheet for the
most current warranty terms applicable to this product.
If annexed warranty sheet is not available, refer to the
warranty details set forth at below website for your
respective country.
United States of America: www.makitatools.com
Canada: www.makita.ca
Other countries: www.makita.com

14 ESPAÑOL
ESPAÑOL (Instrucciones originales)
ESPECIFICACIONES
Modelo: GBU01
Capacidades Volumen de aire 0 m3/min - 16,0 m3/min (0 cu.ft./min - 565 cu.ft./min)
Velocidad del aire (promedio) 0 m/s - 53,5 m/s (0 MPH - 120 MPH)
Velocidad del aire (máx.) 0 m/s - 64,0 m/s (0 MPH - 143 MPH)
Longitud total (con boquilla de extremo) 850 mm (33-1/2″) / 900 mm (35-1/2″) / 950 mm (37-1/2″)
Tensión nominal 36 V - 40 V c.c. máx.
Peso neto 3,1 - 3,9 kg (6,8 - 8,6 lbs)
• Debido a nuestro continuo programa de investigación y desarrollo, las especicaciones aquí incluidas están
sujetas a cambio sin previo aviso.
• Las especicaciones pueden variar de país a país.
• El peso puede variar en función de los accesorios, incluido el cartucho de batería. En la tabla se muestra la
combinación de peso más ligero y más pesado conforme al procedimiento 01/2014 de EPTA.
Cartucho de batería y cargador aplicables
Cartucho de batería BL4025/BL4040
Cargador DC40RA
• Algunos de los cartuchos de batería y cargadores enumerados arriba podrían no estar disponibles depen-
diendo de su área de residencia.
ADVERTENCIA: Use únicamente los cartuchos de batería y los cargadores indicados arriba. El uso de
cualquier otro cartucho de batería y cargador podría ocasionar una lesión y/o un incendio.
ADVERTENCIAS DE
SEGURIDAD
INSTRUCCIONES
IMPORTANTES DE
SEGURIDAD
Al usar cualquier aparato eléctrico, siempre deben
seguirse las precauciones básicas, incluyendo las
siguientes:
LEA TODAS LAS
INSTRUCCIONES ANTES
DE USAR EL APARATO.
ADVERTENCIA: Para redu-
cir el riesgo de incendio,
descarga eléctrica o lesión:
1. No deje el aparato con la batería puesta. Retire
la batería del aparato cuando no lo vaya a utili-
zar y antes de dar servicio de mantenimiento.
2. No lo exponga a la lluvia. Almacénelo en
interiores.
3. No permita que sea utilizado como un juguete.
Preste mucha atención cuando sea utilizado
por niños o cerca de ellos.
4. Utilícelo solamente como se describe en este
manual. Sólo use aditamentos recomendados
por el fabricante.
5. No lo utilice con una batería dañada. Si el
aparato no está funcionando como debiera, se
ha dejado caer, se ha dañado, se ha dejado a la
intemperie o ha caído sobre agua, llévelo a un
centro de servicio.
6. No introduzca ningún objeto en las aberturas.
No lo utilice con ninguna abertura bloqueada;
manténgalo libre de polvo, pelusa, cabello y
cualquier objeto que pueda reducir el ujo de
aire.
7. Mantenga el cabello, la ropa holgada, los
dedos y todas las partes del cuerpo lejos de
las aberturas y piezas móviles.
8. Tenga especial cuidado cuando limpie en
escaleras.
9. Utilice solamente el cargador suministrado por
el fabricante para recargar.
GUARDE ESTAS
INSTRUCCIONES.
Este aparato está diseñado para un uso tanto domés-
tico como comercial.

15 ESPAÑOL
Instrucciones de
seguridad para la
sopladora Inalámbrica
Preparación
1. Siempre use calzado robusto y pantalones
largos al operar la sopladora.
2. No use ropa holgada o alhajas que puedan ser
jaladas hacia la entrada de aire. Mantenga el
cabello largo lejos de las entradas de aire.
3. Use siempre gafas protectoras, una gorra y
una mascarilla cuando utilice la sopladora. Los
anteojos comunes o para el sol NO son gafas de
seguridad.
4. Para evitar la irritación por polvo, se reco-
mienda el uso de una mascarilla.
5. Cuando opere la máquina use siempre calzado
de protección con suela antiderrapante. Los
zapatos y botas de seguridad cerrados con suela
antideslizante reducen el riesgo de lesiones.
Operación
1. Nunca opere la sopladora cuando haya perso-
nas, especialmente niños, o mascotas cerca.
2. Apague la sopladora y retire el cartucho de
batería y asegúrese de que todas las partes
móviles se hayan detenido por completo
• cada vez que deje la sopladora.
• antes de despejar obstrucciones.
• antes de revisar, limpiar o trabajar en la
sopladora.
• Si la sopladora empieza a vibrar de
manera anormal.
3. Utilice la sopladora solamente a la luz del
día o en buenas condiciones de iluminación
articial.
4. No use una postura forzada y mantenga el
equilibrio y los pies en rme en todo momento.
5. Nunca sople escombros en dirección de las
personas cercanas.
6. Utilice la sopladora en una posición recomen-
dada y sobre una supercie rme.
7. No opere la sopladora en lugares elevados.
8. Cuando utilice la sopladora, no apunte nunca
la boquilla a nadie alrededor.
9. Nunca bloquee la entrada de succión o la
salida de la sopladora.
• Tenga cuidado de no bloquear la entrada
de succión o la salida de la sopladora con
polvo o suciedad al operar en áreas con
polvo.
• No use boquillas que no sean las propor-
cionadas por Makita.
• No utilice la sopladora para inar pelotas,
botes de caucho o similares.
10. No haga funcionar la sopladora cerca de una
ventana abierta, etc.
11.
Se recomienda operar la sopladora solo a horas
razonables, no temprano en la mañana o tarde
en la noche para no molestar a las personas.
12. Se recomienda usar rastrillos y escobas para
aojar los residuos antes de soplar.
13.
Si la sopladora golpea algún objeto extraño o
comienza a hacer cualquier ruido o vibración
inusual, apague la sopladora inmediatamente
para detenerlo. Retire el cartucho de batería de
la sopladora e inspeccione la sopladora antes de
volver a encenderla y ponerla en funcionamiento.
Si la sopladora se daña, solicite la reparación a
los centros de servicio autorizado de Makita.
14.
No introduzca los dedos u otros objetos en la
entrada de succión o en la salida de la sopladora.
15. Evite un arranque accidental. Asegúrese de
que el interruptor esté en la posición apa-
gada antes de insertar el cartucho de batería,
levantar la sopladora o cargarla. Cargar la
sopladora con su dedo en el interruptor o
pasar energía a la sopladora con el interruptor
encendido puede propiciar accidentes.
16. Nunca sople sobre materiales peligrosos,
como clavos, fragmentos de vidrio o cuchillas.
17. No opere la sopladora cerca de materiales
inamables.
18.
Evite hacer funcionar la sopladora durante mucho
tiempo en ambientes de temperatura baja.
19. Asegúrese siempre de pisar sobre suelo rme
en las pendientes.
20. No utilice la máquina cuando exista riesgo de
ser alcanzado por un rayo.
21. Cuando utilice la máquina sobre suelo emba-
rrado, inclinaciones mojadas o supercies
resbalosas, tenga cuidado al pisar.
22.
Evite trabajar en un entorno deciente donde
sea probable que aumente la fatiga del usuario.
23. No utilice la máquina cuando las condiciones
climáticas no sean buenas y la visibilidad sea
limitada. En caso contrario se podrían ocasionar
caídas u operaciones incorrectas debido a la baja
visibilidad.
24. No sumerja la máquina en los charcos.
25. Cuando debido a la lluvia se adhieran hojas
mojadas o tierra a la abertura de succión (ven-
tana de ventilación), retírelas.
Mantenimiento y almacenamiento
1.
Mantenga apretados todos los tuercas, pernos
y tornillos para asegurar que la sopladora se
encuentre en condiciones seguras de operación.
2.
Si las piezas están desgastadas o dañadas, reem-
plácelas con piezas proporcionadas por Makita.
3. Guarde la sopladora en un lugar seco fuera del
alcance de los niños.
4. Cuando detenga la sopladora para inspeccio-
narla, repararla, almacenarla o cambiarle un
accesorio, apáguela y asegúrese de que todas
las partes en movimiento se detengan por
completo y retire el cartucho de batería. Enfríe
la sopladora antes de realizar cualquier trabajo
en la misma. Mantenga la sopladora con cui-
dado y manténgala limpia.
5. Siempre permita que la sopladora se enfríe
antes de almacenarla.
6. Cuando levante la sopladora, asegúrese de
doblar las rodillas y tenga cuidado de no lasti-
marse la espalda.
7. No deje la máquina desatendida a la intempe-
rie bajo la lluvia.

16 ESPAÑOL
8. No lave la máquina con agua a alta presión.
9. Almacene la máquina lejos de la lluvia y la luz
directa del sol y en un sitio donde no haga
calor ni haya humedad.
10. Realice las inspecciones y labores de manteni-
miento en un sitio protegido de la lluvia.
11. Después de utilizar la máquina, quite la sucie-
dad adherida y séquela completamente antes
de guardarla. Dependiendo de la estación o de
la zona, existe el riesgo de un mal funcionamiento
por congelación.
Uso y cuidado de la herramienta a batería
1. Evite una puesta en marcha accidental.
Asegúrese de que el interruptor esté en
la posición apagada antes de conectar el
paquete de baterías, levantar la herramienta o
cargarla. Cargar la herramienta con su dedo en el
interruptor o pasar energía a la herramienta con el
interruptor encendido puede propiciar accidentes.
2.
Desconecte el paquete de baterías de la herra-
mienta antes de hacer cualquier ajuste, cambiar
accesorios o almacenar la herramienta. Estas
medidas de seguridad preventivas reducen el riesgo
de poner en marcha la herramienta accidentalmente.
3. Recargue sólo con el cargador especicado
por el fabricante. Un cargador que sea adecuado
para un tipo especíco de paquete de batería
puede generar un riesgo de incendio al usarse
con un paquete de batería distinto.
4.
Use las herramientas únicamente con los paque-
tes de baterías designados especícamente para
ellas. El uso de otros paquetes de baterías puede
generar riesgo de lesiones e incendio.
5. Cuando no se esté usando el paquete de
batería, manténgalo alejado de otros objetos
metálicos, como sujetapapeles (clips), mone-
das, llaves, clavos, tornillos u otros objetos
pequeños de metal que puedan crear una
conexión entre una terminal y otra. Causar un
cortocircuito en las terminales de la batería puede
provocar quemaduras o incendio.
6. En condiciones de mal uso, podría escapar
líquido de la batería; evite el contacto. Si toca
el líquido accidentalmente, enjuague con agua.
Si hay contacto del líquido con los ojos, soli-
cite atención médica. El líquido expulsado de la
batería puede causar irritación o quemaduras.
7. No utilice un paquete de baterías o una herra-
mienta que esté dañado/dañada o haya sido
modicado/modicada. Las baterías dañadas
o modicadas podrían comportarse de manera
impredecible causando un incendio, explosión
o riesgo de lesión.
8. No exponga un paquete de baterías o una
herramienta al fuego o a una temperatura
excesiva. La exposición al fuego a una tempe-
ratura superior a 130 °C (265 °F) podría causar
una explosión.
9. Siga todas las instrucciones relativas a la
carga y no cargue el paquete de baterías o la
herramienta fuera del rango de temperatura
especicado en las instrucciones. Cargar de
manera inapropiada o a temperaturas fuera del
rango especicado podría dañar la batería e incre-
mentar el riesgo de incendio.
10. Pida que el servicio lo realice un técnico en
reparaciones calicado y que utilice única-
mente piezas de repuesto idénticas a las
originales. Esto garantizará que se mantenga la
seguridad del producto.
11. No modique ni intente reparar la herramienta
ni el paquete de baterías salvo como se indi-
que en las instrucciones para el uso y cuidado.
Seguridad eléctrica y de la batería
1.
No arroje la(s) batería(s) al fuego. La celda podría
explotar. Consulte los códigos locales para ver si
hay instrucciones especiales relativas al desecho.
2. No abra ni dañe la(s) batería(s). Los electrolitos
liberados son corrosivos y pueden ocasionar
daños en los ojos o la piel. Pueden ser tóxicos si
se llegan a tragar.
3. No cargue la batería bajo la lluvia ni en lugares
mojados.
4. No cargue la batería en exteriores.
5.
No manipule el cargador, incluida la la clavija del
cargador, ni los terminales con las manos mojadas.
6. No reemplace la batería bajo la lluvia.
7. No moje el terminal de la batería con líquidos,
como el agua, ni sumerja la batería en ellos.
No deje la batería bajo la lluvia, ni cargue,
utilice, o guarde la batería en un lugar húmedo
o mojado. Si el terminal se moja o entra líquido
dentro de la batería, la batería puede sufrir un
cortocircuito, con el consiguiente riesgo de sobre-
calentamiento, incendio o explosión.
8.
Después de retirar la batería de la máquina o el
cargador, asegúrese de acoplar la cubierta de la
batería a la batería y de guardarla en un lugar seco.
9.
No reemplace la batería con las manos mojadas.
10. Si la batería se moja, drene el agua que se
haya acumulado en el interior y luego límpiela
con un paño seco. Seque la batería por com-
pleto en un lugar seco antes de usarla.
11.
Evite los entornos peligrosos. No utilice la
máquina en lugares húmedos o mojados ni
la exponga a la lluvia. El agua que ingrese a la
máquina incrementará el riesgo de descarga eléctrica.
Servicio
1. Haga que una persona calicada repare la
herramienta eléctrica utilizando sólo piezas de
repuesto idénticas. Esto asegura que se man-
tenga la seguridad de la herramienta eléctrica.
2. Nunca dé servicio a baterías que estén daña-
das. El servicio a las baterías solamente deberá
ser efectuado por el fabricante o un agente de
servicio autorizado.
CONSERVE ESTAS
INSTRUCCIONES.
ADVERTENCIA: NO DEJE que la comodidad
o familiaridad con el producto (a base de utilizarlo
repetidamente) evite que siga estrictamente las
normas de seguridad para dicho producto.
El USO INCORRECTO o el no seguir las normas
de seguridad indicadas en este manual de ins-
trucciones puede ocasionar lesiones graves.

17 ESPAÑOL
ADVERTENCIA: El uso de este producto
puede producir polvo que contenga sustancias
químicas que podrían causar enfermedades
respiratorias o de otro tipo. Algunos ejemplos de
estas sustancias químicas son los compuestos
encontrados en pesticidas, insecticidas, fertili-
zantes y herbicidas.
El riesgo al que se expone varía, dependiendo
de la frecuencia con la que realice este tipo de
trabajo. Para reducir la exposición a estas sus-
tancias químicas: trabaje en un área bien ven-
tilada y use un equipo de seguridad aprobado,
tal como las máscaras contra polvo que están
especialmente diseñadas para ltrar partículas
microscópicas.
Símbolos
A continuación se muestran los símbolos utilizados
para la herramienta.
volts o voltios
corriente directa o continua
Instrucciones importantes de
seguridad para el cartucho de batería
1.
Antes de utilizar el cartucho de batería, lea todas
las instrucciones e indicaciones de precaución
en el (1) el cargador de batería, (2) la batería, y (3)
el producto con el que se utiliza la batería.
2. No desarme ni modique el cartucho de bate-
ría. Podría ocurrir un incendio, calor excesivo o
una explosión.
3. Si el tiempo de operación se ha acortado en
exceso, deje de operar de inmediato. Podría
correrse el riesgo de sobrecalentamiento,
posibles quemaduras e incluso explosión.
4. En caso de que ingresen electrolitos en sus
ojos, enjuáguelos bien con agua limpia y con-
sulte de inmediato a un médico. Esto podría
ocasionar pérdida de visión.
5. Evite cortocircuitar el cartucho de batería:
(1) No toque las terminales con ningún mate-
rial conductor.
(2) Evite guardar el cartucho de batería en un
cajón junto con otros objetos metálicos,
tales como clavos, monedas, etc.
(3) No exponga el cartucho de batería al
agua o la lluvia.
Un cortocircuito en la batería puede causar un ujo
grande de corriente, sobrecalentamiento, posibles
quemaduras e incluso una descompostura.
6.
No guarde ni utilice la herramienta y el cartu-
cho de batería en lugares donde la temperatura
pueda alcanzar o exceder los 50 °C (122 °F).
7. Nunca incinere el cartucho de batería incluso
en el caso de que esté dañado seriamente o
ya no sirva en absoluto. El cartucho de batería
puede explotar si se tira al fuego.
8. No clave, corte, aplaste, lance o deje caer el
cartucho de batería, ni golpee un objeto sólido
contra el cartucho de batería. Dicha acción
podría resultar en un incendio, calor excesivo o en
una explosión.
9. No use una batería dañada.
10. Las baterías de ión de litio están sujetas a los
requisitos reglamentarios en materia de bie-
nes peligrosos.
Para el trasporte comercial, por ej., mediante
terceros o agentes de transporte, se deben tomar
en cuenta los requisitos especiales relativos al
empaque y el etiquetado.
Para efectuar los preparativos del artículo que se
va a enviar, se requiere consultar a un experto en
materiales peligrosos. Si es posible, consulte ade-
más otras regulaciones nacionales más detalladas.
Pegue o cubra con cinta adhesiva los contactos
abiertos y empaque la batería de manera que ésta
no pueda moverse dentro del paquete.
11. Para deshacerse del cartucho de batería,
sáquelo de la herramienta y deséchelo en un
lugar seguro. Siga las regulaciones locales
relacionadas al desecho de las baterías.
12. Utilice las baterías únicamente con los pro-
ductos especicados por Makita. Instalar las
baterías en productos que no cumplan con los
requisitos podría ocasionar un incendio, un calen-
tamiento excesivo, una explosión o una fuga de
electrolito.
13. Si no se utiliza la herramienta por un
período largo, debe extraerse la batería de la
herramienta.
14. El cartucho de batería podría absorber calor
durante y después de su uso, lo que ocasiona-
ría quemaduras o quemaduras a baja tempe-
ratura. Tenga cuidado con la manipulación de
los cartuchos de batería que estén calientes.
15. No toque el terminal de la herramienta inme-
diatamente después de su uso, ya que el
mismo podría estar lo sucientemente caliente
como para provocarle quemaduras.
16. No permita que las rebabas, el polvo o la tierra
queden atrapados en los terminales, oricios
y ranuras del cartucho de batería. Esto podría
ocasionar un desempeño deciente o descompos-
tura de la herramienta o del cartucho de batería.
17. No utilice el cartucho de batería cerca de
cables eléctricos de alto voltaje, a menos que
la herramienta sea compatible con el uso cer-
cano a estos cables eléctricos de alto voltaje.
Esto podría ocasionar una avería o descompos-
tura de la herramienta o del cartucho de batería.
18. Mantenga la batería alejada de los niños.
GUARDE ESTAS
INSTRUCCIONES.
PRECAUCIÓN: Utilice únicamente baterías
originales de Makita. El uso de baterías no origina-
les de Makita, o de baterías alteradas, puede ocasio-
nar que las baterías exploten causando un incendio,
lesiones personales y daños. Asimismo, esto inva-
lidará la garantía de Makita para la herramienta y el
cargador Makita.

18 ESPAÑOL
Consejos para alargar al máximo
la vida útil de la batería
1. Cargue el cartucho de batería antes de que
se descargue completamente. Pare siem-
pre la operación y cargue el cartucho de
batería cuando note menos potencia en la
herramienta.
2. No cargue nunca un cartucho de batería que
esté completamente cargado. La sobrecarga
acortará la vida de servicio de la batería.
3. Cargue el cartucho de batería a una tempera-
tura ambiente de 10 °C - 40 °C (50 °F - 104 °F).
Si un cartucho de batería está caliente, déjelo
enfriar antes de cargarlo.
4. Cuando no utilice el cartucho de batería,
sáquelo de la herramienta o del cargador.
5. Cargue el cartucho de batería si no va a utili-
zarlo durante un período prolongado (más de
seis meses).
MONTAJE
PRECAUCIÓN: Asegúrese siempre de que
la máquina haya sido apagada y el cartucho de
batería extraído antes de realizar cualquier tra-
bajo en la máquina.
Instalación de la boquilla de
extremo
Alinee la marca triangular de la boquilla de extremo con
la marca triangular del tubo frontal, luego conecte la
boquilla de extremo al tubo frontal y luego gire la boqui-
lla de extremo para bloquearla en su lugar.
Instale la boquilla de extremo, de manera que la punta
de la boquilla quede mirando hacia abajo. Usted puede
instalar la boquilla de extremo, de manera que la punta
de la boquilla quede mirando hacia arriba, dependiendo
del entorno de trabajo.
2 3
11
► 1. Marca de triángulo 2. Boquilla de extremo
3. Tubo frontal
Para extraer la boquilla de extremo, realice el procedi-
miento de instalación en orden inverso.
NOTA: La longitud de la boquilla se puede modi-
car moviendo la boquilla tal como se muestra en la
ilustración.
1 2
► 1. Boquilla de extremo 2. Tubo frontal
Instalación de la boquilla plana o
boquilla de extensión
Accesorio opcional
1. Alinee la ranura en el tubo adaptador con la protu-
berancia del tubo frontal, luego conecte el tubo adapta-
dor al tubo frontal y luego gírelo para bloquearlo en su
lugar.
2
1
► 1. Tubo adaptador 2. Tubo frontal

19 ESPAÑOL
2. Alinee la ranura de la boquilla plana o de la
boquilla de extensión con la protuberancia del tubo
adaptador, luego coloque la boquilla plana o la boquilla
de extensión al tubo adaptador y luego gírelo para
asegurarlo en su lugar.
1
3
2
► 1. Boquilla plana 2. Boquilla de extensión 3. Tubo
adaptador
Instalación del juego de extensión
para boquilla para canaleta
Accesorio opcional
1.
Alinee la ranura en el tubo adaptador con la protu-
berancia del tubo frontal, luego conecte el tubo adaptador
al tubo frontal y luego gírelo para bloquearlo en su lugar.
Inserte el tubo adaptador hasta el máximo de su reco-
rrido, para que la protuberancia quepa en la ranura más
profunda del tubo adaptador.
2
3
1
4
► 1. Tornillo 2. Abrazadera para manguera 3. Tubo
adaptador 4. Tubo frontal
2. Aoje los tornillos de las abrazaderas para man-
guera y pase la abrazadera grande para manguera por
el tubo adaptador, luego pase la abrazadera chica para
manguera.
3. Conexión del tubo de extensión al tubo adaptador.
Alinee la ranura del tubo de extensión con la protube-
rancia del tubo adaptador, y luego deslice el tubo de
extensión a lo largo de su ranura, de modo que las
marcas triangulares queden orientadas entre sí.
2
1
► 1. Tubo de extensión 2. Tubo adaptador
4. Coloque las abrazaderas para manguera sobre
las ranuras como se ilustra y apriete los tornillos.
1
2
2
► 1. Tornillo 2. Abrazadera para manguera
5. De acuerdo con la altura de trabajo, conecte el
resto de los tubos de extensión al tubo de extensión, el
cual ya haya sido colocado.
PRECAUCIÓN: No coloque el tubo de exten-
sión si la longitud total que incluya el cuerpo de la
sopladora supere los 4 metros (14 ft).
6. Gire la salida de la boquilla de extremo, tal como
se muestra en la ilustración.

20 ESPAÑOL
7. Conecte la boquilla de extremo al tubo de exten-
sión. Cuando los conecte, alinee la marca triangular de
la boquilla de extremo y el tubo de extensión, y luego
empuje la boquilla de extremo hasta que haga clic.
Después de esto, gire la boquilla de extremo a una
posición adecuada para su trabajo.
1
2
3
► 1. Boquilla de extremo 2. Tubo de extensión
3. Marca triangular
Cuando retire la boquilla de extremo, alinee las marcas
triangulares de la boquilla de extremo y del tubo de
extensión, y luego jale la boquilla de extremo del tubo
de extensión.
1
2
3
► 1. Boquilla de extremo 2. Tubo de extensión
3. Marca triangular
Acoplamiento de la correa para el
hombro
PRECAUCIÓN: Asegúrese de colocar bien
los ganchos de la correa para el hombro en la
máquina. Si los ganchos no están bien ensartados,
éstos podrían salirse y ocasionar una lesión.
PRECAUCIÓN: Asegúrese de utilizar la
correa para hombro especíca para esta herra-
mienta. El uso de otro tipo de correa para hombro
puede ocasionar una lesión.
Coloque los ganchos de la correa para el hombro en la
máquina tal como se muestra en la ilustración.
1
1
► 1. Gancho
También puede colocar la correa para el hombro en la
máquina como se muestra en la gura, al colocar un
extremo de la correa para el hombro a la hebilla de la
correa para hombro.
1
► 1. Hebilla
This manual suits for next models
1
Table of contents
Languages:
Other Makita Blower manuals

Makita
Makita DUB361 User manual

Makita
Makita M4000 User manual

Makita
Makita PM001G User manual

Makita
Makita UB100D User manual

Makita
Makita EB7660TH User manual

Makita
Makita DUB363 User manual

Makita
Makita BBX7600 User manual

Makita
Makita M4001 User manual

Makita
Makita M4000 User manual

Makita
Makita DUB362 User manual

Makita
Makita DUB362 User manual

Makita
Makita DAS180 User manual

Makita
Makita DUB185 User manual

Makita
Makita UB1102 Manual

Makita
Makita BHX2500 User manual

Makita
Makita DUB361 User manual

Makita
Makita EB7660TH User manual

Makita
Makita EB7650TH User guide

Makita
Makita UB001G User manual

Makita
Makita UB002C User manual