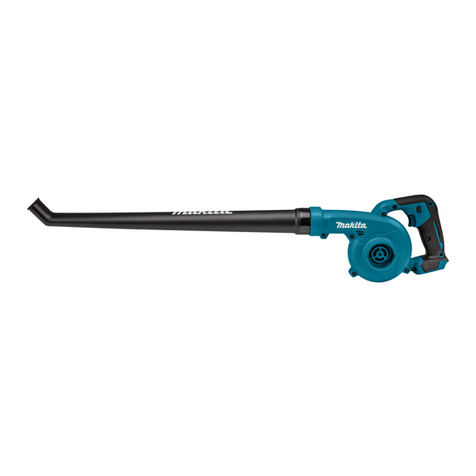
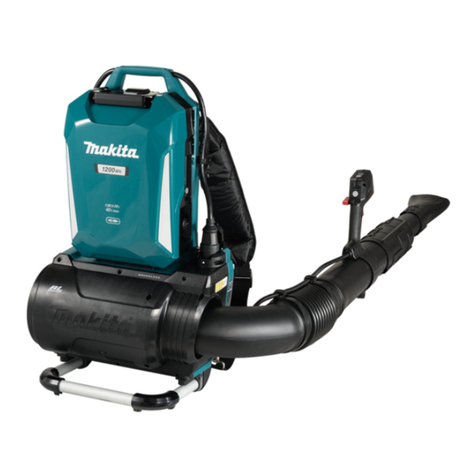
Makita UB001G User manual

INSTRUCTION MANUAL
MANUEL D'INSTRUCTION
MANUAL DE INSTRUCCIONES
Cordless Blower
SOUFFLEUR SANS FIL
Sopladora Inalámbrica
UB001G
IMPORTANT: Read Before Using.
IMPORTANT : Lire avant usage.
IMPORTANTE: Lea antes de usar.

2ENGLISH
ENGLISH (Original instructions)
SPECIFICATIONS
Model: UB001G
Capacities Air volume 0 - 16.0 m3/min (0 - 565 cu.ft./min)
Air speed (average) 0 - 53.5 m/s (0 - 120 MPH)
Air speed (max.) 0 - 64.0 m/s (0 - 143 MPH)
Overall length (with end nozzle) 850 mm (33-1/2″) / 900 mm (35-1/2″) / 950 mm (37-1/2″)
Rated voltage D.C. 36 V - 40 V max
Net weight 3.1 - 3.9 kg (6.8 - 8.6 lbs)
• Due to our continuing program of research and development, the specications herein are subject to change
without notice.
• Specications may dier from country to country.
• The weight may dier depending on the attachment(s), including the battery cartridge. The lightest and heavi-
est combination, according to EPTA-Procedure 01/2014, are shown in the table.
Applicable battery cartridge and charger
Battery cartridge BL4025 / BL4040
Charger DC40RA
• Some of the battery cartridges and chargers listed above may not be available depending on your region of
residence.
WARNING: Only use the battery cartridges and chargers listed above. Use of any other battery cartridges
and chargers may cause injury and/or re.
SAFETY WARNINGS
IMPORTANT SAFETY
INSTRUCTIONS
When using an electrical appliance, basic precautions
should always be followed, including the following:
READ ALL
INSTRUCTIONS BEFORE
USING THIS APPLIANCE.
WARNING - To reduce the
risk of re, electric shock,
or injury:
1. Do not leave appliance when battery tted.
Remove battery from appliance when not in
use and before servicing.
2. Do not expose to rain. Store indoors.
3. Do not allow to be used as a toy. Close
attention is necessary when used by or near
children.
4. Use only as described in this manual. Use only
manufacturer's recommended attachments.
5. Do not use with damaged battery. If appliance
is not working as it should, has been dropped,
damaged, left outdoors, or dropped into water,
return it to a service center.
6. Do not put any object into openings. Do not
use with any opening blocked; keep free of
dust, lint, hair, and anything that may reduce
air ow.
7. Keep hair, loose clothing, ngers, and all parts
of body away from openings and moving parts.
8. Use extra care when cleaning on stairs.
9. Use only the charger supplied by the manufac-
turer to recharge.
SAVE THESE
INSTRUCTIONS.
This appliance is intended for both household use and
commercial use.
Cordless Blower Safety
Instructions
Preparation
1. Always wear substantial footwear and long
trousers while operating the blower.
2. Do not wear loose clothing or jewellery that
can be drawn into the air inlet. Keep long hair
away from the air inlets.

3ENGLISH
3. Always use protective goggles, a cap and
mask when using the blower. Ordinary eye or
sun glasses are NOT safety glasses.
4. To prevent dust irritation the wearing of a face
mask is recommended.
5. While operating the machine, always wear
non-slip and protective footwear. Non-skid,
closed-toed safety boots and shoes will reduce the
risk of injury.
Operation
1. Never operate the blower while people, espe-
cially children, or pets are nearby.
2. Switch o the blower and remove the battery
cartridge and make sure that all moving parts
have come to a complete stop
• whenever you leave the blower.
• before clearing blockages.
• before checking, cleaning or working on
the blower.
• if the blower starts to vibrate abnormally.
3. Operate the blower only in daylight or in good
articial light.
4. Do not overreach and keep proper balance and
footing at all times.
5. Never blow debris in the direction of
bystanders.
6. Operate the blower in a recommended position
and on a rm surface.
7. Do not operate the blower at high places.
8. Never point the nozzle at anyone in the vicinity
when using the blower.
9. Never block suction inlet and/or blower outlet.
• Be careful not to block suction inlet or
blower outlet with dust or dirt when oper-
ating in dusty area.
• Do not use nozzles other than the nozzles
provided by Makita.
• Do not use the blower to inate balls,
rubber boat or the similar.
10.
Do not operate the blower near open window, etc.
11. Operating the blower only at reasonable hours
is recommended - not early in the morning or
late at night when people might be disturbed.
12. Using rakes and brooms to loosen debris
before blowing is recommended.
13. If the blower strikes any foreign objects or
should start making any unusual noise or
vibration, immediately switch o the blower
to stop it. Remove the battery cartridge from
the blower and inspect the blower for damage
before restarting and operating the blower. If
the blower is damaged, ask Makita Authorized
Service Centers for repair.
14. Do not insert ngers or other objects into
suction inlet or blower outlet.
15. Prevent unintentional starting. Ensure the
switch is in the o-position before inserting
battery cartridge, picking up or carrying the
blower. Carrying the blower with your nger
on the switch or energizing the blower that has
the switch on invites accidents.
16. Never blow dangerous materials, such as
nails, fragments of glass, or blades.
17.
Do not operate the blower near ammable materials.
18. Avoid operating the blower for a long time in
low temperature environment.
19. Always be sure of your footing on slopes.
20. Do not use the machine when there is a risk of
lightning.
21. When you use the machine on muddy ground,
wet slope, or slippery place, pay attention to
your footing.
22. Avoid working in poor environment where
increased user fatigue is expected.
23. Do not use the machine in bad weather where
visibility is limited. Failure to do so may cause
fall or incorrect operation due to low visibility.
24. Do not submerge the machine into a puddle.
25. When wet leaves or dirt adhere to the suc-
tion mouth (ventilation window) due to rain,
remove them.
Maintenance and storage
1. Keep all nuts, bolts and screws tight to be sure
the blower is in safe working condition.
2. If the parts are worn or damaged, replace them
with parts provided by Makita.
3. Store the blower in a dry place out of the reach
of children.
4. When you stop the blower for inspection, ser-
vicing, storage, or changing accessory, switch
o the blower and make sure that all moving
parts come to a complete stop, and remove the
battery cartridge. Cool down the blower before
making any work on the blower. Maintain the
blower with care and keep it clean.
5. Always cool down the blower before storing.
6. When you lift the blower, be sure to bend your
knees and be careful not to hurt your back.
7. Do not leave the machine unattended outdoors
in the rain.
8.
Do not wash the machine with high pressure water.
9. When storing the machine, avoid direct sun-
light and rain, and store it in a place where it
does not get hot or humid.
10. Perform inspection or maintenance in a place
where rain can be avoided.
11. After using the machine, remove the adhered
dirt and dry the machine completely before
storing. Depending on the season or the area,
there is a risk of malfunction due to freezing.
Battery tool use and care
1. Prevent unintentional starting. Ensure the
switch is in the o-position before connecting
to battery pack, picking up or carrying the
machine. Carrying the machine with your nger
on the switch or energizing machine that have the
switch on invites accidents.
2. Disconnect the battery pack from the machine
before making any adjustments, changing
accessories, or storing machine. Such preven-
tive safety measures reduce the risk of starting the
machine accidentally.
3. Recharge only with the charger specied by
the manufacturer. A charger that is suitable for
one type of battery pack may create a risk of re
when used with another battery pack.

4ENGLISH
4. Use machines only with specically desig-
nated battery packs. Use of any other battery
packs may create a risk of injury and re.
5. When battery pack is not in use, keep it away
from other metal objects, like paper clips,
coins, keys, nails, screws or other small metal
objects, that can make a connection from one
terminal to another. Shorting the battery termi-
nals together may cause burns or a re.
6. Under abusive conditions, liquid may be
ejected from the battery; avoid contact. If con-
tact accidentally occurs, ush with water. If
liquid contacts eyes, seek medical help. Liquid
ejected from the battery may cause irritation or
burns.
7. Do not use a battery pack or machine that is
damaged or modied. Damaged or modied
batteries may exhibit unpredictable behaviour
resulting in re, explosion or risk of injury.
8. Do not expose a battery pack or machine to
re or excessive temperature. Exposure to re
or temperature above 130°C (265°F) may cause
explosion.
9. Follow all charging instructions and do not
charge the battery pack or machine outside of
the temperature range specied in the instruc-
tions. Charging improperly or at temperatures
outside of the specied range may damage the
battery and increase the risk of re.
10. Have servicing performed by a qualied repair
person using only identical replacement parts.
This will ensure that the safety of the product is
maintained.
11. Do not modify or attempt to repair the machine
or the battery pack except as indicated in the
instructions for use and care.
Electrical and battery safety
1. Do not dispose of the battery(ies) in a re.
The cell may explode. Check with local codes for
possible special disposal instructions.
2. Do not open or mutilate the battery(ies).
Released electrolyte is corrosive and may cause
damage to the eyes or skin. It may be toxic if
swallowed.
3. Do not charge battery in rain, or in wet
locations.
4. Do not charge the battery outdoors.
5. Do not handle charger, including charger plug,
and charger terminals with wet hands.
6. Do not replace the battery in the rain.
7. Do not wet the terminal of battery with liquid
such as water, or submerge the battery. Do not
leave the battery in the rain, nor charge, use,
or store the battery in a damp or wet place. If
the terminal gets wet or liquid enters inside of bat-
tery, the battery may be short circuited and there is
a risk of overheat, re, or explosion.
8. After removing the battery from the machine or
charger, be sure to attach the battery cover to
the battery and store it in a dry place.
9. Do not replace the battery with wet hands.
10. If the battery gets wet, drain the water inside
and then wipe it with a dry cloth. Dry the bat-
tery completely in a dry place before use.
11. Avoid dangerous environment. Don't use the
machine in dump or wet locations or expose it
to rain. Water entering the machine will increase
the risk of electric shock.
Service
1. Have your power tool serviced by a qualied
repair person using only identical replacement
parts. This will ensure that the safety of the power
tool is maintained.
2. Never service damaged battery packs. Service
of battery packs should only be performed by the
manufacturer or authorized service providers.
SAVE THESE
INSTRUCTIONS.
WARNING:
DO NOT let comfort or familiarity
with product (gained from repeated use) replace strict
adherence to safety rules for the subject product.
MISUSE or failure to follow the safety rules stated
in this instruction manual may cause serious
personal injury.
WARNING: Use of this product can create
dust containing chemicals which may cause
respiratory or other illnesses. Some examples of
these chemicals are compounds found in pesti-
cides, insecticides, fertilizers and herbicides.
Your risk from these exposures varies, depend-
ing on how often you do this type of work. To
reduce your exposure to these chemicals: work
in a well ventilated area, and work with approved
safety equipment, such as those dust masks that
are specially designed to lter out microscopic
particles.
Symbols
The followings show the symbols used for tool.
volts
direct current
Important safety instructions for
battery cartridge
1.
Before using battery cartridge, read all instruc-
tions and cautionary markings on (1) battery char-
ger, (2) battery, and (3) product using battery.
2. Do not disassemble or tamper the battery
cartridge. It may result in a re, excessive heat,
or explosion.
3. If operating time has become excessively
shorter, stop operating immediately. It may
result in a risk of overheating, possible burns
and even an explosion.
4. If electrolyte gets into your eyes, rinse them
out with clear water and seek medical atten-
tion right away. It may result in loss of your
eyesight.

5ENGLISH
5. Do not short the battery cartridge:
(1) Do not touch the terminals with any con-
ductive material.
(2) Avoid storing battery cartridge in a con-
tainer with other metal objects such as
nails, coins, etc.
(3) Do not expose battery cartridge to water
or rain.
A battery short can cause a large current
ow, overheating, possible burns and even a
breakdown.
6. Do not store and use the tool and battery car-
tridge in locations where the temperature may
reach or exceed 50 °C (122 °F).
7. Do not incinerate the battery cartridge even if
it is severely damaged or is completely worn
out. The battery cartridge can explode in a re.
8. Do not nail, cut, crush, throw, drop the battery
cartridge, or hit against a hard object to the
battery cartridge. Such conduct may result in a
re, excessive heat, or explosion.
9. Do not use a damaged battery.
10. The contained lithium-ion batteries are subject
to the Dangerous Goods Legislation require-
ments.
For commercial transports e.g. by third parties,
forwarding agents, special requirement on pack-
aging and labeling must be observed.
For preparation of the item being shipped, consult-
ing an expert for hazardous material is required.
Please also observe possibly more detailed
national regulations.
Tape or mask o open contacts and pack up the
battery in such a manner that it cannot move
around in the packaging.
11. When disposing the battery cartridge, remove
it from the tool and dispose of it in a safe
place. Follow your local regulations relating to
disposal of battery.
12. Use the batteries only with the products
specied by Makita. Installing the batteries to
non-compliant products may result in a re, exces-
sive heat, explosion, or leak of electrolyte.
13. If the tool is not used for a long period of time,
the battery must be removed from the tool.
14. During and after use, the battery cartridge may
take on heat which can cause burns or low
temperature burns. Pay attention to the han-
dling of hot battery cartridges.
15. Do not touch the terminal of the tool imme-
diately after use as it may get hot enough to
cause burns.
16. Do not allow chips, dust, or soil stuck into the
terminals, holes, and grooves of the battery
cartridge. It may result in poor performance or
breakdown of the tool or battery cartridge.
17. Unless the tool supports the use near
high-voltage electrical power lines, do not use
the battery cartridge near a high-voltage elec-
trical power lines. It may result in a malfunction
or breakdown of the tool or battery cartridge.
18. Keep the battery away from children.
SAVE THESE INSTRUCTIONS.
CAUTION: Only use genuine Makita batteries.
Use of non-genuine Makita batteries, or batteries that
have been altered, may result in the battery bursting
causing res, personal injury and damage. It will
also void the Makita warranty for the Makita tool and
charger.
Tips for maintaining maximum
battery life
1. Charge the battery cartridge before completely
discharged. Always stop tool operation and
charge the battery cartridge when you notice
less tool power.
2. Never recharge a fully charged battery car-
tridge. Overcharging shortens the battery
service life.
3. Charge the battery cartridge with room tem-
perature at 10 °C - 40 °C (50 °F - 104 °F). Let
a hot battery cartridge cool down before
charging it.
4. When not using the battery cartridge, remove
it from the tool or the charger.
5. Charge the battery cartridge if you do not use
it for a long period (more than six months).
ASSEMBLY
CAUTION: Always be sure that the machine is
switched o and the battery cartridge is removed
before carrying out any work on the machine.
Installing the end nozzle
Align the triangle mark on the end nozzle with the trian-
gle mark on the front pipe, then attach the end nozzle
to the front pipe, and then turn the end nozzle to lock it
into place.
Install the end nozzle so that the tip of the nozzle faces
downward. Depending on the working environment, you
can install the end nozzle so that the tip of the nozzle is
facing up.
2 3
11
► 1. Triangle mark 2. End nozzle 3. Front pipe

6ENGLISH
To remove the end nozzle, perform the installation
procedure in reverse.
NOTE: The length of the nozzle can be changed by
moving the nozzle as shown in the gure.
1 2
► 1. End nozzle 2. Front pipe
Installing the at nozzle or
extension nozzle
Optional accessory
1. Align the groove on the adapter pipe with the pro-
trusion on the front pipe, then attach the adapter pipe to
the front pipe, and then turn it to lock it into place.
2
1
► 1. Adapter pipe 2. Front pipe
2. Align the groove on the at nozzle or extension
nozzle with the protrusion on the adapter pipe, then
attach the at nozzle or extension nozzle to the adapter
pipe, and then turn it to lock it into place.
1
3
2
► 1. Flat nozzle 2. Extension nozzle 3. Adapter pipe
Installing the gutter nozzle set
Optional accessory
1. Align the groove on the adapter pipe with the pro-
trusion on the front pipe, then attach the adapter pipe to
the front pipe, and then turn it to lock it into place.
Insert the adapter pipe as far as it will go so that the
protrusion ts into the deepest groove on the adapter
pipe.
2
3
1
4
► 1. Screw 2. Hose clamp 3. Adapter pipe 4. Front
pipe
2. Loosen the screws on the hose clamps, and pass
the large hose clamp through the adapter pipe, and
then pass the small hose clamp.

7ENGLISH
3. Connect the extension pipe to the adapter pipe.
Align the groove on the extension pipe with the protru-
sion on the adapter pipe, and then slide the extension
pipe along its groove so that the triangle markings face
each other.
2
1
► 1. Extension pipe 2. Adapter pipe
4. Place the hose clamps onto the grooves as illus-
trated and tighten the screws.
1
2
2
► 1. Screw 2. Hose clamp
5. According to the working height, connect the rest
of extension pipes to the extension pipe which has
already been attached.
CAUTION: Do not attach the extension pipe
if the total length including the blower body
exceeds 4 m (14 ft).
6. Turn the outlet of the end nozzle as shown in the
gure.
7. Connect the end nozzle to the extension pipe.
When connecting, align the triangle marking on the end
nozzle and the extension pipe, and then push the end
nozzle until it clicks. After that, rotate the end nozzle to
a suitable position for your work.
1
2
3
► 1. End nozzle 2. Extension pipe 3. Triangle marking
When removing the end nozzle, align the triangle mark-
ings on the end nozzle and extension pipe, and then
pull out the end nozzle from the extension pipe.
1
2
3
► 1. End nozzle 2. Extension pipe 3. Triangle marking

8ENGLISH
Attaching the shoulder strap
CAUTION: Be sure to attach the hooks of
the shoulder strap to the machine securely. If the
hooks are attached incompletely, they may come o
and cause an injury.
CAUTION: Be sure to use the shoulder strap
dedicated to this machine. Using other shoulder
strap may cause an injury.
Attach the hooks of the shoulder strap to the machine
as shown in the gure.
1
1
► 1. Hook
You can also attach the shoulder strap to the machine
as shown in the gure by attaching one end of the
shoulder strap to the buckle of the shoulder strap.
1
► 1. Buckle
FUNCTIONAL
DESCRIPTION
CAUTION: Always be sure that the machine is
switched o and the battery cartridge is removed
before adjusting or checking function on the
machine.
Installing or removing battery cartridge
CAUTION: Always switch o the machine
before installing or removing of the battery
cartridge.
CAUTION: Hold the machine and the battery
cartridge rmly when installing or removing bat-
tery cartridge. Failure to hold the machine and the
battery cartridge rmly may cause them to slip o
your hands and result in damage to the machine and
battery cartridge and a personal injury.
CAUTION: Always install the battery cartridge
fully until the red indicator cannot be seen. If not,
it may accidentally fall out of the machine, causing
injury to you or someone around you.
CAUTION: Do not install the battery cartridge
forcibly. If the cartridge does not slide in easily, it is
not being inserted correctly.
2 3
1
1
► 1. Red indicator 2. Button 3. Battery cartridge
To remove the battery cartridge, slide it from the
machine while sliding the button on the front of the
cartridge.
To install the battery cartridge, align the tongue on the
battery cartridge with the groove in the housing and slip
it into place. Insert it all the way until it locks in place
with a little click. If you can see the red indicator as
shown in the gure, it is not locked completely.

9ENGLISH
Indicating the remaining battery
capacity
Press the check button on the battery cartridge to indi-
cate the remaining battery capacity. The indicator lamps
light up for a few seconds.
1
2
► 1. Indicator lamps 2. Check button
Indicator lamps Remaining
capacity
Lighted O Blinking
75% to 100%
50% to 75%
25% to 50%
0% to 25%
Charge the
battery.
The battery
may have
malfunctioned.
NOTE: Depending on the conditions of use and the
ambient temperature, the indication may dier slightly
from the actual capacity.
NOTE: The rst (far left) indicator lamp will blink when
the battery protection system works.
Machine / battery protection system
The machine is equipped with a machine/battery
protection system. This system automatically cuts o
power to the motor to extend machine and battery life.
The machine will automatically stop during operation if
the machine or battery is placed under one of the fol-
lowing conditions:
Overload protection
When the machine or battery is operated in a manner
that causes it to draw an abnormally high current, the
machine automatically stops and the main power lamp
of the machine blinks in green. In this situation, turn the
machine o and stop the application that caused the
machine to become overloaded. Then turn the machine
on to restart.
Overheat protection
When the machine or battery is overheated, the
machine stops automatically. When the machine is
overheated, the main power lamp of the machine
lights up in red. When the battery is overheated, the
main power lamp of the machine blinks in red. Let
the machine and battery cool down before turning the
machine on again.
Overdischarge protection
When the battery capacity is not enough, the machine
stops automatically and the main power lamp of the
machine blinks in red. In this case, remove the battery
from the machine and charge the battery or change the
battery to fully charged one.
Main power switch
WARNING: Always turn o the main power
switch when not in use.
To turn on the machine, press the main power switch.
The main power lamp lights up in green. To turn o,
press the main power switch again.
1
2
► 1. Main power switch 2. Main power lamp
NOTE: This machine employs the auto power-o
function. To avoid unintentional start up, the main
power switch will automatically shut down when the
switch trigger is not pulled for a certain period after
the main power switch is turned on.
NOTE: If you press the main power switch when the
control lever is not fully returned to the o position,
or while you are pulling the switch trigger, the main
power lamp blinks in green. In this case, fully return
the control lever, or release the switch trigger, and
then press the main power switch.

10 ENGLISH
Switch action
WARNING: Before installing the battery car-
tridge into the machine, always check to see that
the switch trigger actuates properly and returns
to the "OFF" position when released.
To start the machine, simply pull the switch trigger. The
speed increases by increasing pressure on the switch
trigger. Release the switch trigger to stop.
1
► 1. Switch trigger
You can use the machine in the Boost mode. In the
Boost mode, the air volume becomes larger than in the
normal mode. To use the machine in the Boost mode,
pull the switch trigger until the switch trigger stops in the
halfway position, and then pull the switch trigger fully.
1
► 1. Switch trigger
NOTE: Depending on the usage conditions or battery
conditions, use of the Boost mode is restricted to
protect the machine. If the main power lamp of the
machine blinks in green when you pull the switch
trigger fully or while you are using the machine in the
Boost mode, the Boost mode is not available.
NOTE: The Boost mode is not available by turning
the control lever.
Cruise control function
The cruise control function allows the operator to main-
tain a constant speed without pulling the trigger. To
increase the speed, turn the control lever forward. To
decrease the speed, turn the control lever backward.
1
► 1. Control lever
Accidental re-start preventive
function
Even if you install the battery cartridge while pulling the
switch trigger, the machine does not start. To start the
machine, rst release the switch trigger and return the
control lever fully, and then pull the switch trigger.

11 ENGLISH
OPERATION
Blower operation
CAUTION: Do not place the machine on the
ground while it is switched on. Sand or dust may
enter from suction inlet and cause a malfunction or
personal injury.
Hold the machine rmly with a hand and perform the
blowing operation by moving it around slowly. When
blowing around building, big stone or vehicle, direct the
nozzle away from them. When performing an operation
in a corner, start from the corner and then move to wide
area.
Using the gutter nozzle set
CAUTION: When using the gutter nozzle set,
do not use the machine in the Boost mode. You
may lose balance and it may cause an accident since
the air volume becomes larger in the Boost mode.
CAUTION: When using the gutter nozzle set,
do not hold the blower with single hand but with
both hands.
CAUTION: Do not use the gutter nozzle set
near electric wires.
CAUTION: Do not use the gutter nozzle set on
windy day.
CAUTION: When using the gutter nozzle set,
keep other people or animal more than 15 m (50 ft)
away from the blower.
15m (50ft)

12 ENGLISH
Hold the blower upright by grabbing the handle of the blower. Place
the outlet of the blower on the gutter and then turn on the blower.
MAINTENANCE
CAUTION:
Always be sure that the machine is
switched o and the battery cartridge is removed before
attempting to perform inspection or maintenance.
To maintain product SAFETY and RELIABILITY,
repairs, any other maintenance or adjustment should
be performed by Makita Authorized or Factory Service
Centers, always using Makita replacement parts.
Cleaning the machine
Clean the machine by wiping o dust with a dry cloth or
one dipped in soapy water and wrung out.
NOTICE: Never use gasoline, benzine, thinner,
alcohol or the like. Discoloration, deformation or
cracks may result.
Remove dust or dirt from the suction inlet at the rear of
the machine.
1
► 1. Suction inlet
Storage
Before storing the machine, remove the battery car-
tridge from the machine, and perform full maintenance.
Store the machine in a place out of the reach of children
and not exposed to moisture, rain, or direct sunlight.
The hook hole on the bottom of the machine is conve-
nient for hanging the machine from a nail or screw on
the wall.
1
► 1. Hole

13 ENGLISH
TROUBLESHOOTING
Before asking for repairs, conduct your own inspection rst. If you nd a problem that is not explained in the man-
ual, do not attempt to dismantle the machine. Instead, ask Makita Authorized Service Centers, always using Makita
replacement parts for repairs.
State of abnormality Probable cause (malfunction) Remedy
Motor does not run. Battery cartridge is not installed. Install the battery cartridge.
Battery problem (under voltage) Recharge the battery. If recharging is not eective,
replace battery.
The drive system does not work
correctly.
Ask your local authorized service center for repair.
Motor stops running after a little use. Battery's charge level is low. Recharge the battery. If recharging is not eective,
replace battery.
Overheating. Stop using the machine to allow it to cool down.
The machine does not reach the
maximum speed.
Battery is installed improperly. Install the battery cartridge as described in this
manual.
Battery power is dropping. Recharge the battery. If recharging is not eective,
replace battery.
The drive system does not work
correctly.
Ask your local authorized service center for repair.
Abnormal vibration:
stop the machine immediately!
The drive system does not work
correctly.
Ask your local authorized service center for repair.
Motor cannot stop:
Remove the battery immediately!
Electric or electronic malfunction. Remove the battery and ask your local authorized
service center for repair.
OPTIONAL
ACCESSORIES
CAUTION: These accessories or attachments
are recommended for use with your Makita prod-
uct specied in this manual. The use of any other
accessories or attachments might present a risk of
injury to persons. Only use accessory or attachment
for its stated purpose.
If you need any assistance for more details regard-
ing these accessories, ask your local Makita Service
Center.
• Adapter pipe
• Extension nozzle
• Flat nozzle
• End nozzle
• Gutter nozzle set
• Shoulder strap
• Makita genuine battery and charger
NOTE: Some items in the list may be included in the
product package as standard accessories. They may
dier from country to country.
MAKITA LIMITED WARRANTY
Please refer to the annexed warranty sheet for the
most current warranty terms applicable to this product.
If annexed warranty sheet is not available, refer to the
warranty details set forth at below website for your
respective country.
United States of America: www.makitatools.com
Canada: www.makita.ca
Other countries: www.makita.com

14 FRANÇAIS
FRANÇAIS (Mode d’emploi original)
SPÉCIFICATIONS
Modèle : UB001G
Capacités Volume d’air 0 - 16,0 m3/min (0 - 565 cu.ft./min)
Vitesse du ux d’air (moyenne) 0 - 53,5 m/s (0 - 120 MPH)
Vitesse du ux d’air (max.) 0 - 64,0 m/s (0 - 143 MPH)
Longueur hors-tout (avec buse d’extrémité) 850 mm (33-1/2″) / 900 mm (35-1/2″) / 950 mm (37-1/2″)
Tension nominale C.C. 36 V - 40 V max.
Poids net 3,1 - 3,9 kg (6,8 - 8,6 lbs)
• Étant donné l’évolution constante de notre programme de recherche et développement, les spécications
contenues dans ce manuel sont sujettes à modication sans préavis.
• Les spécications peuvent varier suivant les pays.
• Le poids peut varier selon les accessoires, y compris la batterie. La plus légère et la plus lourde combinaisons,
selon la procédure EPTA 01/2014, sont indiquées dans le tableau.
Batteries et chargeurs applicables
Batterie BL4025 / BL4040
Chargeur DC40RA
• Suivant la région où vous habitez, il se peut que certaines des batteries et certains des chargeurs énumérés
ci-dessus ne soient pas disponibles.
MISE EN GARDE : Utilisez exclusivement les batteries et chargeurs énumérés ci-dessus. L’utilisation
de toute autre batterie ou tout autre chargeur peut entraîner une blessure et/ou un incendie.
CONSIGNES DE SÉCURITÉ
IMPORTANTES
CONSIGNES DE SÉCURITÉ
Lors de l’utilisation d’un appareil électrique, vous devez
toujours prendre des précautions de base, dont les
suivantes :
LISEZ TOUTES LES
INSTRUCTIONS AVANT
D’UTILISER CET
APPAREIL.
MISE EN GARDE : Pour
réduire les risques d’in-
cendie, de décharge élec-
trique et de blessure :
1.
Ne vous éloignez pas de l’appareil alors que la bat-
terie y est insérée. Retirez la batterie de l’appareil
lorsqu’il n’est pas utilisé et avant de le réparer.
2. Ne l’exposez pas à la pluie. Rangez-le à
l’intérieur.
3. Ne laissez pas les enfants l’utiliser comme
jouet. Une attention particulière est nécessaire
lors de l’utilisation par les enfants ou près
d’eux.
4. Utilisez-le uniquement de la façon décrite dans
ce manuel. Utilisez uniquement les acces-
soires recommandés par le fabricant.
5. Ne l’utilisez pas avec une batterie endomma-
gée. Si l’appareil ne fonctionne pas bien, s’il a
été échappé, endommagé, laissé à l’extérieur
ou échappé dans l’eau, retournez-le à un
centre de service après-vente.
6. Ne mettez rien dans les ouvertures. Ne l’utili-
sez jamais si une des ouvertures est bouchée ;
gardez ces dernières exemptes de poussières,
charpies, cheveux ou tout objet pouvant
réduire la circulation de l’air.
7. Gardez les cheveux, les vêtements amples, les
doigts et toute autre partie du corps à l’écart
des ouvertures et des pièces mobiles.
8. Soyez tout particulièrement prudent lorsque
vous nettoyez sur les marches d’un escalier.
9. Utilisez uniquement le chargeur fourni par le
fabricant pour recharger la batterie.
CONSERVEZ CES
INSTRUCTIONS.
Cet appareil est conçu à la fois pour l’usage domestique
et pour l’usage commercial.

15 FRANÇAIS
Consignes de sécurité
pour soueur sans l
Préparatifs
1. Portez toujours des chaussures robustes et
des pantalons longs lorsque vous utilisez le
soueur.
2.
Ne portez ni vêtements amples ni bijoux suscep-
tibles d’être entraînés dans l’entrée d’air. Gardez
les cheveux longs à l’écart des entrées d’air.
3.
Portez toujours des lunettes à coques de protec-
tion, une casquette et un masque lorsque vous
utilisez le soueur. Les lunettes ordinaires et les
lunettes de soleil NE sont PAS des lunettes de sécurité.
4. Le port d’un masque facial est recommandé
pour prévenir l’irritation causée par les
poussières.
5. Pendant l’utilisation de la machine, portez
toujours des chaussures de protection antidé-
rapantes. Des bottes et chaussures de sécurité
antidérapantes et fermées réduiront le risque de
blessure.
Utilisation
1. N’utilisez jamais le soueur lorsque d’autres
personnes — et tout particulièrement des
enfants — ou des animaux domestiques se
trouvent à proximité.
2. Éteignez le soueur, retirez la batterie et
assurez-vous de l’arrêt complet de toutes les
pièces mobiles
• chaque fois que vous vous éloignez du
soueur.
• avant de retirer les objets bloqués;
• avant d’inspecter le soueur, de le net-
toyer ou de travailler dessus;
• si le soueur se met à vibrer de manière
anormale.
3. N’utilisez le soueur qu’à la lumière du jour
ou avec une bonne lumière articielle.
4. Ne tendez pas trop les bras et maintenez en
tout temps une bonne prise au sol et un bon
équilibre.
5. Ne souez jamais les débris vers les per-
sonnes présentes.
6. Utilisez le soueur avec la posture recomman-
dée et sur une surface ferme.
7. N’utilisez pas le soueur dans des emplace-
ments élevés.
8. Pendant l’utilisation du soueur, ne pointez
jamais la buse vers une personne se trouvant
à proximité.
9. Ne bloquez jamais l’entrée d’aspiration et/ou la
sortie de soueur.
• Prenez garde de bloquer l’entrée d’aspi-
ration ou la sortie de soueur avec des
poussières ou saletés lors de l’utilisation
dans une zone poussiéreuse.
• N’utilisez pas d’autres buses que celles
fournies par Makita.
• N’utilisez pas le soueur pour goner
des ballons, des canots pneumatiques ou
objets similaires.
10. N’utilisez pas le soueur près des fenêtres
ouvertes, etc.
11. Il est recommandé de n’utiliser le soueur
qu’à des heures raisonnables - pas tôt le matin
ou tard le soir, lorsque les gens pourraient être
dérangés.
12. Il est recommandé d’utiliser des râteaux et
des balais pour dégager les débris avant de
souer.
13. Si le soueur heurte un corps étranger ou
commence à émettre des bruits ou vibrations
inhabituels, éteignez immédiatement le souf-
eur pour l’arrêter. Retirez la batterie du souf-
eur et inspectez-le pour vérier l’absence de
dommages avant de le redémarrer et de l’utili-
ser. Si le soueur est endommagé, demandez
à votre centre de service après-vente Makita
agréé de le réparer.
14. N’insérez ni les doigts ni aucun objet dans
l’entrée d’aspiration ou dans la sortie de
soueur.
15. Prévenez le démarrage accidentel. Assurez-
vous que l’interrupteur est en position d’arrêt
avant d’insérer la batterie et avant de saisir
ou de transporter le soueur. Transporter le
soueur avec le doigt sur l’interrupteur ou le
mettre sous tension alors que son interrupteur
est en position de marche ouvre la porte aux
accidents.
16. Ne souez jamais des matériaux dangereux,
tels que des clous, des fragments de verre ou
des lames.
17. N’utilisez pas le soueur près de matériaux
inammables.
18. Évitez d’utiliser le soueur pendant une
période prolongée dans un environnement à
basse température.
19. Assurez-vous toujours d’être bien campé dans
les pentes.
20. N’utilisez pas la machine lorsqu’il y a un risque
d’éclair.
21. Lorsque vous utilisez la machine sur un sol
boueux, une pente mouillée ou un emplace-
ment glissant, prêtez attention à la stabilité de
votre position.
22. Évitez de travailler dans un environnement
médiocre qui risque fortement d’entraîner une
fatigue accrue de l’utilisateur.
23. N’utilisez pas la machine par mauvais temps,
la visibilité étant réduite. Autrement vous ris-
quez de provoquer une chute ou une utilisation
incorrecte en raison d’une mauvaise visibilité.
24. N’immergez pas la machine dans une aque
d’eau.
25. Lorsque des feuilles mouillées ou des saletés
adhèrent à la bouche d’aspiration (fenêtre de
ventilation) à cause de la pluie, retirez-les.
Entretien et remisage
1. Assurez-vous que tous les écrous, boulons et
vis sont bien serrés pour garantir un fonction-
nement sécuritaire du soueur.
2. Si des pièces sont usées ou endommagées,
remplacez-les avec des pièces fournies par
Makita.

16 FRANÇAIS
3. Remisez le soueur dans un endroit sec, hors
de la portée des enfants.
4. Lorsque vous arrêtez le soueur pour ins-
pection, réparation, remisage ou changement
d’accessoire, éteignez-le et assurez-vous que
toutes les pièces mobiles s’arrêtent complète-
ment, et retirez la batterie. Laissez refroidir le
soueur avant d’eectuer tout travail dessus.
Entretenez soigneusement le soueur et
gardez-le propre.
5. Laissez toujours refroidir le soueur avant de
le remiser.
6. Lorsque vous soulevez le soueur, veillez à
plier les genoux et prenez garde de vous bles-
ser au dos.
7. N’abandonnez pas la machine à l’extérieur
sous la pluie.
8. Ne lavez pas la machine avec de l’eau sous
haute pression.
9. Lorsque vous remisez la machine, évitez la
lumière directe du soleil et la pluie, et mettez-la
dans un emplacement où elle ne sera pas
chaude ou humide.
10. Eectuez l’inspection ou l’entretien dans un
emplacement où la pluie peut être évitée.
11. Après avoir utilisé la machine, retirez la saleté
collée et séchez complètement la machine
avant de la ranger. Selon la saison ou la zone, il
existe un risque de dysfonctionnement dû au gel.
Utilisation et entretien de l’outil à batterie
1. Prévenez le démarrage accidentel. Assurez-
vous que l’interrupteur est en position d’arrêt
avant de connecter la machine à la batterie,
de la saisir ou de la transporter. Transporter
la machine avec le doigt sur l’interrupteur ou la
mettre sous tension alors que son interrupteur
est en position de marche ouvre la porte aux
accidents.
2. Retirez la batterie de la machine avant de pro-
céder à des réglages, au remplacement d’ac-
cessoires ou au rangement de la machine. De
telles mesures de sécurité préventives réduisent
le risque de démarrage accidentel de la machine.
3. Ne la rechargez qu’avec le chargeur spécié
par le fabricant. Un chargeur conçu pour un
certain type de batterie risque de déclencher un
incendie s’il est utilisé avec une autre batterie.
4. N’utilisez les machines qu’avec leurs batteries
spéciques. Les autres batteries risqueraient de
vous blesser ou de provoquer un incendie.
5. Lorsque la batterie n’est pas utilisée, tenez-la à
distance des objets métalliques tels que trom-
bones, pièces de monnaie, clés, clous, vis ou
autres petits objets métalliques, conducteurs
potentiels entre une borne et une autre. Un
court-circuit entre les bornes de la batterie peut
provoquer des brûlures ou un incendie.
6. Dans des conditions d’utilisation inadéquates
de la batterie, il peut y avoir fuite d’électrolyte;
évitez tout contact. En cas de contact acciden-
tel, rincez avec beaucoup d’eau. Si du liquide
entre en contact avec les yeux, consultez un
médecin. Le liquide qui gicle de la batterie peut
provoquer des irritations ou des brûlures.
7.
N’utilisez pas une batterie ou une machine
endommagée ou modiée. Les batteries endom-
magées ou modiées peuvent se comporter de
manière imprévisible et entraîner un incendie,
une explosion ou un risque de blessure.
8. N’exposez pas une batterie ou une machine
au feu ou à une température excessive.
L’exposition au feu ou à une température
supérieure à 130 °C (265 °F) peut provoquer
une explosion.
9. Suivez toutes les instructions de charge et ne
chargez pas la batterie ou la machine à l’exté-
rieur de la plage de température spéciée dans
les instructions. Eectuer la charge de manière
inadéquate ou à une température hors de la plage
spéciée peut endommager la batterie et faire
augmenter le risque d’incendie.
10. L’entretien doit être coné à un réparateur qua-
lié et n’utilisant que des pièces de rechange
identiques aux pièces d’origine. Cela assurera
le maintien du produit dans un état sécuritaire.
11. Ne modiez pas et n’essayez pas de réparer
la machine ou la batterie autrement que tel
qu’indiqué dans les instructions d’utilisation
et d’entretien.
Consignes de sécurité concernant l’alimentation
électrique et la batterie
1. Ne jetez pas la/les batterie(s) au feu. L’élément
pourrait exploser. Vériez la réglementation de
votre région pour savoir s’il existe des directives
particulières sur l’élimination.
2. N’ouvrez pas et n’endommagez pas la/les
batterie(s). L’électrolyte qui s’échappe est corrosif
et peut provoquer des dommages aux yeux ou à
la peau. Il peut être toxique s’il est ingéré.
3. Ne chargez pas la batterie sous la pluie ou
dans les emplacements humides.
4. Ne chargez pas la batterie à l’extérieur.
5. Ne manipulez pas le chargeur, y compris sa
che et ses bornes, avec les mains mouillées.
6. Ne remplacez pas la batterie sous la pluie.
7. Ne mouillez pas la borne de la batterie avec
du liquide tel que de l’eau, et n’immergez pas
la batterie. Ne laissez pas la batterie sous la
pluie, et évitez de la charger, de l’utiliser ou de
la remiser dans un emplacement humide ou
mouillé. Si la borne est mouillée ou si du liquide
pénètre à l’intérieur de la batterie, celle-ci peut
être court-circuitée et il y a risque de surchaue,
d’incendie ou d’explosion.
8. Après avoir retiré la batterie de la machine
ou du chargeur, veillez à xer le couvercle
de batterie à la batterie et rangez-la dans un
emplacement sec.
9.
Ne remplacez pas la batterie avec les mains mouillées.
10.
Si la batterie est mouillée, vidangez l’eau pré-
sente à l’intérieur puis essuyez la batterie avec
un linge sec. Avant d’utiliser la batterie, laissez-la
sécher complètement dans un emplacement sec.
11. Évitez les environnements dangereux.
N’utilisez pas la machine dans les endroits
humides ou mouillés, et ne l’exposez pas à la
pluie. L’inltration d’eau dans la machine accroît
le risque de décharge électrique.

17 FRANÇAIS
Réparation
1.
Faites réparer votre outil électrique par un répa-
rateur qualié qui utilise des pièces de rechange
identiques aux pièces d’origine. Le maintien de la
sûreté de l’outil électrique sera ainsi assuré.
2. N’essayez jamais de réparer les batteries
endommagées. La réparation des batteries ne
doit être eectuée que par le fabricant ou par un
fournisseur de service après-vente agréé.
CONSERVEZ CES
INSTRUCTIONS.
MISE EN GARDE : NE vous laissez PAS
tromper (au l d’une utilisation répétée) par un
sentiment d’aisance ou de familiarité avec le
produit en négligeant les consignes de sécurité
qui accompagnent le produit.
UNE UTILISATION INCORRECTE ou le non-res-
pect des règles de sécurité énoncées dans le
présent manuel d’instructions peut provoquer
des blessures graves.
MISE EN GARDE : L’utilisation de ce pro-
duit peut générer des poussières contenant des
substances chimiques, lesquelles peuvent causer
des problèmes respiratoires ou autres maladies.
Parmi ces substances chimiques gurent les
composés que l’on retrouve dans les pesticides,
insecticides, fertilisants et herbicides.
Les risques liés à l’exposition varient suivant la
fréquence d’exécution du type de travail en ques-
tion. Pour réduire votre exposition à ces subs-
tances chimiques : travaillez dans un emplace-
ment bien aéré et avec des dispositifs de sécurité
approuvés, tels que les masques antipoussières
spécialement conçus pour ltrer les particules
microscopiques.
Symboles
Les symboles utilisés pour l’outil sont indiqués
ci-dessous.
volts
courant continu
Consignes de sécurité importantes
pour la batterie
1. Avant d’utiliser la batterie, lisez toutes les
instructions et les mises en garde apposées
sur (1) le chargeur de batterie, (2) la batterie et
(3) le produit utilisant la batterie.
2. Ne démontez pas et ne modiez pas la batte-
rie. Cela peut entraîner un incendie, une chaleur
excessive ou une explosion.
3. Cessez immédiatement l’utilisation si le temps
de fonctionnement devient excessivement
court. Il y a risque de surchaue, de brûlures,
voire d’explosion.
4. Si l’électrolyte pénètre dans vos yeux, rin-
cez-les à l’eau claire et consultez immédiate-
ment un médecin. Il y a risque de perte de la
vue.
5. Ne court-circuitez pas la batterie :
(1) Ne touchez les bornes avec aucun maté-
riau conducteur.
(2) Évitez de ranger la batterie dans un
conteneur avec d’autres objets métal-
liques tels que clous, pièces de monnaie,
etc.
(3) Évitez d’exposer la batterie à l’eau ou à la
pluie.
Un court-circuit de la batterie pourrait provo-
quer un fort courant, une surchaue, parfois
des brûlures et même une panne.
6. Ne rangez pas et n’utilisez pas l’outil ou la
batterie dans des emplacements où la tempé-
rature peut atteindre ou dépasser 50 °C (122
°F).
7. Ne jetez pas la batterie au feu même si elle est
sérieusement endommagée ou complètement
épuisée. La batterie peut exploser au contact
du feu.
8. Évitez de clouer, de couper, d’écraser, de lan-
cer ou d’échapper la batterie, ou de heurter un
objet dur contre la batterie. Cela peut entraî-
ner un incendie, une chaleur excessive ou une
explosion.
9. N’utilisez pas une batterie si elle est
endommagée.
10. Les batteries lithium-ion fournies sont sou-
mises aux exigences de la législation sur les
marchandises dangereuses.
Des exigences particulières sur l’emballage et
l’étiquetage doivent être respectées lors du trans-
port commercial par des tiers, des transitaires, etc.
Pour préparer la marchandise à expédier, consul-
tez un expert en matériaux dangereux si néces-
saire. Respectez aussi les éventuelles réglemen-
tations nationales plus détaillées.
Recouvrez de ruban isolant les contacts exposés,
et emballez la batterie de sorte qu’elle ne puisse
pas se déplacer à l’intérieur de l’emballage.
11. Lors de l’élimination de la batterie, retirez-la
de l’outil et éliminez-la dans un endroit sûr.
Respectez la réglementation locale concernant
l’élimination de la batterie.
12. N’utilisez les batteries qu’avec les produits
spéciés par Makita. Installer les batteries sur
des produits non conformes peut entraîner un
incendie, une chaleur excessive, une explosion ou
une fuite d’électrolyte.
13. Si l’outil reste inutilisé pour une période pro-
longée, la batterie doit en être retirée.
14. Pendant et après l’utilisation, la batterie peut
accumuler de la chaleur, ce qui peut causer
des brûlures ou des brûlures à basse tempé-
rature. Faites attention lors de la manipulation
des batteries chaudes.
15. Ne touchez pas la borne de l’outil immédiate-
ment après l’utilisation, car elle peut être assez
chaude pour causer des brûlures.

18 FRANÇAIS
16. Ne laissez pas les copeaux, les poussières ou
la terre se coincer dans les bornes, les trous et
les rainures de la batterie. Cela peut entraîner
un fonctionnement médiocre ou une panne de
l’outil ou de la batterie.
17. À moins que l’outil ne soit compatible avec
l’utilisation à proximité des lignes électriques
haute tension, n’utilisez pas la batterie à
proximité d’une ligne électrique haute tension.
Cela peut entraîner un dysfonctionnement ou une
panne de l’outil ou de la batterie.
18. Gardez la batterie à l’écart des enfants.
CONSERVEZ CES
INSTRUCTIONS.
ATTENTION : Utilisez exclusivement les bat-
teries fabriquées par Makita. Les batteries autres
que celles fabriquées par Makita ou les batteries
modiées peuvent exploser et causer un incendie,
une blessure ou des dommages. Cela annule aussi la
garantie Makita de l’outil et du chargeur Makita.
Conseils pour maintenir la
durée de service maximale de la
batterie
1. Rechargez la batterie avant qu’elle ne soit
complètement déchargée. Arrêtez toujours
l’outil et rechargez la batterie quand vous
remarquez que la puissance de l’outil diminue.
2. Ne rechargez jamais une batterie complète-
ment chargée. La surcharge réduit la durée de
service de la batterie.
3. Chargez la batterie à une température
ambiante comprise entre 10 °C et 40 °C (50 °F
et 104 °F). Si la batterie est chaude, laissez-la
refroidir avant de la charger.
4. Lorsque vous n’utilisez pas la batterie, reti-
rez-la de l’outil ou du chargeur.
5. Chargez la batterie si elle est restée inutilisée
pendant une période prolongée (plus de six
mois).
ASSEMBLAGE
ATTENTION : Assurez-vous toujours que la
machine est éteinte et que sa batterie est retirée
avant d’eectuer tout travail sur la machine.
Pose de la buse d’extrémité
Alignez la marque triangulaire de la buse d’extrémité
sur la marque triangulaire du tuyau avant, xez la buse
d’extrémité au tuyau avant, puis tournez la buse d’ex-
trémité pour la verrouiller en place.
Installez la buse d’extrémité de sorte que le bout de la
buse soit orienté vers le bas. Suivant l’environnement
de travail, vous pouvez installer la buse d’extrémité de
sorte que le bout de la buse soit orienté vers le haut.
2 3
11
► 1. Marque triangulaire 2. Buse d’extrémité 3. Tuyau
avant
Pour retirer la buse d’extrémité, eectuez la procédure
d’installation en sens inverse.
NOTE : La longueur de la buse peut être modiée en
déplaçant la buse tel qu’illustré sur la gure.
1 2
► 1. Buse d’extrémité 2. Tuyau avant

19 FRANÇAIS
Pose de la buse plate ou de la buse
de rallonge
Accessoire en option
1. Alignez la rainure du tuyau adaptateur sur la partie
saillante du tuyau avant, puis xez le tuyau adaptateur
au tuyau avant et tournez-le pour le verrouiller en place.
2
1
► 1. Tuyau adaptateur 2. Tuyau avant
2. Alignez la rainure de la buse plate ou de la buse
de rallonge sur la partie saillante du tuyau adaptateur,
puis xez la buse plate ou la buse de rallonge au tuyau
adaptateur et tournez-la pour la verrouiller en place.
1
3
2
► 1. Embout plat 2. Rallonge d’embout 3. Tuyau
adaptateur
Pose de l’ensemble de buse pour
gouttière
Accessoire en option
1. Alignez la rainure du tuyau adaptateur sur la partie
saillante du tuyau avant, puis xez le tuyau adaptateur
au tuyau avant et tournez-le pour le verrouiller en place.
Insérez le tuyau adaptateur à fond, de sorte que la
partie saillante pénètre dans la rainure la plus profonde
du tuyau adaptateur.
2
3
1
4
► 1. Vis 2. Collier de serrage du tuyau 3. Tuyau adap-
tateur 4. Tuyau avant
2. Desserrez les vis des colliers de serrage du tuyau,
faites passer le grand collier de serrage du tuyau à
travers le tuyau adaptateur, puis faites passer le petit
collier de serrage du tuyau.
3. Connectez le tuyau de rallonge au tuyau
adaptateur.
Alignez la rainure du tuyau de rallonge sur la partie sail-
lante du tuyau adaptateur, puis faites glisser le tuyau de
rallonge le long de sa rainure de sorte que les marques
triangulaires soient alignées l’une sur l’autre.
2
1
► 1. Tuyau de rallonge 2. Tuyau adaptateur

20 FRANÇAIS
4. Placez les colliers de serrage du tuyau sur les
rainures tel qu’illustré, et serrez les vis.
1
2
2
► 1. Vis 2. Collier de serrage du tuyau
5. Selon la hauteur d’exécution du travail, connectez
le reste des tuyaux de rallonge au tuyau de rallonge
déjà xé.
ATTENTION : Ne xez pas le tuyau de ral-
longe si la longueur totale, soueur compris,
dépasse 4 m (14 ft).
6. Tournez la sortie de la buse d’extrémité tel qu’illus-
tré sur la gure.
7. Connectez la buse d’extrémité au tuyau de ral-
longe. Lors de la connexion, alignez la marque triangu-
laire de la buse d’extrémité et du tuyau de rallonge, puis
enfoncez la buse d’extrémité jusqu’à ce qu’elle s’en-
clenche. Ensuite, tournez la buse d’extrémité jusqu’à
une position adéquate pour le travail à eectuer.
1
2
3
► 1. Buse d’extrémité 2. Tuyau de rallonge 3. Marque
triangulaire
Lors du retrait de la buse d’extrémité, alignez les
marques triangulaires de la buse d’extrémité et du
tuyau de rallonge, puis tirez sur la buse d’extrémité pour
la retirer du tuyau de rallonge.
1
2
3
► 1. Buse d’extrémité 2. Tuyau de rallonge 3. Marque
triangulaire
Other manuals for UB001G
7
Table of contents
Languages:
Other Makita Blower manuals

Makita
Makita UB1100 User manual

Makita
Makita EB5300TH Operating instructions

Makita
Makita BU01 User manual

Makita
Makita BUB360 User manual

Makita
Makita DUB362Z User manual

Makita
Makita UB141DZ User manual

Makita
Makita UB100D User manual

Makita
Makita BHX2500 User manual

Makita
Makita DUB362 User manual

Makita
Makita DUB143 User manual

Makita
Makita DUB185 User manual

Makita
Makita DOLMAR EB-165 User guide

Makita
Makita DUB184 User manual

Makita
Makita RBL500 Quick start guide

Makita
Makita PM001G User manual

Makita
Makita EB5300TH User guide

Makita
Makita EB7650TH User guide

Makita
Makita DUB142 User manual

Makita
Makita RBL250 User guide

Makita
Makita DUB361 User manual