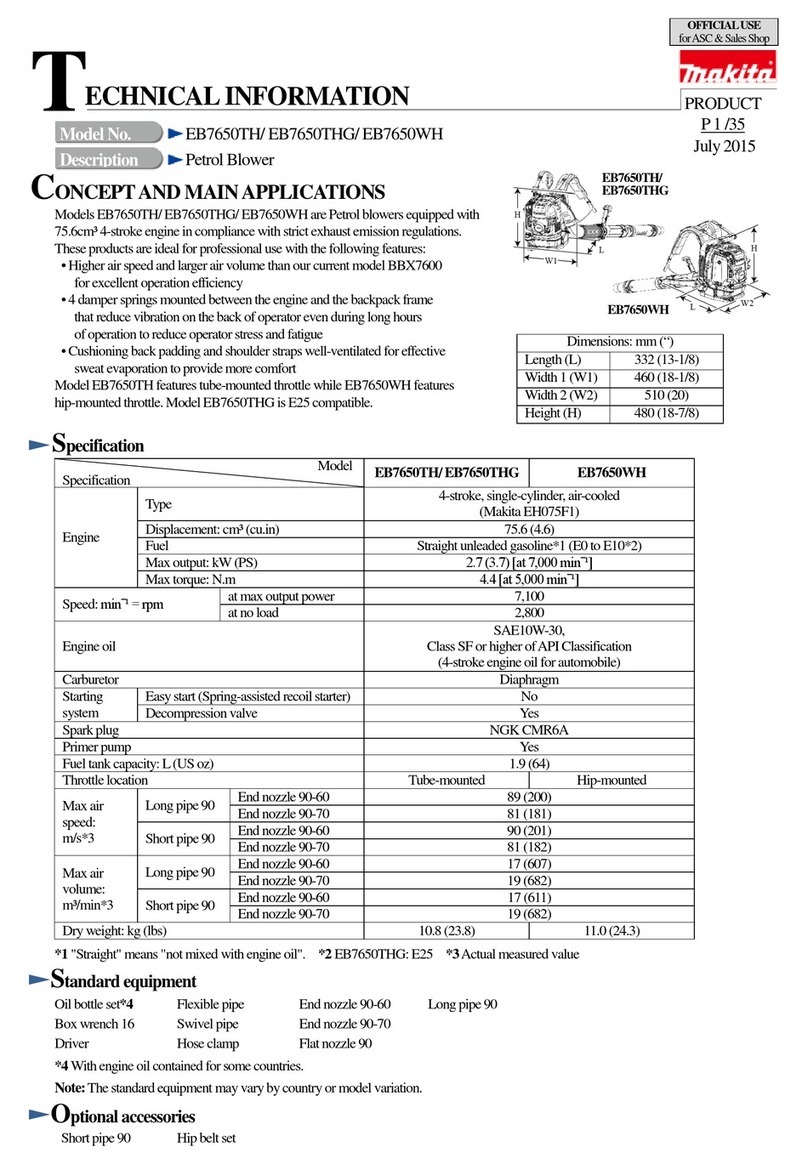
Makita DUB362 User manual

INSTRUCTION MANUAL
Cordless Blower
DUB362
ENGLISH: Original instructions
Read before use.

2ENGLISH
SPECIFICATIONS
Model DUB362
Capacities Air volume (max.) 0 - 13.4 m3/min
Air speed (average) 0 - 54.0 m/s
Air speed (max.) 0 - 65.0 m/s
Overall length (without long nozzle) 585 mm
(with long nozzle) 830, 880, 930 mm
Net weight 3.5 - 4.2 kg
Rated voltage D.C. 36 V
• Duetoourcontinuingprogramofresearchanddevelopment,thespecicationshereinaresubjecttochange
without notice.
• Specicationsandbatterycartridgemaydierfromcountrytocountry.
• Theweightmaydierdependingontheattachment(s),includingthebatterycartridge.Thelightestandheavi-
est combinations, according to EPTA-Procedure 01/2014, are shown in the table.
Applicable battery cartridge and charger
Batterycartridge BL1815N / BL1820B / BL1830B / BL1840B / BL1850B / BL1860B
Charger DC18RC / DC18RD / DC18RE / DC18SD / DC18SE / DC18SF /
DC18SH / DC18WC
• Someofthebatterycartridgesandchargerslistedabovemaynotbeavailabledependingonyourregionof
residence.
WARNING: Only use the battery cartridges and chargers listed above.Useofanyotherbatterycartridges
andchargersmaycauseinjuryand/orre.
Recommended cord connected power source
Batteryadapter BAP182
Cordconnectedbatterypack BL36120A
Portable power pack PDC01 / PDC1200
• Thecordconnectedpowersource(s)listedabovemaynotbeavailabledependingonyourregionofresidence.
• Beforeusingthecordconnectedpowersource,readinstructionandcautionarymarkingsonthem.
Symbols
Thefollowingshowthesymbolsusedfortheequip-
ment.Besurethatyouunderstandtheirmeaningbefore
use.
Take particular care and attention.
Read instruction manual.
Keephandsawayfromrotatingparts.
Longhairmaycauseentanglement
accident.
Keepbystandersaway.
Weareyeandearprotection.
Do not expose to moisture.
Guaranteed sound power level according
to EU Outdoor Noise Directive.
Sound power level according to Australia
NSW Noise Control Regulation.
Ni-MH
Li-ion
OnlyforEUcountries
Due to the presence of hazardous com-
ponentsintheequipment,wasteelectrical
andelectronicequipment,accumulators
andbatteriesmayhaveanegativeimpact
on the environment and human health.
Do not dispose of electrical and electronic
appliances or batteries with household waste!
In accordance with the European Directive
onwasteelectricalandelectronicequip-
ment and on accumulators and batteries
and waste accumulators and batteries,
as well as their adaptation to national law,
wasteelectricalequipment,batteriesand
accumulatorsshouldbestoredseparately
and delivered to a separate collection point
for municipal waste, operating in accor-
dance with the regulations on environmen-
tal protection.
Thisisindicatedbythesymbolofthe
crossed-out wheeled bin placed on the
equipment.

3ENGLISH
Intended use
The tool is intended for blowing dust.
Noise
ThetypicalA-weightednoiseleveldeterminedaccord-
ing to EN50636:
Sound pressure level (LpA) : 79.1 dB (A)
Uncertainty(K):1.8dB(A)
Sound power level (LWA) : 93.5 dB (A)
Uncertainty(K):2.3dB(A)
Wear ear protection
Vibration
The vibration total value (tri-axial vector sum) deter-
mined according to EN50636:
Work mode : operation without load
Vibration emission (ah) : 2.5 m/s2or less
Uncertainty(K):1.5m/s2
NOTE: The declared vibration emission value has
been measured in accordance with the standard test
methodandmaybeusedforcomparingonetoolwith
another.
NOTE: The declared vibration emission value
mayalsobeusedinapreliminaryassessmentof
exposure.
WARNING: The vibration emission during actual
useofthepowertoolcandierfromthedeclared
emissionvaluedependingonthewaysinwhichthe
tool is used.
WARNING:Besuretoidentifysafetymeasures
to protect the operator that are based on an estima-
tion of exposure in the actual conditions of use (taking
accountofallpartsoftheoperatingcyclesuchas
thetimeswhenthetoolisswitchedoandwhenitis
running idle in addition to the trigger time).
EC Declaration of Conformity
For European countries only
TheECdeclarationofconformityisincludedasAnnexA
to this instruction manual.
CORDLESS BLOWER SAFETY
WARNINGS
Training
1. Readtheinstructionscarefully.Befamiliarwiththe
controls and the correct use of the blower.
2. Never allow children, persons with reduced
physical,sensoryormentalcapabilitiesorlackof
experience and knowledge or people unfamiliar
with these instructions to use the blower. Local
regulationsmayrestricttheageoftheoperator.
3. Electric shock could occur if used on wet surfaces.
Do not expose to rain. Store indoors.
4. Keep in mind, that the operator or user is respon-
sible for accidents or hazards occurring to other
peopleortheirproperty.
Preparation
5. Obtainearprotectionandsafetyglasses.Wear
them at all times while operating the blower.
6. Alwayswearsubstantialfootwearandlongtrou-
sers while operating the blower.
7.
Donotwearlooseclothingorjewellerythatcanbedrawn
intotheairinlet.Keeplonghairawayfromtheairinlets.
8. To prevent dust irritation the wearing of a face
mask is recommended.
Operation
9. Operate the blower in a recommended position
andonlyonarm,levelsurface.
10. Neverpointthenozzleatanyoneinthevicinity
when using the blower.
11. Never block suction inlet and/or blower outlet.
• Do not block suction inlet or blower outlet to
cleanupindustyareas.
• Do not use the blower with a tapered nozzle
smaller than the original one, such as a new
nozzleobtainedbyattachinganextradiam-
eter-reduced hose or smaller hose to the
nozzle top end.
• Donotusetheblowertoinateballs,rubber
boat or the similar.
Increasedmotorrevolutionmaycausedangerous
fanbreakageandresultinseriouspersonalinjury.
Heatedmotorandcontrolcircuitmaycauseare.
12. Do not overreach and keep proper balance and
footingatalltimes.Alwaysbesureofthefooting
on slopes and to walk, never run.
13. Do not operate the blower on a paved or gravel
surfacewhereejectedmaterialcouldcauseinjury.
14. Neveroperatetheblowerwhilepeople,especially
children,orpetsarenearby.
15. Do not operate the blower near open window, etc.
16. Operatingthebloweronlyatreasonablehoursis
recommended-notearlyinthemorningorlateat
night when people might be disturbed.
17. Using rakes and brooms to loosen debris before
blowing is recommended.
18. Itisrecommendedtoslightlydampensurfacesin
dustyconditionsorusemisterattachmentavail-
able on the market.
19. It is recommended to use the long nozzle so the
air stream can work close to the ground.
20.
Iftheblowerstrikesanyforeignobjectsorshould
startmakinganyunusualnoiseorvibration,imme-
diatelyswitchotheblowertostopit.Removethe
batterycartridgefromtheblowerandtakethefollow-
ing steps before restarting and operating the blower:
• inspect for damage,
• when the blower is damaged, have it
repairedbyMakitaAuthorizedService
Centers.
21. Switchotheblowerandremovethebatterycar-
tridge and make sure that all moving parts have
come to a complete stop
• wheneveryouleavetheblower,
• before clearing blockages or unclogging
chute,
• before checking, cleaning or working on the
blower,
• iftheblowerstartstovibrateabnormally,for
immediatelycheck,or
• afterstrikingaforeignobjecttoinspectthe
blower for damage.
22. Donotinsertngersorotherobjectsintosuction
inlet or blower outlet.

4ENGLISH
23.
Prevent unintentional starting. Ensure the switch
isintheo-positionbeforeinsertingbatterypack,
pickinguporcarryingtheblower.Carryingthe
blowerwithyourngerontheswitchorenergising
the blower that has the switch on invites accidents.
Maintenance and storage
24. When the blower is stopped for servicing, inspec-
tion,orstorage,ortochangeanaccessory,shut
othepowersource,removethebatterycartridge
from the blower and make sure that all moving
parts come to a complete stop. Cool down the
blowerbeforemakinganyinspections,adjust-
ments, etc. Maintain the blower with care and
keep it clean.
25. Storetheblowerinadryplaceoutofthereachof
children.
26. Alwayscooldowntheblowerbeforestoring.
27. Keep all nuts, bolts and screws tight to be sure the
blower is in safe working condition.
Battery tool use and care
28. Rechargeonlywiththechargerspeciedbythe
manufacturer. A charger that is suitable for one
typeofbatterypackmaycreateariskofrewhen
usedwithanotherbatterypack.
29. Usethebloweronlywithspecicallydesignated
batterypacks.Useofanyotherbatterypacksmay
createariskofinjuryandre.
SAVE THESE INSTRUCTIONS.
WARNING: DO NOT let comfort or famil-
iarity with product (gained from repeated
use) replace strict adherence to safety
rules for the subject product. MISUSE or
failure to follow the safety rules stated in
this instruction manual may cause serious
personal injury.
Important safety instructions for
battery cartridge
1. Before using battery cartridge, read all instruc-
tions and cautionary markings on (1) battery
charger, (2) battery, and (3) product using
battery.
2. Do not disassemble or tamper with the battery
cartridge.Itmayresultinare,excessiveheat,
or explosion.
3. If operating time has become excessively
shorter, stop operating immediately. It may
result in a risk of overheating, possible burns
and even an explosion.
4. If electrolyte gets into your eyes, rinse them
out with clear water and seek medical atten-
tion right away. It may result in loss of your
eyesight.
5. Do not short the battery cartridge:
(1) Do not touch the terminals with any con-
ductive material.
(2) Avoid storing battery cartridge in a con-
tainer with other metal objects such as
nails, coins, etc.
(3) Do not expose battery cartridge to water
or rain.
A battery short can cause a large current
ow, overheating, possible burns and even a
breakdown.
6. Do not store and use the tool and battery car-
tridge in locations where the temperature may
reach or exceed 50 °C (122 °F).
7. Do not incinerate the battery cartridge even if
it is severely damaged or is completely worn
out. The battery cartridge can explode in a re.
8. Do not nail, cut, crush, throw, drop the battery
cartridge, or hit against a hard object to the
battery cartridge.Suchconductmayresultina
re,excessiveheat,orexplosion.
9. Do not use a damaged battery.
10. The contained lithium-ion batteries are subject
to the Dangerous Goods Legislation require-
ments.
Forcommercialtransportse.g.bythirdparties,
forwardingagents,specialrequirementonpack-
aging and labeling must be observed.
For preparation of the item being shipped, consult-
inganexpertforhazardousmaterialisrequired.
Pleasealsoobservepossiblymoredetailed
national regulations.
Tapeormaskoopencontactsandpackupthe
batteryinsuchamannerthatitcannotmove
around in the packaging.
11. When disposing the battery cartridge, remove
it from the tool and dispose of it in a safe
place. Follow your local regulations relating to
disposal of battery.
12. Use the batteries only with the products
specied by Makita. Installing the batteries to
non-compliantproductsmayresultinare,exces-
siveheat,explosion,orleakofelectrolyte.
13. If the tool is not used for a long period of time,
the battery must be removed from the tool.
14. During and after use, the battery cartridge may
take on heat which can cause burns or low
temperature burns. Pay attention to the han-
dling of hot battery cartridges.
15. Do not touch the terminal of the tool imme-
diately after use as it may get hot enough to
cause burns.
16. Do not allow chips, dust, or soil stuck into the
terminals, holes, and grooves of the battery
cartridge.Itmaycauseheating,catchingre,
burstandmalfunctionofthetoolorbatterycar-
tridge,resultinginburnsorpersonalinjury.
17. Unless the tool supports the use near
high-voltage electrical power lines, do not use
the battery cartridge near high-voltage electri-
cal power lines.Itmayresultinamalfunctionor
breakdownofthetoolorbatterycartridge.
18. Keep the battery away from children.
SAVE THESE INSTRUCTIONS.
CAUTION: Only use genuine Makita batteries.
Use of non-genuine Makita batteries, or batteries that
havebeenaltered,mayresultinthebatterybursting
causingres,personalinjuryanddamage.Itwill
alsovoidtheMakitawarrantyfortheMakitatooland
charger.
5ENGLISH
Tips for maintaining maximum
battery life
1. Charge the battery cartridge before completely
discharged. Always stop tool operation and
charge the battery cartridge when you notice
less tool power.
2. Never recharge a fully charged battery car-
tridge. Overcharging shortens the battery
service life.
3. Charge the battery cartridge with room tem-
perature at 10 °C - 40 °C (50 °F - 104 °F). Let
a hot battery cartridge cool down before
charging it.
4. When not using the battery cartridge, remove
it from the tool or the charger.
5. Charge the battery cartridge if you do not use
it for a long period (more than six months).
FUNCTIONAL
DESCRIPTION
CAUTION:
• Alwaysbesurethatthetoolisswitchedoand
thebatterycartridgeisremovedbeforeadjust-
ing or checking function on the tool.
Installing or removing battery
cartridge
2
3
3
1
2
►1. Red indicator 2. Button 3.Batterycartridge
CAUTION:
• Alwaysswitchothetoolbeforeinstallingor
removingofthebatterycartridge.
• Hold the tool and the battery cartridge rmly
when installing or removing battery car-
tridge.Failuretoholdthetoolandthebattery
cartridgermlymaycausethemtoslipoyour
hands and result in damage to the tool and
batterycartridgeandapersonalinjury.
Toremovethebatterycartridge,slideitfromthetool
while sliding the button on the front of the cartridge.
Toinstallthebatterycartridge,alignthetongueonthe
batterycartridgewiththegrooveinthehousingandslip
itintoplace.Insertitallthewayuntilitlocksinplace
withalittleclick.Ifyoucanseetheredindicatoronthe
uppersideofthebutton,itisnotlockedcompletely.
CAUTION:
• Alwaysinstallthebatterycartridgefullyuntilthe
redindicatorcannotbeseen.Ifnot,itmayacci-
dentallyfalloutofthetool,causinginjurytoyou
orsomeonearoundyou.
• Donotinstallthebatterycartridgeforcibly.Ifthe
cartridgedoesnotslideineasily,itisnotbeing
insertedcorrectly.
NOTE:
• Thetooldoesnotworkwithonlyonebattery
cartridge.
Tool / battery protection system
Thetoolisequippedwithatool/batteryprotectionsys-
tem.Thissystemautomaticallycutsopowertothe
motortoextendtoolandbatterylife.
Thetoolwillautomaticallystopduringoperationifthe
toolorbatteryisplacedunderoneofthefollowingcon-
ditions. In some conditions, the indicators light up.
Overload protection
When the tool is operated in a manner that causes it to
drawanabnormallyhighcurrent,thetoolautomatically
stopswithoutanyindication.Inthissituation,turnthe
tooloandstoptheapplicationthatcausedthetoolto
become overloaded. Then turn the tool on to restart.
Overheat protection for tool
On Blinking
When the tool is overheated, the tool stops automat-
ically,thebatteryindicatorblinkabout60seconds.In
this situation, let the tool cool down before turning the
tool on again.
Overdischarge protection
Whenthebatterycapacitybecomeslow,thetoolstops
automatically.Iftheproductdoesnotoperateeven
when the switches are operated, remove the batteries
from the tool and charge the batteries.

6ENGLISH
Indicating the remaining battery
capacity
Only for battery cartridges with the indicator
1
2
►1. Indicator lamps 2. Check button
Pressthecheckbuttononthebatterycartridgetoindi-
catetheremainingbatterycapacity.Theindicatorlamps
light up for a few seconds.
Indicator lamps Remaining
capacity
Lighted O Blinking
75% to 100%
50% to 75%
25% to 50%
0% to 25%
Charge the
battery.
Thebattery
mayhave
malfunctioned.
NOTE: Depending on the conditions of use and the
ambienttemperature,theindicationmaydierslightly
fromtheactualcapacity.
NOTE:Therst(farleft)indicatorlampwillblinkwhen
thebatteryprotectionsystemworks.
Remaining battery capacity
indication
(Countryspecic)
121
►1.Batteryindicator2. CHECK button
Pressthecheckbuttontomakethebatteryindicators
showtheremainingbatterycapacities.Thebattery
indicatorscorrespondtoeachbattery.
Remaining battery capacity
indication
Battery indicator status
Remaining battery capacity
50% - 100%
20% - 50%
0% - 20%
Charge the battery
On Off Blinking

7ENGLISH
Switch action
CAUTION:
• Beforeinsertingthebatterycartridgeintothe
tool,alwayschecktoseethattheswitchtrigger
actuatesproperlyandreturnstothe"OFF"
position when released.
1
►1. Switch trigger
Tostartthetool,simplypulltheswitchtrigger.Tool
speedisincreasedbyincreasingpressureontheswitch
trigger. Release the switch trigger to stop.
1
1
►1. Lock button
For continuous operation, pull the switch trigger, push in
the lock button and then release the switch trigger.
To stop the tool from the locked position, pull the switch
triggerfully,thenreleaseit.
Speed change
1
►1.Adjustingdial
Themaximumairvolumecanbeadjustedjustby
turningtheadjustingdial.Thiscanbedoneevenwhile
the tool is running. The dial is marked 1 (lowest) to 6
(highest).
NOTICE:
Thespeedadjustingdialcanbeturnedonlyasfar
as 6 and back to 1. Do not force it past 6 or 1, or
thespeedadjustingfunctionmaynolongerwork.
When working in a high temperature circum-
stance,thetoolmaybestoppedbecauseofthe
overheatprotectionsystem.Inthatcaseletthe
tool cool down. Avoid setting to speed 6 (highest)
in high temperature circumstances.
ASSEMBLY
CAUTION:
• Alwaysbesurethatthetoolisswitchedoand
thebatterycartridgeisremovedbeforecarrying
outanyworkonthetool.
Installing the long nozzle
1
22
►1. Long nozzle 2. Triangle marking
To install the long nozzle:
1. Alignthesmallprojectionofthehousingwiththe
groove of the long nozzle.

8ENGLISH
2. Slide in the long nozzle, and turn it clockwise until
the triangle markings on the long nozzle and the
housing meet each other.
Thelengthofthenozzlecanbeadjustedbychanging
the locking position.
Installing the at nozzle or extension nozzle
Optional accessory
Theextensionnozzle/atnozzlecanbeinstalledon
thetipofthelongnozzleinthesamewayasabove.
Installing the gutter nozzle
Optional accessory
The gutter nozzle can be installed on the blower. The
adapterpipedesignedexclusivelyforthismodelis
requiredtoinstallthegutternozzle.
For more details, refer to the instruction manual pro-
vided with the gutter nozzle.
Attaching the shoulder strap
Optional accessory
CAUTION:
When you use the tool in combination of
the backpack-type power supply such as portable power pack,
do not use the shoulder strap included in the tool package.
Ifyouputontheshoulderstrapincludedinthetool
package and the shoulder harness of the back-
pack-typepowersupplyatthesametime,removingthe
toolorbackpack-typepowersupplyisdicultincaseof
anemergency,anditmaycauseanaccidentorinjury.
Hook the shoulder strap onto the hanger of the tool.
Beforeuse,adjustthelengthofstrapsothatitiseasy
to work with it.
OPERATION
Blowing
CAUTION:
• Do not place the blower on the ground while it is
switchedon.Sandordustmayenterfromsuc-
tioninlet,andtheymayresultinpersonalinjury.
Holdtheblowerrmlywithahandandperformthe
blowingoperationbymovingitaroundslowly.
When blowing around a building, a big stone or a vehi-
cle,directthenozzleawayfromthem.
When performing an operation in corner, start from the
corner and then move to wide area.
MAINTENANCE
CAUTION:
• Alwaysbesurethatthetoolisswitchedoand
thebatterycartridgeisremovedbeforeattempt-
ing to perform inspection or maintenance.
•
Never use gasoline, benzine, thinner, alcohol or the
like.Discoloration,deformationorcracksmayresult.
Cleaning
Fromtimetotime,wipeotheoutsideofthetoolusing
aclothdampenedinsoapywater.

9ENGLISH
To maintain product SAFETY and RELIABILITY, repairs,
anyothermaintenanceoradjustmentshouldbeper-
formedbyMakitaAuthorizedServiceCenters,always
using Makita replacement parts.
OPTIONAL
ACCESSORIES
CAUTION:
• These accessories or attachments are recom-
mendedforusewithyourMakitatoolspecied
inthismanual.Theuseofanyotheraccessories
orattachmentsmightpresentariskofinjuryto
persons.Onlyuseaccessoryorattachmentfor
its stated purpose.
Ifyouneedanyassistanceformoredetailsregard-
ingtheseaccessories,askyourlocalMakitaService
Center.
• Makitagenuinebatteryandcharger
• Shoulder strap
• Extension nozzle
• Flat nozzle
• Gutter nozzle
• Adapter pipe
NOTE:
• Someitemsinthelistmaybeincludedinthe
toolpackageasstandardaccessories.They
maydierfromcountrytocountry.

10

11

www.makita.com
Makita Europe N.V.
Makita Corporation
3-11-8, Sumiyoshi-cho,
Anjo, Aichi 446-8502 Japa
n
Jan-Baptist Vinkstraat 2,
3070 Kortenberg, Belgium
885401I227
EN
20220114
Other manuals for DUB362
17
Table of contents
Other Makita Blower manuals

Makita
Makita DUB185 User manual

Makita
Makita EB7650TH User guide

Makita
Makita M4000 User manual

Makita
Makita DUB142 User manual

Makita
Makita UB100D User manual

Makita
Makita UB120D User manual

Makita
Makita UB120D User manual

Makita
Makita UB001G User manual

Makita
Makita EB5300TH User guide

Makita
Makita UB003C User manual

Makita
Makita UB001C User manual

Makita
Makita DUB184 User manual

Makita
Makita UB121D User manual

Makita
Makita DUB361 User manual

Makita
Makita DUB143 User manual

Makita
Makita BUB360Z2C User manual

Makita
Makita UB1102 User manual

Makita
Makita DUB363 User manual

Makita
Makita EB7660TH User guide

Makita
Makita EB5300TH User guide