Makita 4112H Manual

Continuous Rating (W)
Voltage (V) Cycle (Hz) Input Output Max.
Output(W)
120 15
23
15
110
120
220 11.5
10.5
11
230
240
Models No.
Description
PRODUCT
Current (A)
TECHNICAL INFORMATION
CONCEPTION AND MAIN APPLICATIONS
Specification
Standard equipment
Optional accessories
< Note > The standard equipment for the tool shown may differ from country to country.
P 1 / 11
Dimensions : mm ( " )
Width ( W )
Height ( H )
Length ( L )
50 / 60
50 / 60
AC / DC
50 / 60
50 / 60
50 / 60
L
H
W
648 (25-1/2)
273 (10-3/4)
240 (9-1/2)
* Width ( W ):from the base to the rear of
motor housing
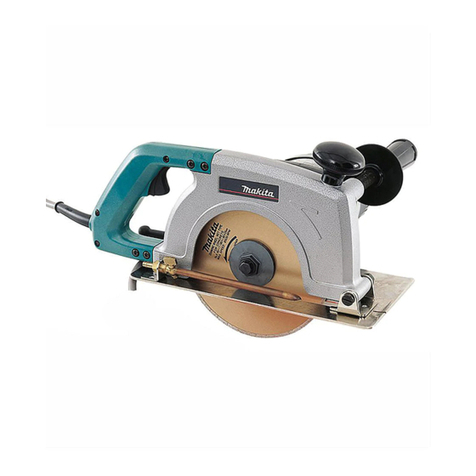
4112H, 4112HS
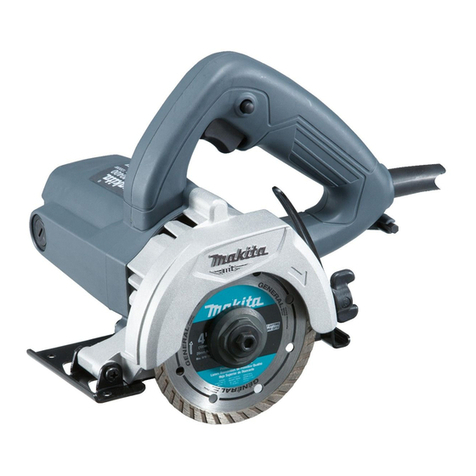
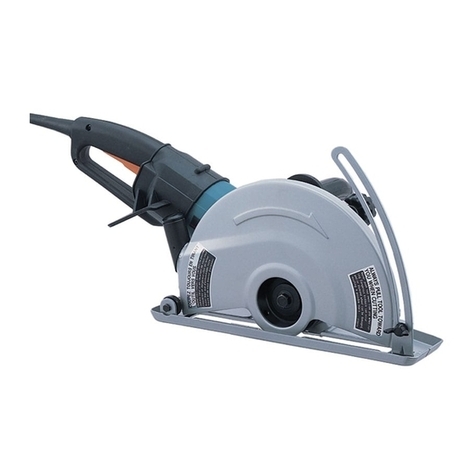
305mm (12") Angle Cutter
The above 305mm (12") angle cutters have been developed
as a successor to the existing model 4110C.
Their features and benefits are ;
* Super Joint System - SJS for suppression of shock
and prevention of damage on gear.
* 305m (12") diamond wheel which provides max.cutting
depth; 100mm (4"), can be used.
4112H
4112H
4112HS
4112HS
1,650 3,000
2,750
3,000
3,700
3,700
3,700
1,650
2,400
2,400
2,400 1,500
1,600
1,600
1,600
800
800
2,400
No load speed : min-1= rpm.
Wheel size Diameter : mm (")
Arbor : mm (")
Safety clutch
Soft start feature
Net weight : kg (lbs)
Power supply cord :m ( ft )
5,000
305 (12)
25.4 (1)
10.3 (22.7)
2.5 (8.2)
Yes (Super Joint System)
YesNo
Model No.
* Socket wrench 17 ............................................ 1 pc.
* Plastic carrying case ........................................ 1 pc.
* Various diamond wheels ( dry only)
* Various abrasive cut off wheels
* Ring 20
* Base set
* Elbow joint 32 assembly
* Plastic carrying case

Repair
P 2 / 11
< 1 > Lubrication
Apply MAKITA grease SG. No.0 to the following portions designated by black triangle to protect
parts and product from unusual abrasion.
32
26
Spiral bevel gear 48
17
Position
No. Amount to
be applied
The portion to be lubricated
Parts items
Spindle
17
Lock spring 24
26
The portion where spiral bevel gear 48 contacts
Its surface
Gear housing
32 Its gear room
approx. 1g (0.04 oz)
approx. 40g (1.41 oz)
Fig. 1
< 2 > Removing base and wheel cover
( 1 ) Remove wing bolt M8x20, spring washer 8, flat washer 8 and 2 pcs. of hex bolt M6. Then, base can be removed
from the machine. See Fig. A.
( 2 ) Remove pressure plate by unscrewing 3 pcs. of hex bolt M5x14. Then, the wheel cover has been disengaged
from bearing box. See Fig. B.
Hex bolt M6
Wing bolt M8x20
Base
Fig. A
Fig. B
Spring washer 8
Flat washer 8
Pressure
plate
Hex bolt
M5x14

Repair
P 3 / 11
( 3 ) Remove 2 pcs. of hex bolt M8x20. Then wheel cover section can be removed from the machine.
See Fig. C.
Hex bolt
M8x20
Hex bolt
M8x20
Fig. C
Plate B
<Note>
Be careful, not to lose
plate B.
< 3 > Disassembling gear section
Fig. 2 Fig. 3 Fig. 4 Fig. 5
Fig. 6
Hex bolt M5x14
( 1 ) Remove gear section by unscrewing 4 pcs. of hex bolt M5x14. See Fig. 2.
( 2 ) Remove ball bearing 6000LLB. See Fig. 3.
( 3 ) After removing retaining ring S-15, remove flat washer 15. See Fig. 4.
( 4 ) Spiral bevel gear 48 with lock sleeve can be separated from spindle. See Fig. 5.
( 5 ) Remove spindle by pressing with arbor press as illustrated in Fig. 6.
Gear section
Ball bearing
6000LLB
Retaining
ring S-15
Flat
washer 15
Spiral
bevel gear 48
Lock sleeve
Spindle
< Note >
Be careful not to damage
the Labyrinth fence of spindle
in this stage.
Labyrinth fence

Repair
P 4 / 11
< 4 > Assembling gear section
( 1 ) Mount spindle by pressing with arbor press from wheel side. See Fig. 6.
( 2 ) Mount spiral bevel gear 48 together with lock sleeve. See Fig. 7.
( 3 ) Mount flat washer 15. Secure the spiral bevel gear 48 and the flat washer 15 with retaining ring S-15.
See Fig. 8.
( 4 ) Mount flat washer 15. Secure the spiral bevel gear 48 and the flat washer 15 with retaining ring S-15.
See Fig. 8.
( 6 ) Mount the gear section to gear housing, and secure it with 4 pcs.of pan head screw M5x14. See Fig. 10.
( 5 ) Put ball bearing 6000LLB on the bearing setting plate. Mount the spindle which has been mounted to the bearing
box, to the ball bearing 6000LLB by pressing with arbor press. See Fig. 9.
The assemble of gear section has been completed at this stage.
Fig. 7 Fig. 8
Fig. 9
Fig. 10
Fig. 6
Spindle
Bearing
box
Retaining
ring S-15
Flat
washer 15
Spiral
bevel gear 48
Lock sleeve
Ball bearing
6000LLB
Bearing
setting plate
Hex bolt M5x14
Gear section

Repair
P 5 / 11
< 5 > Disassembling clutch section
< 6 > Assembling clutch section
Fig. 11
Fig. 12
Fig. 14A Fig. 14B Fig. 14C Fig. 14D
( 1 ) For removing clutch section from bearing box, take the step of Fig. 2, Fig.3, Fig.4 and Fig. 5 at page 3.
( 1 ) Apply MAKITA grease SG. No.0 to the lock spring 24.
( 3 ) Lock sleeve can be mounted to the spiral bevel gear 48 in the same way as the lock spring 24.
See Fig. 14A,B,C and D.
( 2 ) First, put the lock spring 24 slantingly on the spiral bevel gear 48. And press, such as, the portionA
of lock spring 24 See Fig. 13A
Second, turn the spiral bevel gear 48, and press the portion D. See Fig. 13B
Thirdly, turn the spiral bevel gear 48, and press the portion C. See Fig. 13C
Fourthly, turn the spiral bevel gear 48, and press the portion B. See Fig. 13D.
And finally, press the lock spring 24 into the spiral bevel gear 48 completely. See Fig. 13E.
( 2 ) Turning lock sleeve clockwise, pull the spiral bevel gear 48. So lock sleeve can be separated from the spiral
bevel gear 48. See Fig. 11.
( 3 ) Turning the lock spring 24 clockwise, pull the spiral bevel gear 48. So lock spring 24 can be separated
from the spiral bevel gear 48. See Fig. 12.
Water plier
Spiral bevel gear 48
Lock
sleeve
Spiral bevel gear 48
Water plier
Lock
spring 24
Soft cloth
< Note >
Cover the lock spring 24 with soft cloth to protect from
the damage as per this illustration.
A
CDBCD
A
BC
A
BD
B
A
DC
Spiral bevel
gear 48
Lock spring 24
Lock
sleeve
Lock
spring 24
Fig. 13A Fig. 13B Fig. 13C Fig. 13D Fig. 13E
Arbor press
Arbor press
Spiral bevel
gear 48

Repair
P 6 / 11
< 7 > Removing armature
( 1 ) After removing 4 pcs. of hex bolt M5x20, remove gear section from gear housing. And remove dust cover.
See fig. 15.
( 2 ) Remove brush holder caps and carbon brushes, and unscrew 4 pcs. of hex bolt M5x40. Then, motor housing can
be separated from gear housing. See Fig. 16.
( 3 ) After unscrewing hex nut M8x12, remove spiral bevel gear 9 from armature shaft. See Fig. 17.
Fig. 15
Fig. 16
Fig. 17
Hex bolt M5x20
Gear section
Brush holder cap
Carbon brush
Carbon brush
Brush holder cap
Hex bolt M5x40 Gear housing Motor housing
Armature
Gear housing
Armature
Hex nut
M8x12
Spiral bevel
gear 9
Dust cover

Repair
P 7 / 11
Fig. 22
( 3 ) Mount spiral bevel gear 9 and secure it with hex nut M8x12. See Fig. 22.
( 1 ) Make sure, if the rubber ring 36 remains in the gear housing. If not, mount it. Mount the parts to the gear
housing in the following order.
1. Ball baring 6202DDW 2. Flat washer 30
And then, secure them with retaining ring R-40. See Fig. 20.
( 2 ) After mounting flat washer 15 to the armature shaft, mount the armature to the gear housing by pressing
with arbor press. See Fig. 21.
The fastening torque of the hex nut M8x12 has to be 7.4 N.m - 15.0 N.m.
Gear housing
Armature
Spiral bevel
gear 9 Hex nut
M8x12
( 4 ) Armature can be removed together with flat washer 15 from gear housing by striking the edge of motor
housing with plastic hammer. See Fig. 18.
( 5 ) After removing retaining ring R-40 and flat washer 30, insert the armature removed in the step (4) into
the ball bearing 6202DDW. And pull out the ball bearing 6202DDW by swaying the armature.
See Fig. 19.
Fig. 18
Flat washer 15
Armature
Retaining ring R-40
Flat washer 30
Ball bearing 6202DDW
Ball bearing
6202DDW
Fig. 19
< 8 > Mounting armature
Rubber ring 36
Ball baring
6202DDW Flat washer 30
Retaining
ring R-40
Fig. 20
Fig. 21
Flat washer 15

Repair
P 8/ 11
( 4 ) Mount base to the machine by secureing with wing bolt M8x20 and 2 pcs. of hex bolt M6. See Fig. 28.
Hex bolt M6
Wing bolt M8x20
Base Spring washer 8
Flat washer 8
Fig. 28
< 8 > Mounting wheel cover and base
( 1 ) After mounting plate B to bearing box, mount wheel cover section to the machine with aligning the holeA
with the bearing box. See Fig. 25.
( 2 ) Aligning the three screw holes of pressure plate with the same of baring box, mount pressure plate
to the bearing box. And then, fix the pressure plate to the bearing box with 3 pcs. of hex bolt M5x14.
See Fig. 26.
( 3 ) Fix the wheel cover section to the gear housing with 2 pcs. of hex bolt M8x20. See Fig. 27.
The mounting of wheel cover section to machine has been completed with this stage.
Fig. 25
Fig. 27
Hole A
Wheel cover section
Plate B
Bearing box Pressure
plate
Hex bolt
M5x14
Fig. 26
Hex bolt
M8x20
Hex bolt
M8x20

Repair
P 9 / 11
When repairing Model 4112H or 4112HS of North American specification (for up to 120V),
CB-210 has to be used for replacement of carbon brush.
Using carbon brushes other than CB-210 for 4112H and 4112HS may cause the trouble, such as
melting down of motor housing, etc.
< Caution >
210
Carbon Brush CB-210

Circuit diagram
P 10 / 11
1
12
2
Insulated
terminal
Insulated
terminal
Color index of lead wires
Black
White
Orange
Purple
Brush holder
(left)
Field
Brush holder
(right)
Insulated
terminal
Insulated
terminal
Brush holder
(left)
Field
Brush holder
(right)
Power supply cord
1. Circuit diagram for model 4112H
2. Circuit diagram for model 4112HS
Soft start
circuit
1
5
2
2
1
2
1
2
Switch
Switch Noise
suppressor
Noise
suppressor
Insulated receptacle
Line filter
(Left)
(Right)
Brush holder
Brush holder

Wiring diagram
P 11/ 11
Wiring in the motor housing (Model 4112H and 4112HS)
Wiring in the handle
(Model 4112H)
Wiring in the handle
(Model 4112HS)
Pass the following lead
wires through the hook.
* Field lead wire (black)
* Field lead wire (orange)
Pass the following lead
wires through the hook.
* Field lead wire (black)
* Connecting lead wire (orange)
of brush holder
Hook
Hook
Connecting lead wire (purple)
of brush holder
Field lead wire
(purple)
Field lead wire
(orange)
Connecting lead wire (orange)
of brush holder
Field lead wire (black)
Hold the following lead
wires with lead holder.
*Field lead wire (purple)
*Field lead wire (orange)
*Connecting lead wire
(purple) of brush holder
*Connecting lead wire
(orange) of brush holder
Hold the following lead
wires with lead holder.
*Field lead wire (purple)
*Field lead wire (orange)
*Connecting lead wire
(purple) of brush holder
*Connecting lead wire
(orange) of brush holder
Hold the 2 field lead wires
(black) with lead holder.
Hold the following lead
wires with lead holder.
* 2 Field lead wires
(black)
* Soft start lead wire
(white)
* Soft start lead wire
(orange of red)
Put noise suppressor in this space,
if it is used.
Put noise suppressor in this space,
if it is used.
If line filter is used, pass 2 field
lead wires (black) through it.
And put the line filter in this place.
Pass the lead wires of power supply
cord by the rib.
Rib
Insulated receptacle
Terminal of switch
Slit
The slits of insulated receptacles
have to be faced to the same
direction, when connecting to
the terminals of switch.
Soft start circuit
Other manuals for 4112H
4
This manual suits for next models
1
Table of contents
Other Makita Cutter manuals

Makita
Makita DPC6200 User manual

Makita
Makita 4100NS User manual

Makita
Makita EK7650H User manual

Makita
Makita DSC250 User manual

Makita
Makita DCS550 User manual

Makita
Makita 4100NH2 User manual

Makita
Makita DSC250 User manual

Makita
Makita DCO140 User manual

Makita
Makita 4101RH User manual

Makita
Makita MCC400 User manual

Makita
Makita 4101RH User manual

Makita
Makita 4191D User manual

Makita
Makita CP100D User manual

Makita
Makita 4112HS User manual

Makita
Makita 4100KB User manual

Makita
Makita CP100DWA User manual

Makita
Makita 4112HS User manual

Makita
Makita CC300D User manual

Makita
Makita DT2010 User manual

Makita
Makita SC130DRA User manual